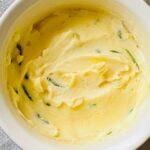
Learn how to make golden homemade clarified butter with one ingredient and a simple stovetop method for clear, golden butterfat ideal for high-heat cooking.
Rich, golden, and wonderfully versatile, this Golden Homemade Clarified Butter Recipe transforms ordinary unsalted butter into a smooth cooking fat with a clean buttery flavor. Slowly heating the butter allows its water to evaporate while the milk solids separate from the clear butterfat.
Clarified butter has a higher smoke point than regular butter because most of the milk solids have been removed. This makes it especially useful for sautéing vegetables, pan-frying potatoes, searing seafood, roasting meats, and preparing delicate sauces. It delivers the richness of butter while being less likely to scorch during high-heat cooking.
Making clarified butter at home requires only one ingredient and about 20 minutes. The most important part of the process is keeping the heat low and allowing the layers to separate naturally. Once strained, the golden butterfat can be stored in the refrigerator and used whenever a recipe calls for a flavorful, heat-tolerant cooking fat.
Prep Time: 5 minutes Cook Time: 15 minutes Total Time: 20 minutes Yield: About 1 cup
Make this fresh herb garden butter recipe with edible flower petals, creamy butter, herbs, and optional garlic and lemon zest for an elegant spread. Fresh, colorful, and filled with garden flavor, this Fresh Herb Garden Butter Recipe With Edible Flower Petals combines creamy butter, fragrant herbs, and delicate edible blossoms. It is a simple compound butter that looks elegant enough for entertaining, homemade gifts, and special occasions. Fresh parsley, chives, thyme, dill, and basil are all excellent choices. Use one favorite herb or combine several to complement the foods you plan to serve. Optional garlic adds savory depth, while lemon zest gives the butter a bright, citrusy finish. Certified edible pansies, nasturtiums, chive blossoms, violas, and calendula add beautiful natural color. Folding some petals into the butter and pressing the rest onto the outside creates an eye-catching presentation. Serve this fresh herb garden butter with bread, dinner rolls, grilled corn, roasted vegetables, baked potatoes, seafood, chicken, or steak. It can be made ahead, refrigerated until needed, and sliced into attractive rounds before serving. Prep Time: 10 minutesChill Time: 1 hourTotal Time: 1 hour 10 minutesYield: 1 butter log
Make flavorful honey lime butter with creamy butter, fresh lime zest, and honey. This easy compound butter complements bread, seafood, corn, and more. Bright, creamy, and wonderfully versatile, this Flavorful Honey Lime Butter Recipe combines rich butter with fragrant lime zest and naturally sweet honey. Made with only three simple ingredients, it is an effortless way to add fresh citrus flavor to both sweet and savory dishes. The finished butter is smooth, spreadable, and perfectly balanced, with a gentle sweetness that complements the lively flavor of fresh lime. Compound butter is simply softened butter blended with herbs, spices, fruit zest, sweeteners, or other flavorful ingredients. Although it sounds elegant, it is one of the easiest condiments to make at home. Once the butter reaches room temperature, this recipe takes only a few minutes to mix. You do not need any special equipment, and a fork or spoon is all that is required to combine the ingredients. Fresh lime zest is essential to the recipe because it contains the aromatic oils found in the outer green layer of the peel. These oils give the butter a bright lime fragrance and concentrated citrus flavor without adding too much liquid. Carefully zest only the green part of the lime and avoid the bitter white pith underneath. Washing and drying the lime before zesting also helps keep the zest clean and easy to grate. Honey balances the tangy lime with a delicate sweetness while enhancing the natural richness of the butter. The result is flavorful without being overly sweet, which allows the butter to complement a wide variety of foods. It tastes wonderful spread over warm cornbread, flaky biscuits, muffins, pancakes, waffles, toast, scones, and freshly baked dinner rolls. This homemade honey lime butter is equally useful for savory meals. Melt a slice over grilled corn on the cob, roasted carrots, sweet potatoes, green beans, or grilled zucchini. The citrus flavor also pairs beautifully with shrimp, salmon, white fish, and chicken. Even simple rice or quinoa can benefit from a small spoonful stirred in just before serving. Shaping the butter into a log makes it easy to refrigerate, slice, and serve. The individual rounds also create an attractive presentation for a brunch table, dinner party, or holiday meal. If you prefer a more casual option, simply spoon the finished butter into a small covered container. Both storage methods work well and keep the butter ready for everyday meals. Prepare this Flavorful Honey Lime Butter Recipe before a summer cookout, weekend brunch, family dinner, or holiday celebration. Because it needs time to chill, it is a convenient condiment to make ahead. Once firm, slice off only what you need and return the remaining butter to the refrigerator. This easy compound butter can also be packaged as a thoughtful homemade food gift. Place it in a small decorative container or shape it into a neat parchment-wrapped log. Whether served with breakfast, warm bread, vegetables, or grilled seafood, honey lime butter delivers a memorable burst of sweet citrus flavor with very little effort. Prep Time: 1 hour 5 minutesChilling Time: 30 minutesTotal Time: 1 hour 35 minutes
Make zesty homemade cilantro chile compound butter with fresh lime and garlic for steak, chicken, seafood, vegetables, potatoes, and more. Bright, creamy, and packed with fresh flavor, this Zesty Homemade Cilantro Chile Compound Butter with Fresh Lime and Garlic Recipe is an easy way to elevate everyday meals. Fresh cilantro and lime give the butter a lively citrus-herb flavor, while garlic and chile pepper add savory depth and gentle heat. Compound butter is a versatile finishing condiment that melts beautifully over hot foods. Serve it with grilled steak, chicken, shrimp, salmon, roasted vegetables, corn on the cob, baked potatoes, rice dishes, or warm gluten-free bread. This flavorful compound butter takes only a few minutes to mix and can be prepared ahead of time. Keep a chilled log ready in the refrigerator or freezer, then slice off a round whenever a meal needs a rich, colorful finishing touch. Prep Time: 10 minutesChill Time: 1 hourTotal Time: 1 hour 10 minutesYield: 8 servings
Ingredients
2 sticks unsalted butter
Directions
Step 1: Melt the Butter
Place the unsalted butter in a small, heavy-bottomed saucepan. Set the saucepan over low heat and allow the butter to melt slowly.
Do not stir the butter as it melts. Leaving it undisturbed helps the butterfat, water, and milk solids separate into distinct layers.
Step 2: Separate the Layers
Continue heating the melted butter gently over low heat. As it cooks, it will begin to separate into three layers. A layer of white foam will rise to the surface, clear golden butterfat will form in the center, and the milk solids will settle at the bottom of the saucepan.
Small bubbles will appear as the water in the butter begins to evaporate. Maintain a quiet, gentle simmer and do not allow the butter to boil vigorously.
Step 3: Evaporate the Water
Cook the butter until the bubbling noticeably decreases. This indicates that most of the water has evaporated.
Watch the saucepan carefully during this stage. The butterfat should appear clear and golden, while the milk solids at the bottom should remain pale. If the milk solids begin to brown, the butter is moving from clarified butter toward ghee.
Step 4: Skim the Foam
Remove the saucepan from the heat. Using a spoon, carefully skim the white foam from the surface without disturbing the milk solids at the bottom of the pan.
The foam can be discarded or reserved for another culinary use.
Step 5: Strain the Clarified Butter
Place a fine-mesh sieve over a clean, heat-safe jar or container. For exceptionally clear results, line the sieve with cheesecloth.
Slowly pour the golden butterfat through the prepared sieve. Stop pouring before the milk solids at the bottom of the saucepan enter the jar. Discard the remaining milk solids or reserve them for another use.
Step 6: Cool and Store
Leave the container uncovered until the clarified butter has cooled completely. Once cool, cover it tightly and store it in the refrigerator.
The clarified butter may solidify and become lighter in color when chilled. This is normal. Scoop out the amount needed and melt it gently or add it directly to a warm pan.
Notes
Use low, gentle heat throughout the process. Excessive heat can brown the milk solids before the water has fully evaporated.
A heavy-bottomed saucepan distributes heat more evenly and reduces the risk of scorching.
Avoid stirring the butter while it melts and separates. Stirring can redistribute the milk solids and make the finished butterfat more difficult to strain clearly.
A fine-mesh sieve will remove most of the solids. Adding a layer of cheesecloth produces an even clearer result.
Clarified butter is different from ghee. Clarified butter is removed from the heat before the milk solids brown. Ghee is cooked longer so that the milk solids toast, creating a deeper golden color and a richer, nuttier flavor.
Use clarified butter for sautéing vegetables, pan-frying potatoes, searing seafood, roasting meats, finishing steaks, or preparing butter-based sauces.
Clarified butter may also be brushed over grilled seafood or vegetables immediately before serving for additional richness and shine.
Store the cooled clarified butter in a clean, airtight container in the refrigerator for several weeks. Always use a clean, dry utensil when removing it from the container.
Although most of the milk solids are removed, homemade clarified butter may still contain trace amounts. It should not automatically be considered suitable for anyone with a milk allergy.
Originally published
April 2026
Updated
September 2026
Reviewed by
Culibloom