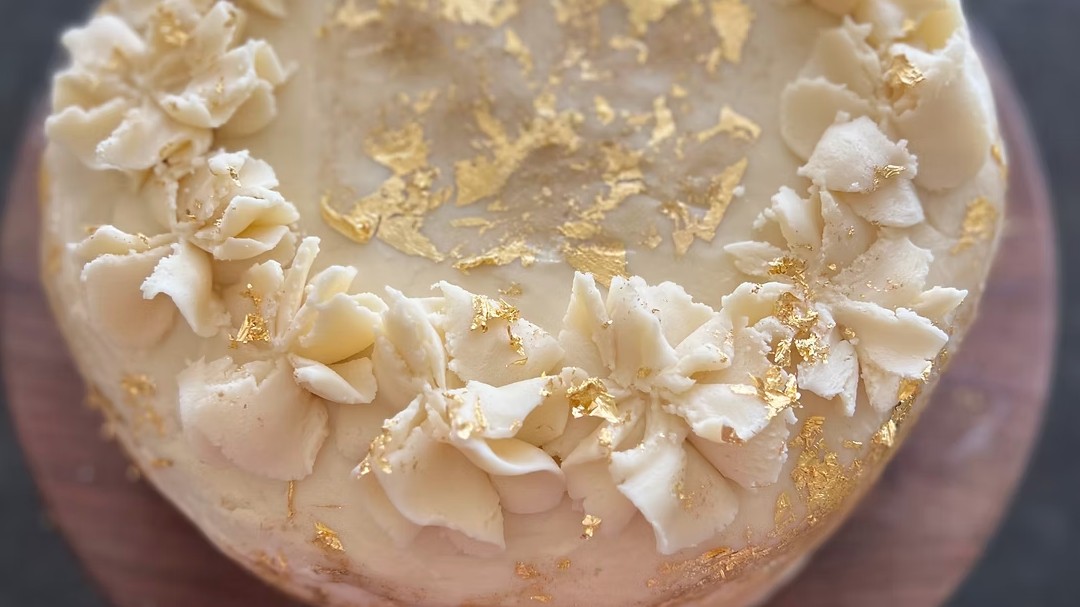
Make an easy gluten-free chocolate bourbon cake with moist chocolate layers, mini chocolate chips, and creamy browned buttercream frosting.
Rich, moist, and wonderfully decadent, this Easy Gluten-Free Chocolate Bourbon Cake with Browned Buttercream Recipe is an impressive dessert for birthdays, holidays, dinner parties, and special celebrations. Dark Dutch-process cocoa powder gives the cake an intense chocolate flavor, while bourbon adds warmth and complexity without overpowering the other ingredients.
A combination of sour cream, instant chocolate pudding mix, butter or oil, and individual gluten-free flours creates soft, tender cake layers that remain moist after baking. Mini chocolate chips add pockets of melted chocolate throughout every slice, making this cake especially appealing to devoted chocolate lovers.
The browned buttercream is the perfect finishing touch. Browning the butter develops toasted caramel, toffee, and nutty flavors that pair beautifully with the chocolate and bourbon. Once cooled and whipped with powdered sugar, heavy cream, vanilla, and a small amount of bourbon, the browned butter becomes a smooth, fluffy frosting suitable for filling, decorating, and piping.
Although the finished cake looks bakery-worthy, the preparation is approachable. The cake layers and buttercream can cool at the same time, helping streamline the process. Serve this elegant gluten-free chocolate cake at room temperature for the softest crumb, creamiest frosting, and richest flavor.
Directions
Step 1: Prepare the Oven and Cake Pans
Preheat the oven to 350°F. Generously coat two 8-inch round cake pans with gluten-free baking spray. Line the bottoms with parchment paper, if desired, to help the baked cake layers release cleanly from the pans.
Step 2: Combine the Dry Ingredients
In a large mixing bowl, whisk together the oat flour, cornstarch, rice flour, glutinous rice flour, tapioca flour, baking powder, baking soda, xanthan gum, kosher salt,
Dutch-process cocoa powder, granulated sugar, and instant chocolate pudding mix.
Whisk thoroughly to distribute the ingredients evenly and break apart any visible lumps of cocoa powder or pudding mix.
Step 3: Mix the Wet Ingredients
In a separate large bowl, combine the softened butter or 1 cup of neutral oil with the eggs, the additional 1/2 cup neutral oil, bourbon, vanilla extract, and sour cream.
Mix until the ingredients are smooth and evenly combined. If using softened butter, make sure it is soft enough to blend into the mixture without leaving large pieces.
Step 4: Prepare the Cake Batter
Gradually add the wet mixture to the bowl of dry ingredients. Mix just until everything is combined and no dry streaks remain. Avoid overmixing the batter.
Gently fold in the mini chocolate chips, distributing them evenly throughout the batter. The finished batter should be thick, smooth, and glossy.
Step 5: Fill the Cake Pans
Divide the cake batter evenly between the prepared pans. Use a spatula to spread the batter into an even layer and smooth the surface of each cake.
For the most evenly sized layers, make sure both pans contain approximately the same amount of batter.
Step 6: Bake the Cake Layers
Place the pans in the preheated oven and bake for 22 to 25 minutes. The cakes are ready when a toothpick inserted into the center comes out clean or with a few moist crumbs attached.
Avoid baking the layers longer than necessary because excessive baking may reduce the cake’s moist, tender texture.
Step 7: Cool the Cakes
Remove the pans from the oven and place them on wire cooling racks. Let the cake layers cool in their pans for 10 minutes.
Carefully turn the layers out onto the racks and allow them to cool completely before frosting. Depending on the temperature of the kitchen, complete cooling may take 45 minutes to 1 hour.
Step 8: Brown the Butter
While the cake layers cool, place the unsalted butter and salted butter for the frosting in a medium saucepan over medium heat.
Allow the butter to melt completely, stirring occasionally. Continue cooking until it turns a deep golden-brown color and develops a rich, nutty aroma. Toasted brown milk solids will collect at the bottom of the saucepan.
Watch the butter carefully as it begins to change color because it can quickly go from browned to burned.
Step 9: Cool the Browned Butter
Immediately transfer the browned butter, including the toasted milk solids, to a heatproof bowl. Let it cool at room temperature for approximately 15 minutes.
Place the butter in the refrigerator and chill until it is cool and nearly solid. Stir it approximately every 15 minutes to maintain a smooth consistency. This process takes about 1 hour and can be completed while the cake layers are cooling.
Step 10: Make the Browned Buttercream
Transfer the chilled browned butter to the bowl of a stand mixer fitted with the paddle attachment. Beat on medium speed for approximately 3 minutes, or until the butter is fluffy and lighter in color.
Reduce the mixer speed to low. Gradually add the powdered sugar and continue mixing until it is fully incorporated.
In a small bowl, whisk together the heavy cream, bourbon, and vanilla extract. Slowly add the cream mixture to the frosting while mixing on low speed.
Increase the speed to medium and beat until the browned buttercream is smooth, creamy, and fluffy. Stop the mixer and scrape down the sides and bottom of the bowl as needed.
Step 11: Fill the Cake
Reserve approximately 1/3 cup of buttercream for decorating. Transfer the reserved frosting to a piping bag fitted with a decorative star tip.
Place one completely cooled cake layer on a serving plate or cake stand. Spread an even layer of browned buttercream over the top, extending the frosting to the edge of the cake.
Place the second cake layer over the frosting. Gently adjust the layer so it is centered over the bottom cake.
Step 12: Frost and Decorate the Cake
Spread the remaining browned buttercream over the top and sides of the cake.
Smooth the frosting with an offset spatula or create decorative swirls for a more relaxed presentation.
Use the reserved buttercream to pipe borders, rosettes, or other decorations around the top of the cake.
Step 13: Rest and Serve
Allow the finished cake to rest at room temperature for 20 minutes before serving. This gives the frosting time to settle and helps create clean, attractive slices.
Cut the cake with a sharp knife. Wipe the blade clean between slices for the neatest presentation.
Notes
For a deep, dark chocolate flavor, use a high-quality unsweetened Black Dutch-process cocoa powder. Regular Dutch-process cocoa powder may also be used, but the finished cake may be lighter in color.
Glutinous rice flour is also called sweet rice flour. Despite its name, it does not contain gluten. It helps create structure and a pleasantly tender texture in gluten-free baked goods.
If using 1 cup neutral oil instead of the 2 sticks of softened butter, the separate 1/2 cup of neutral oil listed in the recipe is still included in the cake batter.
Mini chocolate chips provide pockets of melted chocolate throughout the cake.
Check the package to confirm that the chocolate chips are appropriately labeled gluten-free.
Do not frost the cake layers until they are completely cool. Warm cake can melt the buttercream and cause the layers to shift or slide.
When browning the butter, include the toasted milk solids from the bottom of the saucepan. These browned bits provide much of the frosting’s caramelized, nutty flavor.
The bourbon adds warmth and depth to both the chocolate cake and browned buttercream. Some alcohol may remain after baking, and the bourbon added to the frosting is not cooked.
Must be 21 years of age or older to purchase or consume alcoholic beverages. Please drink responsibly.
Store the cake in a covered container at room temperature for up to 2 days or refrigerate it for up to 5 days. For the best flavor and texture, bring the refrigerated cake to room temperature before serving.
To keep the entire recipe gluten-free, check the oat flour, rice flours, cornstarch, tapioca flour, cocoa powder, pudding mix, chocolate chips, baking spray, bourbon, vanilla extract, and all other packaged ingredients for appropriate gluten-free labeling. Prevent cross-contact by using clean pans, utensils, preparation surfaces, and mixing equipment.