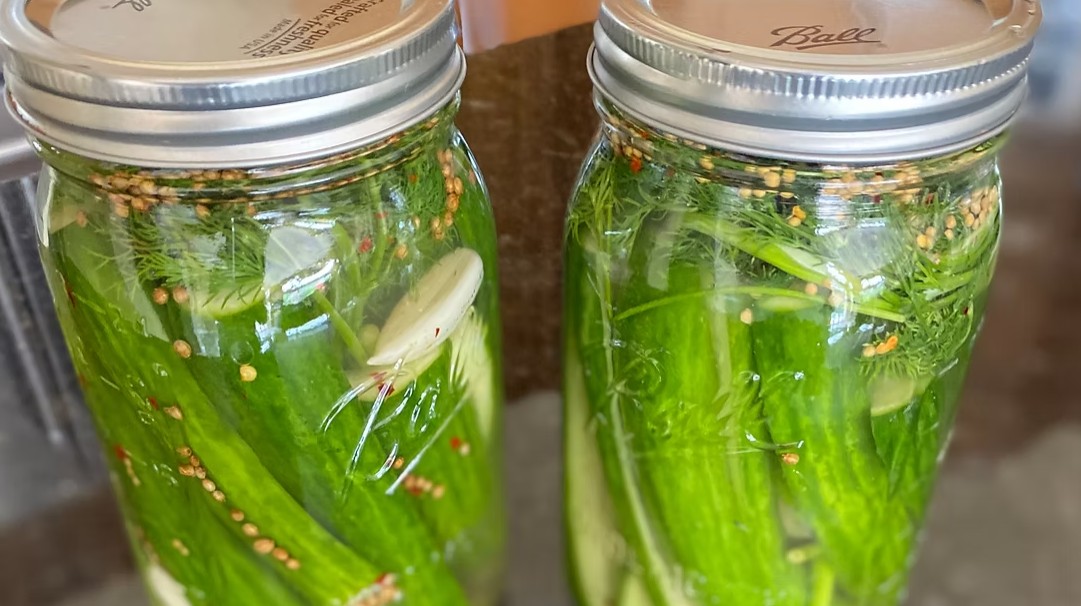
Make crisp garlic dill quick pickles with fresh cucumbers, fragrant spices, and an easy refrigerator brine with no canning required.
Crisp, tangy, and incredibly easy to prepare, this Crisp Garlic Dill Quick Pickles Recipe transforms fresh cucumbers into a flavorful refrigerator staple. A simple homemade brine of distilled white vinegar, kosher salt, sugar, and water gives the cucumbers a pleasantly tart flavor without overpowering their natural freshness. Garlic, dill, coriander seeds, mustard seeds, and red pepper flakes add savory, herbal, and gently spicy notes to every bite.
Unlike traditional preserved pickles, these refrigerator pickles require no canning equipment or complicated processing. The cucumbers are packed into clean jars, covered with cooled brine, and refrigerated for at least 24 hours. Cooling the brine before pouring it over the cucumbers helps protect their firm, crunchy texture. Although the pickles are delicious after one day, their flavor becomes even more developed after 48 hours.
Serve these homemade quick pickles with burgers, sandwiches, wraps, grilled meats, salads, or a colorful charcuterie board. They are also satisfying straight from the jar when you want a crisp, refreshing snack. This approachable recipe is ideal for beginner home cooks, experienced gardeners preserving a cucumber harvest, or anyone who wants flavorful homemade pickles without the work of traditional canning.
Make zesty quick pickled onions with five simple ingredients for a crisp, tangy topping that brightens tacos, burgers, salads, bowls, and more. Bright, crisp, and bursting with tangy flavor, this Zesty Quick Pickled Onions Recipe is one of the easiest ways to add a fresh finish to everyday meals. Thinly sliced red onion softens in a simple warm brine made with red wine vinegar, water, sugar, and salt. The result is a colorful refrigerator condiment with a lively balance of acidity, gentle sweetness, and savory flavor. These homemade pickled red onions are ready to enjoy after only 30 minutes in the refrigerator, although several hours or an overnight rest will deepen their flavor. They add refreshing contrast to rich, smoky, spicy, and creamy foods, making them especially delicious on tacos, burgers, sandwiches, avocado toast, salads, grain bowls, grilled vegetables, roasted meats, and seafood. Their vivid pink color also gives simple dishes an appealing finishing touch. Because this recipe uses only five ingredients and makes approximately one pint, it is a practical way to preserve an extra red onion without committing to a traditional canning project. The onions are refrigerated rather than shelf-stable, so the process is approachable for beginners and convenient for weekly meal preparation. Keep a jar chilled and use a clean utensil each time you serve them for a quick burst of flavor whenever a meal needs brightness. Prep Time: 10 minutesCook Time: 5 minutesCooling Time: 30 minutesTotal Time: 45 minutesYield: Approximately 1 pint
Make an easy homemade pico de gallo and fresh salsa with heirloom tomatoes, lime, cilantro, jalapeño, and balsamic vinegar in only 15 minutes. Fresh, vibrant, and packed with garden-fresh flavor, this Easy Homemade Pico de Gallo and Fresh Salsa Recipe is the perfect addition to tacos, grilled meats, burrito bowls, nachos, and tortilla chips. Juicy heirloom tomatoes, fresh lime juice, cilantro, jalapeño, and balsamic vinegar create a colorful condiment with brightness, sweetness, and mild heat. Unlike store-bought salsa, this homemade pico de gallo is prepared with simple ingredients and bold natural flavors. Aromatic garlic and fresh oregano complement the tomatoes, while honey balances the acidity of the lime juice and balsamic vinegar. Serve this easy fresh salsa for Taco Tuesday, summer cookouts, parties, game-day gatherings, or anytime you need a quick appetizer. Enjoy it chunky as traditional pico de gallo, or briefly pulse it in a food processor for a smoother, restaurant-style salsa. Prep Time: 15 minutesCook Time: 0 minutesTotal Time: 15 minutesYield: Approximately 6 to 8 servings
Make easy Citrus Pickled Onions with fresh lime, orange, and grapefruit juices for a colorful, tangy topping for tacos, burgers, salads, and bowls. Bright, tangy, and beautifully colorful, this Easy Citrus Pickled Onions Recipe With Lime, Orange, and Grapefruit brings fresh flavor and satisfying crunch to everyday meals. Thinly sliced red onions are briefly softened in hot salted water before being marinated in a vibrant blend of freshly squeezed citrus juices. Lime juice gives the onions a lively tartness, orange juice adds gentle sweetness, and grapefruit juice contributes a pleasantly bittersweet finish. As the onions marinate, the citrus mellows their sharp bite while helping them retain their crisp texture and develop an eye-catching pink hue. Unlike traditional quick pickled onions made primarily with vinegar, this citrus-forward version tastes light, fruity, and refreshing. It makes a flavorful topping for tacos, burgers, sandwiches, grain bowls, salads, avocado toast, grilled meats, seafood, roasted vegetables, and plant-based dishes. With just a few ingredients and minimal preparation, these Citrus Pickled Onions add restaurant-quality flavor and color without complicated preserving methods. They are quick enough to prepare for a weeknight meal and can also be made ahead for effortless serving. Prep Time: 10 minutesMarinating Time: 15 minutesTotal Time: 30 minutesYield: 1 cup
Ingredients
1 1/4 cups distilled white vinegar
3 tablespoons kosher salt
2 tablespoons granulated sugar
2 cups cold water
6 Kirby cucumbers, cut into halves or spears
2 tablespoons coriander seeds
6 large garlic cloves, peeled and halved
1 teaspoon mustard seeds
1/4 teaspoon red pepper flakes
16 fresh dill sprigs
Directions
Step 1: Prepare the Pickling Brine
Combine the distilled white vinegar, kosher salt, and granulated sugar in a small saucepan. Place the saucepan over medium-high heat and whisk continuously until the salt and sugar have completely dissolved in the vinegar. The mixture does not need to boil for an extended period. It only needs to become hot enough to dissolve the salt and sugar evenly. Once the liquid looks clear and no visible crystals remain, remove the saucepan from the heat.
Step 2: Cool the Brine
Carefully pour the hot vinegar mixture into a large heat-safe bowl. Add the cold water and whisk until the liquids are thoroughly combined. Transfer the bowl to the refrigerator and allow the brine to cool completely before adding it to the cucumbers. Using cooled brine is an important part of maintaining the cucumbers’ fresh flavor and satisfyingly crisp texture.
Step 3: Prepare the Jars
Wash and dry two clean 1-quart Mason jars and their lids. Divide the coriander seeds, halved garlic cloves, mustard seeds, red pepper flakes, and fresh dill sprigs evenly between the two jars. Placing some of the seasonings near the bottom and along the sides of each jar helps distribute their flavors throughout the cucumbers as they pickle.
Step 4: Pack the Cucumbers
Arrange the cucumber halves or spears tightly inside the prepared jars. Pack them snugly enough to keep them in place, but do not force or crush them. If the cucumbers are too tall to fit below the rim of the jars, trim them as needed. Leave enough room at the top for the brine to circulate and completely cover the cucumbers.
Step 5: Add the Chilled Brine
Remove the cooled brine from the refrigerator. Slowly pour it into each jar, dividing it evenly and covering the cucumbers completely. Gently tap the jars against the work surface or run a clean utensil around the inside edges to release any trapped air bubbles. If necessary, add a small amount of additional cold water so all the cucumbers remain beneath the liquid.
Step 6: Seal and Refrigerate
Secure the lids on the jars and place the pickles in the refrigerator. Chill them for at least 24 hours before serving. During this resting period, the cucumbers absorb the tangy brine along with the flavors of the fresh dill, garlic, coriander, mustard seeds, and red pepper flakes. The pickles will be ready after one day, but allowing them to rest for 48 hours will produce a deeper, more developed flavor.
Step 7: Serve the Quick Pickles
Use a clean utensil to remove the desired number of pickles from the jar. Serve them cold with hamburgers, deli sandwiches, grilled chicken, pulled pork, salads, or snack boards. Return the covered jar to the refrigerator promptly so the remaining pickles stay fresh and crisp.
Notes
Kirby cucumbers are an excellent choice for quick pickles because their firm flesh and thin skin help them remain crunchy after soaking in the brine. Choose fresh cucumbers that feel firm and show no signs of softening.
Cutting the cucumbers into halves creates larger pickles, while cutting them into spears makes them easier to pack and serve. Try to cut the pieces into similar sizes so they pickle evenly.
Allow the brine to cool completely before pouring it over the cucumbers. Hot brine can soften fresh cucumbers and reduce the crisp texture that makes refrigerator pickles so appealing.
Keep the cucumbers completely submerged in the brine while they are stored. This encourages even pickling and helps maintain their quality. If any pieces rise above the liquid, gently press them back beneath the surface with a clean utensil.
For a bolder flavor, refrigerate the pickles for 48 hours before opening the jars. The garlic, dill, and whole spices will continue infusing the brine over the next several days.
For additional depth, add a few whole black peppercorns or a fresh bay leaf to each jar. These additions are optional and are not necessary for a flavorful batch of pickles.
The red pepper flakes provide mild background heat. They can be reduced slightly for gentler pickles, but changing the quantity will alter the flavor of the original recipe.
Store the sealed quick pickles in the refrigerator for up to 4 weeks. These are refrigerator pickles and are not shelf-stable. Do not store the jars at room temperature or treat this recipe as a substitute for a tested canning recipe.
Always use a clean utensil when removing pickles from the jar. Avoid reaching into the brine with your fingers, as this can introduce contaminants and shorten the storage life of the pickles.
Originally published
April 2026
Updated
September 2026
Reviewed by
Culibloom