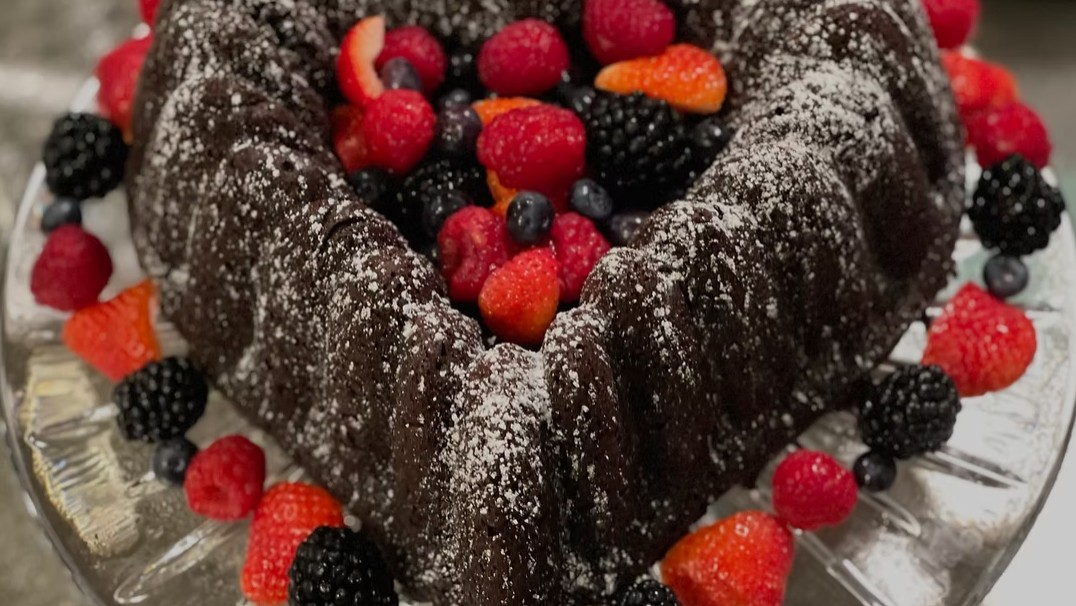
Make a rich gluten-free Mexican hot chocolate Bundt cake with deep cocoa flavor, warm cinnamon, cayenne, chocolate chips, and two cake options.
Deeply chocolatey, exceptionally moist, and filled with warming spice, this Rich Gluten-Free Mexican Hot Chocolate Bundt Cake Recipe turns the comforting flavors of Mexican hot chocolate into an impressive homemade dessert. Black Dutch-process cocoa gives the cake its dramatic dark color and intense chocolate flavor, while ground cinnamon and a touch of cayenne add warmth and complexity without overpowering the chocolate.
This recipe includes two convenient cake options. Prepare the homemade version with an individual gluten-free flour blend, or choose the easy version made with a boxed gluten-free chocolate cake mix. Sour cream and instant chocolate pudding mix help create a soft, tender crumb in both versions, while mini chocolate chips provide rich pockets of melted chocolate throughout every slice.
With its beautiful shape and bold flavor, this Mexican hot chocolate Bundt cake is perfect for Christmas, Cinco de Mayo, birthdays, dinner parties, and other special occasions. Serve it plain, dust it with confectioners’ sugar, or decorate it with chocolate ganache or cinnamon-spiced chocolate glaze.
Directions
Step 1: Preheat the Oven
Preheat the oven to 350°F. Position an oven rack in the center so the Bundt cake will bake evenly.
Thoroughly grease a 10- to 12-cup Bundt pan, making sure the center tube, sides, and every decorative groove are completely coated. For extra protection against sticking, lightly dust the greased pan with gluten-free flour and tap out the excess.
Step 2: Choose the Cake Option
Prepare either the homemade batter in Steps 3 and 4 or the easy cake mix batter in Step 5. The ingredient lists are for two separate cake options and should not be combined.
Step 3: Combine the Homemade Dry Ingredients
For the homemade version, place the oat flour, cornstarch, rice flour, glutinous rice flour, tapioca flour, baking powder, baking soda, xanthan gum, kosher salt, Black Dutch-process cocoa powder, granulated sugar, cinnamon, and cayenne pepper in a large mixing bowl.
Whisk the ingredients thoroughly, breaking apart any visible lumps of cocoa powder. Mixing the dry ingredients well helps distribute the leavening, xanthan gum, cinnamon, and cayenne evenly throughout the batter.
Step 4: Finish the Homemade Batter
Add the oil, eggs, whole milk or buttermilk, vanilla extract, sour cream, and instant chocolate pudding mix to the dry ingredients.
Mix until the ingredients are fully incorporated and the batter is smooth. Scrape the bottom and sides of the bowl as needed so no pockets of dry flour remain.
Gently fold in the mini chocolate chips just until they are evenly distributed. Avoid overmixing the finished batter.
Pour the batter into the prepared Bundt pan and spread the top evenly. Skip Step 5 and continue with Step 6.
Step 5: Prepare the Easy Cake Mix Batter
For the cake mix version, place the gluten-free chocolate cake mix, sour cream, instant chocolate pudding mix, cinnamon, cayenne pepper, oil, water, and eggs in a large mixing bowl.
Mix until the batter is smooth and creamy, scraping the bottom and sides of the bowl as needed.
Fold in the mini chocolate chips until evenly distributed. Pour the batter into the prepared Bundt pan and spread the top evenly.
Step 6: Bake the Cake
Place the Bundt pan on the center rack of the preheated oven. Bake for 50 to 55 minutes.
Begin checking the cake near the end of the baking time. The cake is ready when a toothpick inserted into the center comes out clean or with only a few moist crumbs attached. The top should spring back lightly when touched, and the edges may begin pulling slightly away from the pan.
Step 7: Cool the Cake in the Pan
Remove the cake from the oven and place the Bundt pan on a wire cooling rack. Allow the cake to cool in the pan for 10 to 15 minutes.
This brief cooling period gives the cake time to become firm enough to release without breaking. Do not leave it in the pan until it is completely cold because it may become more difficult to remove.
Step 8: Invert the Bundt Cake
Place a cooling rack over the top of the Bundt pan. Carefully hold the rack and pan together, then invert them in one smooth motion.
Set the rack down and gently lift away the pan. If the cake does not release immediately, let the inverted pan rest over the cake briefly before lifting it again.
Allow the cake to cool completely before adding confectioners’ sugar, ganache, or glaze.
Step 9: Decorate the Cake
Serve the cooled cake plain or dust it lightly with confectioners’ sugar. For a richer presentation, spoon chocolate ganache or cinnamon-spiced chocolate glaze over the top and allow it to flow naturally down the sides.
For additional Mexican hot chocolate flavor, finish the cake with a light dusting of cinnamon and cocoa powder.
Step 10: Slice and Serve
Transfer the decorated cake to a serving plate or cake stand. Cut it into 12 to 16 slices and serve at room temperature.
The cake pairs well with coffee, hot chocolate, or a cold glass of milk.
Notes
Buttermilk gives the homemade cake a richer flavor and slightly softer texture, but whole milk also works well.
The small quantity of cayenne pepper adds gentle warmth that complements the cocoa and cinnamon. It is not intended to make the cake intensely spicy.
Black Dutch-process cocoa powder gives the cake its especially dark color and deep chocolate flavor.
Glutinous rice flour does not contain gluten. The word “glutinous” describes the flour’s sticky texture rather than the presence of wheat gluten.
Mini chocolate chips distribute more evenly throughout the thick cake batter than full-size chips, creating small pockets of chocolate in each slice.
Thorough pan preparation is essential for a clean release. Carefully grease the center tube and every detailed groove before adding the batter.
Let the cake cool in the pan for only 10 to 15 minutes before inverting it. Turning it out immediately may cause it to break, while allowing it to cool completely in the pan may make it more difficult to release.
Make sure the cake is completely cool before adding confectioners’ sugar, ganache, or glaze. A warm cake can melt or absorb the topping.
Store the cake in a covered container at room temperature for up to 3 days or refrigerate it for up to 1 week.
For longer storage, wrap the cake tightly and freeze it for up to 3 months. Thaw it before decorating and serving.
When preparing this recipe for someone with celiac disease or gluten sensitivity, check all packaged ingredients for appropriate gluten-free labeling. This includes the oat flour, cornstarch, rice flour, glutinous rice flour, tapioca flour, baking powder, cocoa powder, pudding mix, chocolate chips, cake mix, and any decorative toppings. Prevent cross-contact by using clean preparation surfaces, bowls, utensils, and baking equipment.