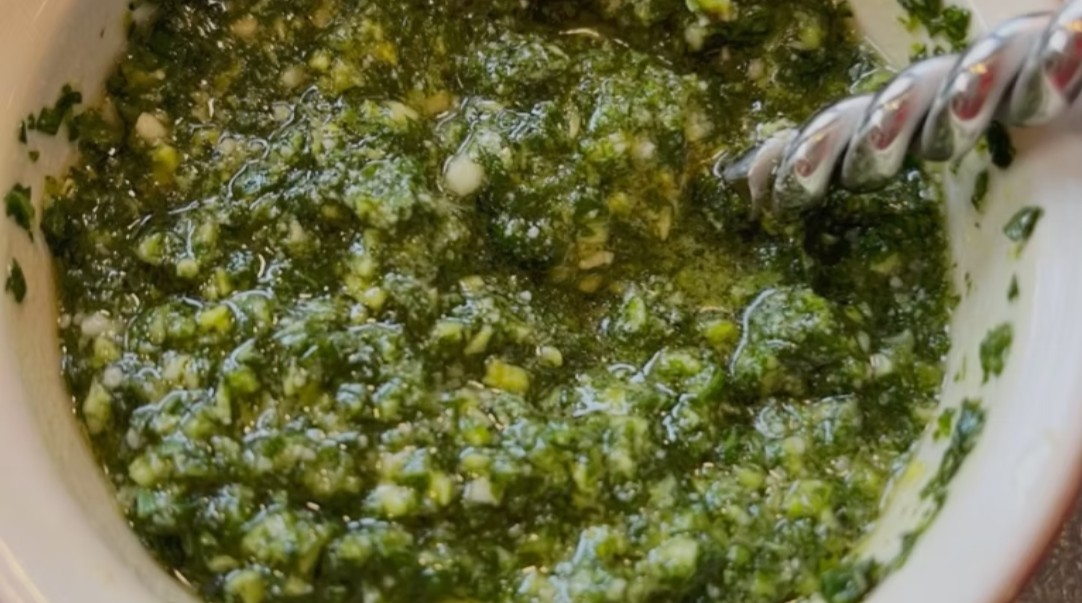
Make a vibrant pine nut pesto with fresh basil, Parmesan or Romano, garlic, and olive oil in just 10 minutes. Perfect for pasta, vegetables, and more.
Fresh, aromatic, and full of classic Italian flavor, this Vibrant Pine Nut Pesto Recipe turns a handful of simple ingredients into a rich green sauce in only 10 minutes. Fragrant basil, buttery pine nuts, savory Parmesan or Romano cheese, fresh garlic, and extra virgin olive oil blend into a creamy pesto that tastes brighter and fresher than most store-bought versions. It is naturally gluten-free and requires no cooking, making it an easy choice for busy lunches, weeknight dinners, and effortless entertaining.
Homemade basil pesto is wonderfully versatile. Toss it with warm gluten-free pasta, spread it over toasted gluten-free bread, spoon it onto grilled chicken or seafood, or drizzle it over roasted vegetables. It also adds a burst of herbaceous flavor to pizza, sandwiches, grain bowls, and appetizers. The optional baby spinach softens the basil flavor while helping the finished sauce retain its vivid color, so you can use all basil for a traditional taste or replace half with spinach for a milder variation.
Toasting the pine nuts is a small optional step that brings out their naturally sweet, nutty character and gives the pesto greater depth. Once they have cooled, the food processor handles the rest of the work. Slowly streaming in the olive oil helps the ingredients combine into a cohesive sauce, while a final taste allows you to fine-tune the seasoning and consistency. Serve the pesto immediately for the freshest flavor, or store it properly so a homemade batch is ready whenever a meal needs a quick, flavorful finishing touch.
Prep Time: 10 minutes
Cook Time: 0 minutes
Total Time: 10 minutes
Yield Amount: About 1 1/2 cups
Ingredients
2 cups packed fresh basil leaves
1 cup baby spinach leaves, optional, to replace half of the basil
1/2 cup freshly grated Parmesan or Romano cheese
1/3 cup pine nuts
1/2 cup extra virgin olive oil
3 cloves garlic, minced
1/4 teaspoon salt, plus more to taste
1/8 teaspoon freshly ground black pepper, plus more to taste
Directions
Step 1: Toast the Pine Nuts
For deeper flavor, place the pine nuts in a dry skillet over medium-low heat. Toast them for 3 to 5 minutes, stirring frequently so they color evenly and do not burn. Remove the skillet from the heat as soon as the pine nuts are lightly golden and fragrant. Transfer them to a plate and allow them to cool completely before adding them to the food processor. This cooling period helps protect the fresh basil from unnecessary heat.
Step 2: Add the Ingredients
Place the packed basil leaves, optional baby spinach, cooled pine nuts, grated Parmesan or Romano cheese, minced garlic, salt, and black pepper in a food processor or high-powered blender. If necessary, gently press the leaves down so the lid fits securely. Pulse several times to begin chopping the leaves and nuts, stopping to scrape down the sides of the bowl if any larger pieces remain above the blade.
Step 3: Pour in the Olive Oil
With the food processor running, slowly drizzle the extra virgin olive oil through the feed tube. Continue processing until the ingredients form a smooth, creamy pesto. For a more rustic, textured sauce, use short pulses instead of blending continuously. Stop once or twice to scrape down the bowl, making sure the cheese, garlic, herbs, and pine nuts are evenly incorporated.
Step 4: Adjust the Seasoning
Taste the pesto and add more salt or freshly ground black pepper if desired. Remember that Parmesan and Romano are naturally salty, so taste before adding extra salt. If the sauce is thicker than you prefer, blend in 1 tablespoon of olive oil at a time until it reaches the desired consistency. A thicker pesto works well as a spread or dip, while a slightly looser pesto is easier to toss with pasta or drizzle over vegetables.
Step 5: Serve or Store
Use the pesto immediately with gluten-free pasta, grilled chicken, seafood, roasted vegetables, sandwiches, pizza, or as a dip. When serving it with pasta, reserve a little pasta cooking water and stir it into the pesto as needed to help the sauce coat the noodles. Transfer leftovers to an airtight container and pour a thin layer of olive oil over the surface to help limit exposure to air and preserve the vibrant green color. Refrigerate for up to 1 week or freeze for up to 3 months.
Notes
Use fresh basil leaves that look bright and healthy. Remove any darkened or bruised leaves before measuring because their flavor and color can affect the finished pesto.
To clean basil, rinse it gently in cool water and dry it thoroughly before processing. Excess water may dilute the sauce or make it less cohesive.
Toasting the pine nuts is optional, but it creates a deeper, rounder flavor. Watch them closely because their natural oils allow them to brown quickly.
For a more budget-friendly version, substitute chopped walnuts for the pine nuts. This changes the flavor slightly but still creates a rich, satisfying sauce.
Baby spinach creates a milder flavor and can help maintain the pesto’s bright green appearance. To use it, replace half of the basil with 1 cup of baby spinach as indicated in the ingredient list.
Freshly grated Parmesan or Romano cheese produces a smoother texture and richer flavor than pre-shredded cheese. Pre-shredded varieties may contain anti-caking ingredients that affect the pesto’s consistency.
For a dairy-free variation, replace the cheese with your favorite dairy-free Parmesan alternative or nutritional yeast. Taste the pesto after blending and adjust the salt because substitutes vary in seasoning.
If serving pesto with gluten-free pasta, add it after the pasta has been drained and removed from direct heat. High heat can dull the basil’s fresh flavor and vivid green color.
For convenient portions, freeze the pesto in small freezer-safe containers or ice cube trays. Once the cubes are solid, transfer them to a sealed freezer-safe container. Thaw only the amount needed for sauces, soups, marinades, or spreads.
The recipe is naturally gluten-free, but packaged ingredients can vary. When cooking for someone with celiac disease or gluten sensitivity, confirm that the cheese and all other packaged products have appropriate gluten-free labeling and prevent cross-contact in the kitchen.