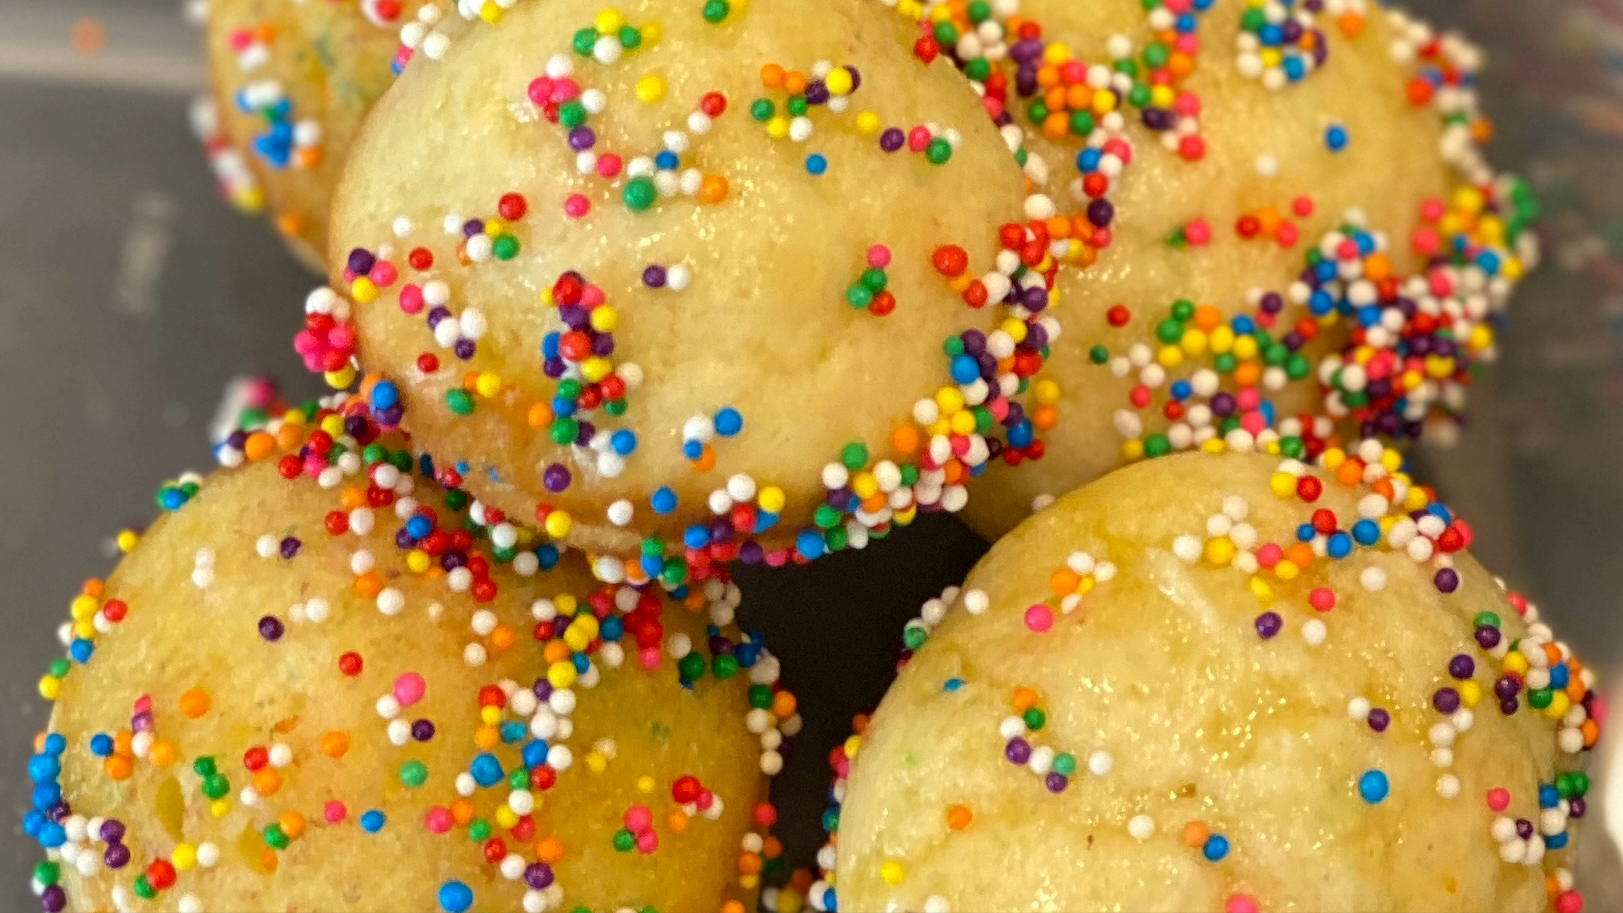
Make festive baked gluten-free nonpareils doughnut holes with a tender vanilla crumb, sweet vanilla sugar, and colorful rainbow sprinkles.
Colorful, tender, and delightfully fun, this Festive Baked Gluten-Free Nonpareils Doughnut Holes Recipe transforms simple pantry ingredients into a cheerful homemade treat. Each doughnut hole has a soft, cake-like vanilla center covered with sweet vanilla sugar and bright rainbow nonpareils.
A balanced combination of white rice flour, potato starch, and tapioca starch creates a light, tender crumb without relying on a commercial flour blend. Allowing the batter to rest before baking gives the gluten-free flours and starches time to absorb the liquid, helping the doughnut holes bake with a softer, more consistent texture.
Because these doughnut holes are baked instead of fried, they are easy to prepare without handling a pot of hot oil. A doughnut hole pan creates their attractive rounded shape, while piping the thick batter into the cavities makes portioning quick and tidy.
Serve these festive doughnut holes for birthday parties, holidays, baby showers, weekend brunches, or colorful dessert tables. They are especially delicious slightly warm with coffee, tea, milk, or hot chocolate.
Prep Time: 20 minutes
Cook Time: 14 to 16 minutes
Total Time: 34 to 36 minutes
Yield: Approximately 24 to 30 doughnut holes
Ingredients
For the Baked Doughnut Holes
2 1/2 cups white rice flour
1/2 cup potato starch
1/2 cup tapioca starch
1/2 cup granulated sugar
2 teaspoons baking powder
1/2 teaspoon baking soda
1 teaspoon xanthan gum
1/2 teaspoon salt
1/4 teaspoon ground nutmeg
2 large eggs
1 cup buttermilk, at room temperature
1/4 cup unsalted butter, melted and slightly cooled
2 teaspoons vanilla extract
For the Vanilla Sugar and Nonpareil Coating
1 cup granulated sugar
1 teaspoon vanilla extract
4 tablespoons unsalted butter, melted
1 cup gluten-free rainbow nonpareils
Directions
Step 1: Prepare the Oven and Pan
Preheat the oven to 375°F. Lightly grease a doughnut hole pan with nonstick baking spray or melted butter.
Greasing the cavities helps the doughnut holes release easily, even when using a nonstick pan.
Step 2: Combine the Dry Ingredients
Place the white rice flour, potato starch, tapioca starch, granulated sugar, baking powder, baking soda, xanthan gum, salt, and nutmeg in a large mixing bowl. Whisk until the ingredients are evenly combined and no lumps remain.
Step 3: Combine the Wet Ingredients
In a separate bowl, whisk together the eggs, buttermilk, melted butter, and vanilla extract until the mixture is smooth and thoroughly blended.
Step 4: Prepare the Batter
Gradually pour the wet mixture into the dry ingredients. Stir just until no dry flour remains and a thick, smooth batter forms.
Allow the batter to rest for 10 minutes. This resting period gives the gluten-free flours and starches time to absorb the liquid, helping produce a softer and more tender crumb.
Step 5: Fill the Pan
Transfer the batter to a piping bag or a large zip-top bag with one corner snipped off. Pipe the batter into the prepared cavities, filling each approximately three-quarters full.
If the pan has deep hemispherical cavities, fill them approximately 80 percent full. Gently smooth the tops with a small spoon if necessary.
Step 6: Bake the Doughnut Holes
Bake for 14 to 16 minutes, or until the tops are lightly golden and a toothpick inserted into the center comes out clean.
Let the doughnut holes cool in the pan for 5 minutes. Carefully remove them from the pan and transfer them to a wire rack.
Step 7: Prepare the Coatings
While the doughnut holes are still slightly warm, place the granulated sugar in a shallow bowl. Add the vanilla extract and stir until the vanilla is evenly distributed throughout the sugar.
Pour the gluten-free rainbow nonpareils into a separate shallow bowl. Place the melted butter in a third bowl.
Step 8: Coat the Doughnut Holes
Lightly brush the entire surface of one warm doughnut hole with melted butter. Roll it in the vanilla sugar until evenly covered.
Immediately roll the doughnut hole in the gluten-free rainbow nonpareils, pressing gently so the sprinkles adhere. Repeat with the remaining doughnut holes.
Step 9: Serve
Serve the doughnut holes slightly warm or allow them to cool completely.
Enjoy them with coffee, tea, milk, or hot chocolate, or arrange them on a colorful dessert platter for a birthday, holiday, brunch, or other special celebration.
Notes
A doughnut hole pan produces evenly shaped treats with an attractive bakery-style appearance.
Piping the batter into the pan is cleaner and generally produces more uniform doughnut holes than filling the cavities with a spoon.
Do not skip the 10-minute batter rest. It allows the gluten-free flours and starches to hydrate, which improves the finished texture.
Avoid overmixing the batter after combining the wet and dry ingredients. Mix only until no visible dry flour remains.
If the doughnut hole pan has deep hemispherical cavities, fill them approximately 80 percent full. This helps the batter rise into a rounded shape without overflowing.
Apply the coating while the doughnut holes are still slightly warm. The melted butter, vanilla sugar, and nonpareils will adhere more easily.
When preparing this recipe for someone with celiac disease or gluten sensitivity, verify that the nonpareils, vanilla extract, baking powder, nonstick baking spray, and all other packaged ingredients have appropriate gluten-free labeling. Prevent cross-contact by using clean utensils, bowls, pans, and preparation surfaces.
Store leftover doughnut holes in an airtight container at room temperature for up to 3 days. The coating may soften slightly during storage.
Uncoated doughnut holes may be frozen for up to 2 months. Thaw them completely before brushing them with melted butter and adding the vanilla sugar and nonpareil coating.