Gardenia Bush: The Complete Guide to Growing Healthy, Fragrant Gardenias
Discover how to grow a beautiful gardenia bush with this complete guide. Learn about planting, watering, fertilizing, pruning, blooming, common problems, and expert care tips for healthy, fragrant gardenias.
Welcome to the Beauty of Gardenia Bushes
Few flowering shrubs can match the elegance and fragrance of a gardenia bush. With its glossy evergreen leaves and creamy white blossoms, the gardenia has been a favorite among gardeners for generations. The flowers are not only stunning to look at, but they also fill the air with a rich, sweet fragrance that makes any garden feel more inviting.
Whether you are creating a peaceful backyard retreat, designing a colorful landscape, or adding fragrance near your patio or front entrance, a gardenia bush is an excellent choice. While these shrubs have a reputation for being a little particular about their growing conditions, providing the right care is easier than many people think. Once established, a healthy gardenia rewards you with years of beautiful foliage and abundant blooms.
This complete guide will teach you everything you need to know about growing a thriving gardenia bush, from choosing the perfect planting location to solving common problems and encouraging more flowers every season.
What Is a Gardenia Bush?
A gardenia bush is an evergreen flowering shrub that belongs to the coffee family, Rubiaceae. Native to tropical and subtropical regions of Asia, Africa, and the Pacific Islands, gardenias are best known for their large, velvety white flowers and their unforgettable fragrance.
The most commonly grown variety is Gardenia jasminoides, often called Cape Jasmine. Despite its common name, it is not a true jasmine. Instead, it is prized for its rose-like blooms, glossy dark green leaves, and long flowering season.
Gardenias are incredibly versatile and can be grown in many different ways, including as foundation shrubs, flowering hedges, specimen plants, patio container plants, or fragrant additions to cottage and pollinator gardens.
Why Gardeners Love Gardenia Bushes
There are many reasons why gardenias continue to be one of the most popular flowering shrubs for home landscapes.
Their elegant flowers bloom in shades of pure white before gradually fading to creamy ivory. The blossoms release one of the strongest and most pleasant fragrances found in ornamental plants, making them perfect for planting near outdoor seating areas, walkways, and windows where their scent can be enjoyed.
Beyond their flowers, gardenias offer year-round beauty thanks to their glossy evergreen foliage. Even when the plant is not blooming, its rich green leaves add texture and color to the landscape.
Gardenias also make wonderful cut flowers, bringing their fragrance indoors for floral arrangements and decorative displays.
Gardenia Bush Quick Facts
Common Name: Gardenia Bush
Botanical Name: Gardenia jasminoides
Plant Type: Evergreen flowering shrub
Mature Height: 2 to 8 feet
Mature Width: 2 to 6 feet
Sunlight: Morning sun with afternoon shade
Soil Type: Rich, well-drained soil
Soil pH: 5.0 to 6.5
Bloom Time: Late spring through summer, with some varieties blooming into fall
Flower Color: White to creamy ivory
USDA Hardiness Zones: 7 through 11
Choosing the Best Location for Your Gardenia
One of the biggest secrets to growing healthy gardenias is selecting the right planting location. These shrubs enjoy plenty of light but appreciate protection from intense afternoon heat.
The ideal location provides several hours of gentle morning sunshine followed by filtered shade during the hottest part of the day. This balance allows the plant to produce abundant flowers without scorching its leaves.
Choose a location that also offers good air circulation while protecting the shrub from strong winds that can damage flower buds.
If possible, avoid planting directly next to concrete sidewalks or foundations. Concrete can gradually increase soil alkalinity, making it more difficult for gardenias to absorb essential nutrients.
The Best Soil for Gardenias
Gardenias thrive in slightly acidic soil that is rich in organic matter. Healthy soil is one of the most important factors in producing lush foliage and abundant blooms.
Before planting, improve your garden soil by mixing in compost, pine bark, or other organic materials. These amendments increase drainage while helping maintain the acidic conditions that gardenias prefer.
The soil should remain consistently moist but never waterlogged. Poor drainage can quickly lead to root problems and declining plant health.
Adding a layer of organic mulch around the base of the shrub also helps retain moisture, suppress weeds, regulate soil temperature, and slowly improve soil quality as it breaks down.
How to Plant a Gardenia Bush
Spring and fall are generally the best times to plant a gardenia bush because cooler temperatures reduce transplant stress.
Dig a planting hole twice as wide as the root ball while keeping it the same depth as the nursery container. Position the shrub so the top of the root ball sits level with the surrounding soil.
After backfilling with amended soil, water deeply to settle the roots and eliminate air pockets. Finish by applying two to three inches of mulch around the base while keeping it several inches away from the trunk.
Watering Gardenias
Gardenias prefer evenly moist soil throughout the growing season. Consistent watering encourages healthy roots and helps prevent flower buds from dropping before they bloom.
Most established gardenias need about one inch of water each week, either from rainfall or irrigation. During periods of extreme heat or drought, additional watering may be necessary.
Deep watering is always better than frequent shallow watering because it encourages roots to grow deeper into the soil.
Avoid allowing the soil to become completely dry, but also avoid overwatering, as soggy soil can lead to root rot.
Fertilizing for More Flowers
Because gardenias are acid-loving plants, they benefit from fertilizers specifically designed for azaleas, camellias, or other acid-loving shrubs.
Feed your gardenia in early spring as new growth begins. Apply another feeding after the first flush of flowers to encourage continued blooming. If needed, a light midsummer application can provide an additional boost.
Avoid fertilizing late in the season since tender new growth may not harden before cooler weather arrives.
How and When to Prune Gardenias
Pruning helps maintain a neat appearance while encouraging healthy growth.
The best time to prune is immediately after flowering has finished. Gardenias begin forming flower buds for the following season later in the year, so pruning too late can reduce next year’s blooms.
Remove dead, damaged, or crossing branches first. Then lightly shape the shrub as needed to encourage a fuller, more attractive form.
Deadheading spent flowers also keeps the plant looking tidy and allows more energy to be directed toward new growth.
When Do Gardenias Bloom?
Most gardenia bushes begin blooming in late spring and continue producing flowers throughout the summer.
Some modern varieties are repeat bloomers and continue flowering well into early fall under favorable growing conditions.
Each flower lasts only a few days, but mature plants often produce many blooms over several weeks, creating a spectacular display of fragrance and beauty.
Growing Gardenias in Containers
Gardenias adapt very well to container gardening, making them ideal for patios, balconies, porches, and entryways.
Choose a container with drainage holes and fill it with a high-quality potting mix designed for acid-loving plants.
Container-grown gardenias usually require more frequent watering and fertilizing than those planted in the ground because the soil dries out more quickly.
In colder climates, growing gardenias in containers also allows you to move them indoors or into a protected location during freezing weather.
The Best Companion Plants
Gardenias grow beautifully alongside other plants that enjoy similar growing conditions.
Excellent companion plants include azaleas, camellias, hydrangeas, ferns, hostas, heucheras, Japanese forest grass, and other shade-loving perennials.
Combining these plants creates a layered landscape filled with texture, color, and seasonal interest.
Common Gardenia Problems
Although gardenias are rewarding plants, they can occasionally experience a few common issues.
Yellow leaves often indicate nutrient deficiencies, improper soil pH, poor drainage, or overwatering.
Flower buds may drop before opening because of sudden temperature changes, inconsistent watering, low humidity, or transplant stress.
Brown leaf edges usually develop from dry soil, excessive fertilizer, hot afternoon sun, or low humidity.
Most problems can be corrected by adjusting growing conditions before permanent damage occurs.
Common Pests
Gardenias should be inspected regularly for insects that feed on new growth.
Common pests include aphids, spider mites, whiteflies, scale insects, and mealybugs.
Early detection makes these pests much easier to control while preventing serious infestations.
Diseases to Watch For
Healthy gardenias are generally resistant to disease when grown under proper conditions.
However, poor drainage or overcrowding can occasionally lead to root rot, leaf spot, powdery mildew, or sooty mold.
Providing adequate spacing, avoiding overhead watering, and maintaining good air circulation greatly reduces disease risk.
Winter Care
In cooler regions, gardenias benefit from extra protection during winter.
Apply a fresh layer of mulch around the root zone to insulate the soil. Water thoroughly before freezing temperatures arrive, and cover outdoor plants during unusually cold nights.
Container-grown gardenias can be moved to a sheltered location until warmer weather returns.
How to Propagate Gardenias
Gardenias are most commonly propagated from softwood stem cuttings taken in late spring or early summer.
Healthy cuttings placed in moist growing medium with adequate humidity often develop roots within several weeks, allowing gardeners to create new plants from established shrubs.
Popular Gardenia Varieties
Many excellent gardenia varieties are available, each offering unique characteristics.
‘August Beauty’ is prized for its large blooms and long flowering season.
‘Frostproof’ is one of the best choices for gardeners in cooler climates because of its improved cold tolerance.
‘Radicans’ is a compact, spreading variety that works beautifully as a ground cover or container plant.
‘Veitchii’ is well known for repeat blooming throughout much of the growing season.
‘Kleim’s Hardy’ offers compact growth with increased winter hardiness, making it a favorite for smaller gardens.
Frequently Asked Questions
How long does a gardenia bush live?
With proper care, a gardenia bush can thrive for several decades, providing beautiful flowers and evergreen foliage year after year.
Why is my gardenia not blooming?
Poor flowering is often caused by insufficient sunlight, improper pruning, inconsistent watering, nutrient deficiencies, or soil that is not acidic enough.
Can gardenias grow in full sun?
Gardenias perform best with morning sunlight and afternoon shade, especially in warmer climates where intense afternoon heat can stress the plant.
Are gardenias easy to grow?
Gardenias require a little more attention than some shrubs, but meeting their basic needs for acidic soil, consistent moisture, and proper sunlight makes them surprisingly rewarding to grow.
Can gardenias be grown indoors?
Yes. Gardenias can thrive indoors when provided with bright indirect light, cool nighttime temperatures, high humidity, and consistently moist acidic soil.
Fill Your Garden with Beauty and Fragrance
A gardenia bush is much more than a beautiful flowering shrub. It is a timeless landscape favorite that combines elegant evergreen foliage with some of the most fragrant blossoms found in the gardening world. Whether planted along a walkway, beside a patio, or as a stunning focal point in your landscape, gardenias create a welcoming atmosphere that can be enjoyed throughout the growing season.
By choosing the right location, maintaining healthy acidic soil, watering consistently, and pruning at the proper time, you can enjoy healthy plants covered in fragrant white blooms for many years. With a little care and attention, your gardenia bush will become one of the highlights of your garden, rewarding you with beauty, fragrance, and year-round appeal.
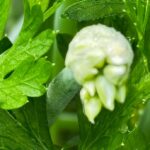
A delicate white gardenia blooms beside a fresh green bud in the garden.
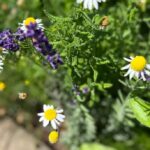
Lavender and chamomile companion planting is one of the easiest and most rewarding ways to create a beautiful, fragrant, and productive herb garden. These two beloved herbs have been cultivated for centuries for their ornamental beauty, calming aromas, culinary uses, and medicinal properties. Together, they form a stunning combination that not only enhances your landscape but also supports pollinators, attracts beneficial insects, and contributes to a healthier garden ecosystem. Whether you are planning a cottage garden, designing a pollinator-friendly landscape, or creating an edible herb garden, lavender and chamomile companion planting offers countless benefits. Their complementary growth habits, similar cultural requirements, and long-lasting blooms make them an ideal pairing for gardeners of all skill levels. What Is Lavender and Chamomile Companion Planting? Lavender and chamomile companion planting is the practice of growing these two herbs together because they thrive under similar growing conditions and provide mutual benefits within the garden. While companion planting cannot eliminate every gardening challenge, it encourages biodiversity, supports beneficial insects, and creates a balanced growing environment. Lavender adds striking vertical spikes of fragrant purple flowers, while chamomile produces delicate white blossoms with cheerful yellow centers. Together they create a classic cottage garden display that is both elegant and functional. Their flowers bloom over an extended period, providing a continuous source of nectar for pollinators while filling the garden with color and fragrance. Benefits of Lavender and Chamomile Companion Planting One of the greatest advantages of lavender and chamomile companion planting is the abundance of pollinators it attracts. Honeybees, native bees, butterflies, hoverflies, and other beneficial insects are drawn to their nectar-rich flowers throughout the growing season. As pollinators visit these herbs, they also improve the pollination of nearby vegetables, fruit trees, berry bushes, and flowering ornamentals. A garden filled with pollinators is often healthier, more productive, and more resilient. Lavender and chamomile also attract beneficial insects such as ladybugs, lacewings, parasitic wasps, and hoverflies. These natural predators help control aphids, whiteflies, spider mites, and other common garden pests, reducing the need for chemical pesticides. Lavender’s aromatic foliage contains naturally fragrant essential oils that may help discourage mosquitoes, moths, fleas, and certain flying insects. While no single plant completely prevents pests, incorporating aromatic herbs into your landscape contributes to a more balanced garden ecosystem. Another advantage of lavender and chamomile companion planting is its simplicity. Since both herbs enjoy similar growing conditions, caring for them together is easy and efficient. Growing Conditions for Lavender and Chamomile Successful lavender and chamomile companion planting begins with choosing the right location. Both herbs grow best in full sun and require at least six to eight hours of direct sunlight each day. Plenty of sunshine encourages compact growth, abundant blooms, and stronger fragrance. Well-drained soil is essential for healthy plants. Lavender thrives in sandy or gravelly soil that drains quickly, while chamomile prefers fertile, loose soil with good drainage. Incorporating compost before planting improves soil structure without sacrificing drainage. Lavender becomes highly drought tolerant once established and prefers the soil to dry slightly between waterings. Chamomile appreciates moderate moisture during dry periods but should never remain in waterlogged soil. Providing adequate spacing between plants encourages good airflow, reduces humidity around the foliage, and minimizes the risk of fungal diseases. The Best Companion Plants for Lavender and Chamomile Although lavender and chamomile thrive together, they also pair beautifully with many other herbs, vegetables, flowers, and fruit-producing plants. Excellent companion plants include rosemary, thyme, sage, oregano, basil, calendula, borage, yarrow, echinacea, roses, strawberries, blueberries, tomatoes, peppers, eggplant, broccoli, cabbage, cauliflower, and many drought-tolerant flowering perennials. These companions benefit from increased pollinator activity while creating a diverse and visually appealing garden. Plants to Avoid To ensure successful lavender and chamomile companion planting, avoid placing lavender near plants that require constantly moist soil. Mint, celery, hostas, watercress, and other moisture-loving plants have watering requirements that differ significantly from lavender. Excess moisture around lavender roots can lead to root rot and poor plant performance. Grouping plants with similar moisture needs simplifies watering and promotes healthier growth throughout the garden. Culinary Uses of Lavender and Chamomile Lavender and chamomile companion planting provides more than ornamental beauty. Both herbs are edible and offer a variety of culinary possibilities. Lavender flowers add delicate floral notes to teas, shortbread cookies, cakes, muffins, scones, ice cream, custards, infused honey, lemonade, simple syrups, sugar blends, and Herbes de Provence seasoning. Lavender also complements roasted vegetables, poultry, lamb, seafood, and grilled dishes. Chamomile flowers are widely enjoyed in herbal teas, infused honey, syrups, jellies, cakes, cookies, fruit salads, custards, smoothies, and homemade desserts. Their mild apple-like flavor makes them a versatile ingredient for both sweet and savory recipes. Growing both herbs together provides a convenient harvest of fresh flowers throughout the growing season. Harvesting Lavender and Chamomile Harvest lavender stems when approximately one-third to one-half of the flowers have opened. At this stage, the blossoms contain the highest concentration of aromatic oils and dry exceptionally well. Chamomile flowers should be harvested once they are fully open. Frequent harvesting encourages additional blooms, providing a continuous supply throughout the season. Dry the flowers in a cool, shaded location with good air circulation before storing them in airtight containers away from direct sunlight. Growing Lavender and Chamomile in Containers Lavender and chamomile companion planting is not limited to garden beds. These herbs also thrive in containers, making them excellent choices for patios, balconies, porches, and small-space gardens. Select containers with drainage holes and fill them with a high-quality, well-draining potting mix. Place containers where they receive plenty of sunlight, and water carefully, allowing the soil to dry slightly between waterings. Container-grown herbs bring fragrance, beauty, and fresh culinary ingredients within easy reach. Why Lavender and Chamomile Companion Planting Belongs in Every Garden Lavender and chamomile companion planting combines ornamental beauty with practical gardening benefits. Their shared growing requirements make them easy to cultivate together, while their abundant flowers support pollinators, attract beneficial insects, and enhance biodiversity throughout the landscape. Whether you are growing herbs for
Here, you will learn all about chive blossoms and parsley, including how companion planting helps both herbs thrive, the many benefits they bring to your garden, and the delicious ways to use them in everyday cooking. Whether you are creating a thriving kitchen garden or looking for fresh inspiration in the kitchen, chive blossoms and parsley are a versatile pairing that offers beauty, flavor, and abundant harvests throughout the growing season. There is something incredibly satisfying about walking into your garden, brushing your hand across a patch of fragrant herbs, and gathering a handful of fresh parsley alongside a few vibrant purple chive blossoms. Moments like these remind us that a garden is more than a place to grow food. It is a space where beauty, nature, and fresh ingredients come together to inspire every meal. Among the many herbs you can grow, chives and parsley are one of the easiest and most rewarding companion planting combinations. They thrive under similar growing conditions, complement one another beautifully, and provide fresh harvests from spring through fall. Their partnership benefits not only your kitchen but your entire garden by attracting pollinators, supporting beneficial insects, and helping create a healthier growing environment. Whether you are planting a large kitchen garden, filling raised beds, or growing herbs in containers on your patio, chive blossoms and parsley are a pairing that delivers season after season. Their fresh flavors elevate everyday meals, while their graceful appearance adds charm and color to any outdoor space. A Perfect Partnership in the Herb Garden Companion planting is the practice of growing plants together that naturally benefit one another. Some companion plants improve soil conditions, others attract pollinators, while some help reduce pest problems or make better use of available growing space. Chives and parsley check nearly every one of those boxes. Parsley grows in lush, leafy mounds that remain attractive throughout much of the growing season. Chives produce slender green leaves that eventually give way to beautiful globe-shaped blossoms in shades of lavender and purple. Together they create layers of texture and color that look just as lovely in ornamental gardens as they do in vegetable beds. Their similar care requirements also make them easy companions. Both appreciate fertile soil, regular watering, and plenty of sunshine, allowing gardeners to care for both herbs using the same routine. For anyone just beginning an herb garden, this combination is an excellent place to start. Why Companion Planting Matters Healthy gardens are built on diversity. Instead of growing a single crop in isolation, companion planting encourages a balanced ecosystem where plants, pollinators, and beneficial insects work together. Every herb contributes something unique to the garden. Parsley provides dense foliage that helps shade the soil and reduce moisture loss. Chives contribute their distinctive onion aroma while producing nectar-rich flowers that become gathering places for pollinating insects. Together they create an environment where plants thrive naturally. Rather than viewing herbs simply as ingredients for cooking, companion planting reminds us that every plant plays an important role in supporting the health of the entire garden. Chives Help Naturally Discourage Garden Pests One reason gardeners have planted chives throughout vegetable gardens for generations is their reputation for helping reduce certain insect problems. As members of the onion family, chives contain sulfur compounds responsible for their mild onion fragrance. While people enjoy this familiar aroma, many insects do not. Growing chives near parsley may help discourage aphids, Japanese beetles, spider mites, and several other common garden pests. Although companion planting is not a replacement for good garden management, it can become an important part of an organic gardening strategy by encouraging healthier plants and reducing stress caused by insect activity. Many gardeners also plant chives near tomatoes, carrots, strawberries, roses, peppers, and apple trees for the very same reason. Chive Blossoms Bring Your Garden to Life If there is one reason never to cut every chive flower before it opens, it is the incredible number of beneficial insects they attract. As spring transitions into early summer, chives produce clusters of soft purple blossoms that quickly become one of the busiest places in the garden. Honeybees eagerly gather nectar from the flowers while native bees move from bloom to bloom collecting pollen. Butterflies drift through the blossoms, adding movement and beauty to the landscape, while hoverflies quietly perform double duty by feeding on nectar as adults and helping control aphids during their larval stage. Watching these visitors move through your herb garden is one of the simple pleasures of gardening. Their presence also benefits nearby vegetables, fruit trees, berry bushes, and flowering plants that depend on pollination for healthy harvests. Growing Chives and Parsley Together One of the reasons these herbs are so popular is because they are wonderfully uncomplicated. Choose a location that receives at least six hours of sunlight each day. While chives love full sun, parsley appreciates a little afternoon shade during periods of intense summer heat, especially in warmer climates. Plant both herbs in fertile, well-drained soil enriched with compost. Rich organic matter encourages vigorous growth while helping retain moisture between waterings. Water regularly, keeping the soil evenly moist without allowing it to become soggy. Applying a layer of mulch around the plants helps regulate soil temperature, conserve moisture, and reduce weed growth. With only a little routine care, both herbs will reward you with months of fresh harvests. Beautiful in Every Garden Style One of the joys of growing herbs is their versatility. Chives and parsley look equally at home in formal herb gardens, rustic cottage gardens, raised beds, decorative borders, and patio containers. The upright foliage and cheerful blossoms of chives create natural height, while parsley fills the surrounding space with rich green leaves. The contrast between soft purple flowers and vibrant green foliage creates a timeless combination that looks attractive from spring until frost. Many gardeners intentionally plant these herbs near walkways or seating areas where their fragrance and colorful blooms can be enjoyed every day. Other Plants That Thrive
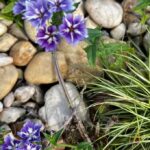
Learn how to grow and care for Purple Sugar Stars phlox, choose companion plants, manage common problems, design containers, and approach culinary use safely. Purple Sugar Stars phlox brings remarkable color and intricate patterns to the garden. Its purple, indigo, and lavender-blue flowers feature crisp white, star-shaped centers that resemble tiny constellations. When planted beside ornamental grass and smooth garden stones, the flowers create a beautiful contrast between soft blooms, fine foliage, and natural textures. Botanically known as Phlox drummondii ‘Sugar Stars,’ this fast-growing annual is a lovely choice for cottage gardens, pollinator beds, containers, cutting gardens, and the front of mixed borders. Unlike perennial garden phlox or creeping phlox, Sugar Stars completes its life cycle in one growing season, although it may reseed where conditions are favorable. Its compact size, fragrance, and abundant flowers make it especially useful in small gardens. Sugar Stars phlox can soften stone edging, fill openings between established plants, or introduce vivid color around ornamental grasses without overwhelming the surrounding landscape. Understanding Purple Sugar Stars Phlox Sugar Stars is a cultivated variety of annual phlox, also called Drummond phlox. The species is native to Texas and naturally occurs in grasslands and meadows. Its flowers attract bees, butterflies, hummingbirds, and other garden visitors. Plants generally develop an upright or gently mounded shape. Depending on climate, soil, and growing conditions, they may reach approximately 12 to 20 inches tall. The branching stems hold clusters of fragrant flowers in shades ranging from lavender and violet to deep indigo. Each blossom has a contrasting white center that gives the cultivar its distinctive starry appearance. As an annual, Sugar Stars phlox does not reliably return from the same root system after freezing weather. Gardeners can collect seeds, allow a few flowers to self-sow, or purchase fresh seed for the following season. Choosing the Best Growing Location Purple Sugar Stars phlox grows best in full sun. A location receiving at least six hours of direct sunlight usually encourages sturdy stems and abundant flowering. In regions with intensely hot summers, light afternoon shade may protect the plants from heat stress and help the blossoms last longer. Choose a site with good air circulation and well-drained soil. Annual phlox can grow in sandy or loamy soil and tolerates a range of soil pH levels, but it performs poorly when its roots remain waterlogged. Incorporating finished compost into very sandy or nutrient-poor ground can improve moisture retention and support healthy flower production. Sugar Stars phlox is particularly effective along sunny pathways, near low garden walls, in raised beds, or around smooth stones. Make sure stones do not trap excessive moisture against the stems or heat the root zone too severely during summer. Growing Sugar Stars Phlox from Seed Start the seeds indoors approximately four to six weeks before your region’s average last frost date. Sow them in a moist, sterile seed-starting medium, following the depth and light instructions printed on the seed packet. Germination requirements can vary among suppliers, so the directions provided with the seeds should be your primary guide. Keep the growing medium consistently moist but not saturated. Once seedlings emerge, place them under strong light and provide gentle air circulation. Thin or transplant crowded seedlings so their roots and leaves have room to develop. Before moving young plants into the garden, gradually acclimate them to outdoor sunlight, wind, and temperature changes. Plant them outside only after the danger of frost has passed. Seeds can also be sown directly in prepared garden soil after the last expected frost. Direct sowing is convenient, but plants started indoors may begin flowering earlier. Depending on the seed strain and growing conditions, the plants may mature in approximately 60 to 85 days. Spacing and Planting Space Sugar Stars phlox approximately 8 to 12 inches apart, adjusting the distance according to the mature size listed on the seed packet. Closer spacing can create a lush mass of flowers, but the plants should not be packed so tightly that air cannot circulate between them. Plant seedlings at approximately the same depth at which they were growing in their containers. Press the soil gently around the roots and water thoroughly to remove large air pockets. A thin layer of organic mulch can help conserve moisture and suppress weeds. Keep the mulch away from the base of the stems to reduce excess moisture and improve air movement. Watering Purple Sugar Stars Phlox Water newly planted phlox regularly while the root system becomes established. Mature plants appreciate even moisture, especially while forming buds, but the soil should be allowed to drain between waterings. Direct water toward the soil instead of repeatedly wetting the flowers and foliage. Watering early in the day gives splashed leaves time to dry and may help discourage fungal problems. Plants growing in containers usually require more frequent watering than those planted in the ground. Check the potting mixture regularly during hot or windy weather. If the top layer feels dry, water deeply enough for excess moisture to drain through the bottom of the container. Feeding for Healthy Growth and Flowers In moderately fertile garden soil, Sugar Stars phlox may need little supplemental fertilizer. Adding finished compost before planting can provide a gentle source of nutrients and improve the soil’s structure. Container-grown plants or those growing in poor soil may benefit from a balanced flower fertilizer applied according to the product label. Avoid excessive nitrogen, which can encourage an abundance of leafy growth while reducing flower production. The appearance of the plant can help guide your care. Healthy Sugar Stars phlox should produce green foliage, branching stems, and regular clusters of flowers. Weak growth does not always indicate a lack of fertilizer. Insufficient sunlight, compacted soil, poor drainage, heat stress, and inconsistent watering can produce similar symptoms. Pinching, Deadheading, and Seasonal Care Pinching the growing tips of young plants can encourage branching and produce a fuller shape. This is optional, particularly when growing a naturally branching strain or when long stems are desired for flower arrangements. Remove
Originally published
March 2026
Updated
August 2026
Reviewed by
Culibloom