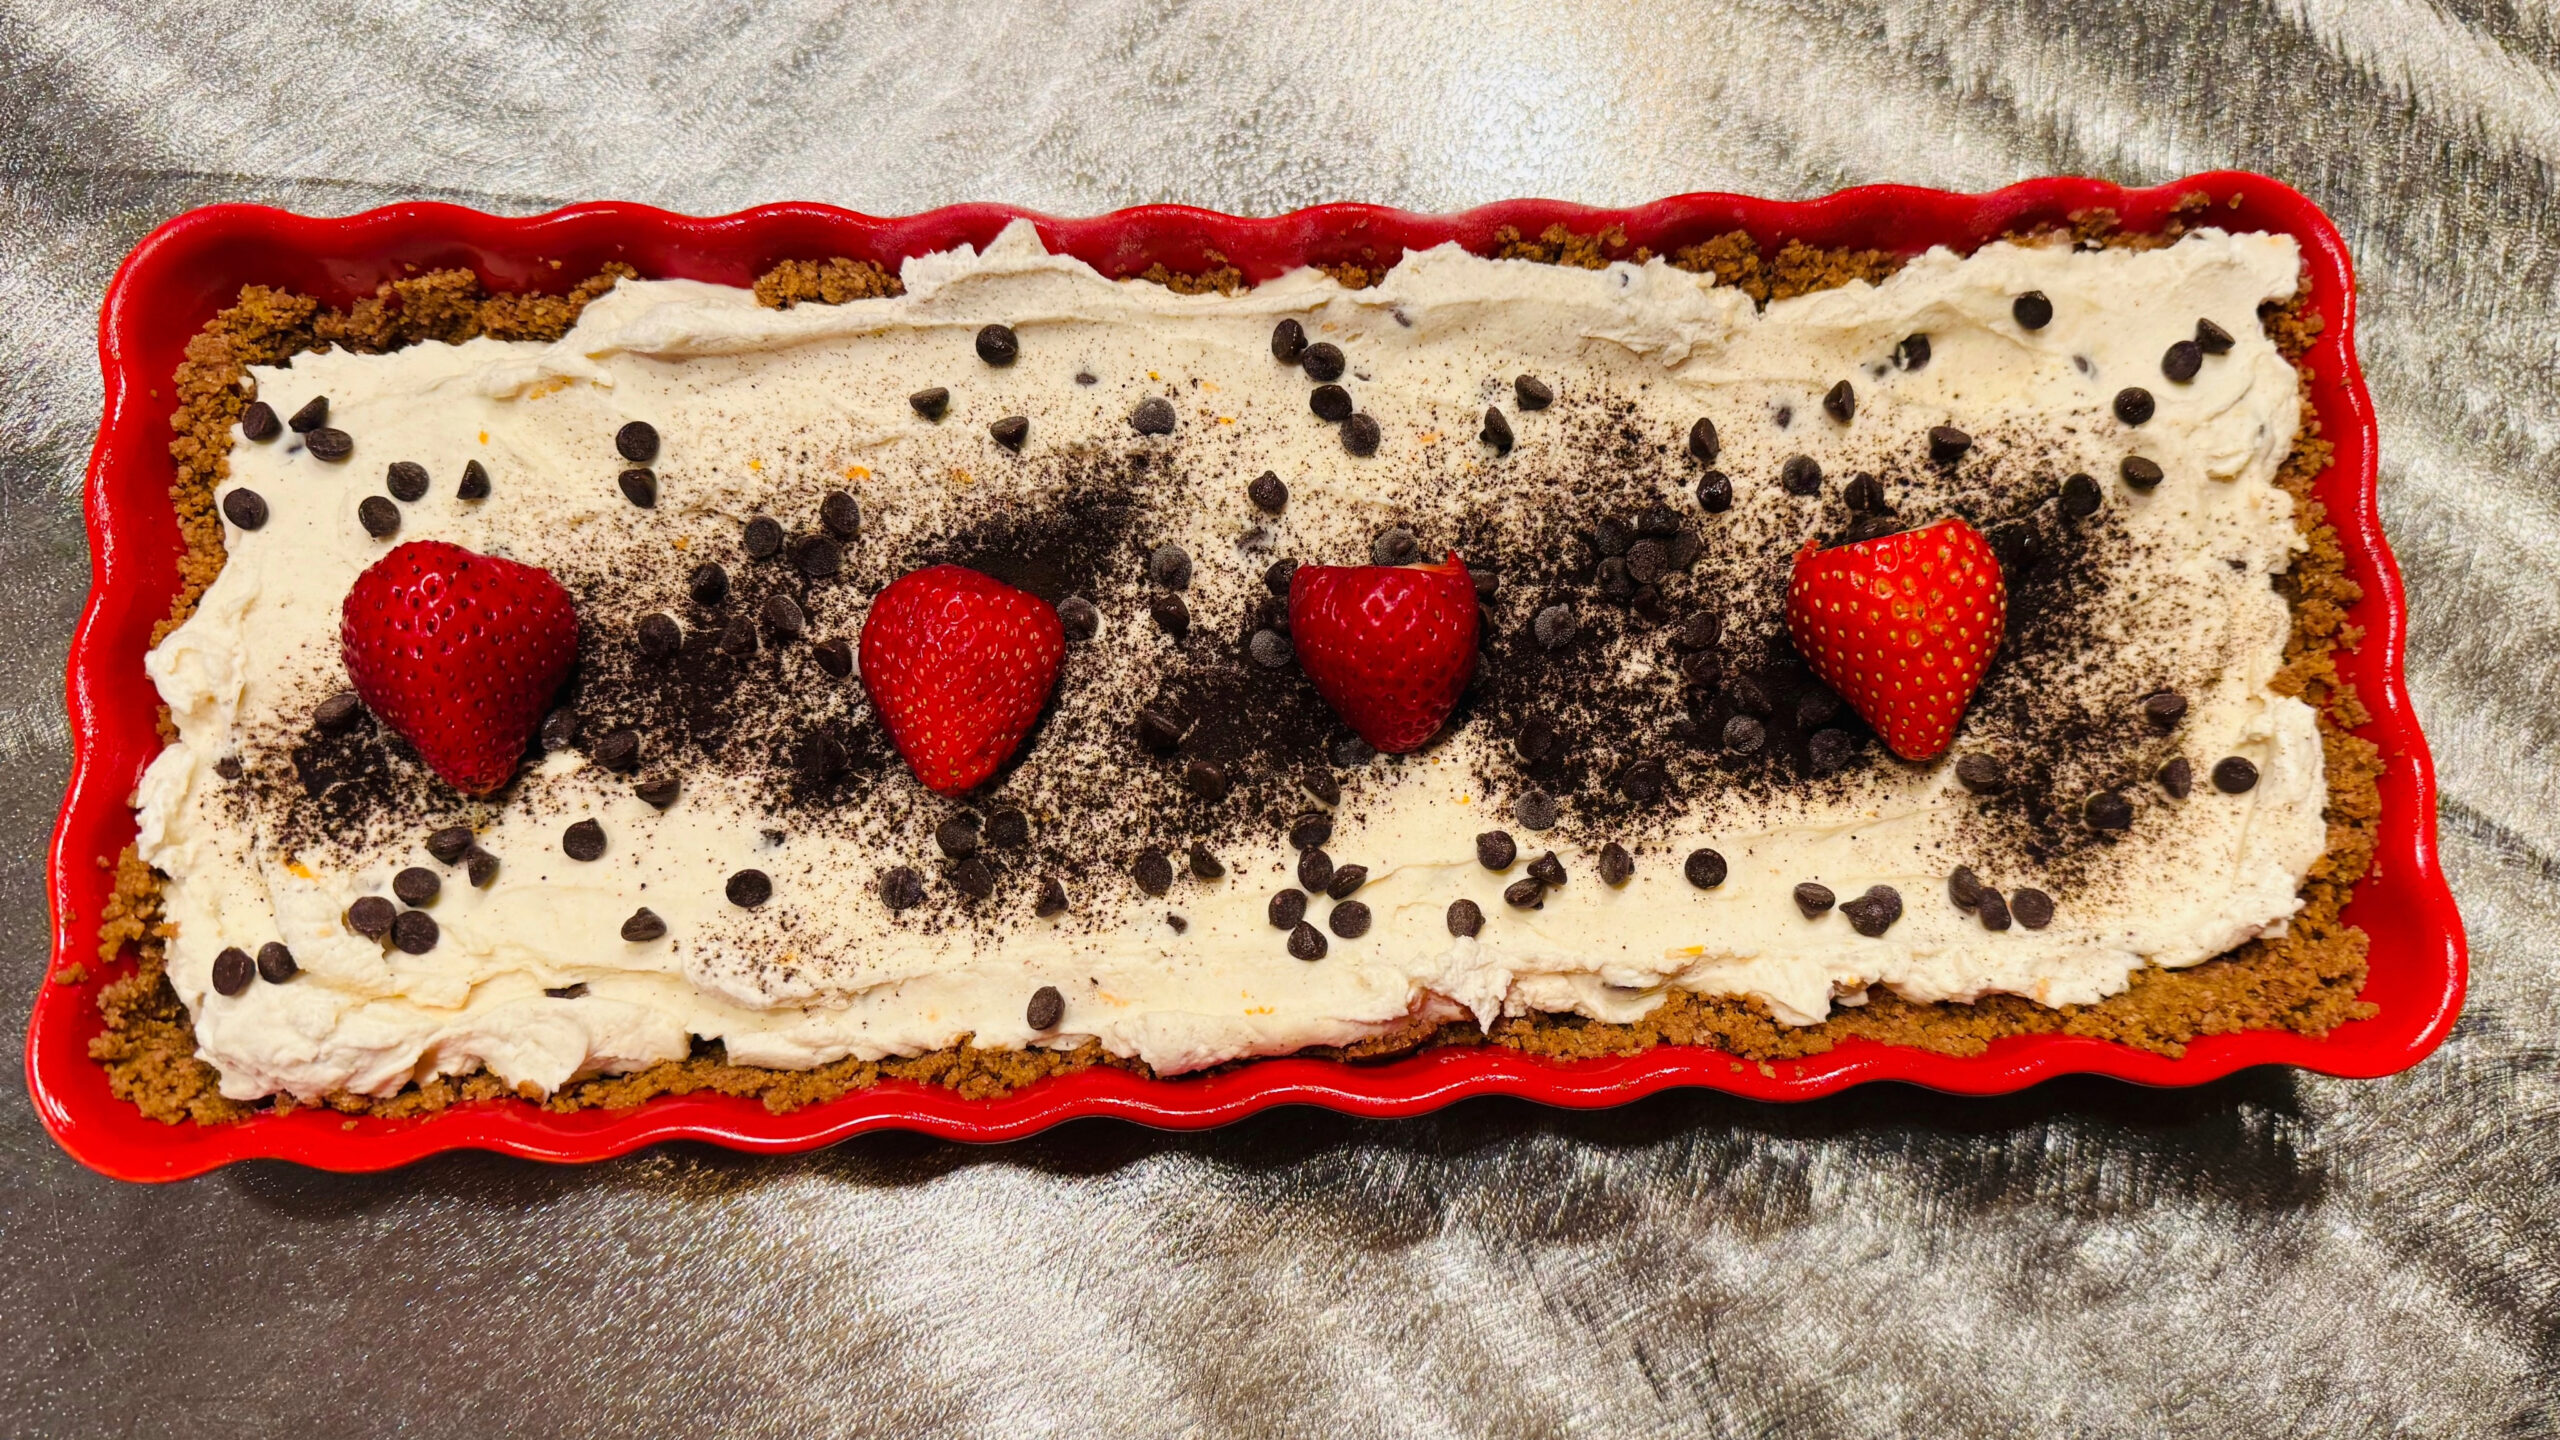
Make this Luxurious Frozen Gluten-Free Cannoli Tart with a cinnamon graham cracker crust and creamy ricotta mascarpone cannoli filling with citrus zest and chocolate chips.
This Luxurious Frozen Gluten-Free Cannoli Tart combines a crisp cinnamon graham cracker crust with silky cannoli cream made from whole milk ricotta, mascarpone, citrus zest, cinnamon, and chocolate chips. Frozen until beautifully set, this Italian-inspired dessert is creamy, refreshing, and perfect for holidays, dinner parties, summer entertaining, or anytime you want an impressive make-ahead gluten-free dessert.
Cannoli is loved for its contrast of crisp pastry and rich ricotta filling, and this frozen tart captures those flavors in a simpler dessert. Instead of filling individual cannoli shells, the creamy filling is spread into a buttery gluten-free cinnamon graham cracker crust and frozen.
The combination of ricotta and mascarpone makes the filling especially luxurious. Ricotta brings traditional cannoli flavor, while mascarpone creates a velvety texture. Fresh orange or lemon zest cuts through the richness, cinnamon adds subtle warmth, and mini chocolate chips provide just the right amount of chocolate in every bite.
Freezing the tart gives the filling a firm yet creamy texture. Allowing it to soften briefly before serving makes it easy to slice while giving the cannoli cream an almost semifreddo-like consistency.
Prep Time: 20 minutes
Cook Time: 8 minutes
Cooling Time: 30 minutes
Freeze Time: 4 hours
Total Time: 4 hours 58 minutes
Yield: 8 servings
Ingredients
Gluten-Free Cinnamon Graham Cracker Crust
1 1/4 cups gluten-free cinnamon graham cracker crumbs
3 tablespoons packed brown sugar
5 tablespoons unsalted butter, melted
Cannoli Cream Filling
15 ounces whole milk ricotta cheese, thoroughly drained
16 ounces mascarpone cheese
1 cup powdered sugar
1 teaspoon pure vanilla extract
2 teaspoons finely grated fresh orange or lemon zest
1/2 teaspoon ground cinnamon
1/8 teaspoon kosher salt
3 ounces mini chocolate chips
Garnish
2 tablespoons mini chocolate chips, or as desired
Powdered sugar, for dusting
Chopped pistachios, optional
Shaved dark chocolate, optional
Directions
Step 1: Preheat the Oven
Preheat the oven to 325°F. Lightly grease a 9-inch tart pan with a removable bottom.
Step 2: Prepare the Gluten-Free Graham Cracker Crust
Place the gluten-free cinnamon graham cracker crumbs and brown sugar in a medium mixing bowl. Add the melted butter and stir until the crumbs are evenly coated and resemble damp sand.
The mixture should hold together when gently pressed. If necessary, crush any larger pieces of graham cracker so the crumbs are fine and uniform.
Step 3: Form the Tart Crust
Transfer the crumb mixture to the prepared tart pan. Press the crumbs firmly and evenly across the bottom and up the sides of the pan.
Use the bottom of a measuring cup or flat-bottomed glass to compact the crust. Pay particular attention to the edges so the finished tart has a sturdy crust that holds together when sliced.
Step 4: Bake and Cool the Crust
Bake for 7 to 8 minutes, or until the crust is lightly golden and fragrant.
Remove the tart pan from the oven and place it on a wire rack. Cool completely for about 30 minutes before adding the filling.
Step 5: Prepare the Cannoli Cream
Place the thoroughly drained ricotta, mascarpone, powdered sugar, vanilla extract, orange or lemon zest, cinnamon, and salt in a large mixing bowl.
Beat just until the ingredients are smooth, creamy, and evenly incorporated. Avoid excessive mixing because mascarpone can become loose or grainy when overworked.
Step 6: Fold in the Chocolate Chips
Add the mini chocolate chips to the cannoli cream and gently fold them into the mixture with a spatula until evenly distributed.
Step 7: Assemble the Cannoli Tart
Spoon the cannoli cream into the completely cooled tart crust. Spread the filling evenly to the edges and smooth the top with an offset spatula or the back of a spoon.
Step 8: Freeze Until Firm
Cover the tart tightly and freeze for at least 4 hours, or until the filling is firm and the tart can be sliced cleanly.
Step 9: Soften Before Serving
Remove the tart from the freezer 15 minutes before serving. This brief softening period gives the filling a creamier texture while allowing each slice to maintain its shape.
Step 10: Garnish and Serve
Just before serving, sprinkle the top with additional mini chocolate chips and lightly dust with powdered sugar.
For an optional decorative finish, add chopped pistachios, shaved dark chocolate, or a little freshly grated citrus zest.
Use a sharp knife to cut the tart into 10 to 12 slices. Wipe the knife clean between cuts for the neatest presentation.
Notes
Thoroughly draining the ricotta is important for a thick, creamy cannoli filling. If the ricotta contains a significant amount of moisture, place it in a fine-mesh strainer lined with cheesecloth and refrigerate for several hours or overnight before preparing the recipe.
Whole milk ricotta and full-fat mascarpone provide the richest flavor and creamiest texture. Keep the mascarpone cool and mix only until the filling is smooth.
Orange zest gives the filling a classic Sicilian-inspired citrus flavor and pairs particularly well with cinnamon and chocolate. Lemon zest can be substituted for a brighter, slightly more tart citrus note.
Use mini chocolate chips rather than standard chocolate chips so the chocolate is evenly distributed throughout the creamy filling and the tart remains easy to slice.
For a stronger chocolate flavor, use mini semisweet or dark chocolate chips. For a sweeter filling, mini milk chocolate chips can be substituted.
Make sure the graham crackers, chocolate chips, vanilla extract, and other packaged ingredients are certified gluten-free when preparing the tart for someone who must strictly avoid gluten.
For additional cannoli-inspired flavor and texture, garnish with finely chopped pistachios, shaved dark chocolate, extra citrus zest, or a combination of these toppings.
Store the tart tightly covered in the freezer for up to 2 weeks.