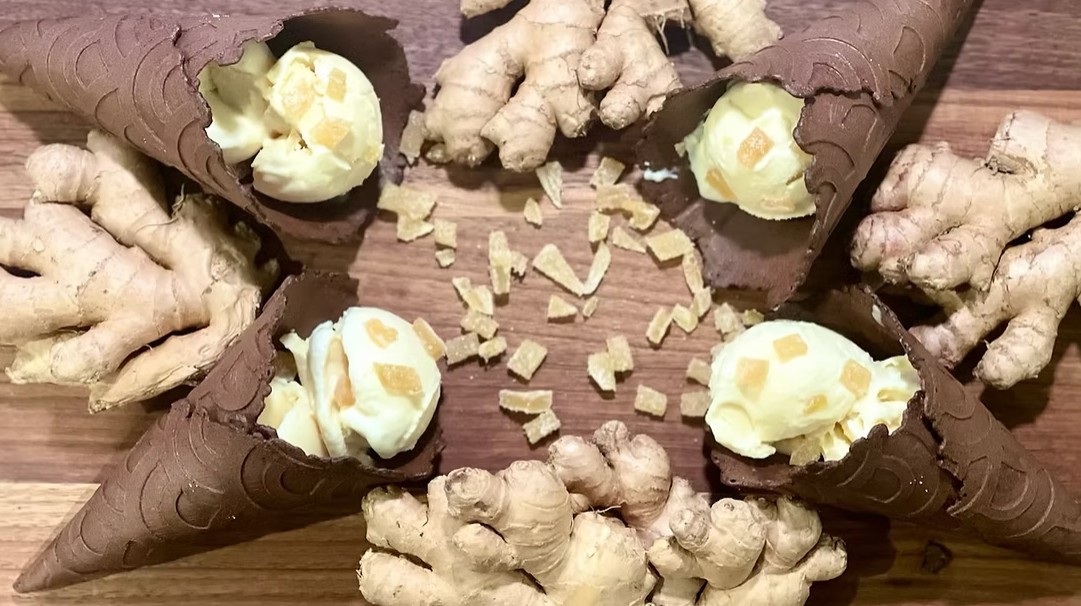
Make this Easy No-Churn Ginger Ice Cream Recipe with fresh ginger juice, whipped cream, condensed milk, and sweet candied ginger.
Creamy, refreshing, and filled with warm spice, this Easy No-Churn Ginger Ice Cream Recipe is a delicious way to enjoy the distinctive flavor of ginger. Each spoonful combines a smooth, velvety ice cream base with bright fresh ginger juice and sweet pieces of chewy candied ginger. It is an impressive homemade dessert that requires only a few ingredients and about 15 minutes of active preparation.
Making ice cream at home does not have to involve a complicated custard or specialized equipment. This simple no-churn method relies on whipped cream to create a light, airy consistency. Sweetened condensed milk adds richness and sweetness while helping the frozen dessert remain creamy and easy to scoop. The ingredients come together quickly before the freezer completes the remaining work.
Fresh ginger juice gives the ice cream a lively flavor without changing its smooth consistency. Vanilla extract rounds out the ginger’s sharper notes, while candied ginger adds concentrated sweetness and pleasantly chewy bursts throughout the dessert. Together, these ingredients create a balanced flavor that is warm and comforting without feeling too heavy.
This homemade ginger ice cream is refreshing enough for a summer gathering yet warmly spiced enough for a holiday dessert. Serve it by itself, tuck a scoop beside apple pie or pear crisp, or pair it with gingerbread, shortbread cookies, fruit cobbler, or warm spice cake. It is also an excellent make-ahead dessert for dinner parties because it can be prepared well before guests arrive.
Prep Time: 15 minutes
Freeze Time: 4 to 6 hours
Total Time: 4 hours 15 minutes to 6 hours 15 minutes
Yield: 8 servings
Ingredients
2 cups heavy whipping cream
14 ounces sweetened condensed milk
1 teaspoon fresh ginger juice
1 teaspoon pure vanilla extract
6 large pieces candied ginger, finely chopped and divided
Directions
Step 1: Whip the Cream
Pour the heavy whipping cream into the bowl of a stand mixer or a large mixing bowl. Using a whisk attachment or hand mixer, beat the cream until stiff peaks form.
The whipped cream should stand upright when the beaters are lifted from the bowl. Avoid overwhipping because the cream can become grainy and affect the smooth texture of the finished ice cream.
Step 2: Prepare the Ginger Ice Cream Base
In a separate large bowl, whisk together the sweetened condensed milk, fresh ginger juice, and vanilla extract until smooth and thoroughly combined.
Step 3: Fold the Mixtures Together
Using a rubber spatula, gently fold the whipped cream into the sweetened condensed milk mixture.
Work slowly to preserve the air incorporated into the whipped cream. Continue folding until the mixture is evenly combined and no visible streaks remain.
Step 4: Add the Candied Ginger
Gently fold two-thirds of the chopped candied ginger into the ice cream base. Reserve the remaining candied ginger for serving.
Step 5: Transfer the Ice Cream
Spoon the mixture into a freezer-safe container, insulated ice cream tub, or paper freezer container. Smooth the surface with a spatula and cover the container tightly with a lid or plastic wrap.
Step 6: Freeze the Ice Cream
Place the container in the freezer and freeze for 4 to 6 hours, or until the ice cream is firm enough to scoop.
If the ice cream has been frozen overnight, let it stand at room temperature for about 5 minutes before scooping.
Step 7: Serve
Scoop the homemade ginger ice cream into bowls or cones. Sprinkle the reserved candied ginger over the top and serve immediately.
Notes
For a stronger ginger flavor, increase the fresh ginger juice to 2 teaspoons.
To make fresh ginger juice, finely grate peeled fresh ginger and squeeze it through a fine-mesh strainer or cheesecloth.
For additional texture and ginger flavor, fold more chopped candied or crystallized ginger into the ice cream before freezing.
A drizzle of honey or caramel sauce makes a delicious topping.
Store the ice cream in an airtight, freezer-safe container for up to 2 weeks. For the best texture, press a piece of plastic wrap directly against the surface before sealing the container. This helps limit the formation of ice crystals.
This easy no-churn recipe is ideal for beginners because it requires only a few ingredients and no specialized ice cream equipment.