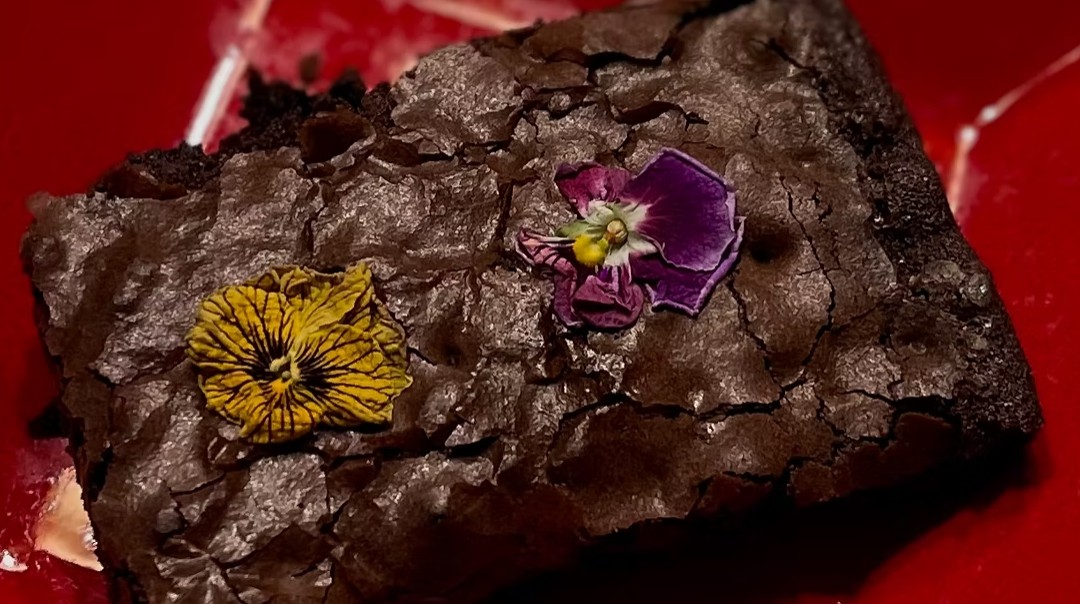
Bake rich and fudgy gluten-free chocolate brownies with oat flour, cocoa, and dark chocolate chips. Includes a separate classic flour version.
Rich, chocolatey, and wonderfully fudgy, these gluten-free chocolate brownies combine cocoa powder with mini dark chocolate chips for a satisfying homemade dessert. Melted butter adds richness, while oat flour gives the brownies a tender texture that holds together once cooled.
This recipe is easy to prepare with everyday baking ingredients and an 8-inch square pan. The chocolate chips create little pockets of melted chocolate throughout the brownies, making each square delicious on its own or served with vanilla ice cream and fresh berries.
Choose the gluten-free oat flour version for a rich, tender brownie, or make the classic all-purpose flour version included below for a traditional alternative. These are two separate recipes with different ingredients, oven temperatures, and baking times. Choose one complete option and follow its matching directions. The classic version is not gluten-free.
Directions
Option 1: Gluten-Free Oat Flour Chocolate Brownies
Step 1: Prepare the Oven and Pan
Preheat the oven to 325°F. Lightly grease an 8 x 8-inch baking pan or line it with parchment paper. If using parchment, leave some overhanging on two sides to help lift the cooled brownies out of the pan.
Step 2: Combine the Dry Ingredients
In a large mixing bowl, whisk together the granulated sugar, powdered sugar, oat flour, cocoa powder, baking powder, and salt.
Break up any visible lumps of cocoa powder or powdered sugar so the mixture is evenly blended before adding the wet ingredients.
Step 3: Add the Wet Ingredients
Add the boiling water, melted butter, vanilla extract, and beaten eggs. Stir until the ingredients are fully combined and the batter is thick and evenly mixed.
Scrape the bottom and sides of the bowl to incorporate any remaining dry ingredients.
Step 4: Fold in the Chocolate Chips
Using a spatula, fold the mini dark chocolate chips into the batter until evenly distributed.
Step 5: Fill the Pan
Transfer the batter to the prepared pan. Spread it into the corners and smooth the surface with a spatula so the brownies bake evenly.
Step 6: Bake the Brownies
Bake for approximately 45 minutes, or until the edges are set and a toothpick inserted near the center comes out with a few moist crumbs rather than wet batter.
Melted chocolate chips may leave chocolate on the toothpick, so check another spot if necessary. Avoid baking until the center is completely dry.
Step 7: Cool Completely
Place the pan on a cooling rack and allow the brownies to cool completely before cutting. Allow up to 2 hours, depending on the pan and room temperature.
Cooling gives the brownies time to firm up, making them easier to lift, slice, and serve.
Step 8: Slice and Serve
If using parchment paper, carefully lift the cooled brownies onto a cutting board. Cut into 9 large squares or 12 smaller portions.
Serve plain or add one of the optional toppings listed in the notes.
Option 2: Classic Chocolate Brownies
Step 1: Prepare the Oven and Pan
Preheat the oven to 350°F. Grease an 8-inch square baking pan or a 9-inch round baking pan.
Step 2: Heat the Butter Mixture
Combine the granulated sugar, butter, and salt in a microwave-safe bowl. Microwave for about 1 minute, or until the butter has melted.
Stir thoroughly to combine. The sugar may still feel slightly grainy.
Step 3: Add the Cocoa and Vanilla
Stir in the vanilla extract and Dutch-process cocoa powder until evenly incorporated. Scrape the sides of the bowl to bring all the ingredients into the mixture.
Step 4: Incorporate the Eggs
Add the eggs one at a time, mixing thoroughly after each addition. Continue until the batter is smooth and evenly blended.
Step 5: Add the Flour and Baking Powder
Add the all-purpose flour and baking powder. Stir gently until no dry flour remains, avoiding unnecessary mixing once the batter comes together.
Step 6: Fold in the Chocolate Chips
Fold in the chocolate chips until distributed throughout the batter.
Step 7: Fill the Pan and Bake
Spread the batter evenly in the prepared pan. Bake for 33 to 38 minutes, or until the edges are set and the center remains slightly soft.
A toothpick inserted near the center should come out with moist crumbs rather than wet batter.
Step 8: Cool and Slice
Place the pan on a cooling rack and let the brownies cool for at least 15 minutes before slicing. For firmer brownies and cleaner portions, allow them to cool completely.
Cut into 9 to 12 portions and serve.
Notes
Choose one complete recipe: The two versions use different amounts of sugar, eggs, cocoa powder, and chocolate chips. Follow the ingredient list and directions for your chosen option without combining the formulas.
Gluten-free ingredients: Use certified gluten-free oat flour for Option 1 and verify that the remaining packaged ingredients are gluten-free. Use clean equipment and preparation surfaces to prevent cross-contact. Option 2 contains wheat flour and is not gluten-free.
Keep the texture fudgy: Watch for set edges and moist crumbs when checking for doneness. Overbaking can make the brownies dry, while slicing the gluten-free version before it has cooled may cause it to break apart.
Egg temperature: Room-temperature eggs blend more easily into the batter. Have your ingredients measured and ready before beginning.
Optional chocolate variation: For extra chocolate, fold an additional 1/2 cup chocolate chips into your chosen batter. Milk chocolate, semisweet, dark chocolate, or white chocolate chips can provide different flavors.
Optional additions: Fold in 1/2 cup chopped walnuts for crunch, or add 1/2 teaspoon espresso powder for a deeper chocolate flavor. A light sprinkle of flaky sea salt over the batter offers a contrast to the sweetness.
Optional swirls: Caramel sauce or peanut butter can be swirled into the batter before baking. Fresh raspberries are another optional addition. Added toppings and swirls may affect the baking time.
Serving suggestions: Serve with vanilla ice cream, whipped cream, chocolate curls, caramel sauce, or fresh strawberries. Brownie pieces can also be layered into trifles or used as the base for brownie sundaes.
Storage: Store plain brownies in an airtight container at room temperature for up to 4 days or refrigerate for up to 1 week. Wrap individual portions tightly and freeze for up to 3 months.
Make ahead: Bake the brownies a day before serving and let them cool completely before storing. Keep toppings separate until serving.