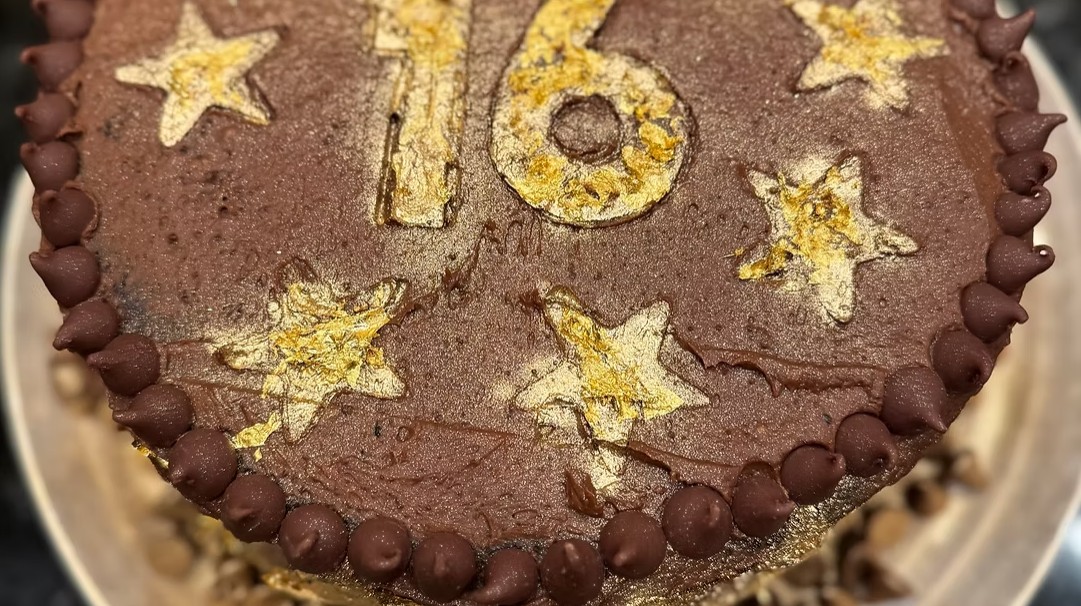
Make the best gluten-free chocolate cake with moist chocolate layers, mini chocolate chips, and creamy homemade chocolate buttercream.
Deeply chocolatey, exceptionally moist, and finished with a creamy homemade frosting, this Best Gluten-Free Chocolate Cake with Rich Chocolate Buttercream Recipe is an impressive dessert for birthdays, holidays, and special celebrations. Dutch-processed cocoa powder gives the cake its intense chocolate flavor, while sour cream and instant chocolate pudding mix help create a tender, bakery-style crumb.
A carefully balanced combination of oat flour, rice flours, cornstarch, and tapioca flour gives the cake structure without making it dry or gritty. Mini chocolate chips add even more chocolate flavor to every slice. Once the layers are completely cool, they are stacked with silky chocolate buttercream and covered in a smooth final coating.
Directions
Step 1: Prepare the Oven and Cake Pans
Position an oven rack in the center of the oven and preheat the oven to 350°F.
Generously grease two 8-inch round cake pans with butter. Line the bottoms with parchment paper rounds, then lightly grease the parchment paper.
Step 2: Combine the Dry Ingredients
Place the oat flour, cornstarch, rice flour, glutinous rice flour, tapioca flour, baking powder, baking soda, xanthan gum, kosher salt, cocoa powder, granulated sugar, and instant chocolate pudding mix in the bowl of a stand mixer fitted with the paddle attachment.
If using the optional espresso powder, add it with the dry ingredients. Mix on low speed until the ingredients are evenly combined and no visible lumps remain.
Step 3: Add the Wet Ingredients
Add the neutral oil or softened butter, eggs, milk or buttermilk, vanilla extract, and sour cream to the dry ingredients.
Mix on low speed until the ingredients begin to combine. Increase the mixer speed to medium-high and beat for 2 to 3 minutes, or until the batter is smooth, thick, and creamy.
Step 4: Add the Chocolate Chips
Use a spatula to gently fold the mini chocolate chips into the batter until they are evenly distributed.
Step 5: Fill the Cake Pans
Divide the batter evenly between the prepared cake pans. Smooth the tops with an offset spatula so the cake layers bake evenly.
Step 6: Bake the Cake Layers
Bake for 28 to 32 minutes, rotating the pans halfway through the baking time. The cakes are ready when the centers spring back lightly when touched and a toothpick inserted in the middle comes out clean or with a few moist crumbs attached.
Step 7: Cool the Cakes
Allow the cakes to cool in their pans for 10 minutes. Run a thin knife around the edges, then carefully turn the cakes out onto wire racks.
Remove the parchment paper and allow the cake layers to cool completely before cutting or frosting them.
Step 8: Whip the Butter
While the cakes cool, place the softened unsalted butter and salted butter in a large mixing bowl. Beat on medium-high speed for 3 to 5 minutes, or until the butter is very light, fluffy, and pale.
Step 9: Finish the Chocolate Buttercream
Gradually add the powdered sugar and cocoa powder, mixing on low speed after each addition. Pour in the heavy cream and vanilla extract.
Increase the mixer speed to medium-high and beat for another 3 minutes, or until the buttercream is smooth, creamy, and easy to spread.
If the frosting is too thick, add more heavy cream 1 tablespoon at a time. If it becomes too soft, refrigerate it for 15 to 20 minutes before assembling the cake.
Step 10: Divide the Cake Layers
Use a long serrated knife to level the tops of the cakes if necessary. Carefully cut each cake horizontally into two even layers to create four cake layers.
Step 11: Begin Assembling the Cake
Place the first cake layer on a cake stand or serving platter. If desired, lightly brush it with chocolate liqueur or chocolate syrup.
Spread approximately 1/4 cup of chocolate buttercream evenly over the layer.
Repeat with the remaining cake layers, adding the optional chocolate liqueur or syrup and buttercream between each layer.
Step 12: Apply the Crumb Coat
Spread a very thin layer of buttercream over the top and sides of the assembled cake. This crumb coat traps loose crumbs and helps produce a cleaner final finish.
Refrigerate the cake for 15 to 20 minutes, or until the crumb coat is set.
Step 13: Finish Frosting the Cake
Remove the cake from the refrigerator. Spread the remaining chocolate buttercream generously over the top and sides. Use an offset spatula or cake scraper to create a smooth finish or decorative swirls.
Step 14: Rest and Serve
Allow the finished cake to rest at room temperature for about 1 hour before serving. This gives the buttercream time to soften slightly. Cut the cake into slices and serve.
Notes
The individual flours and starches work together to create a tender gluten-free cake with enough structure to support four layers. Glutinous rice flour is gluten-free despite its name. The word “glutinous” refers to its sticky texture, not the presence of gluten.
For an easier alternative, replace the oat flour, cornstarch, rice flour, glutinous rice flour, and tapioca flour with 2 3/4 cups gluten-free all-purpose flour containing xanthan gum. If the blend already contains xanthan gum, omit the additional xanthan gum.
When preparing this cake for someone with celiac disease or gluten sensitivity, check that the oat flour, cornstarch, rice flours, tapioca flour, cocoa powder, pudding mix, chocolate chips, and all other packaged ingredients carry appropriate gluten-free labeling. Prevent cross-contact by using clean equipment, pans, utensils, and work surfaces.
Whole milk produces a rich cake, while buttermilk adds a slightly tangy flavor and helps create an especially soft crumb.
Neutral oil generally creates a very moist cake that remains soft when chilled. Softened butter gives the cake a richer buttery flavor.
The optional espresso powder intensifies the chocolate flavor without making the finished cake taste strongly of coffee.
Use chocolate syrup instead of chocolate liqueur when preparing the cake for children or anyone avoiding alcohol.
Must be 21 years of age or older to purchase or consume alcoholic beverages. Please drink responsibly.
If the cake layers have domed tops, level them before splitting and stacking them. A flat surface helps keep the finished layer cake straight and stable.
Make sure the cake layers are completely cool before cutting and frosting them. Warm cake can tear easily and cause the buttercream to melt.
For a special presentation, decorate the finished cake with chocolate curls, chocolate shavings, or chocolate ganache.
Store the frosted cake covered at room temperature for up to 3 days or in the refrigerator for up to 5 days. If refrigerated, let individual slices stand briefly at room temperature before serving for the softest texture.
The unfrosted cake layers can be wrapped tightly and frozen for up to 3 months.
Thaw them before assembling and decorating the cake.