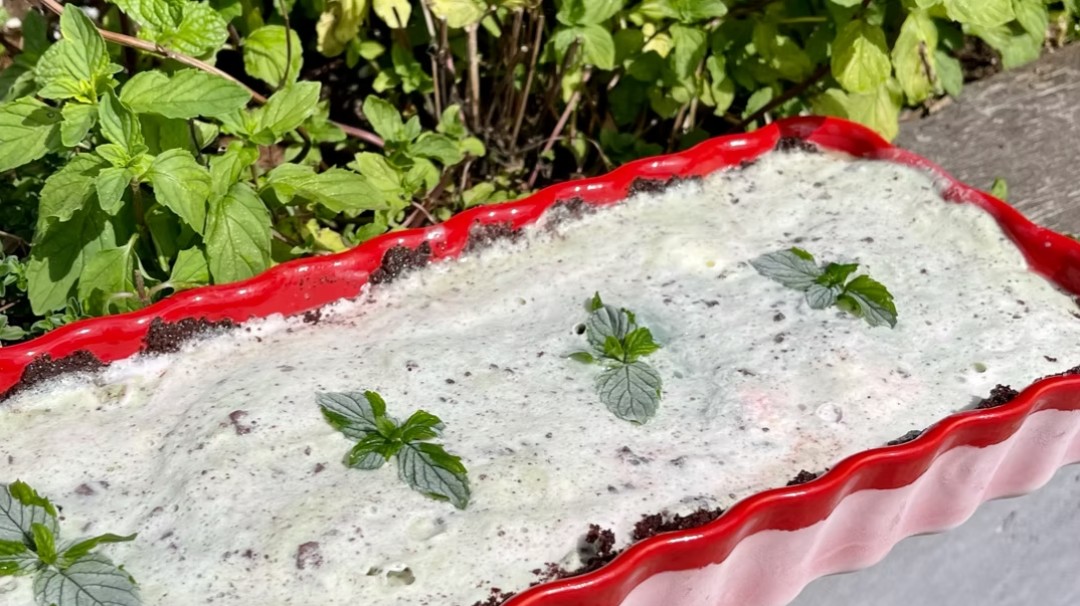
Make easy no-churn mint ice cream with a gluten-free chocolate cookie crust and fresh mint leaves for a refreshing frozen dessert.
Cool, creamy, and deliciously chocolatey, this Easy No-Churn Mint Ice Cream with Gluten-Free Chocolate Cookie Crust Recipe turns a simple homemade frozen dessert into an irresistible ice cream pie. A crisp chocolate cookie crust provides the perfect contrast to the smooth mint ice cream filling.
The no-churn filling does not require an ice cream maker. Freshly whipped heavy cream incorporates air into the mixture, while sweetened condensed milk creates a rich, velvety consistency. Peppermint and vanilla extracts work together to produce a refreshing but balanced mint flavor.
The gluten-free chocolate cookie crust is made by combining finely crushed cookies with melted butter. It is pressed into a pie plate and frozen before the mint filling is added. This helps the crust become firm enough to support the creamy ice cream layer without requiring any baking.
Serve this frozen dessert for summer celebrations, birthdays, holidays, or family dinners. Decorate it with fresh mint leaves, whipped cream, gluten-free chocolate cookie crumbs, mini chocolate chips, or chocolate sauce for a beautiful finishing touch.
Directions
Step 1: Prepare the Pie Plate
Lightly grease a 9-inch pie plate or line the bottom of a 9-inch springform pan with parchment paper.
A springform pan makes it easier to remove and slice the finished frozen dessert, but a standard pie plate also works well.
Step 2: Crush the Chocolate Cookies
Place the gluten-free chocolate cookies in a food processor and process them until fine crumbs form.
If you do not have a food processor, place the cookies in a securely sealed food-storage bag. Crush them with a rolling pin until the crumbs are fine and evenly textured.
Fine crumbs will hold together more effectively than large cookie pieces and create a sturdier crust.
Step 3: Make the Chocolate Cookie Crust
Place the chocolate cookie crumbs in a medium bowl. Pour the melted butter over the crumbs and stir until they are evenly moistened.
The mixture should resemble wet sand and hold together when pressed between your fingers. If the cookies include a cream filling, crush the whole cookies without removing the filling.
Step 4: Shape and Freeze the Crust
Transfer the cookie mixture to the prepared pie plate or springform pan. Press it firmly and evenly across the bottom of the pan.
For a traditional pie shape, press some of the mixture approximately 1 inch up the sides. Use the flat bottom of a measuring cup or drinking glass to compact the crust.
Place the crust in the freezer for at least 30 minutes. Freezing the crust before adding the filling helps it become firm and reduces the chance that loose crumbs will mix into the ice cream.
Step 5: Chill the Mixing Equipment
While the crust is freezing, place a large mixing bowl and whisk attachment in the refrigerator for approximately 15 minutes.
Cold equipment helps the heavy whipping cream thicken quickly and maintain its structure.
Step 6: Whip the Heavy Cream
Pour the heavy whipping cream into the chilled bowl of a stand mixer fitted with the whisk attachment. If using a hand mixer, pour the cream into a large chilled mixing bowl.
Beat the cream on medium-high speed until stiff peaks form. The cream is ready when the whisk is lifted and the peak stands upright without falling over.
Watch the cream carefully as it thickens. Overwhipped cream can begin to separate and develop a grainy texture, which may affect the smoothness of the finished ice cream.
Step 7: Prepare the Mint Ice Cream Base
In a separate large bowl, combine the sweetened condensed milk, vanilla extract, and peppermint extract. Whisk until the mixture is smooth and evenly blended.
The vanilla extract rounds out the peppermint and creates a more balanced mint flavor. For a stronger peppermint flavor, increase the peppermint extract to 3/4 teaspoon.
Step 8: Lighten the Ice Cream Base
Add approximately one-third of the whipped cream to the sweetened condensed milk mixture.
Use a rubber spatula to gently fold the whipped cream into the base. This first addition lightens the condensed milk mixture and makes it easier to incorporate the remaining whipped cream.
Step 9: Fold in the Remaining Whipped Cream
Add the rest of the whipped cream. Continue folding with slow, broad strokes, scraping from the bottom of the bowl and lifting the mixture over the top.
Rotate the bowl as you work and continue folding until no visible streaks remain. Avoid vigorous stirring because it can deflate the whipped cream and produce denser ice cream.
Step 10: Add the Optional Green Color
For a classic pale green appearance, add the spirulina powder or a small amount of green food coloring.
Fold gently until the color is evenly distributed. If using food coloring, begin with a few drops and add more only if needed.
This step is optional. The ice cream will have the same refreshing mint flavor if left naturally white.
Step 11: Fill the Chocolate Cookie Crust
Remove the chilled crust from the freezer. Spoon the mint ice cream mixture over the crust.
Spread the mixture into an even layer, taking care not to disturb the cookie crumbs. Smooth the top with a spatula.
For a mint chocolate chip variation, gently fold 1 cup mini chocolate chips into the ice cream mixture before adding it to the crust.
Step 12: Cover and Freeze
Cover the pan tightly with plastic wrap. Press the plastic wrap gently against the surface of the ice cream to reduce air exposure and help prevent ice crystals.
Freeze the dessert on a level surface for 6 to 8 hours or until completely firm. Freezing it overnight will provide the firmest texture and make it easier to slice.
Step 13: Decorate and Serve
Remove the frozen dessert from the freezer and let it stand at room temperature for 5 to 10 minutes.
If using a springform pan, carefully release and remove the outer ring.
Decorate the top with fresh mint leaves, whipped cream, crushed gluten-free chocolate cookies, mini chocolate chips, or gluten-free chocolate sauce.
Cut the dessert into wedges with a sharp knife. For cleaner slices, warm the knife under hot water and dry it before making each cut.
Notes
Use a 9-inch pie plate or springform pan so the crust and filling have enough room. A springform pan offers the easiest release and creates a cake-like presentation.
Make sure the chocolate sandwich cookies or chocolate wafer cookies are specifically labeled gluten-free. Conventional chocolate sandwich cookies usually contain wheat.
Cookie brands vary in sweetness, fat content, and moisture. The crust mixture should resemble wet sand and hold its shape when pressed.
Compacting it firmly helps prevent crumbling when the dessert is sliced.
If using gluten-free chocolate sandwich cookies with cream filling, crush the entire cookies. There is no need to remove the filling.
Let the melted butter cool slightly before combining it with the cookie crumbs.
Freeze the crust for at least 30 minutes before adding the ice cream. This makes the base firmer and helps keep crumbs out of the filling.
A chilled mixing bowl and whisk help the heavy cream whip faster and maintain its structure.
Do not substitute regular milk for the heavy whipping cream. Heavy cream contains the fat needed to whip properly and give the no-churn ice cream its creamy consistency.
For mint chocolate chip ice cream, fold 1 cup mini chocolate chips into the prepared filling. Mini chips are easier to bite when frozen and distribute more evenly than regular chocolate chips.
For a cookies-and-mint variation, fold additional crushed gluten-free chocolate cookies into the filling before spreading it over the crust.
Rinse the fresh mint leaves under cool water and dry them thoroughly before using them as a garnish. Add the leaves immediately before serving so they remain fresh and vibrant.
Store the dessert tightly covered in the freezer for up to 2 weeks. Pressing plastic wrap against the ice cream helps protect it from freezer burn.
Allow the frozen dessert to soften for 5 to 10 minutes before slicing. Avoid leaving it at room temperature for an extended period or repeatedly thawing and refreezing it.
This recipe is gluten-free only when every ingredient is gluten-free. Check the labels on the cookies, sweetened condensed milk, extracts, spirulina, food coloring, chocolate chips, chocolate sauce, and other packaged toppings. When serving someone with celiac disease or gluten sensitivity, use appropriately labeled products and prevent cross-contact during preparation and serving.