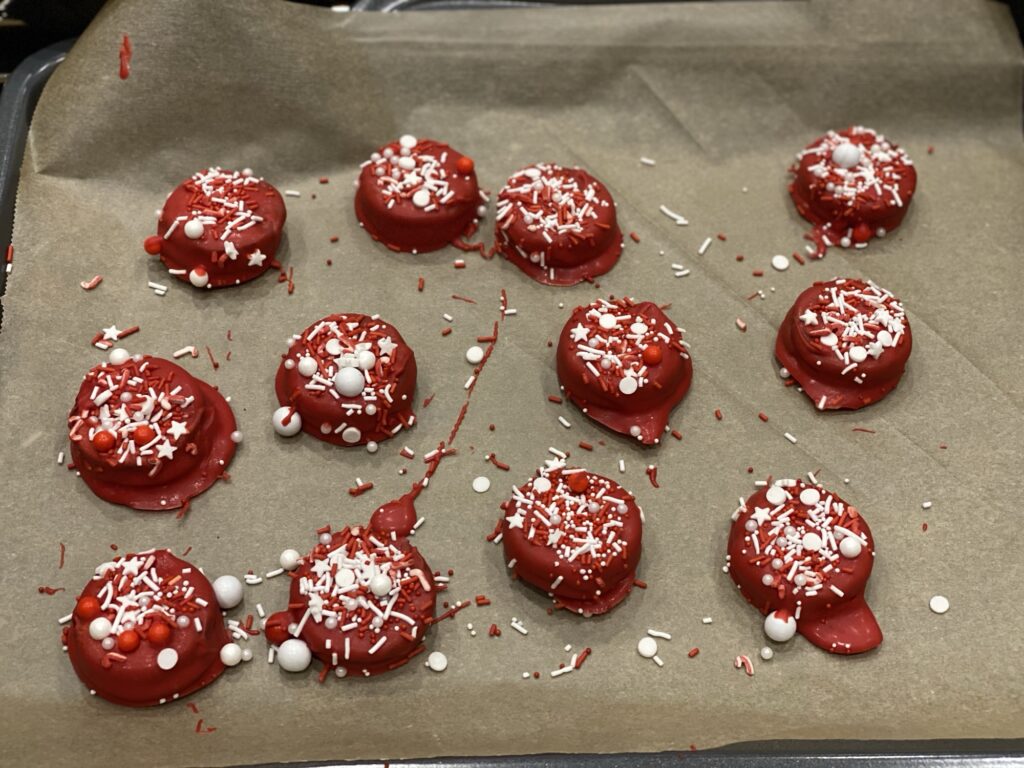
Chocolate Covered Oreos: A Simple No Bake Treat Everyone Loves
Chocolate Covered Oreos are one of the easiest no bake desserts you can make, yet they always look impressive. With just a few simple ingredients and endless decorating possibilities, these sweet treats are perfect for holidays, birthday parties, baby showers, bake sales, gift boxes, or simply satisfying a chocolate craving. Whether you are making them with kids or creating elegant party favors, Chocolate Covered Oreos come together in minutes and are guaranteed to disappear just as quickly.
The combination of a crunchy chocolate sandwich cookie wrapped in a smooth chocolate coating creates a delicious contrast of textures. You can keep them classic with milk chocolate or customize them with white, dark, or colored candy melts for every season and celebration. Best of all, there is no baking required, making this recipe ideal for busy days when you need a quick and beautiful dessert.
Why You Will Love These Chocolate Covered Oreos
Chocolate Covered Oreos require very little effort while delivering bakery-quality results. They are beginner-friendly, require only a handful of ingredients, and can be decorated in countless ways. Because they store well, they are also an excellent make-ahead dessert for parties and holiday gatherings.
Their versatility makes them one of the most popular no bake treats. Decorate them with festive sprinkles for Christmas, pastel colors for Easter, red and pink drizzle for Valentine’s Day, orange and black for Halloween, or your favorite team colors for game day celebrations.
Perfect for Every Occasion
One of the best things about Chocolate Covered Oreos is how easily they fit into almost any event. Package them in decorative bags for homemade gifts, arrange them on dessert platters for parties, or include them in cookie boxes during the holidays.
They are also wonderful for birthday parties because they can be customized to match any party theme. Children especially enjoy helping dip the cookies and adding colorful toppings before the chocolate hardens.
Tips for the Best Chocolate Covered Oreos
Using high-quality melting chocolate or candy melts will give the cookies a smooth, glossy finish. Melt the chocolate slowly to prevent scorching, and stir frequently until completely smooth.
A fork or dipping tool makes coating the cookies much easier while allowing excess chocolate to drip away before placing them on parchment paper.
Decorate immediately after dipping each cookie. The chocolate begins to set fairly quickly, so adding sprinkles, crushed candies, cookie crumbs, or drizzled chocolate right away ensures the decorations stick properly.
If your kitchen is warm, allow the cookies to chill in the refrigerator for about 15 to 20 minutes until the coating is completely firm.
Fun Decorating Ideas
Chocolate Covered Oreos can be customized in countless creative ways.
Try drizzling white chocolate over dark chocolate for an elegant finish.
Sprinkle crushed peppermint candies over white chocolate during the holidays.
Use colorful candy melts and matching sprinkles for birthday celebrations.
Add edible glitter for weddings and baby showers.
Top with crushed nuts, mini chocolate chips, toasted coconut, or colorful sanding sugar for extra texture and flavor.
Great for Homemade Gifts
Few homemade treats are as easy to package and gift as Chocolate Covered Oreos. Once the chocolate has fully hardened, place them in decorative tins, cellophane bags tied with ribbon, or festive gift boxes. Because they stay fresh for several days, they travel well and make thoughtful gifts for teachers, neighbors, coworkers, and family members.
They also make beautiful additions to dessert charcuterie boards, cookie platters, and holiday cookie exchanges.
Storage Tips
Store Chocolate Covered Oreos in an airtight container at room temperature for up to one week. If your home is particularly warm, refrigerate them to keep the chocolate firm. Allow refrigerated cookies to sit at room temperature for several minutes before serving for the best texture.
For longer storage, freeze them in an airtight container for up to three months. Thaw overnight in the refrigerator before serving.
Frequently Asked Questions
What kind of chocolate works best?
Candy melts, melting wafers, almond bark, or high-quality chocolate chips with a small amount of coconut oil or shortening all work well for coating the cookies.
Do I need a special mold?
No. Simply dip the Oreos into melted chocolate and place them on parchment paper. Silicone molds can create a perfectly smooth finish but are completely optional.
Can I make them ahead of time?
Yes. Chocolate Covered Oreos are an excellent make-ahead dessert because they stay fresh for several days and are easy to store until you are ready to serve them.
Can I use different Oreo flavors?
Absolutely. Golden Oreos, Mint Oreos, Birthday Cake Oreos, Peanut Butter Oreos, and many seasonal varieties all work wonderfully in this recipe.
Elevate your dessert game with these easy-to-make homemade chocolate covered strawberries. Perfect for Valentine's Day, Mother's Day, or any occasion, these treats are a delightful combination of fresh strawberries and rich chocolate. With just a few simple steps, you can create elegant desserts that impress your loved ones.
Creative cake decorations can turn an ordinary dessert into the centerpiece of any celebration. Whether you are baking for a birthday, wedding, baby shower, anniversary, or holiday gathering, the right decorating techniques can make your cake look professionally designed while showcasing your personal style. From elegant edible flowers to eye catching ombre effects, creative cake decorations allow you to transform simple cakes into unforgettable works of edible art.
Keeping colorful sprinkles firmly attached to your cookies is one of the easiest ways to make homemade treats look as though they came straight from a professional bakery. Whether you are baking classic sugar cookies for the holidays, colorful birthday treats, or gluten-free cookies for a special celebration, the right decorating techniques can make all the difference. Knowing when to add sprinkles, how much pressure to use, and which decorating methods work best will help your cookies stay beautiful from the moment they come out of the oven until the last delicious bite. Decorated cookies are a favorite for birthdays, holidays, baby showers, weddings, and cookie exchanges, but nothing is more frustrating than watching sprinkles fall off after baking or scatter across the bottom of a storage container. Fortunately, keeping sprinkles securely attached is easier than many home bakers realize. The key is understanding how cookie dough, frosting, and sprinkles work together. A few simple techniques can transform ordinary cookies into colorful, bakery-worthy creations that stay picture-perfect long after they have cooled. Why Sprinkles Fall Off Cookies Before learning how to keep sprinkles in place, it helps to understand why they sometimes fail to stick. One of the most common mistakes is applying sprinkles to dough that has dried out or to frosting that has already formed a crust. Without a slightly sticky surface, the sprinkles have nothing to grip. Overhandling decorated cookies or stacking them before they have completely cooled can also loosen decorations. Fortunately, each of these issues can be prevented with proper timing and a few easy decorating habits. Decorate Before Baking Whenever Possible For many cookie recipes, the best time to apply sprinkles is before the cookies go into the oven. After shaping your cookie dough, gently press the sprinkles into the surface. As the cookies bake, the dough expands slightly around the decorations, helping secure them in place. This technique works especially well for sugar cookies, butter cookies, shortbread, chocolate cookies, and gluten-free sugar cookies. The finished cookies maintain bright, colorful decorations with very little effort. Use Gentle Pressure One of the biggest decorating mistakes is pressing too hard when adding sprinkles. A light touch is all that is needed to help the decorations adhere to the dough. Pressing too firmly can flatten shaped cookies, distort decorative edges, or cause the dough to spread unevenly during baking. If you are decorating large batches, the flat bottom of a drinking glass lined with parchment paper can gently press sprinkles into the dough without damaging the cookie’s shape. Chill the Dough After Decorating If your cookie recipe recommends chilling the dough, decorate first and refrigerate afterward. Chilling helps the dough firm up around the sprinkles while also reducing cookie spread during baking. The result is sharper cookie shapes and decorations that remain exactly where you placed them. This extra step is especially helpful when making intricate cut-out cookies for holidays or special occasions. Add an Egg Wash for Extra Adhesion For cookies that require additional security, lightly brushing the tops with beaten egg before adding sprinkles works extremely well. The thin layer of egg acts like edible glue, helping sprinkles bond to the surface while baking. This method is commonly used for decorative pie crusts, pastry cookies, and holiday sugar cookies. Only a light coating is necessary. Too much egg wash can leave the cookies with an overly shiny appearance. Decorate Baked Cookies with Royal Icing If you prefer decorating cookies after baking, royal icing offers one of the strongest and most reliable ways to secure sprinkles. Apply a thin layer of icing and immediately add the sprinkles before the icing begins to dry. As the royal icing hardens, it locks the decorations into place and creates a beautiful, smooth finish. Royal icing is ideal for detailed cookie decorating because it dries firm enough for stacking and packaging. Buttercream Works Beautifully Too Soft buttercream frosting naturally holds sprinkles without requiring any additional adhesive. Spread or pipe the frosting onto cooled cookies and immediately decorate while the buttercream is still fresh. Once the frosting begins to crust over, sprinkles become much more difficult to attach. Buttercream is an excellent choice for oversized bakery-style cookies, sandwich cookies, and festive celebration treats. Choose Sprinkles That Bake Well Not every type of sprinkle performs the same during baking. Jimmies are among the most dependable because they hold their shape and vibrant colors in the oven. Sanding sugar adds sparkle while maintaining its texture. Sugar crystals create a beautiful shimmering finish with a pleasant crunch. Confetti sprinkles add cheerful color to birthday and holiday cookies. Nonpareils provide excellent coverage but may slightly bleed into lighter-colored dough during baking. Selecting the right sprinkle for your recipe can dramatically improve your finished cookies. Avoid Using Too Many Sprinkles Although it is tempting to completely cover each cookie, using too many sprinkles can actually reduce how well they stay attached. A moderate, even layer allows the dough or frosting to grip each sprinkle more effectively while creating a cleaner, more polished appearance. Sometimes less truly creates a more elegant result. Bake at the Proper Temperature Following the recommended baking temperature helps preserve the color and texture of decorative sprinkles. Oven temperatures that are too high may cause certain sprinkle varieties to fade or soften excessively. Overbaking can also make cookies more fragile, increasing the chance that decorations will loosen during handling. Proper baking helps ensure your cookies remain both beautiful and delicious. Cool and Store Cookies Carefully Freshly baked cookies need time to set before being moved. Allow them to cool on the baking sheet for several minutes before transferring them to a cooling rack. Once completely cooled, store decorated cookies in airtight containers with parchment paper placed between each layer. Keeping cookies in a cool, dry location also helps preserve both their freshness and their decorative finish. Common Mistakes to Avoid Even experienced bakers occasionally make simple decorating mistakes. Applying sprinkles after the dough has dried, waiting too long to decorate frosting, using