How to Harvest Kale, Peppers, and Herbs Using a Colander and Garden Clippers
Learn how to harvest kale, peppers, and fresh herbs using garden clippers and a simple colander. Discover easy garden harvest tips to keep plants healthy, boost production, and enjoy fresh garden-to-table ingredients all season long.
Harvesting fresh vegetables and herbs is one of the most rewarding parts of maintaining a home garden. Whether you are growing curly kale, sweet bell peppers, hot peppers, basil, parsley, rosemary, or thyme, knowing how to harvest them properly helps keep your plants healthy and productive throughout the growing season.
One of the easiest and most practical ways to gather your harvest is with a pair of sharp garden clippers and a simple kitchen colander. While many gardeners use traditional harvest baskets, a colander offers several unique advantages. It is lightweight, easy to carry, allows loose soil to fall away naturally, and can go directly from the garden to the sink for washing fresh produce.
If you are looking for an easy garden harvest method that saves time while protecting your plants, harvesting kale, peppers, and herbs with garden clippers and a colander is a simple solution that every gardener can appreciate.
Why Proper Harvesting Matters
Learning how to harvest vegetables correctly is just as important as learning how to grow them. Proper harvesting encourages plants to continue producing, reduces stress on stems and branches, and helps prevent unnecessary damage that can slow future growth.
Garden clippers create clean, precise cuts that heal quickly, unlike twisting or pulling vegetables by hand. Clean cuts also reduce the risk of introducing diseases into your vegetable garden, especially when clippers are sanitized between plants.
Regular harvesting keeps many vegetables and herbs actively producing, allowing you to enjoy fresh ingredients from your garden for weeks or even months.
How to Harvest Kale
Kale is one of the easiest leafy greens to grow because it produces continuously when harvested correctly. Rather than removing the entire plant, harvest the large outer leaves first while leaving the smaller center leaves untouched. This allows the growing crown to continue producing new foliage.
Choose leaves that are dark green, crisp, and fully developed. Avoid removing more than one-third of the plant at one time, giving it plenty of energy to produce another flush of healthy leaves.
Fresh garden kale is incredibly versatile and can be used in smoothies, salads, soups, casseroles, pasta dishes, stir-fries, and homemade kale chips.
Harvesting kale regularly not only provides a steady supply of nutritious greens but also encourages stronger, healthier plants throughout the season.
How to Harvest Garden Peppers
Whether you grow sweet bell peppers, jalapeños, banana peppers, cayenne peppers, or colorful heirloom varieties, harvesting peppers correctly helps maximize production.
Never pull peppers from the plant. Instead, use garden clippers to cut the stem about one inch above the pepper. Pulling can snap branches or damage developing fruit.
Green peppers can be harvested early for a crisp texture, while allowing peppers to mature produces sweeter flavors and brilliant shades of red, orange, yellow, purple, or chocolate, depending on the variety.
Frequent harvesting encourages pepper plants to continue flowering and producing new fruit well into the growing season.
Fresh peppers are perfect for grilling, roasting, stuffing, freezing, dehydrating, making homemade salsa, adding to salads, or preserving through pickling.
How to Harvest Fresh Herbs
Fresh culinary herbs are among the easiest and most rewarding plants to harvest. Regular trimming actually improves growth by encouraging plants to become fuller and bushier.
For the best flavor, harvest herbs during the morning after the dew has dried but before the afternoon heat begins. At this time, the essential oils responsible for flavor and aroma are often at their highest concentration.
Popular herbs to harvest include basil, parsley, oregano, thyme, rosemary, sage, mint, cilantro, dill, and chives.
Always trim stems just above a set of leaves rather than cutting randomly. This encourages branching and continuous production throughout the season.
Fresh herbs can be enjoyed immediately or preserved by drying, freezing, or infusing them into oils, vinegars, and compound butters.
Why a Colander Is the Perfect Harvest Basket
Many gardeners already have the perfect harvest basket sitting in their kitchen.
A colander offers excellent airflow that helps keep leafy greens cool while you continue harvesting throughout the garden. Its drainage holes allow loose soil and garden debris to fall away naturally, making cleanup much easier.
Unlike solid buckets, a colander also prevents moisture from collecting around freshly picked vegetables and herbs, helping maintain their freshness until they are washed.
Once harvesting is complete, simply rinse your produce directly in the same colander before bringing it into the kitchen.
It is an inexpensive, practical tool that works beautifully for everyday harvesting.
Garden Harvest Tips for Healthier Plants
Harvest during the cooler morning hours whenever possible.
Use clean, sharp garden clippers for every harvest.
Harvest kale from the outer leaves inward.
Cut peppers from the stem instead of pulling them.
Never remove more than one-third of an herb plant during a single harvest.
Inspect plants regularly for insects, diseases, or damaged foliage.
Harvest often to encourage continuous vegetable production.
Wash produce shortly after harvesting and store it properly for maximum freshness.
Enjoy the Freshest Garden-to-Table Harvest
There is something incredibly satisfying about walking into your garden with nothing more than a pair of garden clippers and a colander, then returning to your kitchen with a colorful collection of fresh kale, ripe peppers, and fragrant herbs.
Homegrown produce offers exceptional flavor, beautiful color, and peak freshness that simply cannot be matched by store-bought vegetables. Every harvest represents weeks of care and attention, making each meal even more rewarding.
Whether you are preparing a crisp salad, homemade soup, roasted vegetables, herb butter, fresh salsa, pasta dishes, or your favorite family recipe, harvesting directly from your garden allows you to enjoy ingredients at their absolute best.
By harvesting regularly and using proper techniques, your kale, peppers, and herbs will continue producing throughout the growing season, providing a steady supply of delicious garden-fresh ingredients from your backyard to your table.
Frequently Asked Questions
Can I use a kitchen colander as a garden harvest basket?
Yes. A colander is lightweight, provides excellent airflow, allows loose dirt to fall through, and doubles as a washing basket once you bring your harvest indoors.
When is the best time to harvest kale, peppers, and herbs?
The best time to harvest is during the early morning after the dew has dried. Cooler temperatures help vegetables and herbs stay crisp and retain their flavor.
Should I pull peppers off the plant?
No. Always use clean garden clippers or pruning shears to cut peppers from the stem to prevent damage to the plant.
How often should I harvest herbs?
Many culinary herbs can be harvested weekly throughout the growing season. Frequent trimming encourages fuller growth and increases production.
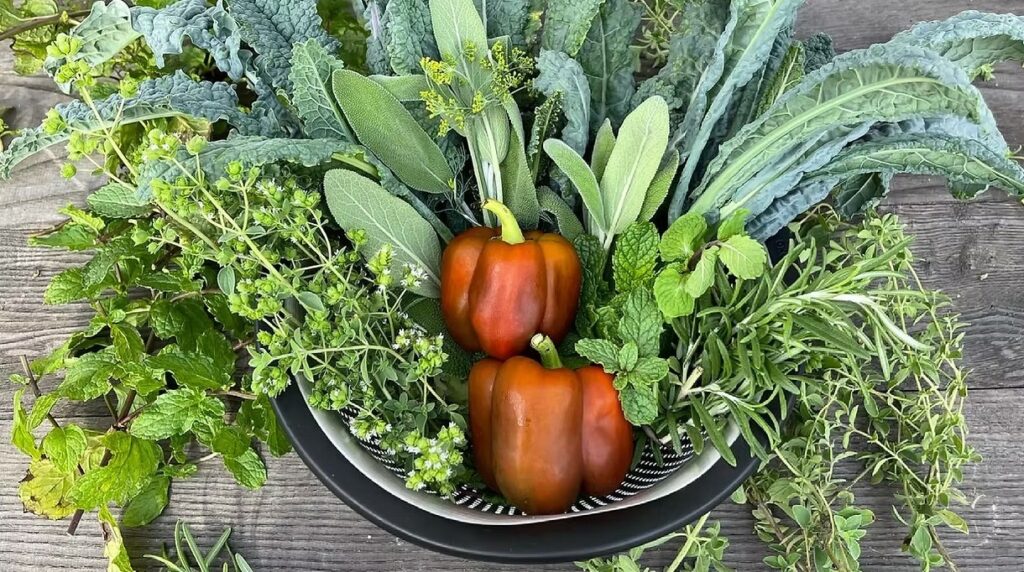
Colorful peppers, leafy kale, and fragrant herbs come together in a beautiful homegrown garden harvest.
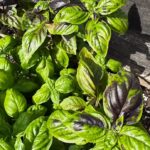
There is something timeless about growing basil. With its fragrant leaves, vibrant foliage, and incredible versatility in the kitchen, basil has earned its place as one of the world’s most beloved culinary herbs. Whether you are planting a traditional herb garden, filling containers on a sunny patio, or tucking basil among vegetables in raised beds, this remarkable plant rewards gardeners with continuous harvests and exceptional flavor throughout the growing season. A Basil Growing Guide is the perfect starting point for learning how to grow healthy, productive plants while enjoying one of the easiest and most satisfying herbs to cultivate. What Is Basil? Basil (Ocimum basilicum) is a warm-season annual herb in the mint family that is native to tropical regions of Asia and Africa. Known for its aromatic leaves and rapid growth, basil has become an essential ingredient in cuisines around the world. From classic Italian pesto and fresh Caprese salads to Thai curries and Mediterranean dishes, basil adds a fresh, sweet, and slightly peppery flavor that enhances countless recipes. Beyond its culinary uses, basil is also valued for its ornamental appeal. Depending on the variety, plants produce lush green, deep purple, variegated, or ruffled foliage that adds color and texture to herb gardens, flower beds, and containers. Why Grow Basil? Basil is one of the most rewarding herbs for gardeners of every experience level. It grows quickly, thrives in warm weather, and provides a steady supply of fresh leaves for months with regular harvesting. Some of the many reasons gardeners love growing basil include: Fresh herbs available just steps from the kitchen. Fast-growing plants that produce abundant harvests. Beautiful foliage that complements vegetable and flower gardens. Excellent companion plants for tomatoes, peppers, and many other vegetables. Fragrant leaves that bring wonderful aroma to outdoor spaces. Flowers that attract bees, butterflies, and other beneficial pollinators when allowed to bloom. Whether you grow a single pot on a windowsill or an entire herb garden, basil delivers beauty, fragrance, and flavor throughout the season. Popular Types of Basil One of the greatest joys of growing basil is discovering the remarkable diversity available. While sweet basil remains the most familiar variety, many cultivars offer unique flavors, colors, and textures. Sweet Basil is prized for its tender green leaves and classic flavor that pairs perfectly with pasta, pizza, and tomato dishes. Genovese Basil is considered the gold standard for homemade pesto because of its large, aromatic leaves. Purple Basil offers striking burgundy foliage with a slightly spicier flavor, making it both ornamental and edible. Thai Basil features narrow leaves and a distinctive anise-like flavor that complements Asian cuisine. Lemon Basil produces bright green leaves with a refreshing citrus aroma, making it ideal for seafood, desserts, teas, and beverages. Cinnamon Basil combines traditional basil flavor with warm cinnamon notes that work beautifully in fruit dishes and baked goods. Each variety brings its own personality to the garden while sharing the same easy-growing nature. Basil Brings Beauty and Flavor Together Basil is much more than a culinary herb. Its lush foliage creates attractive borders, fills containers with vibrant greenery, and blends beautifully with flowers and vegetables. Gardeners often plant basil alongside tomatoes because the two share similar growing requirements while creating an attractive and productive garden display. Whether harvested fresh for everyday meals, preserved for later use, or simply enjoyed for its delightful fragrance, basil offers months of enjoyment from spring through the first frost. With minimal care and plenty of sunshine, even beginner gardeners can grow healthy plants that provide generous harvests all season long. Growing basil is simple when you provide the right environment. As a warm-season herb, basil flourishes in sunshine, fertile soil, and consistent moisture. Whether you are planting in a backyard garden, raised beds, containers, or windowsill planters, giving basil proper care will reward you with vigorous plants and an abundant harvest throughout the growing season. Choosing the Best Location Basil thrives in locations that receive plenty of direct sunlight. Select an area that receives at least six to eight hours of sunlight each day. More sunlight encourages fuller plants, stronger stems, and highly aromatic leaves. If you live in an area with extremely hot summers, basil appreciates a little afternoon shade during periods of intense heat. Good air circulation also helps reduce the risk of fungal diseases while keeping plants healthy. Soil Requirements Basil grows best in rich, well-drained soil filled with organic matter. The ideal soil is loose enough to allow roots to expand while holding enough moisture to support steady growth. Before planting, enrich garden beds with compost or well-aged organic matter. This improves soil fertility, drainage, and moisture retention. Basil prefers a slightly acidic to neutral soil with a pH between 6.0 and 7.5. Planting Basil Basil can be grown from seeds or nursery transplants. Seeds should be sown after the danger of frost has passed and the soil has warmed. Plant seeds about ¼ inch deep and lightly cover them with soil. Germination usually occurs within five to ten days under warm conditions. When planting young basil plants, space them about 12 to 18 inches apart. This spacing provides room for healthy air circulation and allows plants to become full and bushy. Container-grown basil should be planted in pots with drainage holes using a high-quality potting mix. Watering Basil Consistent watering is one of the keys to healthy basil plants. Keep the soil evenly moist but never soggy. Water deeply whenever the top inch of soil begins to dry. Morning watering is preferred because it gives leaves time to dry before evening, reducing the chance of disease. Container-grown basil typically requires more frequent watering than plants growing directly in garden beds, especially during hot summer weather. Applying mulch around outdoor plants helps conserve moisture, regulate soil temperature, and suppress weeds. Fertilizing Although basil is not a heavy feeder, occasional fertilizing encourages vigorous growth. Mix compost into the soil before planting to provide a steady source of nutrients. During the growing season, apply a balanced liquid
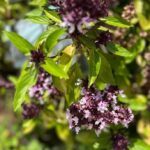
Learn how to grow Thai basil in garden beds or containers, from planting and watering to harvesting its fragrant leaves and managing flowers. Thai basil brings fragrance, flavor, and ornamental beauty to the garden. Its glossy green leaves, purple stems, and delicate flower spikes make it as attractive in a container or garden bed as it is useful in the kitchen. When the leaves are gently brushed, they release a distinctive aroma with notes of anise, licorice, clove, and warm spice. Unlike sweet basil, which is often associated with Italian cooking, Thai basil has a bolder flavor and a slightly firmer texture. The leaves hold up especially well when added near the end of cooking, making this aromatic herb a favorite for curries, noodle dishes, stir-fries, soups, and fresh garnishes. Thai basil is a warm-season herb that thrives in sunshine and warmth. Although it is sensitive to cold, it grows quickly when provided with suitable soil, consistent moisture, and regular harvesting. Gardeners can grow it in traditional garden beds, raised beds, patio containers, or sunny indoor spaces. What Is Thai Basil? Thai basil is a cultivated type of basil valued for its spicy, licorice-like aroma and attractive purple accents. It belongs to the mint family, which helps explain its square stems, opposite leaves, and highly aromatic foliage. The appearance of Thai basil can vary among cultivars, but many plants develop bright green leaves, reddish-purple or deep purple stems, and purple flower spikes. Its upright growth habit gives the plant a polished appearance, allowing it to function as both a culinary herb and an ornamental addition to edible landscapes. In climates with freezing winters, Thai basil is grown as an annual. It grows throughout the warm season and dies when exposed to frost. Gardeners in consistently warm, frost-free climates may be able to grow it for a longer period, although plant performance still depends on local heat, humidity, rainfall, and disease pressure. The Bold Flavor and Fragrance of Thai Basil Thai basil has a sweet, spicy flavor with noticeable anise or licorice notes. Some varieties also suggest clove, cinnamon, or mint. Its flavor is usually more assertive than that of common sweet basil, giving it enough character to complement strongly seasoned dishes. The fragrance becomes more pronounced when the leaves are crushed, torn, or chopped. Because aroma is one of the herb’s most appealing qualities, fresh leaves are generally added near the end of cooking or scattered over a finished dish. Prolonged cooking can soften their fresh fragrance and change their texture. Growing conditions may influence the intensity of the leaves. Sun exposure, moisture, temperature, soil fertility, harvest timing, and the specific cultivar can all affect the plant’s growth and aromatic character. Choosing the Best Location Thai basil grows best in a sunny location that receives at least six hours of direct sunlight each day. In many gardens, six to eight hours of sun encourages sturdy growth and flavorful foliage. In regions with extremely hot summers, light afternoon shade may help reduce stress, particularly when the plant is growing in a container that dries quickly. Too much shade, however, can cause weak or stretched growth and reduce leaf production. Choose a location with good air circulation, but avoid an exposed area where strong winds may damage the stems or dry the soil too rapidly. Air movement around the foliage can also help discourage diseases that develop under persistently damp, crowded conditions. Soil and Drainage Plant Thai basil in fertile, well-drained soil. The ground should retain enough moisture to support steady growth without remaining waterlogged. Heavy soil that stays saturated can contribute to root problems, while extremely sandy soil may require more frequent watering and additional organic matter. Mixing finished compost into ordinary garden soil can improve its texture and moisture-holding ability. Compost should complement the existing soil rather than replace it entirely. For container growing, use a quality potting mix designed for pots instead of soil taken directly from the garden. The container must have drainage holes so excess water can escape. A pot that is too small may dry rapidly and restrict the plant’s roots, so choose one that provides room for the mature cultivar. Starting Thai Basil From Seed Thai basil can be started indoors several weeks before the expected final spring frost or sown directly in the garden after the weather and soil have warmed. Because basil is sensitive to cold, planting it outdoors too early can stunt growth or damage the leaves. Sow the seeds according to the depth recommended on the seed packet and keep the growing medium consistently moist, but not saturated. Warm conditions support faster, more reliable germination. Place indoor seedlings under strong grow lights or beside an exceptionally bright window so they do not become thin and stretched. Before transplanting indoor seedlings into the garden, gradually expose them to outdoor conditions over several days. This transition helps the young plants adjust to direct sunlight, wind, and changing temperatures. Direct sowing also works well once frost danger has passed and the ground is warm. Keep the seedbed evenly moist while the seeds germinate and the young roots become established. Transplanting Thai Basil Outdoors Wait until the danger of frost has passed and nighttime temperatures are reliably mild before transplanting Thai basil. Cold soil and chilly air can slow its growth, discolor the leaves, and damage tender plants. Space plants according to the mature dimensions printed on the seed packet or plant label. Cultivars differ in height and spread, so their spacing requirements can vary. Providing adequate space improves airflow and gives each plant access to sunlight. Water transplants thoroughly after planting. During the first several days, monitor the soil closely while the roots adjust to their new location. Watering Thai Basil Thai basil performs best with consistent moisture. Water when the upper layer of soil begins to feel dry, soaking the root area thoroughly instead of applying only a light surface sprinkle. The correct watering schedule will depend on temperature, rainfall, soil texture,
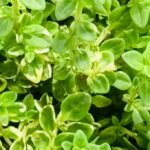
Learn how to grow variegated thyme with guidance on sunlight, soil, watering, pruning, harvesting, containers, propagation, and garden design. Variegated thyme brings color, fragrance, texture, and culinary versatility to the garden. Its tiny green leaves are edged or splashed with shades of cream, silver, white, or gold, creating a bright contrast against darker foliage. When brushed or gently crushed, the leaves release the familiar herbal scent of thyme, sometimes with hints of lemon depending on the variety. This compact herb works beautifully along sunny borders, beside pathways, in rock gardens, between ornamental plants, and in patio containers. Many varieties retain their foliage throughout much or all of the year in suitable climates, providing interest even when other garden plants are dormant. Small flowers appearing in late spring or summer can also supply nectar and pollen for bees and other beneficial insects. Despite its delicate appearance, variegated thyme is generally a resilient, low-maintenance plant when given abundant sunlight and excellent drainage. Understanding its specific variety, growth habit, and regional hardiness will help you choose the right planting location and enjoy healthy growth for years. What Is Variegated Thyme? Variegated thyme refers to thyme varieties with leaves displaying more than one color. Rather than having solid green foliage, these plants may feature creamy margins, silvery edges, golden patches, or irregular color patterns. Different variegated cultivars can vary in fragrance, flavor, size, growth habit, and cold tolerance. Some grow as small, upright mounds, while others spread close to the ground. Lemon-scented selections contribute a fresh citrus fragrance, while other varieties have the earthy, peppery character associated with traditional culinary thyme. Popular examples include ‘Silver Posie,’ ‘Doone Valley,’ ‘Golden Lemon,’ and ‘Lemon Variegated.’ Plant names and classifications may vary among nurseries, so read the plant label carefully to understand the cultivar’s mature size, hardiness, and recommended uses. Why Grow Variegated Thyme? Variegated thyme is both ornamental and useful. Its multicolored foliage adds definition to garden edges and helps brighten gravel gardens, patios, and mixed herb beds. The leaves provide visual interest on a small scale, making the plant particularly appealing beside stones, pavers, terracotta pots, and plants with deep green or purple foliage. The fragrance is another important benefit. Planting thyme near a walkway, seating area, or raised bed allows its aromatic foliage to be appreciated whenever the plant is touched. Its flowers can support visiting pollinators, while its leaves may provide fresh flavor for cooking when the selected cultivar is sold as a culinary herb. Choosing the Right Variety Begin by deciding whether appearance, culinary flavor, ground coverage, or container performance is your priority. A compact, upright variety is usually easier to harvest, while a low-growing selection can soften the edge of a pathway or spill gracefully over a container. Leaf color also influences garden design. Silver and cream varieties pair beautifully with lavender, sage, ornamental grasses, and pale stone. Golden varieties bring warmth to borders and create an attractive contrast with purple basil, dark-leaved ornamentals, or blue-green foliage. If you want to cook with the plant, purchase it from a reputable nursery and confirm that the specific variety is intended for culinary use. Avoid harvesting plants treated with products that are not approved for edible crops. The Best Location for Variegated Thyme Variegated thyme performs best in a warm location with full sun. Aim for at least six hours of direct sunlight each day whenever possible. Strong light encourages dense growth, supports the foliage coloration, and helps keep the soil from remaining wet for extended periods. A sheltered location can be helpful in areas with cold winds, heavy winter rain, or high humidity. Good air circulation is still important, so avoid crowding thyme beneath vigorous neighboring plants. Variegated thyme is especially well suited to rock gardens, gravel beds, raised beds, sunny slopes, and containers. These settings often provide the fast drainage that Mediterranean herbs prefer. Soil and Drainage Requirements Drainage is one of the most important factors in growing healthy thyme. The plant generally prefers light, lean soil that does not remain soggy after rain or watering. Sandy, gravelly, or loamy soil can work well when excess water drains away quickly. Heavy clay or persistently damp soil can lead to root and stem deterioration, particularly during winter. Instead of trying to grow thyme in a waterlogged location, plant it in a raised bed or container where moisture is easier to manage. Thyme usually grows well in neutral to alkaline conditions, although exact preferences can vary. If you are uncertain about your garden soil, a soil test can help identify its pH and drainage characteristics. Avoid enriching the planting area with excessive fertilizer or large amounts of moisture-retentive organic matter. Very fertile conditions can encourage weak, floppy growth and may reduce the plant’s compact appearance. How to Plant Variegated Thyme Spring through early summer is an excellent time to plant thyme in many climates because the roots have time to become established before winter. In warmer regions, fall planting may also be suitable if the plant will not face prolonged cold or saturated soil shortly afterward. Dig a hole approximately as deep as the plant’s root ball and slightly wider. Place the thyme at the same depth it was growing in its nursery pot. Planting the crown too deeply can trap moisture around the stems and encourage decay. Allow enough room for the cultivar’s mature spread. A compact variety may remain relatively small, while a creeping selection can form a wider mat. Check the plant label for cultivar-specific spacing guidance. Water thoroughly after planting to settle the soil around the roots. Continue monitoring moisture while the plant becomes established, but do not keep the soil continually wet. Growing Variegated Thyme in Containers Containers provide excellent drainage and make it easier to position variegated thyme where its fragrance and colorful leaves can be enjoyed. Choose a pot with unobstructed drainage holes and use a loose potting mix formulated for herbs, Mediterranean plants, or other plants that require free-draining conditions. A container should be
Originally published
March 2026
Updated
August 2026
Reviewed by
Culibloom