Salad Greens Growing Guide: Grow Fresh, Crisp Greens for Every Meal
Use this salad greens growing guide to plant, care for, harvest, and store fresh lettuce, spinach, arugula, kale, and more at home.
Growing salad greens at home is one of the simplest and most rewarding ways to enjoy fresher meals. Lettuce, spinach, arugula, kale, mustard greens, and other leafy crops can provide weeks of tender leaves from a relatively small garden space. Many varieties also grow quickly, making them an excellent choice for new gardeners, families, and anyone who wants a dependable edible crop.
A homegrown salad garden can fit into a traditional vegetable plot, raised bed, window box, patio container, or specialized salad table. Because many greens develop shallow roots, they do not always require deep garden beds. They do, however, benefit from fertile soil, consistent moisture, and protection from extreme heat.
The key to an abundant harvest is choosing greens suited to the season and planting small amounts regularly. With thoughtful variety selection and succession planting, you can gather crisp leaves throughout much of spring and fall, and potentially during winter or summer in mild climates.
What Are Salad Greens?
Salad greens include a diverse collection of leafy vegetables that can be harvested while young and tender. Some have a mild, buttery flavor, while others contribute peppery, bitter, earthy, or mustard-like notes.
Lettuce remains the foundation of many salad gardens. Loose-leaf varieties are particularly convenient because you can harvest their outer leaves while allowing the center of each plant to continue growing. Butterhead lettuce produces soft, gently cupped leaves, while romaine develops upright leaves with crisp ribs. Crisphead varieties form dense heads but generally need a longer period of cool weather.
Spinach contributes tender, slightly earthy leaves. Arugula has a distinctive peppery flavor that can become stronger as the leaves mature. Mizuna, tatsoi, baby kale, mustard greens, endive, escarole, and Swiss chard add different colors, shapes, textures, and flavors. University of Maryland Extension also identifies crops such as corn salad, purslane, sorrel, beet greens, and several Asian greens as possible additions to a varied salad garden. University of Maryland Extension
Choose Greens for Your Growing Conditions
Before buying seeds, consider your local climate, available sunlight, and preferred harvest season. Most traditional salad greens are cool-season crops. They usually perform best during spring and fall, although precise planting dates vary by region.
Leaf lettuce, spinach, arugula, and mustard greens are useful choices for quick harvests. Romaine and butterhead lettuce need more time and space if you want mature heads. Baby kale, Swiss chard, and certain heat-tolerant greens can help bridge the gap when temperatures become too warm for delicate lettuce or spinach.
Read each seed packet carefully. Variety descriptions often identify plants with improved heat tolerance, cold tolerance, slow-bolting growth, compact size, or disease resistance. These characteristics can make a noticeable difference when the weather becomes unpredictable.
Gardeners in warm regions may obtain their best harvests from fall through early spring. Those in colder climates can plant as soon as the soil becomes workable, then sow another crop in late summer for a fall harvest. Always adjust planting dates according to local frost patterns and the recommendations of your regional extension service.
Find the Right Location
Spring and fall salad greens generally grow well in full sun. Most benefit from approximately six hours of direct light, but some lettuce varieties can also grow with four to six hours. Partial afternoon shade may help protect lettuce from intense summer heat and delay bolting.
Select a location with loose, well-drained soil. Avoid areas where water collects after rain because saturated conditions can encourage root and leaf diseases. At the same time, do not choose a dry site that will be difficult to water consistently.
Salad greens have relatively shallow roots, so they are well suited to raised beds and containers. A container should have adequate drainage holes and enough room for the roots to develop. Window boxes and shallow planters can work for baby greens, while larger pots offer more consistent moisture and space for mature plants.
Prepare Fertile, Well-Drained Soil
Healthy soil encourages fast, tender leaf growth. Before planting, loosen the soil and incorporate finished compost if your garden would benefit from additional organic matter. The ideal soil should retain moisture without becoming compacted or waterlogged.
A soil test is the most reliable way to determine whether the garden needs fertilizer or a pH adjustment. If testing is unavailable, use a fertilizer labeled for edible vegetable gardens according to its package directions. Applying too much nitrogen can lead to overly soft growth and does not correct problems caused by poor drainage, insufficient light, or inconsistent watering.
Containers should be filled with a quality potting mix rather than ordinary garden soil. Garden soil may become dense in a pot, restricting drainage and root growth. Potting mixes are designed to balance moisture retention with aeration.
Plant Seeds for a Steady Harvest
Many salad greens grow well when sown directly in the garden. Create shallow furrows and plant according to the depth listed on the seed packet. Small lettuce and arugula seeds are commonly covered with only a thin layer of soil or potting mix. University of Maryland Extension recommends covering seeds in a salad box with approximately ¼ inch of growing mix. University of Maryland Extension
Water the newly planted area gently so the seeds remain in place. Keep the upper layer of soil consistently moist while the seeds germinate. A watering wand, fine sprinkler, or misting nozzle can provide moisture without washing small seeds away.
Thin crowded seedlings once they begin growing. Proper spacing improves air circulation and gives each plant better access to light, moisture, and nutrients. Plants intended for baby-leaf harvesting can be grown closer together than lettuce being raised to form mature heads. Follow the spacing recommendations for the specific crop and your preferred harvest stage.
Use Succession Planting
Planting an entire packet of seeds at once can produce more greens than you can use during a short harvest window. Succession planting creates a steadier supply.
Sow a short row or small section, then plant another section approximately every two to three weeks while conditions remain favorable. You can also combine varieties with different maturity dates. Fast-growing arugula and loose-leaf lettuce may be ready while slower romaine, kale, or chard continues developing.
As spring temperatures rise, allow taller vegetables such as tomatoes or pole beans to provide light afternoon shade. Later in the season, start another round of greens early enough for the plants to mature before growth slows significantly. For fall planning, count backward from your expected first frost date and consider that plants generally grow more slowly as daylight decreases.
Water Salad Greens Consistently
Salad greens need even moisture to produce tender leaves. Long dry periods can slow growth, intensify bitterness, and contribute to premature bolting in susceptible crops.
Check the soil regularly and water when the surface begins to feel dry. Apply water at the base of the plants whenever practical. Morning watering allows wet foliage to dry more quickly and reduces the amount of moisture lost during the heat of the day.
Containers may need water more frequently than in-ground beds because their limited soil volume dries faster. During warm or windy weather, check pots daily. Mulching around established plants with clean straw, shredded leaves, or another suitable organic material can help conserve soil moisture and reduce weeds.
Protect Greens from Heat
Bolting occurs when a leafy plant begins producing a flower stalk and seeds. Rising temperatures, increasing day length, drought stress, and plant maturity can all contribute, depending on the crop. Once lettuce or spinach bolts, its leaves often become smaller, tougher, or more bitter.
Planting early, maintaining even moisture, choosing slow-bolting varieties, and providing afternoon shade can extend the harvest. Shade cloth may be useful during unusually warm periods, but it should be positioned so air can circulate around the plants.
Spinach is especially sensitive to changing day length and heat. Swiss chard is generally better suited to warm conditions and can serve as a colorful summer alternative. University of Minnesota Extension notes that spinach may stop producing leaves and develop a flowering stem when conditions become hot or dry. University of Minnesota Extension
Manage Common Pests and Diseases
Aphids, slugs, snails, flea beetles, caterpillars, and leaf miners may visit salad crops. Inspect the upper and lower surfaces of leaves regularly so problems can be addressed before they become severe.
Remove badly damaged leaves and keep weeds under control. Avoid leaving decaying plant material around the bed because it can provide hiding places for pests. Encourage air circulation by thinning crowded seedlings and following recommended spacing.
Lightweight row cover can protect young greens from certain insects when it is installed immediately after planting and secured at the edges. Watch the temperature beneath the fabric because covered beds can become too warm during hot weather. University of Maryland Extension recommends monitoring row covers carefully when they are used over salad crops during summer. University of Maryland Extension
Crop rotation can help reduce recurring soilborne problems. When space permits, avoid growing crops from the same plant family in the same location season after season. If disease symptoms continue despite good care, consult a local extension service for identification before applying a treatment.
Harvest Leaves at Their Best
Baby greens can be harvested when the leaves reach a useful size and remain tender. Depending on the crop, variety, spacing, season, and growing conditions, this may take approximately three to six weeks. Mature plants require more time.
For a cut-and-come-again harvest, use clean scissors to cut leaves above the growing point. Many salad crops will produce another flush of leaves when the center remains undamaged. Another option is to remove a few mature outer leaves from each plant while leaving the younger center leaves to continue growing.
Harvest mature lettuce heads near the soil line with a clean knife. Gather greens in the cool morning when possible, especially during warm weather. Stop harvesting leaves that appear diseased, slimy, badly damaged, or contaminated by animals.
Wash and Store Freshly Harvested Greens
Handle harvested leaves gently to prevent bruising. Remove damaged portions, rinse the greens thoroughly under clean running water, and dry them well in a salad spinner or on clean towels. Do not use soap, bleach, or household cleaning products on produce.
Store dry greens in the refrigerator in a clean container or food-storage bag. A dry paper towel placed in the container can help absorb excess moisture. Homegrown greens are generally at their best when used promptly.
If greens wilt slightly, placing them in cold water for a short period may restore some crispness. Discard leaves that develop mold, slime, unpleasant odors, or extensive decay.
Grow Salad Greens in Containers
Container-grown greens are convenient for patios, balconies, decks, and small yards. They also keep the harvest close to the kitchen.
Choose a container with drainage holes and fill it with fresh potting mix. Sow several types of greens together only when they have similar growth rates and care requirements. Faster crops such as arugula may otherwise crowd slower-growing spinach or chard.
Place the container where it receives adequate light, but consider afternoon protection during hot weather. Rotate pots periodically if one side receives significantly more sunlight. Check the moisture level frequently because shallow containers can dry quickly.
After the plants have finished producing, remove the roots and refresh the potting mix before sowing another crop. If you grow greens in the same containers repeatedly, monitor fertility and follow product directions for any fertilizer intended for edible container plants.
Create a Personalized Salad Mix
One of the pleasures of growing salad greens is creating a blend suited to your taste. Combine mild lettuce with peppery arugula, colorful baby chard, feathery mizuna, or tender young kale. Red and bronze lettuces add visual contrast, while mustard greens contribute a sharper flavor.
Grow each variety in a separate short row if their growth rates differ considerably. This arrangement makes harvesting and thinning easier. Alternatively, select a packaged mesclun blend formulated for baby-leaf production.
Try small amounts of unfamiliar greens before devoting substantial space to them. Some varieties develop strong flavors as they mature, while others remain mild. Keeping simple notes about planting dates, flavor, heat tolerance, and harvest length will help you choose better varieties in future seasons.
Enjoy Fresh Greens Through the Seasons
A productive salad garden does not require a large space or complicated equipment. It depends primarily on selecting appropriate varieties, planting during favorable weather, maintaining consistent soil moisture, and harvesting regularly.
Begin with a few dependable crops, such as loose-leaf lettuce, spinach, arugula, and baby kale. Add new textures and flavors as your confidence grows. With repeated sowings and thoughtful seasonal planning, a small garden bed or group of containers can supply crisp, colorful greens for salads, sandwiches, wraps, grain bowls, and everyday meals.
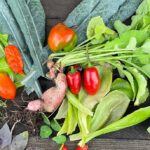
Bright ladybugs explore a colorful assortment of fresh garden salad greens.
Discover the fresh flavors of a Heart Harvest Salad made with crisp radishes, juicy tomatoes, peppery arugula, tender kale, and fragrant tarragon. This colorful garden-to-table salad is healthy, naturally gluten-free, and perfect for any occasion. Heart Harvest Salad: Bringing the Garden to Your Table There is nothing quite like walking into the garden with a basket in hand and returning with the ingredients for a meal that is bursting with freshness. Every season offers its own treasures, and few dishes showcase them better than a simple garden salad. This Heart Harvest Salad is a celebration of colorful vegetables, leafy greens, and fragrant herbs that come together to create a meal that is both beautiful and nourishing. With every bite, you will enjoy the crisp crunch of freshly picked radishes, the juicy sweetness of ripe tomatoes, the peppery kick of arugula, the hearty texture of kale, and the delicate herbal notes of fresh tarragon. Each ingredient has its own personality, yet together they create a balanced salad that feels light, refreshing, and satisfying. Whether you grow your own vegetables, visit a local farmers market, or simply enjoy seasonal produce from the grocery store, this salad is an easy way to bring the flavors of the garden to your table. A Salad That Celebrates Fresh Ingredients One of the best things about this salad is that it allows every ingredient to shine. There is no need for heavy dressings or complicated techniques. Fresh, high-quality produce does all the work. The brilliant red radishes add a crisp texture and a gentle peppery bite that wakes up the palate. Sweet tomatoes provide bursts of juicy flavor that perfectly balance the greens. Arugula contributes its signature peppery taste, while kale adds heartiness and an abundance of nutrients. Finally, fresh tarragon introduces a subtle hint of anise that gives the salad an elegant finish without overwhelming the other ingredients. It is a combination that feels simple yet sophisticated, making it equally at home on a casual lunch table or served alongside an elegant dinner. Why You Will Love This Salad This Heart Harvest Salad is naturally gluten-free and filled with wholesome ingredients that are as nutritious as they are flavorful. It comes together in just a few minutes, making it perfect for busy weekdays, leisurely weekend lunches, or entertaining guests. Because it relies on fresh produce rather than processed ingredients, every serving is packed with vibrant colors, crisp textures, and naturally delicious flavors. It is also incredibly versatile, allowing you to customize it based on what is growing in your garden or what is in season. Best of all, it is a salad that never feels boring. Every bite offers something different, from crunchy radishes and juicy tomatoes to tender greens and fragrant herbs. The Stars of the Garden Radishes Fresh radishes are often one of the earliest vegetables to be harvested from the garden. Their crisp texture and mild peppery flavor add excitement to every bite while their bright color makes the salad visually appealing. Tomatoes Few ingredients capture the taste of summer quite like a perfectly ripe tomato. Whether you choose cherry tomatoes, heirloom varieties, grape tomatoes, or Roma tomatoes, their natural sweetness adds balance and freshness to the salad. Arugula Arugula brings a lively peppery flavor that complements both the tomatoes and radishes. Its tender leaves create a light texture while adding depth to the overall flavor profile. Kale Kale provides substance and nutrition, making the salad more filling without feeling heavy. Lightly massaging the leaves with a drizzle of olive oil softens their texture and makes them wonderfully tender. Tarragon Fresh tarragon is often overlooked, yet it is one of the herbs that can completely transform a simple salad. Its delicate herbal aroma and subtle notes of licorice create a unique flavor that pairs beautifully with leafy greens and ripe tomatoes. A Light Dressing That Lets the Produce Shine Instead of masking the fresh vegetables with a rich dressing, this salad benefits from a simple homemade lemon vinaigrette. A combination of extra-virgin olive oil, fresh lemon juice, Dijon mustard, honey, sea salt, and freshly ground black pepper creates a bright, tangy dressing that enhances every ingredient while allowing the garden-fresh flavors to remain the focus. Perfect for Every Season Although this salad shines during the height of summer, it can easily be adapted throughout the year. In spring, add edible flowers such as nasturtiums or calendula petals for extra color. During summer, include cucumbers, sweet peppers, or freshly picked strawberries. Autumn is the perfect time to add crisp apples, roasted squash, or toasted pecans. In winter, roasted beets, citrus segments, or pomegranate arils bring warmth and vibrant seasonal color. This flexibility makes the Heart Harvest Salad one you can enjoy nearly year-round. Serving Ideas This salad is wonderfully versatile and pairs beautifully with countless meals. Serve it alongside grilled chicken, roasted salmon, shrimp, or steak for a complete dinner. It also complements gluten-free pasta dishes, homemade soups, quiche, or roasted vegetables. For entertaining, it makes an elegant first course that is both colorful and refreshing. If you would like to make it even more filling, top it with avocado slices, toasted pumpkin seeds, sunflower seeds, shaved Parmesan, or crumbled gluten-free feta cheese. Garden Fresh Is Always Best Harvesting vegetables just before preparing a meal is one of the greatest rewards of gardening. Radishes are at their sweetest when picked young, tomatoes develop their richest flavor when allowed to ripen on the vine, and leafy greens stay crispest when harvested during the cool morning hours. Fresh tarragon should be snipped just before serving to preserve its delicate aroma, while kale benefits from a quick massage with olive oil to soften the leaves and enhance their flavor. These simple touches elevate the salad from ordinary to unforgettable. A Salad That Nourishes Body and Soul Beyond its beautiful appearance, the Heart Harvest Salad is packed with nutrients. Tomatoes provide lycopene and vitamin C, radishes offer antioxidants and fiber, kale supplies vitamins A, C, and
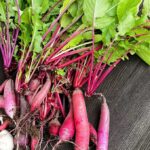
Learn when and how to harvest radishes for crisp texture and fresh flavor, plus tips for picking spring radishes, daikon, cleaning, and storage. Radishes are among the quickest and most satisfying vegetables to grow, but their harvest window can be surprisingly short. Pull them at the right time, and the roots are crisp, juicy, and pleasantly peppery. Leave them in the ground too long, especially during warm weather, and they may become woody, spongy, cracked, or excessively hot. The best harvest time depends on the type of radish, its expected mature size, local weather, and growing conditions. Small spring radishes may be ready within a few weeks, while daikon and other winter varieties need considerably more time to develop. This radish harvest guide explains how to recognize mature roots, harvest them without damage, troubleshoot quality problems, and store fresh radishes so they retain their crunch. How Long Do Radishes Take to Grow? Small garden radishes are known for their rapid growth. Many spring varieties are ready approximately three to five weeks after planting, although the seed packet provides the most reliable estimate for a particular cultivar. Cool temperatures, consistent moisture, adequate sunlight, loose soil, and proper spacing all help the roots develop on schedule. Days to maturity should be treated as a general guide rather than an exact harvest date. Cold weather may slow growth, while sudden heat can shorten the period during which the roots remain tender. Begin checking the crop several days before the estimated maturity date instead of waiting until every plant has reached the same age. Winter radishes, including many daikon, black, and storage varieties, grow more slowly. Depending on the cultivar, they may need approximately six to ten weeks or longer to reach maturity. These larger radishes generally have a wider harvest window than small spring varieties, especially when they mature during cool fall weather. How to Tell When Radishes Are Ready to Harvest Root size is usually a better indicator of readiness than leaf size. Gently brush a small amount of soil away from the shoulder of a radish, which is the upper portion of the root directly below the leaves. If the shoulder has reached the size described on the seed packet, the radish is likely ready to pull. Many round spring radishes are harvested when they are about ¾ inch to 1¼ inches across. Some cultivars are intended to remain smaller, while others can grow larger without losing quality. This is why the mature dimensions listed for the variety are more useful than a single universal measurement. A mature radish should feel firm. If the exposed shoulder looks oversized, split, or unusually rough, harvest it immediately and check its interior quality. Small spring radishes can pass their prime quickly, so inspect the planting every day or two once the first roots begin reaching usable size. Do not wait for every radish in the row to mature at once. Seedlings often grow at slightly different rates because of spacing, moisture, soil texture, shade, and competition. Harvesting the largest roots first creates additional room for smaller ones to continue developing. The Best Time of Day to Harvest Radishes Harvest radishes during the cool part of the day whenever possible. Early morning is ideal because the roots are typically well hydrated and the air is cooler. If the soil is extremely dry, watering it lightly several hours before harvesting can make pulling easier and reduce stress on the roots. Avoid saturating very dry soil immediately before harvest. A sudden surge of moisture after drought stress can contribute to splitting in mature radishes. Consistent moisture throughout the growing period is more beneficial than a heavy last-minute watering. Once harvested, move the radishes out of direct sunlight promptly. Heat encourages moisture loss and can quickly soften the roots and wilt the greens. How to Harvest Small Spring Radishes Loosen the soil around the roots if it is dry, compacted, or heavy. Hold the leaves close to the top of the root and pull upward using gentle, steady pressure. In loose garden soil, mature spring radishes usually lift easily. If the foliage breaks or the root resists, use a hand fork to loosen the surrounding soil. Position the tool far enough away from the radish to avoid piercing it. Lift the soil slightly, then pull the root by hand. Check several radishes from different parts of the row. If the first root is still narrow or underdeveloped, cover the remaining shoulders with soil and allow them more time. If it is crisp and appropriately sized, continue harvesting other roots with similar shoulders. How to Harvest Daikon and Winter Radishes Daikon and other long-rooted radishes need more care because their roots may extend deeply into the soil. Pulling forcefully on the leaves can break the root, particularly in compacted ground. Insert a garden fork or spade beside the row, leaving enough space to avoid cutting the roots. Loosen the soil beneath and around each radish, then lift it gently while holding the foliage near the crown. The University of Minnesota Extension specifically recommends loosening beneath long daikon roots to prevent breakage. University of Minnesota Extension Winter radishes should reach the mature size expected for their variety before harvesting. Unlike small spring radishes, many winter types can remain in cool fall soil for a longer period without immediately becoming pithy. However, they should generally be harvested before the soil freezes hard enough to make digging difficult or damage the crop. Why Radishes Become Woody, Pithy, or Too Spicy An old radish often develops a dry, fibrous, or spongy interior. Small spring varieties are particularly susceptible because they mature rapidly and decline quickly after reaching their ideal size. Heat and slow growth can also affect quality. Radishes grow best as a cool-season crop. When temperatures rise or plants experience prolonged stress, roots may become stronger in flavor and less tender. Illinois Extension advises harvesting spring radishes promptly once they reach edible size, before heat, pithiness, or seed stalk development reduces
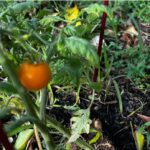
Follow this Tomato Plant Growing Guide to grow healthy plants from tiny seedlings, prevent common problems, and enjoy flavorful homegrown tomatoes. Few garden experiences are as satisfying as watching a tiny tomato seedling grow into a vigorous plant covered with ripe, flavorful fruit. Tomatoes are a favorite among home gardeners because they can flourish in traditional garden beds, raised beds, and containers. With sufficient sunlight, fertile soil, steady moisture, and dependable support, even a first-time gardener can enjoy a productive harvest. Tomato plants are tender, warm-season plants that thrive during the bright days of late spring and summer. They do require regular attention, but much of that care is straightforward. Choosing an appropriate variety, planting after the danger of frost has passed, watering consistently, and watching for early signs of trouble can make a remarkable difference. This Tomato Plant Growing Guide explains how to select, plant, support, maintain, and harvest tomatoes throughout the growing season. Whether you begin with seeds or purchase young plants from a nursery, a few thoughtful decisions will help transform those tiny seedlings into garden favorites. Understanding Tomato Plant Growth Tomatoes, botanically known as Solanum lycopersicum, are tender perennials in tropical climates but are usually grown as annuals in temperate gardens. Frost damages tomato foliage, and cool soil can slow root development, so these heat-loving plants should not be rushed outdoors in spring. Tomato varieties generally have determinate or indeterminate growth habits. Determinate tomatoes grow to a relatively compact size and produce much of their fruit within a concentrated period. Their manageable shape makes them useful for small gardens, containers, preserving, and gardeners who want a large harvest at one time. Indeterminate tomatoes continue producing new vines, flowers, and fruit until frost or disease ends the growing season. These plants can become tall and vigorous, so they need strong cages, stakes, or trellises. Their extended harvest makes them an appealing choice for gardeners who want fresh tomatoes throughout summer and early fall. Dwarf and patio varieties offer another solution for limited spaces. Although compact, they still need adequate sunlight, fertile potting mix, consistent moisture, and a container large enough to support healthy root growth. Choosing the Right Tomato Variety The best tomato variety depends on the garden, climate, available space, and intended use. Cherry and grape tomatoes are often prolific and convenient for snacking and salads. Slicing tomatoes provide substantial fruit for sandwiches and fresh meals, while paste tomatoes generally contain more flesh and less juice, making them well suited to sauces and preserving. Days to maturity are especially important in regions with short growing seasons. A variety that matures quickly may produce a more dependable harvest before cool autumn weather arrives. Gardeners in hot climates may prefer varieties known to set fruit more reliably during warm conditions. Disease resistance can also influence success. Seed packets and plant labels may include letters indicating resistance to particular diseases. Resistance does not guarantee that a plant will remain problem-free, but it can reduce the likelihood or severity of certain common infections. Heirloom tomatoes are treasured for their distinctive flavors, colors, and shapes. Hybrid varieties may offer improved uniformity, productivity, disease resistance, or tolerance to challenging conditions. A garden can include both, allowing the gardener to enjoy heirloom character alongside the dependability of carefully selected hybrids. Starting Tomato Plants From Seed Tomato seeds are commonly started indoors approximately five to eight weeks before the expected outdoor planting date. Starting too early can result in crowded, overgrown plants that become difficult to maintain before the weather is warm enough for transplanting. Sow the seeds about ¼ inch deep in a clean, sterile seed-starting mix. Warmth encourages germination, with temperatures around 75°F to 85°F generally supporting quick emergence. Once seedlings appear, place them beneath a bright overhead grow light. Insufficient light causes thin, stretched stems that lean toward the light source. Keep the growing medium evenly moist but not saturated. Constantly wet soil and poor air circulation can encourage seedling diseases. Once the seedlings develop true leaves, move them into individual containers if they were started together. As they grow, provide enough space for air circulation and turn or reposition the containers when necessary to encourage balanced growth. Healthy tomato seedlings should be compact and sturdy rather than tall and pale. A stocky plant with a strong stem and deep green leaves is usually better prepared for transplanting than an oversized plant that has already begun flowering indoors. Choosing Healthy Nursery Seedlings Gardeners who prefer to purchase plants should look for short, sturdy seedlings with healthy green foliage and well-developed stems. Avoid plants with yellowing leaves, extensive spotting, visible insects, or severely tangled roots. A smaller, healthy transplant frequently establishes more successfully than a large plant that has remained in its nursery container too long. Flowers and tiny tomatoes may look appealing at the garden center, but they do not necessarily indicate that the plant will establish quickly after transplanting. Read the plant label before buying. Confirm the mature size, growth habit, estimated days to maturity, and disease-resistance information. This helps prevent placing a vigorous indeterminate tomato in a container or garden space designed for a compact variety. Hardening Off Tomato Seedlings Seedlings grown indoors are not immediately prepared for direct sunlight, wind, and changing outdoor temperatures. Hardening off gradually introduces them to outdoor conditions and reduces transplant stress. Begin about one to two weeks before planting. Place the seedlings in a protected, shaded location for a short period, then gradually increase their exposure to sunlight and outdoor air. Bring them inside when frost or unusually cold temperatures threaten. Watch the leaves carefully during this transition. Bleached, pale, or papery areas can indicate sunscald caused by too much direct sunlight too quickly. Gradual exposure allows the leaves and stems to adjust without severe damage. When to Plant Tomatoes Outdoors Plant tomatoes after the danger of frost has passed, the soil has warmed, and nighttime temperatures are consistently suitable for tender plants. Local frost dates are useful planning tools, but actual
Originally published
March 2026
Updated
August 2026
Reviewed by
Culibloom