Scallions Growing Guide: How to Grow Fresh, Flavorful Green Onions at Home
Learn how to grow scallions at home, from planting seeds and caring for containers to watering, harvesting, regrowing, and storing fresh green onions.
Scallions are among the easiest and most rewarding vegetables to grow at home. Their slender green leaves, crisp white stems, and mild onion flavor make them a versatile addition to salads, soups, stir-fries, eggs, baked potatoes, dips, and countless other dishes. Because scallions require very little space, they are an excellent choice for garden beds, raised beds, patio containers, and sunny balcony gardens.
Also called green onions or bunching onions, true scallions are typically harvested before they develop large bulbs. Many bunching varieties, including Allium fistulosum, naturally produce long white stems and hollow green leaves instead of rounded bulbs. Young plants from bulbing onion varieties may also be harvested early and used as green onions.
With the right sunlight, soil, and consistent moisture, scallions can provide a steady harvest through much of the growing season. Succession planting makes it possible to enjoy tender, flavorful stalks for months, while careful harvesting may allow established bunching varieties to produce additional leaves.
Why Grow Scallions at Home?
Homegrown scallions are wonderfully fresh and convenient. Instead of purchasing a full bunch every time a recipe calls for a small amount, you can harvest only what you need. Freshly picked scallions tend to have firm stems, bright green leaves, and a clean onion flavor.
These compact plants are especially useful for small-space gardens. They can grow between larger vegetables, along the edge of an herb garden, or in containers close to the kitchen. Their narrow, upright foliage allows gardeners to fit a generous number of plants into a relatively small area.
Scallions are also suitable for new gardeners because they grow quickly and do not require complicated pruning, staking, or training. Their main needs are sunlight, well-drained soil, steady moisture, and early weed control.
Choosing the Right Type of Scallion
For long, straight stems without large bulbs, look for seeds labeled bunching onion, scallion, or green onion. Evergreen White Bunching is a familiar choice, but seed catalogs offer many varieties with different levels of cold tolerance, color, and flavor.
True bunching onions are often grown specifically for their stems and leaves. They may remain in the garden longer than bulbing onions without forming pronounced round bulbs. Some varieties can also develop clumps when allowed to mature.
Regular bulbing onions can be harvested young and eaten as green onions. This is a practical way to use seedlings removed while thinning a closely planted onion row. However, their growth habit and eventual shape may differ from varieties bred specifically for scallion production.
When selecting seeds or transplants, consider your local growing season and whether you want a single harvest or a longer-lasting planting. A local garden center or Cooperative Extension office can help identify varieties suited to your climate.
When to Plant Scallions
Scallions are cool-season vegetables that can usually be planted in early spring as soon as the soil is workable. The exact timing depends on local weather, soil conditions, and the variety being grown.
Seeds can be started indoors about four weeks before the expected outdoor planting date. Starting them indoors may provide an earlier harvest, particularly in regions with a short spring season. Seedlings should be gradually acclimated to outdoor conditions before transplanting.
Direct sowing is another simple option. Additional small plantings can be made every two to three weeks while conditions remain suitable. This succession-planting approach helps prevent the entire crop from becoming ready at once.
In many climates, scallions may also be sown in midsummer for a fall harvest. Some bunching varieties tolerate light frost, but cold tolerance varies. Gardeners interested in overwintering scallions should choose an appropriate hardy variety and follow local recommendations for planting and winter protection.
Selecting the Best Growing Location
Scallions grow best in full sun. A location receiving at least six hours of direct sunlight generally supports strong, upright leaves and steady growth. In very warm climates, some afternoon shade may help reduce heat stress, but excessive shade can result in thin or weak plants.
Choose an area with fertile, well-drained soil. Scallion roots need moisture, but they should not remain in waterlogged ground. If the garden has heavy clay soil or drains slowly, planting in a raised bed or container can make moisture management easier.
Avoid planting scallions in an area where onions, garlic, leeks, or related crops recently experienced serious pest or disease problems. Rotating crops can help interrupt the life cycles of certain soilborne diseases and insects.
Preparing the Soil
Loose, crumbly soil encourages healthy roots and makes scallions easier to pull at harvest. Before planting, remove weeds, stones, and compacted clumps. Incorporate finished compost if the soil needs more organic matter, but avoid adding fresh manure directly before planting.
Scallions prefer fertile soil, although fertilizer requirements vary with existing soil conditions. A soil test is the best way to determine whether nutrients are needed. If fertilizer is recommended, follow the product directions and local guidance. Applying too much nitrogen can produce excessive leafy growth and may contribute to weak plants or environmental runoff.
For containers, use a fresh, lightweight potting mix rather than dense garden soil. A quality potting mix retains enough moisture for growth while allowing excess water to drain.
How to Plant Scallion Seeds
Sow scallion seeds approximately ¼ to ½ inch deep. Seeds may be planted in a narrow band or a shallow row. Keep the soil evenly moist while they germinate, since allowing the seedbed to dry completely can interfere with emergence.
Once the seedlings are large enough to handle, thin them to approximately one inch apart when the goal is to harvest slender scallions. Greater spacing may be helpful for mature bunching plants or varieties that develop thicker stems. Check the seed packet because recommendations can vary.
Rows can be spaced about 12 to 18 inches apart when using a traditional garden layout. In raised beds and containers, rows may be arranged more closely as long as the plants receive adequate sunlight, moisture, airflow, and nutrients.
Do not discard healthy seedlings removed during thinning. Tender young onion plants can often be washed and used in the kitchen.
Growing Scallions From Transplants
Scallion transplants provide a head start and are useful when spring weather delays direct sowing. Prepare a shallow furrow and place the seedlings about one inch apart, or follow the spacing recommended for the selected variety.
Set the roots into the soil and gently firm the ground around each plant. Water thoroughly after transplanting to settle the soil and reduce stress around the roots.
Planting transplants in a shallow furrow can help produce a longer white portion as the surrounding soil gradually settles. Avoid burying the green leaves deeply or packing heavy, wet soil tightly around the stems.
Growing Scallions in Containers
Scallions adapt beautifully to containers because they have a compact, upright growth habit. Choose a pot with drainage holes and enough room for the number of plants you intend to grow. A container approximately 10 inches across can support a small grouping, while a longer window box or planter provides space for multiple rows.
Fill the container with well-drained potting mix and position it in a sunny location. Sow seeds ¼ to ½ inch deep and keep the surface evenly moist during germination.
Container soil dries faster than garden soil, particularly during hot or windy weather. Check it regularly and water when the upper layer begins to feel dry. Water thoroughly enough for a small amount to drain from the bottom, then empty any saucer that holds standing water.
Container-grown plants may need supplemental nutrients because regular watering gradually removes nutrients from the potting mix. Follow the label directions for a fertilizer formulated for edible container plants, and avoid overfeeding.
Watering Scallions
Consistent moisture helps scallions develop crisp, tender stems. Garden-grown scallions generally benefit from about one inch of water per week from rainfall and irrigation combined, although sandy soil, containers, heat, and wind can increase their needs.
Water deeply enough to moisten the root zone rather than repeatedly wetting only the surface. Allow excess water to drain, since constantly saturated soil can contribute to root and stem problems.
A light layer of clean mulch may help conserve moisture and suppress weeds. Keep thick mulch from pressing tightly against small seedlings, which can restrict growth or create overly damp conditions.
Controlling Weeds
Young scallion plants grow slowly and can be overwhelmed by aggressive weeds. Keep the planting area clear, especially during the first several weeks of growth.
Pull weeds carefully by hand or cultivate only the soil surface. Scallion roots are shallow and can be damaged by deep hoeing. Mulch can reduce weed germination once the plants are established, but it should not bury the slender stems.
Removing weeds also improves airflow and reduces competition for sunlight, water, and nutrients.
Common Scallion Problems
Scallions are relatively easy to grow, but they may occasionally attract thrips, onion maggots, or other onion-family pests. Thrips can leave pale or silvery streaks on the leaves, while onion maggots may damage the underground portion and cause plants to yellow or wilt.
Wet soil, poor airflow, and repeated planting of onion-family crops in the same location may increase the risk of certain diseases. Healthy soil, appropriate watering, sanitation, and crop rotation are important preventive measures.
Yellow leaves do not always indicate disease. Uneven watering, overcrowding, nutrient imbalances, natural aging, and physical damage may produce similar symptoms. Examine the entire plant and its growing conditions before deciding on a treatment. When a problem is difficult to identify, consult a local Cooperative Extension office for region-specific help.
When and How to Harvest Scallions
Scallions can be harvested whenever they reach a useful size. Depending on the variety and growing conditions, many green onions are ready approximately 50 to 70 days after sowing. Seed-packet maturity dates provide the best estimate for a specific variety.
For a whole-plant harvest, loosen the surrounding soil and gently pull the scallion from the ground. Harvesting young plants creates slender, tender scallions, while leaving them longer generally produces thicker stems and stronger flavor.
Some established bunching onions may be harvested by cutting selected outer leaves or stems while leaving enough healthy growth for the plant to continue. Regrowth depends on the variety, season, root health, and harvesting method, so repeated harvests are not guaranteed.
Harvest scallions in the morning when possible, especially during warm weather. Promptly rinse away soil, dry the plants, and refrigerate them.
Regrowing Grocery Store Green Onions
Green onions with healthy roots attached can produce additional leaves. Place the white root ends in a shallow container with enough water to cover the roots without submerging most of the stem. Set the container near a bright window and replace the water regularly.
New green growth can appear quickly, but water alone does not provide all the nutrients needed for strong, sustained development. For longer-lasting plants, transfer rooted scallion bases into a container filled with potting mix.
Regrown grocery store scallions may provide a few modest harvests, but they are not a complete substitute for growing healthy plants from seed or transplants. The quality and vigor of regrowth will gradually decline if the plants remain crowded in water.
Storing Freshly Harvested Scallions
Remove damaged or slimy leaves before storing scallions. Keep the plants dry and place them in the refrigerator in a produce bag or loosely wrapped in a slightly damp paper towel. Excess moisture can encourage deterioration, while completely dry, exposed leaves may wilt.
For the freshest flavor and crispest texture, use harvested scallions as soon as practical. Both the white and green portions are edible. The white section has a more concentrated onion flavor, while the leafy green tops tend to taste milder and fresher.
Culinary Uses for Homegrown Scallions
Fresh scallions add color, fragrance, and a gentle onion bite to many dishes. Slice them over soups, grain bowls, salads, roasted vegetables, baked potatoes, scrambled eggs, tacos, and noodle dishes. They can also be stirred into dips, compound butter, savory spreads, and dressings.
The green tops work especially well as a finishing garnish because their color and mild flavor can brighten a finished dish. The firmer white portions may be briefly sautéed, grilled, roasted, or added earlier in cooking.
Wash homegrown scallions thoroughly, paying attention to the area where the leaves meet the white stem. Remove the root end and any damaged outer growth before using them.
Enjoying a Continuous Homegrown Harvest
A dependable scallion harvest begins with the right variety, a sunny location, loose soil, and consistent moisture. Early weed control protects slow-growing seedlings, while succession planting keeps fresh plants developing throughout the season.
Whether grown in a vegetable bed, a raised garden, or a sunny container, scallions offer an easy way to bring garden-fresh flavor into everyday meals. Their small footprint, flexible harvest time, and culinary versatility make them an excellent crop for beginners and experienced gardeners alike.
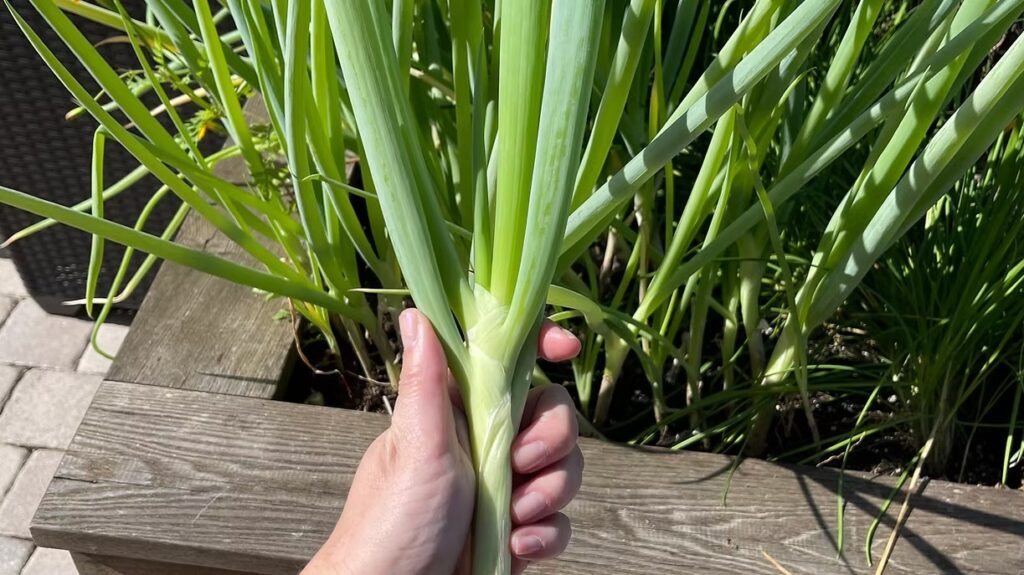
Fresh scallions gathered from a thriving home vegetable garden.
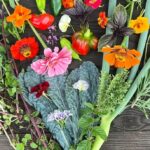
Discover the beauty and bounty of a heart-shaped harvest featuring vibrant zinnias, kale, rosemary, marigolds, scallions, and violas. Learn how this colorful garden collection celebrates fresh flavors, edible flowers, and the joy of gardening. There is something truly special about gathering the day’s harvest and arranging it into a heart. It transforms fresh flowers, herbs, and vegetables into a beautiful expression of gratitude for the garden and the season. A heart-shaped harvest reminds us that gardening is about more than growing food. It is about nurturing life, celebrating nature’s beauty, and sharing the rewards of patience and care. This colorful harvest combines cheerful zinnias, nutrient-rich kale, fragrant rosemary, sunny marigolds, crisp scallions, and delicate violas. Together, they create a stunning display that captures the diversity and abundance found in a flourishing garden. Every bloom and every leaf tells a story of growth, making this arrangement both visually striking and deeply meaningful. A Celebration of Garden Diversity One of the greatest joys of gardening is watching many different plants thrive together. This heart-shaped harvest showcases ornamental flowers alongside edible herbs and vegetables, demonstrating how beauty and functionality can exist side by side. The bright zinnias provide bold splashes of color that attract butterflies and other beneficial pollinators throughout the growing season. Their vibrant blooms add warmth and energy to the arrangement while reminding gardeners of the important role flowers play in supporting a healthy ecosystem. Deep green kale brings rich texture and a sense of abundance. Its sturdy leaves symbolize nourishment, making it one of the most rewarding vegetables to grow for both fresh meals and beautiful harvest displays. Rosemary contributes elegant evergreen foliage and its unmistakable fragrance. Simply brushing against the stems releases aromatic oils that instantly evoke memories of homemade meals and fresh herbs gathered straight from the garden. Golden marigolds brighten the arrangement with cheerful blossoms that have long been treasured for attracting pollinators and helping create healthy companion planting combinations throughout vegetable gardens. Fresh scallions introduce graceful green stems that complement the flowers while offering a versatile ingredient for countless recipes. Their upright growth creates visual balance within the heart-shaped design. Nestled among the larger harvest items, delicate violas provide soft pops of color. These edible flowers add an elegant finishing touch while demonstrating that beauty can also be delicious. From Garden to Table One of the most rewarding aspects of this harvest is how many of its ingredients can be enjoyed in the kitchen. Fresh kale becomes the foundation for nutritious salads, hearty soups, smoothies, and sautéed side dishes. Its mild sweetness develops even further after cooler temperatures, making it a favorite throughout much of the growing season. Rosemary adds incredible flavor to roasted vegetables, potatoes, chicken, seafood, homemade breads, and infused olive oils. A few freshly picked sprigs can elevate an ordinary meal into something memorable. Scallions offer a crisp onion flavor that works beautifully in salads, stir-fries, baked potatoes, egg dishes, tacos, pasta, and fresh garnishes. Violas bring delicate beauty to salads, desserts, cakes, cookies, charcuterie boards, and refreshing beverages. Their edible blooms make everyday dishes feel elegant and garden inspired. Marigold petals, depending on the edible variety grown, can be sprinkled over salads or used as colorful garnishes, while zinnias continue serving the garden by attracting pollinators rather than appearing on the dinner plate. The Beauty of Companion Planting This harvest also represents the benefits of thoughtful companion planting. Marigolds are well known for attracting beneficial insects while helping create a balanced garden environment. Zinnias continuously invite bees, butterflies, and other pollinators that support vegetable production throughout the season. Rosemary’s aromatic foliage naturally complements nearby vegetables and herbs while filling the garden with its pleasant scent. Kale benefits from thriving pollinator populations nearby, and scallions fit beautifully among mixed plantings, making efficient use of available garden space. Together, these plants create a vibrant ecosystem where flowers, herbs, and vegetables support one another while providing continuous interest from planting through harvest. Harvesting at the Perfect Time Harvesting each crop at its peak ensures maximum beauty and freshness. Cut zinnias early in the morning after the dew has dried for the longest vase life. Pick kale leaves while they are young, crisp, and richly colored. Harvest rosemary by snipping tender stems without removing too much growth from any one plant. Gather marigolds as soon as blossoms fully open, collect scallions before they become overly large, and pick violas shortly after opening while the petals remain fresh and vibrant. Freshly harvested plants not only taste better but also maintain their color and texture longer when displayed together. A Heart That Reflects the Garden Arranging these harvests into a heart serves as a reminder that every garden grows more than vegetables and flowers. It grows memories, traditions, patience, and appreciation for nature’s incredible generosity. Each colorful bloom represents the pollinators that visited throughout the season. Every herb reflects months of steady growth, while every leafy vegetable reminds us of the satisfaction that comes from harvesting food grown with care. Whether displayed as a centerpiece, photographed to celebrate the season, or shared with family and friends, this heart-shaped harvest becomes a lasting symbol of gratitude for the garden’s abundance. Gardening has a unique way of bringing beauty and nourishment together. This simple heart arrangement captures that connection perfectly, celebrating not only the harvest itself but also the love, dedication, and joy that make every growing season worthwhile.
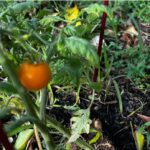
Follow this Tomato Plant Growing Guide to grow healthy plants from tiny seedlings, prevent common problems, and enjoy flavorful homegrown tomatoes. Few garden experiences are as satisfying as watching a tiny tomato seedling grow into a vigorous plant covered with ripe, flavorful fruit. Tomatoes are a favorite among home gardeners because they can flourish in traditional garden beds, raised beds, and containers. With sufficient sunlight, fertile soil, steady moisture, and dependable support, even a first-time gardener can enjoy a productive harvest. Tomato plants are tender, warm-season plants that thrive during the bright days of late spring and summer. They do require regular attention, but much of that care is straightforward. Choosing an appropriate variety, planting after the danger of frost has passed, watering consistently, and watching for early signs of trouble can make a remarkable difference. This Tomato Plant Growing Guide explains how to select, plant, support, maintain, and harvest tomatoes throughout the growing season. Whether you begin with seeds or purchase young plants from a nursery, a few thoughtful decisions will help transform those tiny seedlings into garden favorites. Understanding Tomato Plant Growth Tomatoes, botanically known as Solanum lycopersicum, are tender perennials in tropical climates but are usually grown as annuals in temperate gardens. Frost damages tomato foliage, and cool soil can slow root development, so these heat-loving plants should not be rushed outdoors in spring. Tomato varieties generally have determinate or indeterminate growth habits. Determinate tomatoes grow to a relatively compact size and produce much of their fruit within a concentrated period. Their manageable shape makes them useful for small gardens, containers, preserving, and gardeners who want a large harvest at one time. Indeterminate tomatoes continue producing new vines, flowers, and fruit until frost or disease ends the growing season. These plants can become tall and vigorous, so they need strong cages, stakes, or trellises. Their extended harvest makes them an appealing choice for gardeners who want fresh tomatoes throughout summer and early fall. Dwarf and patio varieties offer another solution for limited spaces. Although compact, they still need adequate sunlight, fertile potting mix, consistent moisture, and a container large enough to support healthy root growth. Choosing the Right Tomato Variety The best tomato variety depends on the garden, climate, available space, and intended use. Cherry and grape tomatoes are often prolific and convenient for snacking and salads. Slicing tomatoes provide substantial fruit for sandwiches and fresh meals, while paste tomatoes generally contain more flesh and less juice, making them well suited to sauces and preserving. Days to maturity are especially important in regions with short growing seasons. A variety that matures quickly may produce a more dependable harvest before cool autumn weather arrives. Gardeners in hot climates may prefer varieties known to set fruit more reliably during warm conditions. Disease resistance can also influence success. Seed packets and plant labels may include letters indicating resistance to particular diseases. Resistance does not guarantee that a plant will remain problem-free, but it can reduce the likelihood or severity of certain common infections. Heirloom tomatoes are treasured for their distinctive flavors, colors, and shapes. Hybrid varieties may offer improved uniformity, productivity, disease resistance, or tolerance to challenging conditions. A garden can include both, allowing the gardener to enjoy heirloom character alongside the dependability of carefully selected hybrids. Starting Tomato Plants From Seed Tomato seeds are commonly started indoors approximately five to eight weeks before the expected outdoor planting date. Starting too early can result in crowded, overgrown plants that become difficult to maintain before the weather is warm enough for transplanting. Sow the seeds about ¼ inch deep in a clean, sterile seed-starting mix. Warmth encourages germination, with temperatures around 75°F to 85°F generally supporting quick emergence. Once seedlings appear, place them beneath a bright overhead grow light. Insufficient light causes thin, stretched stems that lean toward the light source. Keep the growing medium evenly moist but not saturated. Constantly wet soil and poor air circulation can encourage seedling diseases. Once the seedlings develop true leaves, move them into individual containers if they were started together. As they grow, provide enough space for air circulation and turn or reposition the containers when necessary to encourage balanced growth. Healthy tomato seedlings should be compact and sturdy rather than tall and pale. A stocky plant with a strong stem and deep green leaves is usually better prepared for transplanting than an oversized plant that has already begun flowering indoors. Choosing Healthy Nursery Seedlings Gardeners who prefer to purchase plants should look for short, sturdy seedlings with healthy green foliage and well-developed stems. Avoid plants with yellowing leaves, extensive spotting, visible insects, or severely tangled roots. A smaller, healthy transplant frequently establishes more successfully than a large plant that has remained in its nursery container too long. Flowers and tiny tomatoes may look appealing at the garden center, but they do not necessarily indicate that the plant will establish quickly after transplanting. Read the plant label before buying. Confirm the mature size, growth habit, estimated days to maturity, and disease-resistance information. This helps prevent placing a vigorous indeterminate tomato in a container or garden space designed for a compact variety. Hardening Off Tomato Seedlings Seedlings grown indoors are not immediately prepared for direct sunlight, wind, and changing outdoor temperatures. Hardening off gradually introduces them to outdoor conditions and reduces transplant stress. Begin about one to two weeks before planting. Place the seedlings in a protected, shaded location for a short period, then gradually increase their exposure to sunlight and outdoor air. Bring them inside when frost or unusually cold temperatures threaten. Watch the leaves carefully during this transition. Bleached, pale, or papery areas can indicate sunscald caused by too much direct sunlight too quickly. Gradual exposure allows the leaves and stems to adjust without severe damage. When to Plant Tomatoes Outdoors Plant tomatoes after the danger of frost has passed, the soil has warmed, and nighttime temperatures are consistently suitable for tender plants. Local frost dates are useful planning tools, but actual
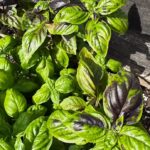
There is something timeless about growing basil. With its fragrant leaves, vibrant foliage, and incredible versatility in the kitchen, basil has earned its place as one of the world’s most beloved culinary herbs. Whether you are planting a traditional herb garden, filling containers on a sunny patio, or tucking basil among vegetables in raised beds, this remarkable plant rewards gardeners with continuous harvests and exceptional flavor throughout the growing season. A Basil Growing Guide is the perfect starting point for learning how to grow healthy, productive plants while enjoying one of the easiest and most satisfying herbs to cultivate. What Is Basil? Basil (Ocimum basilicum) is a warm-season annual herb in the mint family that is native to tropical regions of Asia and Africa. Known for its aromatic leaves and rapid growth, basil has become an essential ingredient in cuisines around the world. From classic Italian pesto and fresh Caprese salads to Thai curries and Mediterranean dishes, basil adds a fresh, sweet, and slightly peppery flavor that enhances countless recipes. Beyond its culinary uses, basil is also valued for its ornamental appeal. Depending on the variety, plants produce lush green, deep purple, variegated, or ruffled foliage that adds color and texture to herb gardens, flower beds, and containers. Why Grow Basil? Basil is one of the most rewarding herbs for gardeners of every experience level. It grows quickly, thrives in warm weather, and provides a steady supply of fresh leaves for months with regular harvesting. Some of the many reasons gardeners love growing basil include: Fresh herbs available just steps from the kitchen. Fast-growing plants that produce abundant harvests. Beautiful foliage that complements vegetable and flower gardens. Excellent companion plants for tomatoes, peppers, and many other vegetables. Fragrant leaves that bring wonderful aroma to outdoor spaces. Flowers that attract bees, butterflies, and other beneficial pollinators when allowed to bloom. Whether you grow a single pot on a windowsill or an entire herb garden, basil delivers beauty, fragrance, and flavor throughout the season. Popular Types of Basil One of the greatest joys of growing basil is discovering the remarkable diversity available. While sweet basil remains the most familiar variety, many cultivars offer unique flavors, colors, and textures. Sweet Basil is prized for its tender green leaves and classic flavor that pairs perfectly with pasta, pizza, and tomato dishes. Genovese Basil is considered the gold standard for homemade pesto because of its large, aromatic leaves. Purple Basil offers striking burgundy foliage with a slightly spicier flavor, making it both ornamental and edible. Thai Basil features narrow leaves and a distinctive anise-like flavor that complements Asian cuisine. Lemon Basil produces bright green leaves with a refreshing citrus aroma, making it ideal for seafood, desserts, teas, and beverages. Cinnamon Basil combines traditional basil flavor with warm cinnamon notes that work beautifully in fruit dishes and baked goods. Each variety brings its own personality to the garden while sharing the same easy-growing nature. Basil Brings Beauty and Flavor Together Basil is much more than a culinary herb. Its lush foliage creates attractive borders, fills containers with vibrant greenery, and blends beautifully with flowers and vegetables. Gardeners often plant basil alongside tomatoes because the two share similar growing requirements while creating an attractive and productive garden display. Whether harvested fresh for everyday meals, preserved for later use, or simply enjoyed for its delightful fragrance, basil offers months of enjoyment from spring through the first frost. With minimal care and plenty of sunshine, even beginner gardeners can grow healthy plants that provide generous harvests all season long. Growing basil is simple when you provide the right environment. As a warm-season herb, basil flourishes in sunshine, fertile soil, and consistent moisture. Whether you are planting in a backyard garden, raised beds, containers, or windowsill planters, giving basil proper care will reward you with vigorous plants and an abundant harvest throughout the growing season. Choosing the Best Location Basil thrives in locations that receive plenty of direct sunlight. Select an area that receives at least six to eight hours of sunlight each day. More sunlight encourages fuller plants, stronger stems, and highly aromatic leaves. If you live in an area with extremely hot summers, basil appreciates a little afternoon shade during periods of intense heat. Good air circulation also helps reduce the risk of fungal diseases while keeping plants healthy. Soil Requirements Basil grows best in rich, well-drained soil filled with organic matter. The ideal soil is loose enough to allow roots to expand while holding enough moisture to support steady growth. Before planting, enrich garden beds with compost or well-aged organic matter. This improves soil fertility, drainage, and moisture retention. Basil prefers a slightly acidic to neutral soil with a pH between 6.0 and 7.5. Planting Basil Basil can be grown from seeds or nursery transplants. Seeds should be sown after the danger of frost has passed and the soil has warmed. Plant seeds about ¼ inch deep and lightly cover them with soil. Germination usually occurs within five to ten days under warm conditions. When planting young basil plants, space them about 12 to 18 inches apart. This spacing provides room for healthy air circulation and allows plants to become full and bushy. Container-grown basil should be planted in pots with drainage holes using a high-quality potting mix. Watering Basil Consistent watering is one of the keys to healthy basil plants. Keep the soil evenly moist but never soggy. Water deeply whenever the top inch of soil begins to dry. Morning watering is preferred because it gives leaves time to dry before evening, reducing the chance of disease. Container-grown basil typically requires more frequent watering than plants growing directly in garden beds, especially during hot summer weather. Applying mulch around outdoor plants helps conserve moisture, regulate soil temperature, and suppress weeds. Fertilizing Although basil is not a heavy feeder, occasional fertilizing encourages vigorous growth. Mix compost into the soil before planting to provide a steady source of nutrients. During the growing season, apply a balanced liquid
Originally published
March 2026
Updated
August 2026
Reviewed by
Culibloom