Make an easy gluten-free pretzel pie crust with three simple ingredients for a crisp, buttery, sweet-and-salty base for pies and cheesecakes.
Sweet, salty, buttery, and crisp, this Easy Gluten-Free Pretzel Pie Crust Recipe creates a delicious foundation for creamy pies, cheesecakes, and frozen desserts. The crunchy pretzel crumbs provide a satisfying contrast to smooth, sweet fillings.
Made with only three ingredients, this simple homemade crust comes together in minutes. Gluten-free pretzels, brown sugar, and melted butter combine to create a sturdy crumb crust with a rich, caramel-like flavor.
This versatile crust pairs especially well with key lime pie, chocolate cream pie, peanut butter pie, banana cream pie, cheesecake, and other rich desserts. Prepare it ahead of time for an easy base that is ready whenever you want to assemble your dessert.
Prep Time: 10 minutes
Cook Time: 10 minutes
Total Time: 20 minutes
Yield: 1 (9-inch) pie crust
Ingredients
3 cups small gluten-free pretzels
4 tablespoons brown sugar
1/2 cup unsalted butter, melted
Directions
Step 1: Prepare the Oven
Preheat the oven to 350°F. Lightly grease a 9-inch pie pan to help prevent the finished crust from sticking.
Step 2: Make the Pretzel Crumbs
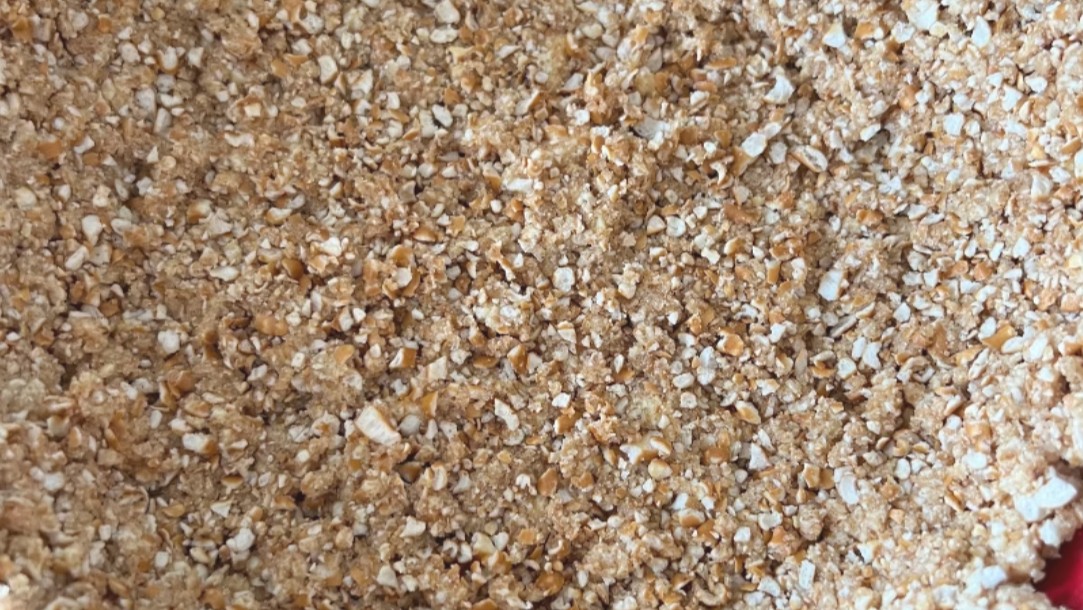
Place the gluten-free pretzels and brown sugar in a food processor. Pulse until the pretzels form fine crumbs resembling coarse sand, with no large pieces remaining.
Step 3: Add the Butter
Pour the melted butter into the food processor. Continue processing until the crumbs are evenly coated and resemble wet sand. The mixture should hold together when gently pressed.
Step 4: Form the Crust
Transfer the pretzel mixture to the prepared pie pan. Use the bottom of a measuring cup, a drinking glass, or your fingertips to press the crumbs firmly and evenly across the bottom and up the sides of the pan.
Make sure the crust has an even thickness. Compacting the crumbs firmly will help the baked crust hold together when it is filled and sliced.
Step 5: Bake the Crust
Bake the crust for 10 minutes, or until it is lightly golden around the edges and has a buttery aroma. Watch it carefully near the end of the baking time because pretzel crumbs can darken quickly.
Step 6: Cool Completely
Remove the crust from the oven and place it on a wire rack. Allow it to cool completely before adding the desired filling.
For a chilled dessert, refrigerate the completely cooled crust for 15 to 20 minutes before filling it.
Notes
Use certified gluten-free pretzels when preparing this crust for someone with celiac disease or gluten sensitivity. Check all packaged ingredients for appropriate gluten-free labeling and prevent cross-contact during preparation.
Fresh, crisp pretzels will produce the best flavor and texture.
Process the pretzels into fine crumbs so the mixture can be pressed evenly into the pie pan.
Press the crumbs firmly into the bottom and sides of the pan to help prevent the finished crust from crumbling.
Do not skip the cooling step. The crust needs time to set before the filling is added.
Light or dark brown sugar may be used. Dark brown sugar will give the crust a deeper caramel flavor.
For a slightly sweeter crust, increase the brown sugar by 1 tablespoon.
If a food processor is unavailable, place the pretzels in a sturdy zip-top bag and crush them finely with a rolling pin. Transfer the crumbs to a bowl, stir in the brown sugar, and then mix in the melted butter.
This crust is particularly delicious with cheesecake, strawberry cheesecake, chocolate silk pie, chocolate mousse pie, peanut butter pie, banana cream pie, coconut cream pie, key lime pie, lemon icebox pie, salted caramel pie, frozen yogurt pie, ice cream pie, or berry cream pie.
The baked crust may be prepared one or two days before it is filled. Allow it to cool completely, cover it tightly, and store it at room temperature.
Once filled, follow the storage instructions provided with the chosen pie or cheesecake recipe.