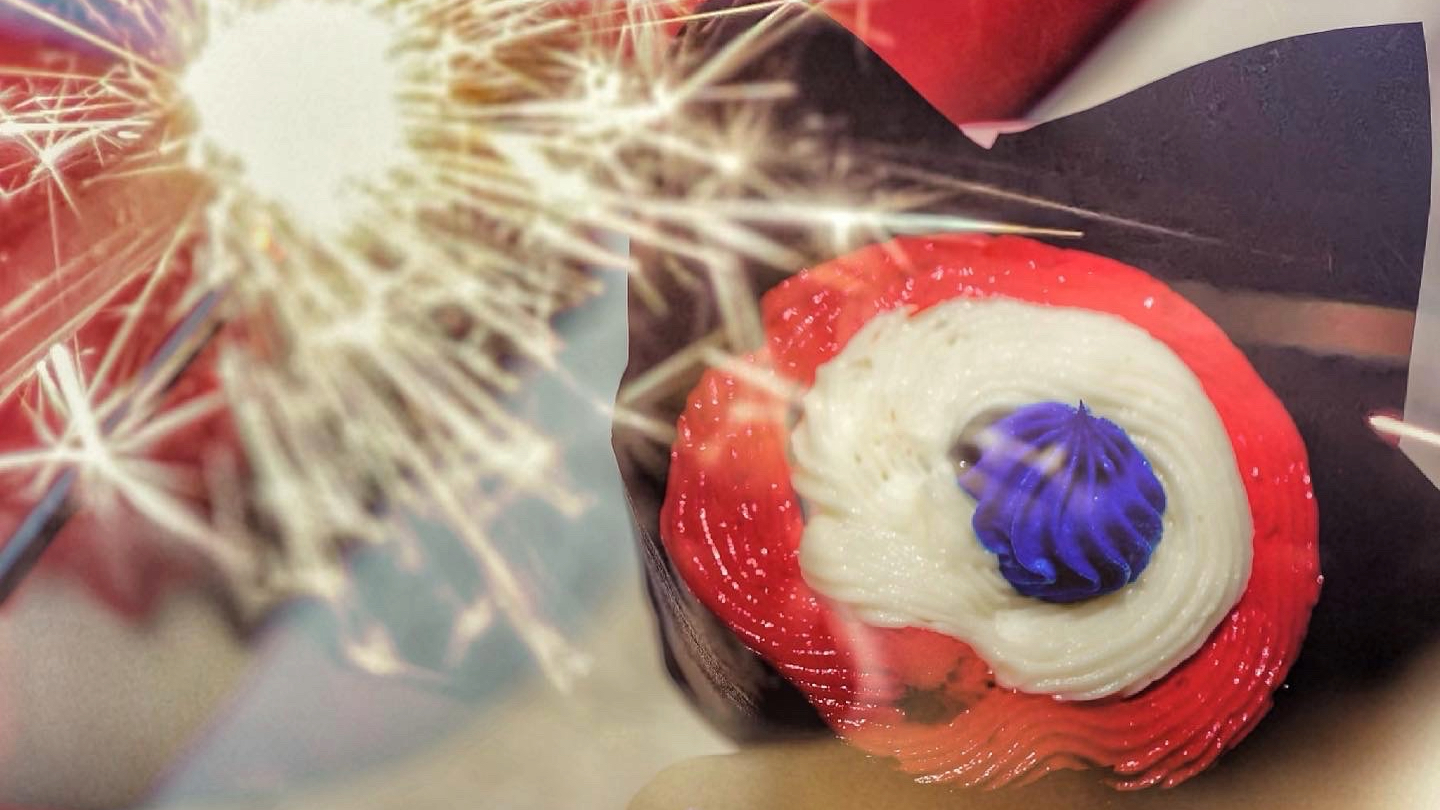
Bake festive gluten-free Captain America vanilla cupcakes with red, white, and blue buttercream for superhero birthdays and patriotic celebrations.
Bring a little superhero spirit to your dessert table with these Festive Gluten-Free Captain America Vanilla Cupcakes with Red, White, and Blue Buttercream. Tender vanilla cupcakes topped with colorful frosting swirls make a cheerful centerpiece for birthday parties, patriotic holidays, and superhero celebrations.
A combination of sweet rice flour, white rice flour, tapioca flour, and brown rice flour forms the base of these homemade gluten-free cupcakes. Butter, sour cream, and milk give the cake richness, while vanilla extract adds a familiar flavor that pairs beautifully with the creamy frosting.
The Captain America-inspired finish comes together with three colors of vanilla buttercream piped into one swirl. Add white sprinkles, red and blue sanding sugar, or optional edible silver stars to create a festive batch for the Fourth of July, Memorial Day, Veterans Day, or your favorite superhero fan’s birthday.
Directions
Step 1: Prepare the Oven and Pans
Preheat the oven to 350°F. Line two standard 12-cup muffin pans with cupcake liners.
Step 2: Combine the Dry Ingredients
In a medium bowl, whisk together the sweet rice flour, white rice flour, tapioca flour, brown rice flour, xanthan gum, baking powder, baking soda, and kosher salt. Mix thoroughly so the flours, leavening, and xanthan gum are evenly distributed.
Step 3: Cream the Butter and Sugar
In a large mixing bowl, beat the softened butter and granulated sugar for 3 to 4 minutes, until light, fluffy, and pale in color. Scrape down the sides and bottom of the bowl as needed to keep the mixture evenly blended.
Step 4: Add the Eggs and Vanilla
Beat in the eggs one at a time, mixing well after each addition. Add the vanilla extract and mix until incorporated.
Step 5: Finish the Cupcake Batter
Add one-third of the flour mixture to the butter mixture and mix until incorporated. Pour in half of the milk or buttermilk and mix again.
Add another third of the flour mixture, followed by the remaining milk or buttermilk and the sour cream.
Finish with the remaining flour mixture, mixing just until the batter is evenly combined. Scrape the bowl to incorporate any remaining pockets of flour.
Step 6: Fill the Cupcake Liners
Divide the batter evenly among the 24 cupcake liners, filling each approximately two-thirds full. Use a scoop or spoon to portion the batter as evenly as possible so the cupcakes bake at a similar rate.
Step 7: Bake and Cool
Bake for 18 to 22 minutes, or until the tops spring back lightly when touched and a toothpick inserted into the center comes out clean.
Let the cupcakes cool in their pans for 5 minutes, then transfer them to a wire rack. Allow them to cool completely before frosting.
Step 8: Make the Vanilla Buttercream
Beat the butter until smooth and creamy. Gradually add the sifted powdered sugar, mixing until incorporated.
Add the vanilla extract and kosher salt. Start with 3 tablespoons of heavy cream, then add more as needed, up to 5 tablespoons total, until the buttercream reaches a smooth piping consistency. Beat for another 2 to 3 minutes, until light and fluffy.
Step 9: Color the Buttercream
Divide the buttercream evenly among three bowls. Leave one portion uncolored for the white swirl. Tint one portion red and the remaining portion blue with gel food coloring, mixing each until the color is uniform.
Transfer each color to its own piping bag. Snip the ends, then place all three bags inside one large piping bag fitted with a large open star tip. Position the openings together near the tip so all three colors feed through as you pipe.
Step 10: Decorate and Serve
Pipe generous red, white, and blue buttercream swirls onto the completely cooled cupcakes.
Decorate with white sprinkles, blue sanding sugar, and red sanding sugar as desired. Add optional edible silver stars or Captain America cupcake toppers for a superhero-themed finish. Arrange on a serving platter and enjoy.
Notes
The listed cook time uses a 20-minute estimate within the 18-to-22-minute baking range. Cooling and decorating times may vary; let the cupcakes cool completely even if they need longer than the estimated time.
Use the full 1/2 cup of milk or buttermilk. The directions incorporate it in two additions so none of the listed liquid is left out.
Gel food coloring gives the buttercream vibrant red and blue shades without adding as much liquid as conventional liquid food coloring. Add it gradually until you reach your preferred color.
The uncolored buttercream may have a soft ivory tint because it contains butter and vanilla extract.
If the frosting becomes too soft to hold a defined swirl, optionally chill the filled piping bag for about 10 minutes before decorating. It should remain soft enough to squeeze comfortably.
For optional make-ahead preparation, freeze the unfrosted cupcakes in an airtight container for up to 3 months. Thaw before decorating. Keep frosted cupcakes covered in the refrigerator and allow them to soften at room temperature before serving.
Check the gluten-free labeling on flours, powdered sugar, food coloring, sprinkles, sanding sugars, and edible decorations. Use clean bowls, utensils, and work surfaces to help prevent cross-contact.
Use stars specifically labeled edible. Remove any non-edible cupcake toppers before eating.