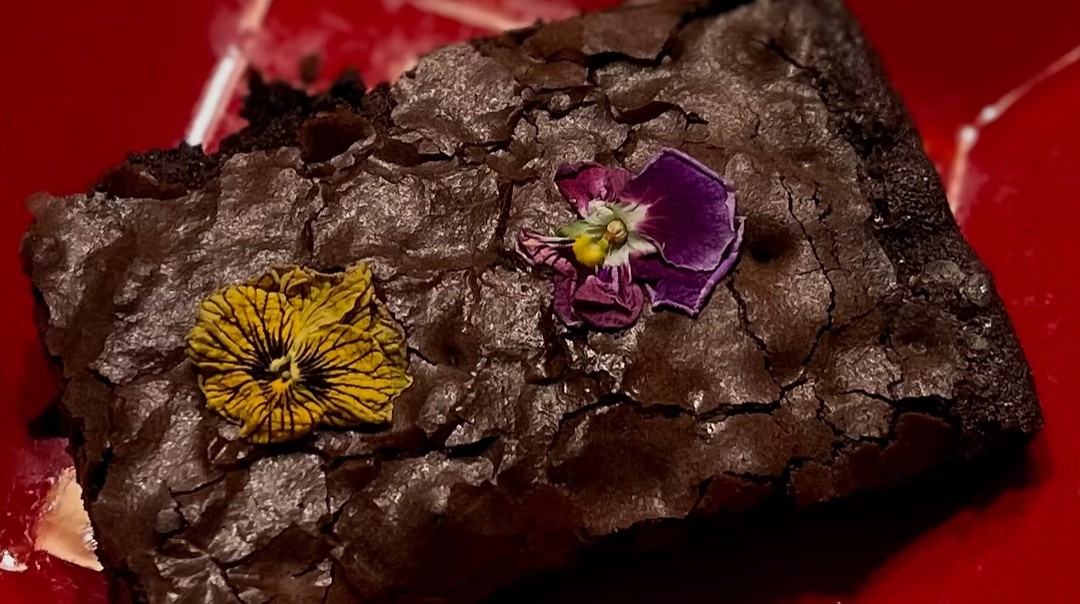
There are few desserts as universally loved as gluten-free homemade chocolate brownies. With their rich chocolate flavor, dense and fudgy texture, and irresistible aroma, brownies have become a staple dessert for everything from casual family dinners to elegant holiday celebrations. Whether enjoyed fresh from the oven, chilled from the refrigerator, or topped with a scoop of vanilla ice cream, brownies offer a comforting chocolate experience that never goes out of style.
If you have been searching for the best gluten-free homemade chocolate brownies, you have found a recipe that delivers everything a great brownie should be. These brownies are rich without being overwhelming, sweet without being cloying, and soft without falling apart. Every bite is packed with deep chocolate flavor thanks to cocoa powder and chocolate chips working together to create layers of chocolate goodness.
One of the biggest challenges in gluten-free baking is achieving the same texture that traditional baked goods offer. Many gluten-free brownies can become dry, crumbly, or grainy. This recipe solves those problems by using oat flour, which creates a wonderfully tender crumb while maintaining the dense, fudgy consistency brownie lovers crave. The result is a gluten-free brownie that tastes so delicious most people would never guess it is gluten-free.
For readers who prefer a traditional brownie recipe, a classic all-purpose flour version is included as well. This option produces a chewy, bakery-style brownie with a glossy top and rich chocolate center. Both recipes are simple to prepare, use everyday ingredients, and require minimal effort.
Whether you are baking for a birthday celebration, holiday dessert spread, bake sale, potluck, family movie night, or simply because you are craving chocolate, these brownies are guaranteed to impress. They are easy enough for beginner bakers while producing professional-quality results that experienced bakers will appreciate.
Best of all, these brownies can be customized in countless ways. Add nuts for crunch, swirl in caramel for extra indulgence, or serve them with fresh berries for a beautiful dessert presentation. No matter how you enjoy them, these homemade chocolate brownies are destined to become a favorite recipe in your collection.
Directions
Option 1: Gluten-Free Homemade Chocolate Brownies
Prepare the Oven and Pan
Preheat your oven to 325°F. Prepare an 8 x 8-inch baking dish by lightly greasing it with cooking spray or lining it with parchment paper. Allowing the parchment paper to extend slightly over the edges of the pan creates handles that make removing the brownies much easier after baking.
Mix the Dry Ingredients
In a large mixing bowl, combine the granulated sugar, powdered sugar, oat flour, cocoa powder, baking powder, and salt. Whisk thoroughly until all ingredients are evenly distributed. Properly mixing the dry ingredients ensures that every brownie has consistent flavor and texture.
Add the Wet Ingredients
Pour the boiling water into the bowl, followed by the melted butter, vanilla extract, and beaten eggs. Stir until the batter becomes thick, smooth, and glossy.
The boiling water plays an important role by helping bloom the cocoa powder. Blooming cocoa intensifies the chocolate flavor and creates a deeper, richer taste throughout the brownies.
Fold in the Chocolate Chips
Using a rubber spatula, gently fold the mini dark chocolate chips into the batter. These chocolate chips melt during baking, creating pockets of rich chocolate throughout every brownie square.
Fill the Pan
Transfer the batter into the prepared baking dish. Spread it evenly into the corners and smooth the top using a spatula.
Bake
Place the pan in the preheated oven and bake for approximately 45 minutes.
The brownies are finished baking when the edges appear set and a toothpick inserted near the center comes out with a few moist crumbs attached. If the toothpick comes out completely clean, the brownies may be overbaked.
Cool Completely
Remove the pan from the oven and place it on a cooling rack.
Allow the brownies to cool completely before slicing. This cooling period is essential because it allows the structure of the brownies to fully develop, resulting in the perfect fudgy texture.
Slice and Serve
Once cooled, cut into squares and serve.
Option 2: Classic Homemade Chocolate Brownies
Prepare the Pan
Preheat the oven to 350°F. Grease an 8-inch square baking pan or a 9-inch round baking pan.
Melt the Butter Mixture
Place the sugar, butter, and salt into a microwave-safe bowl. Microwave for about 1 minute or until the butter is fully melted.
Whisk until smooth and fully combined.
Create the Chocolate Base
Add the vanilla extract and Dutch-process cocoa powder. Stir until the mixture becomes thick, smooth, and glossy.
This step creates the rich chocolate foundation that gives these brownies their incredible flavor.
Incorporate the Eggs
Add the eggs one at a time, mixing thoroughly after each addition.
This helps create the shiny, crackly top that many people associate with bakery-style brownies.
Add the Flour
Add the all-purpose flour and baking powder. Stir gently until just combined.
Avoid overmixing, which can create a tougher texture.
Add Chocolate Chips
Fold in the chocolate chips until evenly distributed throughout the batter.
Transfer to the Pan
Spread the batter evenly in the prepared baking pan.
Bake
Bake for 33 to 38 minutes.
The center should remain slightly soft while the edges become set.
Cool
Allow the brownies to cool for at least 15 minutes before slicing.
For the richest flavor and best texture, allow them to cool completely.
Brownie Variations
Double Chocolate Brownies
Add an extra ½ cup chocolate chips.
Walnut Brownies
Fold in ½ cup chopped walnuts.
Salted Brownies
Sprinkle flaky sea salt over the batter before baking.
Caramel Brownies
Swirl caramel sauce into the batter.
Raspberry Brownies
Add fresh raspberries for a sweet and tart flavor combination.
Peanut Butter Brownies
Swirl peanut butter into the batter before baking.
Serving Suggestions
Serve warm with vanilla ice cream.
Top with whipped cream and chocolate curls.
Drizzle with warm caramel sauce.
Serve alongside fresh strawberries.
Pair with espresso or coffee.
Create brownie sundaes for parties and celebrations.
Layer brownie pieces into trifles.
Storage Instructions
Store brownies in an airtight container at room temperature for up to 4 days.
Refrigerate for up to 1 week.
Freeze individual brownie squares for up to 3 months.
Wrap each brownie tightly before freezing to preserve freshness and prevent freezer burn.
Notes
Use room-temperature eggs for the smoothest batter.
For deeper chocolate flavor, add ½ teaspoon espresso powder.
Allow brownies to cool completely before slicing.
Use parchment paper for easy cleanup and removal.
Store leftovers in an airtight container to maintain freshness.
How to Achieve Perfect Fudgy Brownies
Choose Quality Ingredients
High-quality cocoa powder and chocolate chips create a richer, more complex chocolate flavor.
Avoid Overmixing
Mix only until ingredients are combined. Excess mixing can affect texture.
Watch the Baking Time
A few extra minutes in the oven can dramatically change the texture of brownies.
Let Them Cool
Cooling allows the brownies to set properly and enhances their fudgy consistency.
Why Oat Flour Works So Well in Brownies
Oat flour has become increasingly popular in gluten-free baking because it provides a naturally soft texture and mild flavor. Unlike some gluten-free flours that can taste gritty or dry, oat flour blends seamlessly into brownie batter.
It also contributes moisture retention, helping brownies stay soft for several days after baking. Combined with cocoa powder and butter, oat flour creates a rich dessert that rivals traditional brownies.
Frequently Asked Questions
Can I make these brownies ahead of time?
Yes. In fact, many people find that brownies taste even better the next day.
Can I freeze brownies?
Absolutely. Brownies freeze exceptionally well and maintain their flavor and texture after thawing.
How do I know when brownies are done?
Look for set edges and a toothpick with a few moist crumbs attached.
Why are my brownies dry?
Overbaking is the most common reason brownies become dry.
Can I use different chocolate chips?
Yes. Milk chocolate, semi-sweet, dark chocolate, or white chocolate chips all work well.
Are oat flour brownies really gluten-free?
Yes, provided you use certified gluten-free oat flour and verify all ingredients are gluten-free.