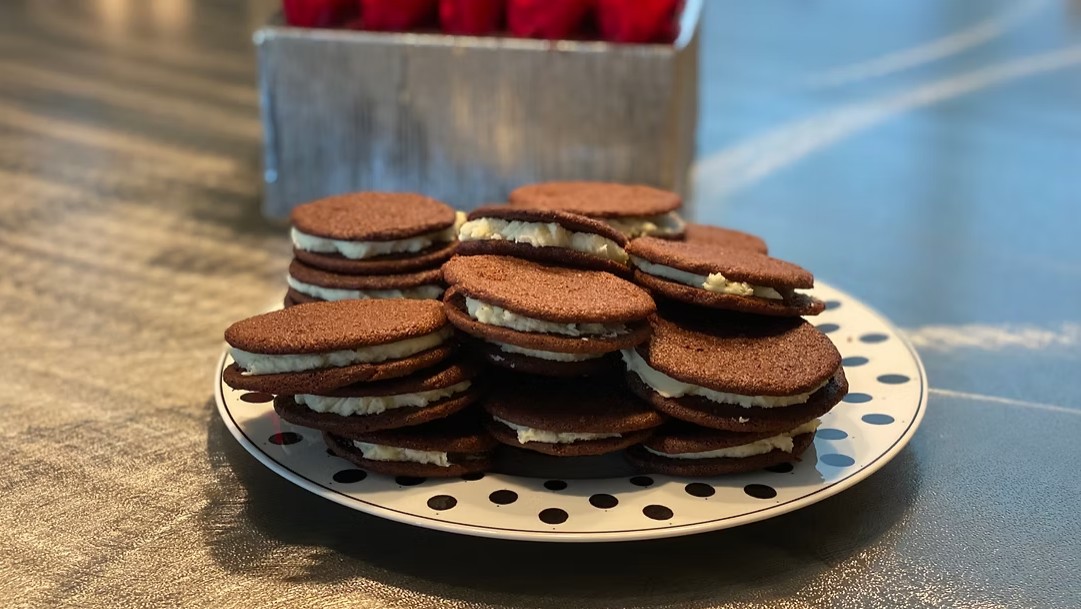
Make the best gluten-free whoopie pies with moist chocolate cakes and your choice of two fluffy marshmallow fillings.
These Gluten-Free Whoopie Pies feature soft, cake-like chocolate cookies surrounding a thick layer of fluffy marshmallow filling. Their deep cocoa flavor, tender texture, and creamy center make them taste like a traditional bakery favorite.
A balanced combination of white rice flour, sweet rice flour, tapioca starch, and xanthan gum gives the chocolate cakes enough structure to hold the filling while keeping them light and tender. Dark brown sugar adds moisture, and buttermilk helps create the signature softness of a classic whoopie pie.
This recipe includes two marshmallow filling options. Choose one filling option before you begin. Prepare either the Classic Marshmallow Cream Filling or the Marshmallow Fluff Filling. You do not need to make both fillings to complete the recipe.
The classic filling combines butter and shortening for a firmer, more stable bakery-style center. The marshmallow fluff filling uses butter for a softer texture and richer flavor. Either option makes enough filling for the entire batch of 12 whoopie pies.
Ingredients
For the Gluten-Free Chocolate Cakes
1 cup white rice flour
1/2 cup sweet rice flour
1/2 cup Dutch-process cocoa powder
1/2 cup tapioca starch
1 1/4 teaspoons baking soda
1 teaspoon salt
1/2 teaspoon xanthan gum
1/2 cup unsalted butter, softened
1 cup packed dark brown sugar
1 large egg, at room temperature
1 teaspoon pure vanilla extract
1 cup buttermilk, at room temperature
Choose One Filling Option
Prepare only one of the following filling options. Each option makes enough filling for all 12 whoopie pies.
Filling Option 1: Classic Marshmallow Cream Filling
Choose this option for a firmer, more stable bakery-style filling.
1/2 cup unsalted butter, softened
1/4 cup vegetable shortening
3/4 cup powdered sugar, sifted
1 jar marshmallow creme, 7 1/2 ounces
1 teaspoon pure vanilla extract
Filling Option 2: Marshmallow Fluff Filling
Choose this option for a softer filling with a richer butter flavor.
1/2 cup unsalted butter, softened
2 cups marshmallow fluff
1 cup powdered sugar, sifted
1 teaspoon pure vanilla extract
Pinch of salt
Directions
Step 1: Choose One Filling Option
Before beginning, decide which filling you want to use. Select either Filling
Option 1, the Classic Marshmallow Cream Filling, or Filling Option 2, the Marshmallow Fluff Filling.
Prepare only the ingredients listed under your chosen filling. Do not combine the two formulas. Each filling option is designed to fill the complete batch of 12 whoopie pies.
Step 2: Prepare the Oven and Baking Sheets
Preheat the oven to 350°F. Line a large baking sheet with parchment paper. If you have two baking sheets, prepare both so you can portion the next batch while the first batch bakes.
Step 3: Combine the Dry Ingredients
Place the white rice flour, sweet rice flour, Dutch-process cocoa powder, tapioca starch, baking soda, salt, and xanthan gum in a medium bowl. Whisk thoroughly to distribute the cocoa powder, baking soda, salt, and xanthan gum evenly.
Step 4: Cream the Butter and Brown Sugar
Place the softened butter and dark brown sugar in a large mixing bowl. Beat with an electric mixer on medium speed until the mixture is creamy, smooth, and slightly lighter in color.
Step 5: Add the Egg and Vanilla
Add the egg and vanilla extract to the butter mixture. Beat until completely incorporated, stopping to scrape the sides and bottom of the bowl as needed.
Step 6: Finish the Chocolate Batter
Add half of the dry mixture to the butter mixture and blend on low speed. Pour in half of the buttermilk and mix gently.
Add the remaining dry mixture, followed by the remaining buttermilk. Mix only until a smooth, thick batter forms. Avoid overmixing.
Step 7: Portion the Batter
Scoop six 1/4-cup portions of batter onto the prepared baking sheet. Leave at least 2 inches between the portions because the cakes will spread as they bake. Gently shape the batter into evenly sized mounds if necessary.
Step 8: Bake the Chocolate Cakes
Bake for 15 to 18 minutes. The cakes are ready when the tops spring back after being touched lightly and a toothpick inserted near the center comes out with a few moist crumbs.
Step 9: Cool the Cakes
Allow the cakes to cool on the baking sheet for 2 minutes. Carefully transfer them to a wire rack and let them cool completely.
Repeat the portioning and baking process with the remaining batter. Make sure all 24 chocolate cakes are completely cool before adding the filling.
Step 10: Prepare Filling Option 1
If you chose the Classic Marshmallow Cream Filling, beat the softened butter and vegetable shortening until light and fluffy.
Add the sifted powdered sugar and mix on low speed until combined. Add the marshmallow creme and vanilla extract, then beat on medium speed until the filling is smooth and fluffy.
Skip this step if you chose Filling Option 2.
Step 11: Prepare Filling Option 2
If you chose the Marshmallow Fluff Filling, beat the softened butter until smooth and creamy.
Add the marshmallow fluff, sifted powdered sugar, vanilla extract, and salt.
Begin mixing on low speed, then increase to medium speed and beat until the filling is light and fluffy.
Skip this step if you chose Filling Option 1.
Step 12: Match the Chocolate Cakes
Arrange the completely cooled chocolate cakes in pairs of similar size and shape. Turn one cake from each pair flat-side up.
Step 13: Fill and Assemble the Whoopie Pies
Spread or pipe a generous layer of your chosen marshmallow filling over the flat side of each bottom cake.
Place the matching cake on top with its flat side facing the filling. Press gently until the filling reaches close to the edges.
Step 14: Rest and Serve
Allow the assembled whoopie pies to rest for 10 to 15 minutes. This gives the filling time to settle and helps the cakes stay together when served.
Notes
Choose only one filling option for the recipe. Do not prepare or combine both options unless you intentionally want two different batches of filling.
The Classic Marshmallow Cream Filling contains butter and vegetable shortening. It has a firmer, more stable texture that works well for transporting the whoopie pies or displaying them on a dessert table.
The Marshmallow Fluff Filling uses butter without shortening. It has a softer texture and more pronounced butter flavor.
Each filling option makes enough for all 12 whoopie pies.
Use certified gluten-free ingredients when preparing these whoopie pies for someone with celiac disease or a serious gluten sensitivity. Check the labels on the cocoa powder, baking soda, vanilla extract, marshmallow creme, marshmallow fluff, and powdered sugar.
Use Dutch-process cocoa powder for the deepest chocolate flavor. Natural cocoa powder has a different acidity level and may change the flavor, color, rise, and texture of the cakes.
Measure the flours and tapioca starch carefully. If measuring by volume, spoon each ingredient into its measuring cup and level the top without packing it down.
Room-temperature butter, egg, and buttermilk blend more smoothly and help the chocolate cakes bake evenly.
Do not overmix the finished batter. Mix only until the ingredients are incorporated and no dry streaks remain.
Make sure the chocolate cakes are completely cool before adding the filling.
Warm cakes can cause the butter-based filling to soften or melt.
A large cookie scoop helps create evenly sized cakes that are easier to pair after baking.
If your chosen filling is too soft, refrigerate it for 10 to 15 minutes before assembling the whoopie pies. If it is too firm, let it stand briefly at room temperature and beat it again.
Store the whoopie pies in a single layer inside an airtight container at room temperature for up to 3 days. Place parchment paper between the layers if stacking is necessary.
For longer storage, refrigerate the whoopie pies in an airtight container for up to 5 days. Let them stand at room temperature for approximately 20 minutes before serving so the cakes and filling can soften.
Individually wrapped whoopie pies may be frozen in an airtight freezer container for up to 2 months. Thaw them overnight in the refrigerator, then bring them to room temperature before serving.