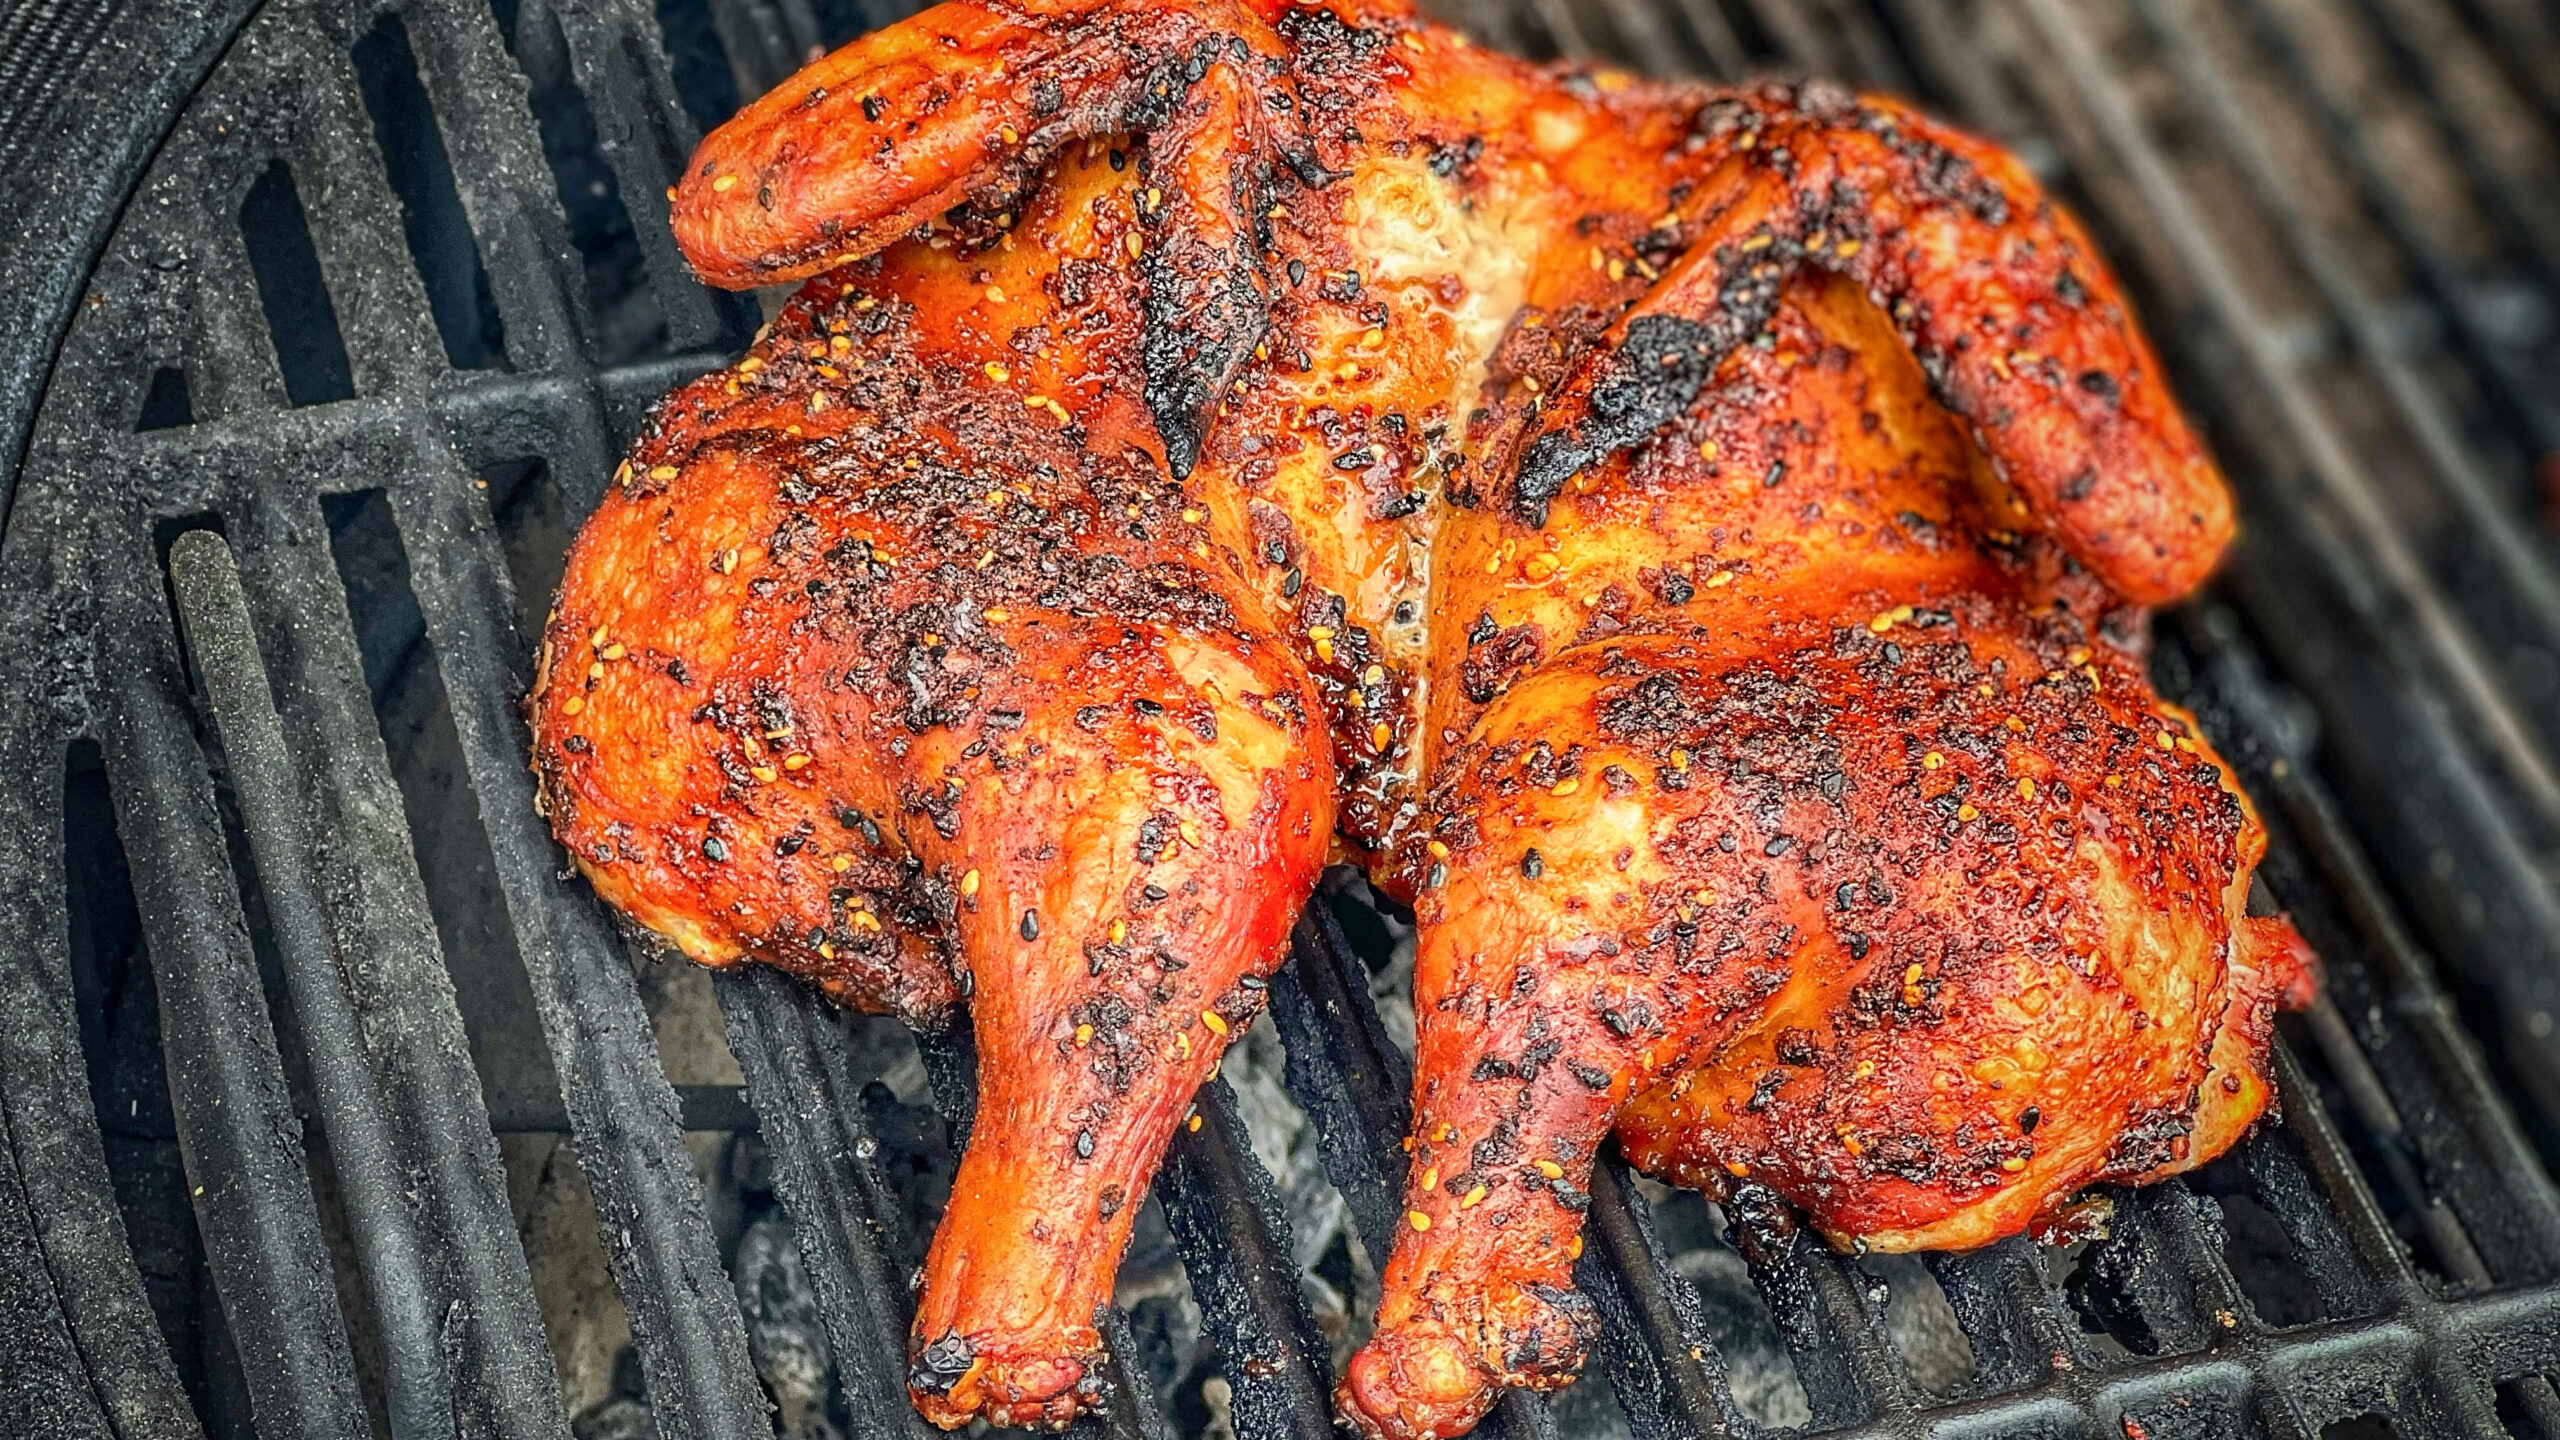
Make juicy grilled spatchcocked Tuscan chicken with a buttermilk brine, lemon, garlic, rosemary, oregano, and irresistibly crisp skin.
Bring the rustic flavors of the Italian countryside to your backyard with this Juicy Grilled Spatchcocked Tuscan Chicken Recipe. A whole chicken is soaked in a simple buttermilk brine, coated with a vibrant lemon and herb marinade, and slowly grilled until the meat is tender and the skin is beautifully golden and crisp.
The buttermilk brine helps tenderize the chicken while protecting its natural moisture during grilling. Fresh rosemary, garlic, and a touch of salt infuse the meat with savory flavor before the Tuscan marinade adds extra virgin olive oil, fresh lemon, oregano, and crushed red pepper flakes. The result is a wonderfully aromatic chicken with bright citrus flavor, fragrant herbs, gentle heat, and juicy meat in every serving.
Spatchcocking, or removing the backbone and flattening the chicken, allows the meat to cook more evenly than a traditional whole bird. Beginning over low indirect heat gives the chicken time to cook gently and absorb smoky flavor. Increasing the grill temperature toward the end crisps the skin without drying out the meat.
This versatile grilled chicken can be prepared on a Big Green Egg, charcoal grill, pellet grill, or gas grill configured for indirect cooking. It is equally suited to a relaxed summer cookout, a family dinner, or an outdoor celebration. Serve it with roasted potatoes, grilled vegetables, a garden salad, or warm gluten-free bread for a colorful and satisfying meal.
Directions
Step 1: Brine the Chicken
Place the buttermilk, kosher salt, halved garlic, and rosemary sprigs in a large food-safe container or resealable bag. Stir or gently shake the mixture until the salt is distributed throughout the buttermilk.
Add the spatchcocked chicken and turn it several times to coat it completely. Cover the container or seal the bag, then refrigerate the chicken for 12 to 24 hours. Keep the chicken refrigerated throughout the entire brining period.
Step 2: Prepare the Tuscan Marinade
Place the extra virgin olive oil, lemon zest, lemon juice, minced garlic, chopped rosemary, oregano, and crushed red pepper flakes in a medium bowl. Whisk until the ingredients are thoroughly combined.
The fresh lemon brightens the richness of the chicken, while rosemary, oregano, and garlic create the recipe’s signature Tuscan-inspired flavor.
Step 3: Marinate the Chicken
Remove the chicken from the buttermilk brine and discard the used brine, garlic, and rosemary. Pat the chicken thoroughly dry with paper towels. Drying the surface helps the skin become crisp during grilling.
Place the chicken on a large baking sheet or platter. Rub the Tuscan marinade generously over the skin and underside of the chicken. Carefully loosen the skin where possible and spread some of the marinade underneath it without tearing the skin.
Season the chicken lightly with kosher salt and freshly ground black pepper. Remember that the chicken has already been seasoned by the brine, so avoid adding too much additional salt. Cover and refrigerate for 1 hour.
Step 4: Prepare the Grill
Preheat the grill for indirect cooking at 250°F.
If using a Big Green Egg, install the convEGGtor before preheating. If using a charcoal grill, arrange the hot coals on one side and place the chicken over the cooler side. For a gas grill, light only the burners needed to create a separate indirect heat zone. Follow the manufacturer’s instructions when preparing a pellet grill.
Clean and oil the grill grate before adding the chicken to help prevent the skin from sticking.
Step 5: Slowly Grill the Chicken
Remove the chicken from the refrigerator and place it breast-side up over indirect heat. Close the grill lid and cook for 45 to 50 minutes.
Check the temperature in the thickest part of the breast without touching the bone. Continue cooking until the breast reaches approximately 155°F. Monitor the grill temperature and adjust the vents, burners, or fuel as necessary to maintain steady indirect heat.
Step 6: Crisp the Skin
Increase the grill temperature to between 375°F and 400°F. Continue cooking the chicken for 10 to 15 minutes, or until the skin is deeply golden and crisp.
Use a digital meat thermometer to check the chicken in more than one place. The breast should reach 165°F, and the thickest part of the thighs should reach 175°F. Make sure the thermometer does not touch bone when taking a reading.
Step 7: Rest the Chicken
Transfer the grilled chicken to a clean cutting board. Allow it to rest for 10 to 15 minutes before carving. Resting gives the juices time to redistribute through the meat, helping each portion remain tender and moist.
Do not place the cooked chicken on the unwashed platter or baking sheet that held the raw chicken.
Step 8: Carve and Serve
Separate the legs and thighs from the chicken, then remove the wings and slice the breast meat. Arrange the pieces on a serving platter and spoon any juices from the clean cutting board over the meat.
Serve the chicken warm with grilled vegetables, roasted potatoes, a fresh seasonal salad, or your favorite gluten-free side dishes.
Step 1: Brine the Chicken
Place the buttermilk, kosher salt, halved garlic, and rosemary sprigs in a large food-safe container or resealable bag. Stir or gently shake the mixture until the salt is distributed throughout the buttermilk.
Add the spatchcocked chicken and turn it several times to coat it completely. Cover the container or seal the bag, then refrigerate the chicken for 12 to 24 hours. Keep the chicken refrigerated throughout the entire brining period.
Step 2: Prepare the Tuscan Marinade
Place the extra virgin olive oil, lemon zest, lemon juice, minced garlic, chopped rosemary, oregano, and crushed red pepper flakes in a medium bowl. Whisk until the ingredients are thoroughly combined.
The fresh lemon brightens the richness of the chicken, while rosemary, oregano, and garlic create the recipe’s signature Tuscan-inspired flavor.
Step 3: Marinate the Chicken
Remove the chicken from the buttermilk brine and discard the used brine, garlic, and rosemary. Pat the chicken thoroughly dry with paper towels. Drying the surface helps the skin become crisp during grilling.
Place the chicken on a large baking sheet or platter. Rub the Tuscan marinade generously over the skin and underside of the chicken. Carefully loosen the skin where possible and spread some of the marinade underneath it without tearing the skin.
Season the chicken lightly with kosher salt and freshly ground black pepper. Remember that the chicken has already been seasoned by the brine, so avoid adding too much additional salt. Cover and refrigerate for 1 hour.
Step 4: Prepare the Grill
Preheat the grill for indirect cooking at 250°F.
If using a Big Green Egg, install the convEGGtor before preheating. If using a charcoal grill, arrange the hot coals on one side and place the chicken over the cooler side. For a gas grill, light only the burners needed to create a separate indirect heat zone. Follow the manufacturer’s instructions when preparing a pellet grill.
Clean and oil the grill grate before adding the chicken to help prevent the skin from sticking.
Step 5: Slowly Grill the Chicken
Remove the chicken from the refrigerator and place it breast-side up over indirect heat. Close the grill lid and cook for 45 to 50 minutes.
Check the temperature in the thickest part of the breast without touching the bone. Continue cooking until the breast reaches approximately 155°F. Monitor the grill temperature and adjust the vents, burners, or fuel as necessary to maintain steady indirect heat.
Step 6: Crisp the Skin
Increase the grill temperature to between 375°F and 400°F. Continue cooking the chicken for 10 to 15 minutes, or until the skin is deeply golden and crisp.
Use a digital meat thermometer to check the chicken in more than one place. The breast should reach 165°F, and the thickest part of the thighs should reach 175°F. Make sure the thermometer does not touch bone when taking a reading.
Step 7: Rest the Chicken
Transfer the grilled chicken to a clean cutting board. Allow it to rest for 10 to 15 minutes before carving. Resting gives the juices time to redistribute through the meat, helping each portion remain tender and moist.
Do not place the cooked chicken on the unwashed platter or baking sheet that held the raw chicken.
Step 8: Carve and Serve
Separate the legs and thighs from the chicken, then remove the wings and slice the breast meat. Arrange the pieces on a serving platter and spoon any juices from the clean cutting board over the meat.
Serve the chicken warm with grilled vegetables, roasted potatoes, a fresh seasonal salad, or your favorite gluten-free side dishes.
Notes
Fresh rosemary and oregano provide the most vibrant flavor and aroma. Remove the tough rosemary stems and use only the finely chopped leaves in the marinade.
For additional smoky flavor, add cherry, oak, or pecan wood to the grill during the indirect cooking stage. Use only wood intended for cooking and follow the grill manufacturer’s recommendations.
Grill temperatures can fluctuate, and chickens may vary in thickness. Use the cooking times as a guide and rely on a digital meat thermometer to determine when the chicken is safely cooked.
Keep the raw chicken and marinade refrigerated. Wash your hands, utensils, cutting boards, and work surfaces thoroughly after they come into contact with raw poultry.
Leftover chicken can be stored in an airtight container in the refrigerator for up to 4 days. Enjoy it cold or reheated in salads, sandwiches, wraps, grain bowls, and other meal-prep dishes.
This recipe is naturally gluten-free when prepared with appropriately labeled ingredients. When cooking for someone with celiac disease or gluten sensitivity, verify the labels on the buttermilk, seasonings, and other packaged ingredients, and prevent cross-contact during preparation and grilling.