Make gluten-free homemade cherry vanilla Pop-Tarts with flaky pastry, real cherry filling, vanilla glaze, and your choice of two crust options.
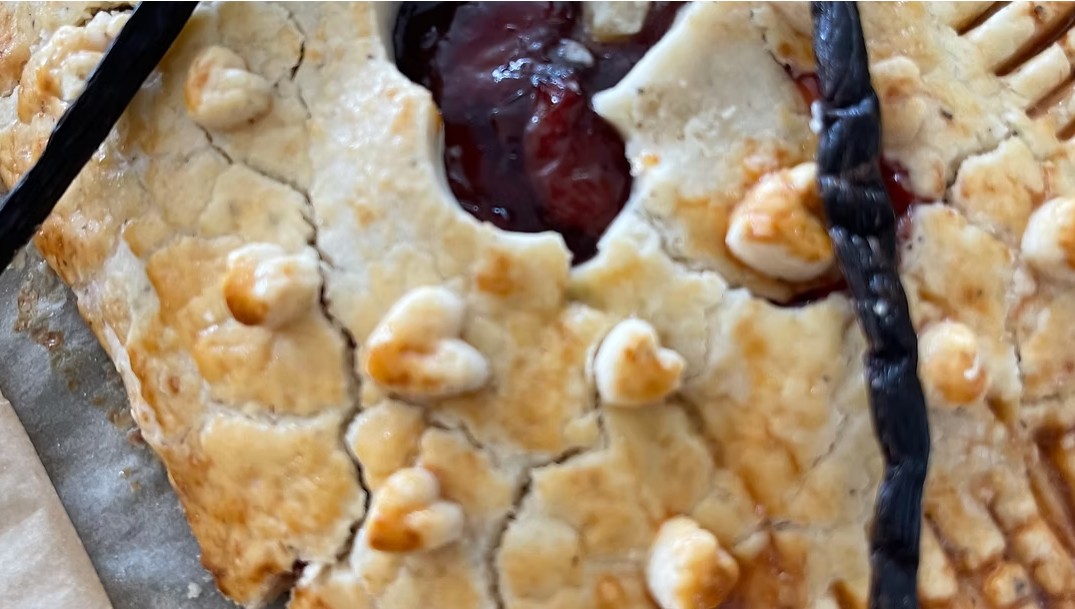
These Easy Gluten-Free Homemade Cherry Vanilla Pop-Tarts feature tender, flaky pastry filled with a thick homemade cherry filling and finished with a smooth vanilla glaze. Sweet cherries, fresh lemon juice, and pure vanilla extract create a vibrant fruit filling that tastes like a delicious combination of cherry pie and homemade preserves.
Choose one of the two gluten-free crust options before beginning. The custom gluten-free flour blend combines tapioca flour, cornstarch, brown rice flour, and oat flour to create a delicately crisp pastry. The second option uses gluten-free all-purpose flour for added convenience. Use only the ingredients and egg wash listed for your selected crust.
These homemade Pop-Tarts are perfect for a special breakfast, weekend brunch, afternoon snack, or fruit-filled dessert. Prepare the classic cherry vanilla version or substitute one of the included brown sugar cinnamon, wild berry, strawberry, or hot fudge sundae variations.
Ingredients
Choose One Crust Option
Option 1: Custom Gluten-Free Flour Blend Crust
3/4 cup plus 2 tablespoons tapioca flour, plus extra for dusting
3/4 cup cornstarch
1/4 cup plus 2 tablespoons superfine brown rice flour
1/4 cup oat flour
2 teaspoons granulated sugar
1/4 teaspoon sea salt
1 1/2 teaspoons xanthan gum
2 sticks cold salted butter, diced
3 large eggs
Option 2: Gluten-Free All-Purpose Flour Crust
2 1/2 cups gluten-free all-purpose flour
3 tablespoons granulated sugar
1/2 teaspoon salt
2 sticks cold butter, diced
1 large egg yolk, beaten
1 teaspoon pure vanilla extract
1/4 teaspoon vanilla bean flecks
1/4 cup ice-cold water
For the Cherry Vanilla Filling
4 cups pitted cherries
1 cup granulated sugar
2 tablespoons lemon juice
1/4 cup cornstarch
1/8 teaspoon ground cinnamon, optional
1 teaspoon pure vanilla extract
2 to 4 tablespoons water, if needed
Choose the Egg Wash for Your Selected Crust
Option 1 Egg Wash
1 large egg
1 tablespoon water
Option 2 Egg Wash
1 large egg
2 tablespoons milk
For the Vanilla Glaze
1 1/2 cups powdered sugar
2 tablespoons milk
1 teaspoon pure vanilla extract
Pinch of salt
Sprinkles, optional
Brown Sugar Cinnamon Filling Variation
1/4 cup softened butter
1/2 cup packed dark brown sugar
4 teaspoons brown rice flour
1/2 teaspoon ground cinnamon
1/8 teaspoon salt
Wild Berry Filling Variation
1 cup frozen mixed berries
1/4 cup granulated sugar
1 tablespoon cornstarch
Strawberry Filling Variation
1 cup chopped strawberries
1/4 cup granulated sugar
1 tablespoon cornstarch
Hot Fudge Sundae Filling Variation
4 ounces cream cheese, softened
1/4 cup powdered sugar
1 teaspoon pure vanilla extract
2 tablespoons unsweetened cocoa powder, for a chocolate crust variation
Hot fudge topping, for serving
Directions
Step 1: Choose the Crust
Choose either Option 1, the custom gluten-free flour blend crust, or Option 2, the gluten-free all-purpose flour crust. Prepare only the dough and egg wash associated with your selected option.
Step 2: Prepare the Option 1 Dough
If using Option 1, place the tapioca flour, cornstarch, superfine brown rice flour, oat flour, granulated sugar, sea salt, and xanthan gum in a food processor. Pulse several times until thoroughly combined.
Add the diced cold salted butter and pulse until the mixture resembles coarse crumbs. Add the eggs one at a time, pulsing after each addition just until the dough begins to come together.
Transfer the dough to a lightly floured work surface and knead it gently until smooth. Divide the dough into two equal portions and shape each portion into a disk. Wrap the disks tightly and refrigerate them for at least 2 hours or up to 2 days.
Skip Step 3 and continue with Step 4.
Step 3: Prepare the Option 2 Dough
If using Option 2, combine the gluten-free all-purpose flour, granulated sugar, and salt in a food processor. Add the diced cold butter and pulse until the mixture resembles coarse cornmeal.
In a small bowl, whisk together the egg yolk, vanilla extract, vanilla bean flecks, and ice-cold water. Add the liquid mixture to the food processor and pulse just until a dough forms.
Gather the dough into a ball and wrap it tightly. Refrigerate it for at least 30 minutes or overnight.
Step 4: Prepare the Cherry Vanilla Filling
Place the pitted cherries, granulated sugar, lemon juice, cornstarch, optional cinnamon, and vanilla extract in a medium saucepan.
Cook over medium heat, stirring frequently, until the cherries begin releasing their juices. If the mixture is too dry to form a sauce, add 2 to 4 tablespoons of water as needed.
Bring the mixture to a gentle boil. Reduce the heat to medium-low and continue cooking for 8 to 10 minutes, stirring frequently, until the filling becomes thick, glossy, and jam-like.
Remove the saucepan from the heat and allow the filling to cool completely. Refrigerate the filling until thoroughly chilled for easier assembly.
Step 5: Prepare the Oven
Preheat the oven to 375°F. Line baking sheets with parchment paper.
Keep the dough refrigerated until you are ready to roll it. If you are working in a warm kitchen, roll one portion at a time while keeping the remaining dough cold.
Step 6: Roll and Cut the Dough
Lightly dust the work surface and rolling pin with gluten-free flour. Roll the chilled dough to approximately 1/8-inch thickness.
Cut the dough into 16 evenly sized rectangles. Place eight rectangles on the prepared baking sheets, leaving space between them. These will form the bottoms of the Pop-Tarts.
Step 7: Fill the Pop-Tarts
Spoon approximately 2 tablespoons of chilled cherry vanilla filling into the center of each bottom rectangle. Leave a clean border around the filling so the pastries can be sealed properly.
Avoid overfilling the Pop-Tarts because excess filling may escape during baking.
Step 8: Seal the Pop-Tarts
Place a second rectangle of dough over each filled pastry. Gently press around the filling to remove large air pockets.
Seal the edges firmly with the tines of a fork. If the dough becomes too warm or soft during assembly, refrigerate the Pop-Tarts for 10 to 15 minutes before adding the egg wash.
Step 9: Prepare the Correct Egg Wash
If you chose the Option 1 crust, whisk together 1 egg and 1 tablespoon of water.
If you chose the Option 2 crust, whisk together 1 egg and 2 tablespoons of milk.
Brush the corresponding egg wash lightly over the top of each pastry. Use a fork or toothpick to make several small vents in the top crust so steam can escape during baking.
Step 10: Bake the Pop-Tarts
Bake the Pop-Tarts for 20 to 25 minutes, or until the pastry is lightly golden around the edges.
Remove the baking sheets from the oven and let the pastries cool on the pans for 10 minutes.
Carefully transfer them to a wire rack and allow them to cool completely before glazing.
Step 11: Prepare the Vanilla Glaze
Place the powdered sugar, milk, vanilla extract, and salt in a small bowl. Whisk until the glaze is smooth and spreadable.
If the glaze is too thick, add a very small amount of milk. If it is too thin, add a little more powdered sugar.
Step 12: Glaze the Pop-Tarts
Spread the vanilla glaze over the completely cooled Pop-Tarts. Add sprinkles while the glaze is still wet, if desired.
Allow the glaze to set before serving the pastries.
Step 13: Make the Brown Sugar Cinnamon Variation
To replace the cherry filling, combine the softened butter, dark brown sugar, brown rice flour, cinnamon, and salt. Stir until smooth.
Divide the filling among the bottom pastry rectangles. Leave a clean border around the edges, then assemble, seal, vent, and bake the Pop-Tarts according to the main directions.
Step 14: Make the Wild Berry Variation
Place the frozen mixed berries in a saucepan and simmer until softened. In a small bowl, stir together the sugar and cornstarch.
Add the sugar mixture to the berries and continue cooking until the filling is thick and glossy. Cool the filling completely before assembling the Pop-Tarts.
Step 15: Make the Strawberry Variation
Cook the chopped strawberries in a saucepan until softened. Stir the sugar and cornstarch together, then add the mixture to the strawberries.
Continue cooking and stirring until the filling thickens. Allow it to cool completely before using it in the Pop-Tarts.
Step 16: Make the Hot Fudge Sundae Variation
Beat the softened cream cheese until smooth. Add the powdered sugar and vanilla extract, then continue beating until creamy.
For a chocolate pastry variation, add the cocoa powder to the dry ingredients for your selected crust. Fill the pastry rectangles with the cream cheese mixture, then assemble and bake as directed. Drizzle the finished Pop-Tarts with hot fudge topping before serving.
Notes
Choose only one crust option. Do not combine the ingredients from Option 1 and Option 2.
Use the egg wash that corresponds with your selected crust. The Option 1 egg wash contains egg and water. The Option 2 egg wash contains egg and milk.
Keeping the dough cold throughout preparation is essential for creating flaky gluten-free pastry. If the dough becomes sticky or difficult to handle, refrigerate it for 10 to 15 minutes before continuing.
The cherry filling must be completely cool before it is added to the pastry. Warm filling can soften the butter in the dough and make the Pop-Tarts difficult to assemble.
Do not overfill the pastries. Leaving a border around the filling helps create a secure seal and reduces the chance of leakage during baking.
Check all packaged ingredients for appropriate gluten-free labeling. This includes the gluten-free flour, oat flour, cornstarch, xanthan gum, vanilla extract, powdered sugar, sprinkles, cocoa powder, and hot fudge topping. When preparing the recipe for someone with celiac disease or gluten sensitivity, prevent cross-contact by using clean equipment, utensils, baking sheets, and work surfaces.
Store finished Pop-Tarts in an airtight container at room temperature for up to 2 days or refrigerate them for up to 5 days.
For longer storage, wrap the Pop-Tarts individually and freeze them for up to 3 months. Thaw them before reheating.
For the best texture, warm unglazed or lightly glazed Pop-Tarts in a toaster oven. Do not place heavily glazed Pop-Tarts in an upright toaster because the glaze may melt and drip inside the appliance.