Shamrock (Wood Sorrel): The Complete Growing and Care Guide for This Beautiful and Edible Garden Plant
Learn how to grow and care for shamrock wood sorrel, identify popular Oxalis species, manage spreading, and safely enjoy its edible leaves.
Shamrock, commonly associated with plants in the Oxalis genus, is loved for its delicate flowers and distinctive three-part leaves. Depending on the species, the foliage may be bright green, deep burgundy, purple, or patterned with contrasting markings. Its compact growth habit makes it a charming addition to woodland gardens, shaded borders, containers, and indoor plant collections.
Wood sorrel is more than an ornamental plant. Properly identified edible species have a pleasantly tart, lemon-like flavor that can add interest to salads and garnishes when used sparingly. The tanginess comes from oxalic acid, so wood sorrel should be treated as an occasional accent rather than a vegetable eaten in large portions.
The name shamrock can describe several different plants, including true clovers and multiple Oxalis species. Their hardiness, growth habits, and care requirements are not identical. Before planting or tasting a shamrock, identify its botanical name and learn about the particular species you are growing.
What Is Shamrock or Wood Sorrel?
Wood sorrels belong to the Oxalidaceae family and the large Oxalis genus. Species grow naturally in many parts of the world, ranging from cool woodlands to warm tropical environments. Some are cultivated as garden perennials, some are grown as tender bulbs or houseplants, and others appear as spreading lawn weeds.
The foliage commonly consists of three heart-shaped or triangular leaflets. This shape helps distinguish wood sorrel from true clover, whose leaflets are generally more rounded. Oxalis leaves may fold at night, during dull weather, or when the plant is stressed, then reopen when conditions improve.
Flowers usually have five petals and may be white, yellow, pink, lavender, or purple. Yellow wood sorrel, often identified as Oxalis stricta, has small yellow flowers and elongated seed capsules. American wood sorrel, Oxalis montana, generally prefers cool, moist woodland conditions and produces white or pale pink flowers with visible veining.
Shamrock Versus Clover
Shamrock is a cultural common name rather than one precise botanical classification. Traditional Irish shamrocks have been associated with true clovers in the Trifolium genus, while plants marketed as shamrocks for homes and gardens are often Oxalis.
Both groups may have three leaflets, but the leaflet shape and flowers provide useful clues. Oxalis frequently has heart-shaped or sharply triangular leaflets and open, five-petaled flowers. Clover usually has rounded or oval leaflets and dense flower heads composed of many tiny blossoms.
Correct identification matters because different plants have different growing requirements and levels of culinary suitability. A common name or clover-like appearance alone is not enough to confirm that a plant is edible.
Popular Types of Oxalis
Common wood sorrel, Oxalis acetosella, is a low-growing woodland species with green foliage and delicate white flowers. It performs best in cool, shaded settings with moist, humus-rich soil.
American wood sorrel, Oxalis montana, is native to parts of eastern North America. It spreads through rhizomes or stolons and can form attractive colonies beneath trees and around woodland shrubs.
Yellow wood sorrel, Oxalis stricta, produces yellow flowers and green, heart-shaped leaves. It can spread vigorously through seeds and underground growth, making it either a useful informal ground cover or a persistent garden weed.
Creeping wood sorrel, Oxalis corniculata, grows along the soil surface and roots as its stems spread. Its foliage may be green, reddish, or purple. Because of its vigorous habit, it is best grown where its movement can be monitored.
Purple shamrock, Oxalis triangularis, is admired for its dramatic, triangular purple foliage and pale flowers. It is commonly grown as a container or houseplant and may be moved outdoors during warm weather. It is not hardy in every climate.
Choosing the Right Growing Location
The best location depends on the species. Woodland wood sorrels generally favor partial to full shade, cool roots, and protection from harsh afternoon sun. Decorative purple shamrocks often appreciate bright, filtered light or gentle morning sun. Some yellow-flowering species tolerate considerably more sunlight.
Observe how quickly the soil dries before choosing a site. A position beneath deciduous trees can work well for woodland species because it provides spring light followed by increasing shade as the trees leaf out. Avoid planting delicate woodland Oxalis in exposed locations where hot sun and dry wind can scorch the foliage.
Since some species spread freely, choose the location carefully. Containers, defined woodland beds, and areas bordered by paths can make enthusiastic growth easier to manage.
Soil Requirements
Wood sorrel generally performs well in loose, well-drained soil containing plenty of organic matter. Woodland species appreciate soil that resembles the forest floor, with decayed leaves, fine organic material, and consistent moisture.
Heavy soil should be improved before planting because waterlogged conditions can damage bulbs, rhizomes, and roots. Compost or leaf mold can improve soil structure, but amendments should be mixed into the surrounding soil rather than concentrated in a small planting hole.
Many wood sorrels tolerate mildly acidic soil. The exact preference varies by species, so use the plant label or botanical name to confirm special requirements.
How to Plant Wood Sorrel
Plant container-grown wood sorrel at approximately the same depth it was growing in its nursery pot. Water it thoroughly after planting and keep the soil evenly moist while the roots become established.
Oxalis grown from bulbs, tubers, or rhizomes should be planted according to the directions supplied with that species. Planting depth varies, and some types have very small underground structures that should not be buried deeply.
Allow enough space for the plant’s mature growth habit. Creeping and rhizomatous species can fill an area faster than their initial size suggests. Container-grown shamrocks need drainage holes and a loose potting mixture that does not remain saturated.
Watering Shamrock Plants
Water when the upper layer of soil begins to feel dry, but do not allow the roots to sit in standing water. Plants growing beneath mature trees may need supplemental water because tree roots compete strongly for moisture.
Container-grown shamrocks dry more quickly than garden plants and should be checked regularly during warm weather. Yellow leaves, mushy stems, and persistently wet soil may indicate overwatering. Dry, collapsing foliage can result from insufficient moisture, excessive heat, or the beginning of a normal dormant period.
Reduce watering when a species enters dormancy. Continuing to saturate inactive bulbs or rhizomes can encourage rot.
Fertilizing Wood Sorrel
Wood sorrel planted in fertile garden soil generally needs little fertilizer. A light application of compost in spring may provide sufficient nutrition for woodland species.
Container plants can be fed with a diluted, balanced fertilizer during active growth. Avoid heavy feeding, which may encourage weak foliage and unnecessary spreading. Stop or reduce fertilizer when growth slows or dormancy begins.
Understanding Dormancy
Some ornamental Oxalis plants periodically lose their foliage and appear to die back. This does not necessarily mean the plant has failed. Dormancy allows the underground bulbs or rhizomes to rest before producing another flush of growth.
When the foliage naturally yellows and declines, remove the dead leaves and reduce watering. Keep the container in a cool location where the planting medium will not become completely waterlogged. Resume regular care when fresh shoots appear.
The timing and duration of dormancy vary by species and growing environment. Outdoor woodland species often follow a seasonal cycle, while indoor plants may rest in response to temperature, light, or moisture changes.
Pruning and Routine Care
Remove yellow, damaged, or spent foliage to keep the plant tidy. Trimming finished flowers can improve appearance, although plants grown for seed should be allowed to develop mature capsules.
If an Oxalis species spreads aggressively, remove unwanted plants before seedpods mature. Some wood sorrels eject ripe seeds several feet from the parent plant. Pulling isolated plants promptly and removing as much of the root, rhizome, or creeping stem as possible can reduce regrowth. Mulch may help suppress new seedlings, but it will not always stop established underground growth. University of Minnesota Extension
Growing Shamrock in Containers
Containers are especially useful for tender or vigorous species. Choose a pot with dependable drainage and fill it with a lightweight, well-drained growing mixture.
Place green woodland types in filtered light. Purple shamrock generally develops its best color in bright light but may need protection from intense afternoon sun. Turn indoor containers occasionally so the plant grows evenly.
Water thoroughly, allow excess water to drain, and empty any saucer beneath the pot. Bring tender plants indoors before cold weather arrives, preferably before they experience frost.
Propagating Wood Sorrel
Many perennial Oxalis plants can be propagated by division. Lift the plant during a suitable resting or mild-weather period, separate healthy bulbs, rhizomes, or rooted sections, and replant them promptly.
Some species can also be grown from seed. However, seeds from named ornamental varieties may not produce plants identical to the parent. Species with explosive seed capsules may reproduce readily without assistance, so remove developing capsules if self-seeding is unwanted.
Pests and Diseases
Healthy wood sorrel usually has few serious problems. Aphids, spider mites, whiteflies, or other sap-feeding insects may occasionally appear, especially on indoor plants. Inspect the undersides of leaves and isolate affected houseplants until the problem is controlled.
Overwatering and poor drainage are often more damaging than insects. Root and bulb rot may cause soft stems, yellow foliage, and collapse. Improving drainage and allowing the soil to dry slightly between waterings can help prevent these problems.
Leaf spots, rust, or powdery fungal growth can develop when plants are crowded or foliage remains wet for long periods. Provide reasonable spacing, water near the soil, and remove badly affected material.
Is Wood Sorrel Edible?
Several properly identified wood sorrel species have edible leaves, flowers, seeds, or underground parts. The leaves are best known for their bright, sour flavor. Small amounts may be used as a garnish or added to salads, cold drinks, soups, and other dishes.
Edibility does not mean unlimited consumption. Oxalis contains soluble oxalates, and eating substantial amounts may interfere with calcium or contribute to health concerns. People with kidney disease, kidney stones, gout, or another condition affected by oxalates should consult a qualified healthcare professional before consuming it.
Only taste a plant after its identity has been confirmed by a reliable expert or authoritative regional resource. Never harvest plants exposed to pesticides, herbicides, roadside pollution, pet waste, or contaminated soil. Do not assume that a decorative plant purchased as a shamrock was grown for culinary use.
Children and pets should not be allowed to eat the plant freely. North Carolina Extension classifies American wood sorrel as having low-severity poisonous characteristics while noting that small amounts have traditionally been eaten. North Carolina Extension Gardener Plant Toolbox
Harvesting Wood Sorrel
Harvest a few young, healthy leaves or flowers at a time from a positively identified edible species. Choose clean growth without insect damage, disease, or chemical exposure.
Rinse the harvested material gently and use it promptly. Its tart flavor is strongest when fresh. Leaving most of the foliage on the plant allows it to continue photosynthesizing and supports healthy regrowth.
Companion Planting and Garden Design
Woodland Oxalis pairs naturally with plants that appreciate similar light and moisture. Ferns, heuchera, woodland phlox, native violets, sedges, and other shade-tolerant plants can create a layered planting around it.
Place low-growing wood sorrel near the front of shaded borders, between stepping stones where foot traffic is minimal, or beneath open-branched shrubs. Purple shamrock provides striking contrast beside silver, chartreuse, or soft green foliage in containers.
Choose companions according to compatible growing conditions rather than expecting wood sorrel to repel pests or improve another plant’s growth. Consider mature size, moisture needs, light exposure, and spreading behavior before combining plants.
Controlling Unwanted Spread
Not every wood sorrel behaves like a restrained ornamental. Yellow and creeping species can colonize lawns, containers, greenhouse benches, and garden beds.
Remove unwanted plants before their seed capsules mature. Check around established patches for seedlings and pull them while they are small. When dealing with creeping species, follow the stems and remove rooted nodes. Avoid moving contaminated soil into other garden areas.
A vigorous species can also be enjoyed in a container, where its roots and seeds are easier to monitor.
A Small Plant With Lasting Garden Appeal
Shamrock or wood sorrel brings graceful foliage, delicate flowers, and woodland character to the garden. With correct species identification, it can serve as a ground cover, container accent, houseplant, pollinator resource, or occasional edible garnish.
Successful care begins with understanding which Oxalis you have. Match the plant to the appropriate light, soil, moisture, and climate, watch for unwanted spreading, and approach culinary use with moderation. With those considerations in place, wood sorrel can be a beautiful and intriguing addition to both ornamental and edible landscapes.
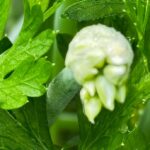
Colorful purple shamrock and green wood sorrel create a lively garden display with delicate lavender blooms.
Here, you will learn all about chive blossoms and parsley, including how companion planting helps both herbs thrive, the many benefits they bring to your garden, and the delicious ways to use them in everyday cooking. Whether you are creating a thriving kitchen garden or looking for fresh inspiration in the kitchen, chive blossoms and parsley are a versatile pairing that offers beauty, flavor, and abundant harvests throughout the growing season. There is something incredibly satisfying about walking into your garden, brushing your hand across a patch of fragrant herbs, and gathering a handful of fresh parsley alongside a few vibrant purple chive blossoms. Moments like these remind us that a garden is more than a place to grow food. It is a space where beauty, nature, and fresh ingredients come together to inspire every meal. Among the many herbs you can grow, chives and parsley are one of the easiest and most rewarding companion planting combinations. They thrive under similar growing conditions, complement one another beautifully, and provide fresh harvests from spring through fall. Their partnership benefits not only your kitchen but your entire garden by attracting pollinators, supporting beneficial insects, and helping create a healthier growing environment. Whether you are planting a large kitchen garden, filling raised beds, or growing herbs in containers on your patio, chive blossoms and parsley are a pairing that delivers season after season. Their fresh flavors elevate everyday meals, while their graceful appearance adds charm and color to any outdoor space. A Perfect Partnership in the Herb Garden Companion planting is the practice of growing plants together that naturally benefit one another. Some companion plants improve soil conditions, others attract pollinators, while some help reduce pest problems or make better use of available growing space. Chives and parsley check nearly every one of those boxes. Parsley grows in lush, leafy mounds that remain attractive throughout much of the growing season. Chives produce slender green leaves that eventually give way to beautiful globe-shaped blossoms in shades of lavender and purple. Together they create layers of texture and color that look just as lovely in ornamental gardens as they do in vegetable beds. Their similar care requirements also make them easy companions. Both appreciate fertile soil, regular watering, and plenty of sunshine, allowing gardeners to care for both herbs using the same routine. For anyone just beginning an herb garden, this combination is an excellent place to start. Why Companion Planting Matters Healthy gardens are built on diversity. Instead of growing a single crop in isolation, companion planting encourages a balanced ecosystem where plants, pollinators, and beneficial insects work together. Every herb contributes something unique to the garden. Parsley provides dense foliage that helps shade the soil and reduce moisture loss. Chives contribute their distinctive onion aroma while producing nectar-rich flowers that become gathering places for pollinating insects. Together they create an environment where plants thrive naturally. Rather than viewing herbs simply as ingredients for cooking, companion planting reminds us that every plant plays an important role in supporting the health of the entire garden. Chives Help Naturally Discourage Garden Pests One reason gardeners have planted chives throughout vegetable gardens for generations is their reputation for helping reduce certain insect problems. As members of the onion family, chives contain sulfur compounds responsible for their mild onion fragrance. While people enjoy this familiar aroma, many insects do not. Growing chives near parsley may help discourage aphids, Japanese beetles, spider mites, and several other common garden pests. Although companion planting is not a replacement for good garden management, it can become an important part of an organic gardening strategy by encouraging healthier plants and reducing stress caused by insect activity. Many gardeners also plant chives near tomatoes, carrots, strawberries, roses, peppers, and apple trees for the very same reason. Chive Blossoms Bring Your Garden to Life If there is one reason never to cut every chive flower before it opens, it is the incredible number of beneficial insects they attract. As spring transitions into early summer, chives produce clusters of soft purple blossoms that quickly become one of the busiest places in the garden. Honeybees eagerly gather nectar from the flowers while native bees move from bloom to bloom collecting pollen. Butterflies drift through the blossoms, adding movement and beauty to the landscape, while hoverflies quietly perform double duty by feeding on nectar as adults and helping control aphids during their larval stage. Watching these visitors move through your herb garden is one of the simple pleasures of gardening. Their presence also benefits nearby vegetables, fruit trees, berry bushes, and flowering plants that depend on pollination for healthy harvests. Growing Chives and Parsley Together One of the reasons these herbs are so popular is because they are wonderfully uncomplicated. Choose a location that receives at least six hours of sunlight each day. While chives love full sun, parsley appreciates a little afternoon shade during periods of intense summer heat, especially in warmer climates. Plant both herbs in fertile, well-drained soil enriched with compost. Rich organic matter encourages vigorous growth while helping retain moisture between waterings. Water regularly, keeping the soil evenly moist without allowing it to become soggy. Applying a layer of mulch around the plants helps regulate soil temperature, conserve moisture, and reduce weed growth. With only a little routine care, both herbs will reward you with months of fresh harvests. Beautiful in Every Garden Style One of the joys of growing herbs is their versatility. Chives and parsley look equally at home in formal herb gardens, rustic cottage gardens, raised beds, decorative borders, and patio containers. The upright foliage and cheerful blossoms of chives create natural height, while parsley fills the surrounding space with rich green leaves. The contrast between soft purple flowers and vibrant green foliage creates a timeless combination that looks attractive from spring until frost. Many gardeners intentionally plant these herbs near walkways or seating areas where their fragrance and colorful blooms can be enjoyed every day. Other Plants That Thrive
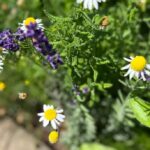
Lavender and chamomile companion planting is one of the easiest and most rewarding ways to create a beautiful, fragrant, and productive herb garden. These two beloved herbs have been cultivated for centuries for their ornamental beauty, calming aromas, culinary uses, and medicinal properties. Together, they form a stunning combination that not only enhances your landscape but also supports pollinators, attracts beneficial insects, and contributes to a healthier garden ecosystem. Whether you are planning a cottage garden, designing a pollinator-friendly landscape, or creating an edible herb garden, lavender and chamomile companion planting offers countless benefits. Their complementary growth habits, similar cultural requirements, and long-lasting blooms make them an ideal pairing for gardeners of all skill levels. What Is Lavender and Chamomile Companion Planting? Lavender and chamomile companion planting is the practice of growing these two herbs together because they thrive under similar growing conditions and provide mutual benefits within the garden. While companion planting cannot eliminate every gardening challenge, it encourages biodiversity, supports beneficial insects, and creates a balanced growing environment. Lavender adds striking vertical spikes of fragrant purple flowers, while chamomile produces delicate white blossoms with cheerful yellow centers. Together they create a classic cottage garden display that is both elegant and functional. Their flowers bloom over an extended period, providing a continuous source of nectar for pollinators while filling the garden with color and fragrance. Benefits of Lavender and Chamomile Companion Planting One of the greatest advantages of lavender and chamomile companion planting is the abundance of pollinators it attracts. Honeybees, native bees, butterflies, hoverflies, and other beneficial insects are drawn to their nectar-rich flowers throughout the growing season. As pollinators visit these herbs, they also improve the pollination of nearby vegetables, fruit trees, berry bushes, and flowering ornamentals. A garden filled with pollinators is often healthier, more productive, and more resilient. Lavender and chamomile also attract beneficial insects such as ladybugs, lacewings, parasitic wasps, and hoverflies. These natural predators help control aphids, whiteflies, spider mites, and other common garden pests, reducing the need for chemical pesticides. Lavender’s aromatic foliage contains naturally fragrant essential oils that may help discourage mosquitoes, moths, fleas, and certain flying insects. While no single plant completely prevents pests, incorporating aromatic herbs into your landscape contributes to a more balanced garden ecosystem. Another advantage of lavender and chamomile companion planting is its simplicity. Since both herbs enjoy similar growing conditions, caring for them together is easy and efficient. Growing Conditions for Lavender and Chamomile Successful lavender and chamomile companion planting begins with choosing the right location. Both herbs grow best in full sun and require at least six to eight hours of direct sunlight each day. Plenty of sunshine encourages compact growth, abundant blooms, and stronger fragrance. Well-drained soil is essential for healthy plants. Lavender thrives in sandy or gravelly soil that drains quickly, while chamomile prefers fertile, loose soil with good drainage. Incorporating compost before planting improves soil structure without sacrificing drainage. Lavender becomes highly drought tolerant once established and prefers the soil to dry slightly between waterings. Chamomile appreciates moderate moisture during dry periods but should never remain in waterlogged soil. Providing adequate spacing between plants encourages good airflow, reduces humidity around the foliage, and minimizes the risk of fungal diseases. The Best Companion Plants for Lavender and Chamomile Although lavender and chamomile thrive together, they also pair beautifully with many other herbs, vegetables, flowers, and fruit-producing plants. Excellent companion plants include rosemary, thyme, sage, oregano, basil, calendula, borage, yarrow, echinacea, roses, strawberries, blueberries, tomatoes, peppers, eggplant, broccoli, cabbage, cauliflower, and many drought-tolerant flowering perennials. These companions benefit from increased pollinator activity while creating a diverse and visually appealing garden. Plants to Avoid To ensure successful lavender and chamomile companion planting, avoid placing lavender near plants that require constantly moist soil. Mint, celery, hostas, watercress, and other moisture-loving plants have watering requirements that differ significantly from lavender. Excess moisture around lavender roots can lead to root rot and poor plant performance. Grouping plants with similar moisture needs simplifies watering and promotes healthier growth throughout the garden. Culinary Uses of Lavender and Chamomile Lavender and chamomile companion planting provides more than ornamental beauty. Both herbs are edible and offer a variety of culinary possibilities. Lavender flowers add delicate floral notes to teas, shortbread cookies, cakes, muffins, scones, ice cream, custards, infused honey, lemonade, simple syrups, sugar blends, and Herbes de Provence seasoning. Lavender also complements roasted vegetables, poultry, lamb, seafood, and grilled dishes. Chamomile flowers are widely enjoyed in herbal teas, infused honey, syrups, jellies, cakes, cookies, fruit salads, custards, smoothies, and homemade desserts. Their mild apple-like flavor makes them a versatile ingredient for both sweet and savory recipes. Growing both herbs together provides a convenient harvest of fresh flowers throughout the growing season. Harvesting Lavender and Chamomile Harvest lavender stems when approximately one-third to one-half of the flowers have opened. At this stage, the blossoms contain the highest concentration of aromatic oils and dry exceptionally well. Chamomile flowers should be harvested once they are fully open. Frequent harvesting encourages additional blooms, providing a continuous supply throughout the season. Dry the flowers in a cool, shaded location with good air circulation before storing them in airtight containers away from direct sunlight. Growing Lavender and Chamomile in Containers Lavender and chamomile companion planting is not limited to garden beds. These herbs also thrive in containers, making them excellent choices for patios, balconies, porches, and small-space gardens. Select containers with drainage holes and fill them with a high-quality, well-draining potting mix. Place containers where they receive plenty of sunlight, and water carefully, allowing the soil to dry slightly between waterings. Container-grown herbs bring fragrance, beauty, and fresh culinary ingredients within easy reach. Why Lavender and Chamomile Companion Planting Belongs in Every Garden Lavender and chamomile companion planting combines ornamental beauty with practical gardening benefits. Their shared growing requirements make them easy to cultivate together, while their abundant flowers support pollinators, attract beneficial insects, and enhance biodiversity throughout the landscape. Whether you are growing herbs for
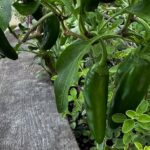
Discover how to grow jalapeño peppers and oregano together in your garden. Learn planting tips, care requirements, harvesting methods, culinary uses, and the benefits of this delicious herb and pepper combination. Jalapeño and Oregano: A Flavorful Garden Combination If you enjoy growing ingredients that go straight from the garden to the kitchen, few combinations are as rewarding as jalapeño peppers and oregano. These two plants complement each other beautifully in both the garden and countless recipes. The mild heat of fresh jalapeños pairs perfectly with the earthy, slightly peppery flavor of oregano, making them staples in Mexican, Tex-Mex, Mediterranean, and Southwestern cooking. Not only do they create bold flavors together, but they also have similar growing requirements, making them excellent companion plants for home gardeners. Whether you have a large backyard, raised beds, or a few containers on a sunny patio, jalapeños and oregano can thrive with proper care. Why Grow Jalapeños and Oregano Together? Jalapeños and oregano share many of the same growing preferences. Both enjoy warm temperatures, full sun, and well-drained soil. Planting them together creates an attractive and productive garden space while giving you fresh ingredients throughout the growing season. Oregano forms a low-growing mat that can help shade the soil around pepper plants, reducing moisture loss during hot weather. Meanwhile, the upright jalapeño plants provide visual interest and make harvesting simple. Growing these two together also means you can step into the garden and gather everything needed for homemade salsa, grilled vegetables, marinades, pizza toppings, soups, and countless other dishes. About Jalapeño Peppers Jalapeños are one of the world’s most popular chili peppers. They typically measure 2 to 4 inches long and mature from green to bright red if left on the plant. Green jalapeños offer a fresh, crisp flavor with moderate heat, while fully ripened red peppers become slightly sweeter with a deeper flavor. Most jalapeños measure between 2,500 and 8,000 Scoville Heat Units, making them flavorful without being overwhelmingly spicy for many people. Healthy jalapeño plants can produce dozens of peppers throughout the growing season when harvested regularly. About Oregano Oregano is a hardy perennial herb in many climates and is prized for its aromatic leaves. It produces small oval leaves packed with essential oils that become even more flavorful when dried. Its earthy, warm, and slightly peppery taste makes oregano an essential ingredient in Italian, Greek, Mediterranean, and Mexican cuisine. Once established, oregano requires very little maintenance and often returns year after year. Growing Requirements Both plants thrive in similar conditions, making them easy to grow together. Choose a location that receives at least 6 to 8 hours of direct sunlight every day. Plant them in loose, well-drained soil rich in organic matter. While oregano tolerates poorer soils better than peppers, both benefit from compost worked into the planting area before planting. Maintain consistent watering during the growing season, allowing the soil to dry slightly between waterings. Jalapeños require more moisture than oregano, so avoid overwatering the herb while ensuring the peppers receive enough water during flowering and fruit production. Companion Planting Benefits Growing oregano near jalapeños offers several advantages. The fragrant oils released by oregano may help confuse certain insect pests while attracting beneficial pollinators when allowed to flower. Both plants make excellent companions for tomatoes, basil, onions, garlic, carrots, and marigolds, creating a productive and diverse vegetable garden. Their compact growth habits also make them ideal choices for container gardening. Harvesting Jalapeños Harvest jalapeños once they reach full size and have a glossy appearance. Most gardeners pick them while green, but leaving them on the plant allows them to ripen to red for a sweeter flavor. Use clean pruning shears or scissors to remove peppers rather than pulling them from the plant, which can damage stems. Frequent harvesting encourages continued pepper production throughout the season. Harvesting Oregano Harvest oregano by snipping stems just above a pair of leaves. Regular harvesting encourages bushier growth and prevents the plant from becoming woody. For the strongest flavor, harvest oregano just before flowering when the essential oils are most concentrated. Fresh oregano can be used immediately or dried for long-term storage. Culinary Uses Fresh jalapeños and oregano create an incredible flavor combination in many recipes. They work beautifully in homemade salsa, tacos, burritos, enchiladas, fajitas, chili, soups, grilled chicken, roasted vegetables, pizza, pasta sauces, marinades, salad dressings, and stuffed peppers. Blend fresh oregano with jalapeños, garlic, olive oil, lime juice, and cilantro to create a vibrant herb sauce for grilled meats or vegetables. Both ingredients also enhance homemade tomato sauces and garden-fresh pasta dishes. Health Benefits Jalapeños contain vitamins A and C, antioxidants, and capsaicin, the natural compound responsible for their heat. Oregano is rich in antioxidants and contains beneficial plant compounds that have been valued for centuries in traditional herbal practices. Together, these fresh garden ingredients provide flavor without adding excess calories, making them excellent additions to healthy meals. Growing in Containers Jalapeños and oregano perform exceptionally well in containers. Choose pots with adequate drainage holes and use a high-quality potting mix designed for vegetables and herbs. Place containers where they receive full sunlight and water consistently during hot weather. Container-grown plants are perfect for patios, balconies, decks, and small-space gardens. Common Problems Jalapeños may occasionally encounter aphids, spider mites, blossom end rot, or fungal diseases if overwatered. Oregano is generally resistant to pests but can develop root rot in consistently wet soil. Proper spacing, good air circulation, and careful watering help prevent most problems before they begin. Storage Tips Fresh jalapeños can be refrigerated for one to two weeks. They can also be frozen, pickled, or dehydrated for long-term storage. Fresh oregano keeps well in the refrigerator for several days when wrapped in a slightly damp paper towel. It can also be air-dried or frozen to preserve its flavor for future recipes. Frequently Asked Questions Can jalapeños and oregano grow in the same container? Yes. Use a container that is at least 14 to 18 inches wide with excellent drainage so both
Originally published
March 2026
Updated
August 2026
Reviewed by
Culibloom