Make a festive gluten-free rainbow swirl surprise cake with colorful vanilla layers, rainbow buttercream, and a sprinkle-filled center.
Bright and colorful this Festive Gluten-Free Rainbow Swirl Surprise Cake Recipe features tender vanilla cake, rainbow-swirled buttercream, and a sprinkle-filled center that spills out when the cake is sliced. It is a joyful dessert for birthdays, pride celebrations, holidays, and other special occasions.
Choose from four gluten-free vanilla cake options, including a from-scratch flour blend, a gluten-free all-purpose flour version, a measure-for-measure flour version, or a convenient boxed cake mix. Choose only one cake option and follow the corresponding batter directions.
Gel food coloring creates vivid rainbow shades without thinning the cake batter or frosting. Spooning the colors into the pans and gently swirling them produces a unique pattern inside every layer, while six colors of vanilla buttercream give the outside an equally cheerful finish.
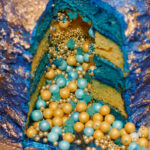
The hidden center is filled with gluten-free rainbow sprinkles or small candies. When the finished cake is sliced, the colorful filling tumbles out for a fun surprise.
Ingredients
Choose one cake option. Do not combine the cake options.
Option 1: Classic Gluten-Free Vanilla Layer Cake From Scratch
1/2 cup plus 1 tablespoon sweet rice flour
1/2 cup white rice flour
1/2 cup plus 1 tablespoon tapioca flour
1/4 cup brown rice flour
3/4 teaspoon xanthan gum
1 teaspoon baking powder
1/2 teaspoon baking soda
1/2 teaspoon kosher salt
1/2 cup unsalted butter, softened, or 1/2 cup neutral oil
1 cup granulated sugar
4 large eggs, at room temperature
2 teaspoons pure vanilla extract
1/2 cup whole milk or buttermilk, at room temperature
8 ounces sour cream, at room temperature
Option 2: Gluten-Free Vanilla Cake With All-Purpose Flour
2 1/4 cups gluten-free all-purpose flour
1 teaspoon xanthan gum or guar gum, if the flour blend does not contain it
1 3/4 cups granulated sugar
1 cup unsalted butter, softened
1 teaspoon kosher salt
2 1/2 teaspoons baking powder
1 tablespoon pure vanilla extract
4 large eggs, at room temperature
1 cup whole milk, at room temperature
Option 3: Measure-for-Measure Gluten-Free Vanilla Cake
1 3/4 cups measure-for-measure gluten-free flour
1/2 cup unsalted butter, softened
1 cup granulated sugar
3 large eggs, at room temperature
2 teaspoons pure vanilla extract
1/2 cup whole milk, at room temperature
Option 4: Gluten-Free Vanilla Cake Mix Version
1 package gluten-free vanilla cake mix, 15 to 16 ounces
Eggs, oil, water, or milk called for on the package
1 teaspoon pure vanilla extract
1/4 cup sour cream or plain Greek yogurt, optional
2 tablespoons melted butter, optional
For the Rainbow Cake Swirls
Red gel food coloring
Orange gel food coloring
Yellow gel food coloring
Green gel food coloring
Blue gel food coloring
Purple gel food coloring
For the Rainbow Vanilla Buttercream
1 1/2 cups unsalted butter, softened
5 cups confectioners’ sugar, sifted
2 teaspoons pure vanilla extract
1/4 teaspoon kosher salt
3 to 5 tablespoons whole milk or heavy cream
Red gel food coloring
Orange gel food coloring
Yellow gel food coloring
Green gel food coloring
Blue gel food coloring
Purple gel food coloring
1/2 cup rainbow sprinkles, for decorating
For the Surprise Center
3/4 to 1 cup gluten-free rainbow sprinkles or small gluten-free candies
Directions
Step 1: Prepare the Oven and Cake Pans
Preheat the oven to 350°F. Grease three 8-inch round cake pans and line the bottoms with parchment paper. Lightly grease the parchment paper.
Step 2: Make the Option 1 Cake Batter
If using Option 1, whisk together the sweet rice flour, white rice flour, tapioca flour, brown rice flour, xanthan gum, baking powder, baking soda, and salt.
In a separate large bowl, beat the softened butter and sugar for 3 to 4 minutes, or until pale and fluffy. If using oil instead of butter, whisk the oil thoroughly with the sugar.
Add the eggs one at a time, beating well after each addition. Mix in the vanilla extract. Add the flour mixture in three portions, alternating with the milk or buttermilk. Begin and finish with the flour mixture. Fold in the sour cream just until the batter is smooth.
Skip Steps 3 through 5 and continue with Step 6.
Step 3: Make the Option 2 Cake Batter
If using Option 2, whisk together the gluten-free all-purpose flour, xanthan gum or guar gum if needed, salt, and baking powder.
In a separate large bowl, beat the butter and sugar for 3 to 4 minutes, or until light and fluffy. Mix in the vanilla extract. Add the eggs one at a time, beating well after each addition.
Add the flour mixture in three portions, alternating with the milk. Begin and finish with the flour mixture. Mix only until evenly combined.
Skip Steps 4 and 5 and continue with Step 6.
Step 4: Make the Option 3 Cake Batter
If using Option 3, place the measure-for-measure gluten-free flour in a medium bowl and set it aside.
In a large bowl, beat the butter and sugar for 3 to 4 minutes, or until pale and fluffy. Add the eggs one at a time, beating well after each addition.
Mix in the vanilla extract.
Add the flour in three portions, alternating with the milk. Begin and finish with the flour. Mix only until the batter is smooth.
Skip Step 5 and continue with Step 6.
Step 5: Make the Option 4 Cake Batter
If using Option 4, prepare the gluten-free vanilla cake mix with the eggs, oil, water, or milk listed on the package.
Mix in the vanilla extract. For a richer, softer cake, add the optional sour cream or Greek yogurt and melted butter. Mix only until evenly combined.
Step 6: Create the Rainbow Batter Colors
Divide the prepared cake batter evenly among six small bowls. Tint one portion red, one orange, one yellow, one green, one blue, and one purple.
Add the gel food coloring a little at a time until each color reaches the desired intensity. Avoid liquid food coloring because it may thin the batter.
Step 7: Swirl the Rainbow Cake Batter
Spoon alternating colors of batter into each prepared cake pan. Continue adding small spoonfuls until the batter is divided evenly among the three pans.
Gently drag a clean skewer through the batter once or twice to create a rainbow swirl. Do not overmix, or the individual colors may blend together and become muddy.
Step 8: Bake the Cake Layers
Bake the cake layers for 25 to 32 minutes, or until the centers spring back when lightly touched and a toothpick inserted into the center comes out clean or with a few moist crumbs.
Begin checking Option 3 and cake mix layers after 22 minutes because thinner layers may bake more quickly.
Step 9: Cool the Cake Layers
Allow the cakes to cool in their pans for 10 minutes. Carefully turn them out onto wire racks and remove the parchment paper.
Let the cake layers cool completely before cutting or assembling them.
Warm cake layers may crumble or melt the buttercream.
Step 10: Prepare the Vanilla Buttercream
Beat the softened butter for 3 minutes, or until smooth and creamy.
Gradually add the confectioners’ sugar, mixing on low speed after each addition.
Add the vanilla extract, salt, and 3 tablespoons of milk or heavy cream.
Beat for 3 to 5 minutes, or until the buttercream is light and fluffy.
If necessary, add more milk or cream, 1 tablespoon at a time, until the buttercream reaches a smooth spreading and piping consistency.
Reserve approximately 2 cups of white buttercream for filling and crumb-coating the cake.
Step 11: Color the Rainbow Buttercream
Divide the remaining buttercream evenly among six small bowls. Tint the portions red, orange, yellow, green, blue, and purple with gel food coloring.
Add the coloring gradually and mix thoroughly before adding more.
Step 12: Create the Surprise Center
Use a 3- to 4-inch round cutter to remove the center from two of the cooled cake layers. Leave the third cake layer whole because it will become the top of the cake.
Save the removed cake pieces for snacking or another dessert.
Step 13: Assemble the First Two Layers
Place one cut cake layer on a serving plate or cake board. Spread a layer of the reserved white buttercream over the top, keeping the hollow center open.
Place the second cut cake layer on top. Spread it with another layer of white buttercream, again keeping the center open.
Step 14: Add the Rainbow Surprise
Fill the hollow center with 3/4 to 1 cup of gluten-free rainbow sprinkles or small gluten-free candies.
Fill the opening to the top without pressing or packing the candy down.
Keeping the filling loose will help it tumble out when the cake is sliced.
Step 15: Add the Top Layer and Crumb Coat
Carefully place the whole cake layer on top. Apply a thin layer of the reserved white buttercream over the top and sides of the cake to trap loose crumbs.
Refrigerate the crumb-coated cake for 20 minutes, or until the buttercream is firm.
Step 16: Prepare the Rainbow Piping Bag
Lay six separate strips of plastic wrap on the counter. Spoon one buttercream color in a line down the center of each strip. Roll each strip into a narrow log and snip off one end.
Place all six wrapped buttercream logs together inside a large piping bag fitted with a large open-star tip. Gently squeeze the piping bag until all six colors begin flowing through the tip.
Step 17: Decorate With Rainbow Buttercream
Hold the piping bag upright and apply steady, even pressure to pipe rainbow rosettes and swirls over the top and sides of the chilled cake.
Make sure all six buttercream colors continue flowing through the piping tip. Finish the cake with rainbow sprinkles.
Step 18: Chill and Serve
If the buttercream feels soft, refrigerate the decorated cake for another 20 minutes.
Let the cake stand at room temperature for 20 to 30 minutes before slicing. Cut carefully to reveal the rainbow cake swirls, rainbow buttercream, and colorful sprinkle surprise.
Notes
Choose only one of the four cake formulas. Do not combine ingredients from different cake options.
Check the labels on the flour blend, cake mix, food coloring, sprinkles, candies, and other packaged ingredients to confirm they are gluten-free.
When preparing the cake for someone with celiac disease or severe gluten sensitivity, use appropriately labeled products and prevent cross-contact with gluten-containing ingredients, utensils, and work surfaces.
If a gluten-free flour blend already contains xanthan gum or guar gum, do not add the additional gum listed in Option 2.
Gel food coloring creates brighter colors without significantly changing the consistency of the cake batter or buttercream.
Add food coloring gradually. Gel colors can become much deeper as they are mixed into the batter or frosting.
Measure gluten-free flour by spooning it into the measuring cup and leveling the top. Scooping flour directly from the bag may pack too much into the cup and produce a dry cake.
Do not overmix the colored cake batter. Excessive swirling can blend the individual rainbow shades and create a muddy appearance.
Let the cake layers cool completely before cutting the surprise centers or adding buttercream. Warm layers are more likely to crumble.
For cleaner buttercream swirls, chill the filled piping bag for about 10 minutes if the frosting becomes too soft while decorating.
Do not overfill the piping bag. If the full bag is difficult to handle, work with half of the colored buttercream at a time.
The cake layers can be baked one day in advance. Once completely cool, wrap them tightly and store them at room temperature overnight.
Store the assembled cake in a covered container in the refrigerator for up to four days. Allow refrigerated slices to soften at room temperature before serving.