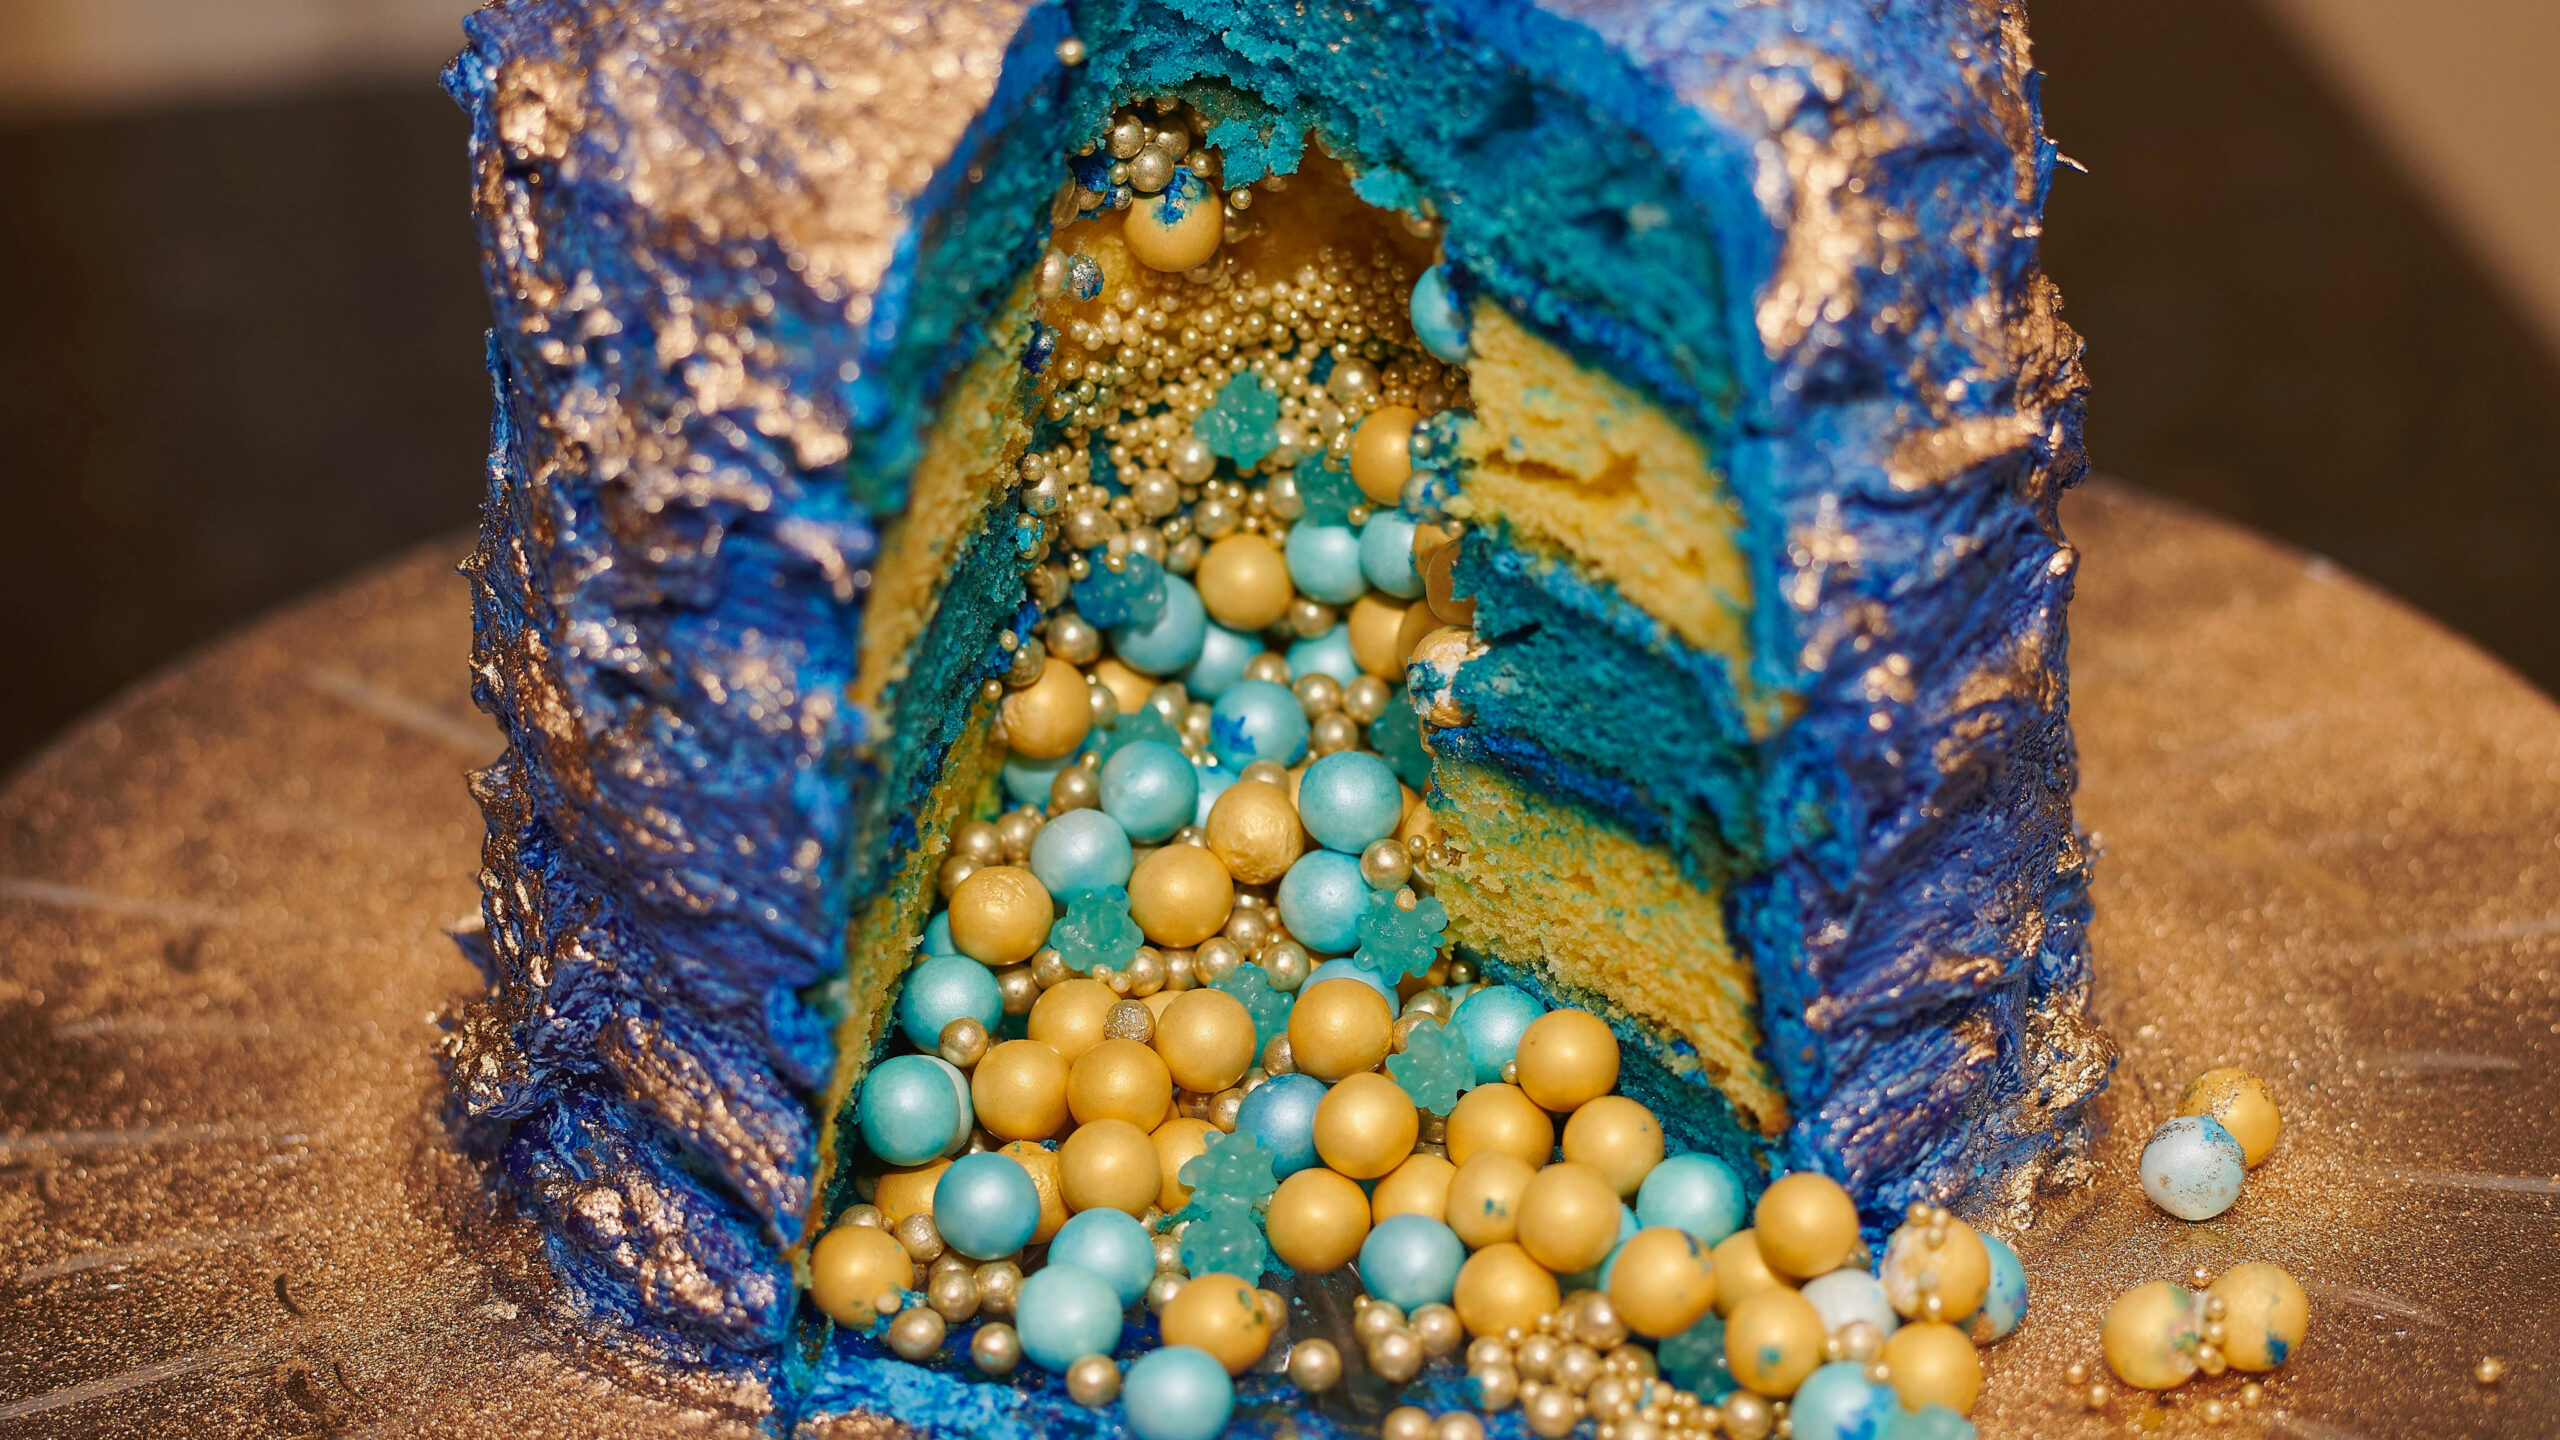
Make an easy gluten-free gold foil surprise cake with moist vanilla layers, royal blue buttercream, edible gold accents, and a hidden candy center.
Elegant, colorful, and filled with a playful surprise, this Easy Gluten-Free Gold Foil Surprise Cake Recipe makes an unforgettable centerpiece for birthdays, graduations, anniversaries, showers, and other special occasions. The cake features tender vanilla layers covered with vibrant royal blue buttercream and shimmering accents of edible gold leaf.
Once the cake is sliced, colorful gluten-free candies, sprinkles, chocolate pearls, or mini marshmallows tumble from the hidden center. This unexpected reveal adds a fun, celebratory touch to an otherwise sophisticated blue and gold cake.
Three cake options are included, allowing you to choose a homemade flour combination, a gluten-free all-purpose flour blend, or a measure-for-measure flour. Choose one complete cake formula and do not combine ingredients from the different options. The finished vanilla cake is paired with a smooth homemade buttercream that provides the perfect canvas for textured frosting, contrasting shades of blue, and scattered gold details.
For the most reliable gluten-free results, check the labels on the flour, decorations, candy, sprinkles, food coloring, and every other packaged ingredient. Products and manufacturing practices can vary, so select items with appropriate gluten-free labeling and prevent cross-contact throughout preparation and decorating.
Ingredients
Option 1: Classic Gluten-Free Vanilla Layer Cake
1/2 cup plus 1 tablespoon sweet rice flour
1/2 cup white rice flour
1/2 cup plus 1 tablespoon tapioca flour
1/4 cup brown rice flour
3/4 teaspoon xanthan gum
1 teaspoon baking powder
1/2 teaspoon baking soda
1/2 teaspoon kosher salt
1/2 cup unsalted butter, softened
1 cup granulated sugar
4 large eggs, at room temperature
2 teaspoons pure vanilla extract
1/2 cup whole milk or buttermilk, at room temperature
8 ounces sour cream, at room temperature
Option 2: Gluten-Free Vanilla Cake Using All-Purpose Flour
2 1/4 cups gluten-free all-purpose flour
1 teaspoon xanthan gum or guar gum, if the flour blend does not contain it
1 3/4 cups granulated sugar
1 cup unsalted butter, softened
1 teaspoon kosher salt
2 1/2 teaspoons baking powder
1 tablespoon pure vanilla extract
4 large eggs, at room temperature
1 cup whole milk, at room temperature
Option 3: Measure-for-Measure Gluten-Free Vanilla Cake
1 3/4 cups measure-for-measure gluten-free flour
1/2 cup unsalted butter, softened
1 cup granulated sugar
3 large eggs, at room temperature
1/2 cup whole milk, at room temperature
2 teaspoons pure vanilla extract
Homemade Vanilla Buttercream
3 sticks unsalted butter, at room temperature
4 1/2 cups powdered sugar, sifted
1 tablespoon pure vanilla extract
3 to 5 tablespoons heavy cream
1/2 teaspoon kosher salt
Royal blue gel food coloring
Sky blue gel food coloring, optional
Surprise Filling
1 1/2 to 2 cups gluten-free candies, chocolate gems, mini marshmallows, sprinkles, or chocolate pearls
Decorations
Edible gold foil or edible gold leaf
Gold edible luster dust, optional
Gold sanding sugar for the cake board
Extra buttercream for the crumb coat
Directions
Step 1: Prepare the Cake Pans
Preheat the oven to 350°F. Grease three 6-inch or three 8-inch round cake pans and line the bottoms with parchment paper.
Choose one of the three cake formulas before beginning. Use only the ingredients and directions that correspond to your selected option.
Step 2: Combine the Dry Ingredients
For Option 1, whisk together the sweet rice flour, white rice flour, tapioca flour, brown rice flour, xanthan gum, baking powder, baking soda, and kosher salt until evenly combined.
For Option 2, whisk together the gluten-free all-purpose flour, baking powder, kosher salt, and xanthan gum or guar gum, if needed. Omit the additional gum if the flour blend already contains it.
For Option 3, place the measure-for-measure gluten-free flour in a separate bowl and whisk it to remove any lumps.
Step 3: Cream the Butter and Sugar
Using a stand mixer fitted with the paddle attachment or a large bowl and hand mixer, beat the softened butter and the amount of granulated sugar specified in your selected cake option.
Continue beating for 4 to 5 minutes, scraping down the bowl as needed, until the mixture is pale, light, and fluffy.
Step 4: Add the Eggs and Vanilla
Add the eggs one at a time, beating well after each addition. Scrape down the sides and bottom of the bowl to make sure the mixture is evenly blended.
Add the amount of vanilla extract specified in your selected option and mix until incorporated.
Step 5: Complete the Cake Batter
Alternate adding the dry ingredients and milk to the butter mixture, beginning and ending with the dry ingredients. Mix on low speed after each addition and stop as soon as the batter is combined.
If preparing Option 1, gently fold in the sour cream after incorporating the milk and dry ingredients.
Do not add sour cream to Options 2 or 3.
The finished batter should be smooth and creamy. Avoid excessive mixing, which can affect the texture of the baked layers.
Step 6: Bake the Cake Layers
Divide the batter evenly among the three prepared pans and smooth the tops.
Bake for 30 to 35 minutes, or until the centers are set and a toothpick inserted into the middle of each layer comes out clean.
Let the cakes cool in their pans for 10 minutes. Carefully turn them out onto cooling racks, remove the parchment paper, and allow the layers to cool completely before cutting or decorating.
Step 7: Prepare the Vanilla Buttercream
Beat the room-temperature butter until creamy and smooth. Gradually add the sifted powdered sugar while mixing on low speed.
Add the vanilla, kosher salt, and 3 tablespoons of heavy cream. Beat until the frosting is light and fluffy. Add the remaining cream gradually, as needed, until the buttercream reaches a smooth, spreadable consistency.
Tint most of the buttercream with royal blue gel food coloring. If desired, reserve a small portion and tint it sky blue to create contrasting strokes and added dimension.
Step 8: Create the Surprise Center
Level the cooled cake layers with a serrated knife if necessary.
Leave the bottom and top cake layers whole. Use a round cookie cutter to remove a circle from the center of the middle layer. Make sure the remaining ring is wide enough to support the top layer.
Set aside the removed cake circle for another use.
Step 9: Assemble and Fill the Cake
Place one whole cake layer on a cake board or serving stand. Spread an even layer of blue buttercream over the top.
Position the hollow middle layer over the first layer and spread buttercream over its top, taking care not to cover the opening.
Fill the cavity with the selected gluten-free candies, chocolate gems, sprinkles, mini marshmallows, or chocolate pearls. Do not pack the filling down tightly.
Place the remaining whole cake layer on top, positioning it carefully so the cake remains level.
Step 10: Apply the Crumb Coat
Spread a thin layer of buttercream over the top and sides of the assembled cake. This crumb coat will trap loose crumbs and create a smooth foundation for the final decoration.
Refrigerate the cake for 20 to 30 minutes, or until the crumb coat feels firm.
Step 11: Decorate with Blue Buttercream
Cover the chilled cake with a generous layer of royal blue buttercream. Use an offset spatula to smooth the frosting or create free-form textured strokes around the top and sides.
Add small strokes of the lighter blue buttercream, if using, and blend them lightly into the royal blue frosting. Avoid overworking the colors so the different shades remain visible.
Step 12: Add the Gold Decorations
Using clean, dry tweezers or a small food-safe brush, carefully place pieces of edible gold leaf or edible gold foil over the buttercream. Arrange the pieces irregularly to create an artistic, abstract appearance.
Only use gold leaf, foil, luster dust, and sanding sugar that are specifically labeled as edible.
Products labeled merely nontoxic or decorative should not be placed on food intended for consumption.
Lightly apply edible gold luster dust if desired. Finish the presentation by adding edible gold sanding sugar to the cake board.
Step 13: Chill and Serve
Refrigerate the decorated cake for about 30 minutes to help set the buttercream. Before serving, let it stand at room temperature for approximately 30 minutes for the best flavor and texture.
Cut through the cake with a sharp knife to reveal the hidden candy center. Wipe the knife clean between slices for a neater presentation.
Notes
Choose one complete vanilla cake option. Do not combine flour quantities, eggs, milk, leavening, or other ingredients from different formulas.
The supplied measure-for-measure cake formula does not include additional baking powder, baking soda, salt, or xanthan gum. Prepare it with the ingredients listed for that option rather than borrowing quantities from the other formulas.
This recipe uses three cake layers. Only the middle layer is hollowed out, leaving the bottom and top layers intact to contain the surprise filling.
Use gel food coloring rather than liquid coloring. Gel creates a more intense blue without adding enough liquid to noticeably thin the buttercream.
Add food coloring gradually. Royal blue frosting may deepen slightly as it rests, so allow the buttercream to sit briefly before deciding whether it needs more color.
Check that candies, sprinkles, chocolate pearls, marshmallows, food coloring, flour, confectioners’ sugar, and edible decorations carry appropriate gluten-free labeling. Prevent cross-contact by using clean pans, utensils, mixers, work surfaces, and decorating tools.
Only use edible gold leaf, foil, luster dust, and sanding sugar that are specifically manufactured and labeled for consumption.
For clean slices, chill the cake before cutting and wipe the knife clean between each serving.
The cake layers may be baked one day before decorating. Once completely cool, wrap them tightly to keep them from drying out.
The buttercream may be prepared up to two days ahead and refrigerated. Bring it to room temperature and whip it again before decorating the cake.
Keep the finished cake covered in the refrigerator for up to four days. Let individual slices or the whole cake stand at room temperature for about 30 minutes before serving.
Choose fillings that are small enough to fit easily inside the center cavity. Do not use wet, juicy, or highly perishable fillings that could soak into the cake layers.
For a coordinated celebration table, decorate cupcakes or cookies with matching royal blue frosting, gluten-free sprinkles, and edible gold accents.