Tomato Plant Growing Guide: From Tiny Seedling to Garden Favorite
Follow this Tomato Plant Growing Guide to grow healthy plants from tiny seedlings, prevent common problems, and enjoy flavorful homegrown tomatoes.
Few garden experiences are as satisfying as watching a tiny tomato seedling grow into a vigorous plant covered with ripe, flavorful fruit. Tomatoes are a favorite among home gardeners because they can flourish in traditional garden beds, raised beds, and containers. With sufficient sunlight, fertile soil, steady moisture, and dependable support, even a first-time gardener can enjoy a productive harvest.
Tomato plants are tender, warm-season plants that thrive during the bright days of late spring and summer. They do require regular attention, but much of that care is straightforward. Choosing an appropriate variety, planting after the danger of frost has passed, watering consistently, and watching for early signs of trouble can make a remarkable difference.
This Tomato Plant Growing Guide explains how to select, plant, support, maintain, and harvest tomatoes throughout the growing season. Whether you begin with seeds or purchase young plants from a nursery, a few thoughtful decisions will help transform those tiny seedlings into garden favorites.
Understanding Tomato Plant Growth
Tomatoes, botanically known as Solanum lycopersicum, are tender perennials in tropical climates but are usually grown as annuals in temperate gardens. Frost damages tomato foliage, and cool soil can slow root development, so these heat-loving plants should not be rushed outdoors in spring.
Tomato varieties generally have determinate or indeterminate growth habits. Determinate tomatoes grow to a relatively compact size and produce much of their fruit within a concentrated period. Their manageable shape makes them useful for small gardens, containers, preserving, and gardeners who want a large harvest at one time.
Indeterminate tomatoes continue producing new vines, flowers, and fruit until frost or disease ends the growing season. These plants can become tall and vigorous, so they need strong cages, stakes, or trellises. Their extended harvest makes them an appealing choice for gardeners who want fresh tomatoes throughout summer and early fall.
Dwarf and patio varieties offer another solution for limited spaces. Although compact, they still need adequate sunlight, fertile potting mix, consistent moisture, and a container large enough to support healthy root growth.
Choosing the Right Tomato Variety
The best tomato variety depends on the garden, climate, available space, and intended use. Cherry and grape tomatoes are often prolific and convenient for snacking and salads. Slicing tomatoes provide substantial fruit for sandwiches and fresh meals, while paste tomatoes generally contain more flesh and less juice, making them well suited to sauces and preserving.
Days to maturity are especially important in regions with short growing seasons. A variety that matures quickly may produce a more dependable harvest before cool autumn weather arrives. Gardeners in hot climates may prefer varieties known to set fruit more reliably during warm conditions.
Disease resistance can also influence success. Seed packets and plant labels may include letters indicating resistance to particular diseases. Resistance does not guarantee that a plant will remain problem-free, but it can reduce the likelihood or severity of certain common infections.
Heirloom tomatoes are treasured for their distinctive flavors, colors, and shapes. Hybrid varieties may offer improved uniformity, productivity, disease resistance, or tolerance to challenging conditions. A garden can include both, allowing the gardener to enjoy heirloom character alongside the dependability of carefully selected hybrids.
Starting Tomato Plants From Seed
Tomato seeds are commonly started indoors approximately five to eight weeks before the expected outdoor planting date. Starting too early can result in crowded, overgrown plants that become difficult to maintain before the weather is warm enough for transplanting.
Sow the seeds about ¼ inch deep in a clean, sterile seed-starting mix. Warmth encourages germination, with temperatures around 75°F to 85°F generally supporting quick emergence. Once seedlings appear, place them beneath a bright overhead grow light. Insufficient light causes thin, stretched stems that lean toward the light source.
Keep the growing medium evenly moist but not saturated. Constantly wet soil and poor air circulation can encourage seedling diseases. Once the seedlings develop true leaves, move them into individual containers if they were started together. As they grow, provide enough space for air circulation and turn or reposition the containers when necessary to encourage balanced growth.
Healthy tomato seedlings should be compact and sturdy rather than tall and pale. A stocky plant with a strong stem and deep green leaves is usually better prepared for transplanting than an oversized plant that has already begun flowering indoors.
Choosing Healthy Nursery Seedlings
Gardeners who prefer to purchase plants should look for short, sturdy seedlings with healthy green foliage and well-developed stems. Avoid plants with yellowing leaves, extensive spotting, visible insects, or severely tangled roots.
A smaller, healthy transplant frequently establishes more successfully than a large plant that has remained in its nursery container too long. Flowers and tiny tomatoes may look appealing at the garden center, but they do not necessarily indicate that the plant will establish quickly after transplanting.
Read the plant label before buying. Confirm the mature size, growth habit, estimated days to maturity, and disease-resistance information. This helps prevent placing a vigorous indeterminate tomato in a container or garden space designed for a compact variety.
Hardening Off Tomato Seedlings
Seedlings grown indoors are not immediately prepared for direct sunlight, wind, and changing outdoor temperatures. Hardening off gradually introduces them to outdoor conditions and reduces transplant stress.
Begin about one to two weeks before planting. Place the seedlings in a protected, shaded location for a short period, then gradually increase their exposure to sunlight and outdoor air. Bring them inside when frost or unusually cold temperatures threaten.
Watch the leaves carefully during this transition. Bleached, pale, or papery areas can indicate sunscald caused by too much direct sunlight too quickly. Gradual exposure allows the leaves and stems to adjust without severe damage.
When to Plant Tomatoes Outdoors
Plant tomatoes after the danger of frost has passed, the soil has warmed, and nighttime temperatures are consistently suitable for tender plants. Local frost dates are useful planning tools, but actual weather conditions should guide the final decision.
A cool, cloudy day or late afternoon is often an ideal time to transplant. This gives the seedlings time to begin adjusting before they face intense midday sun. Water the plants before removing them from their containers so that the root balls are evenly moist.
Do not assume that planting unusually early will produce an earlier harvest. Tomatoes placed in cold soil may grow slowly and experience prolonged stress. Waiting for reliably warm conditions usually supports stronger establishment.
Selecting the Best Garden Location
Tomatoes grow best in full sun. Provide at least six hours of direct sunlight daily, although eight to ten hours is preferable in many gardens. In extremely hot climates, some protection from intense late-afternoon sun may help reduce heat stress and sunscald.
Choose a location with well-drained soil and good air circulation. Avoid low areas where water collects after rain. Waterlogged soil deprives roots of oxygen and can contribute to poor growth and root problems.
Whenever practical, rotate tomatoes with plants outside the nightshade family. Tomatoes, peppers, potatoes, eggplants, and tomatillos can share certain diseases. Avoid growing these crops in the same location year after year when sufficient garden space is available.
Preparing the Soil
Tomatoes prefer fertile, well-drained soil with a slightly acidic pH, generally around 6.0 to 6.8. A soil test is the most reliable way to determine pH and nutrient needs. It can prevent unnecessary amendments and help gardeners select fertilizer more accurately.
Work finished compost or other well-decomposed organic matter into the planting area to improve soil structure. Compost can help sandy soil retain moisture and improve drainage and aeration in heavier soil.
Avoid adding Epsom salt as a routine tomato treatment. It supplies magnesium and sulfur but does not prevent blossom-end rot, and unnecessary applications can create nutrient imbalances. Use it only when a soil test identifies a magnesium deficiency and provides an appropriate recommendation.
Excess nitrogen can produce large, leafy plants with fewer flowers and fruit. Apply fertilizer according to soil-test results or product directions, and avoid assuming that more fertilizer will result in a larger harvest.
Planting Tomato Seedlings Deeply
Tomatoes can form additional roots along buried sections of their stems. This makes deep or horizontal planting useful for establishing sturdy plants, particularly when seedlings have become leggy.
Remove the lowest leaves and place the root ball deeply enough that part of the stem will sit below the soil surface. Leave several healthy sets of leaves above the ground. If the soil is still cool below the surface, dig a shallow trench and position the plant horizontally, gently turning the leafy top upward. Roots will develop along the covered stem.
Handle the stem carefully because it can break if sharply bent. Firm the soil gently around the plant and water thoroughly after planting to settle the soil around the roots.
Spacing depends on the variety and support method. Compact determinate plants may be placed closer together than sprawling indeterminate vines. Follow the seed packet or plant label while allowing enough room for mature growth and air movement.
Supporting Tomato Plants
Install cages, stakes, or trellises at planting time or shortly afterward. Early installation reduces the risk of damaging mature roots and makes it easier to guide the plant while the stems are still flexible.
Indeterminate tomatoes need tall, sturdy structures capable of supporting vigorous vines and heavy fruit. Determinate tomatoes may remain shorter, but their branches can still bend or break under a concentrated crop.
Use soft plant ties when attaching stems to stakes. Fasten them loosely enough to allow the stem to expand. Check ties throughout the season and adjust any that begin pressing into the plant.
Supporting the vines keeps fruit away from the ground, improves access for harvesting, and can increase air circulation through the foliage. It also helps limit soil contact and reduces the amount of soil splashed onto lower leaves during rain or watering.
Watering Tomatoes Consistently
Consistent moisture is one of the most important parts of tomato care. Most established garden tomatoes need approximately 1 to 1½ inches of water per week from rainfall and irrigation, although the amount varies with temperature, wind, soil type, plant size, and container conditions.
Water deeply enough to moisten the root zone. Frequent, shallow watering encourages roots to remain near the soil surface, where they are more vulnerable to heat and drought. Check the soil rather than relying only on a fixed schedule.
Direct water toward the base of the plant and keep the foliage as dry as practical. Morning watering is generally preferable because any wet leaves have time to dry. A soaker hose or drip-irrigation system can deliver water slowly while reducing splashing.
Sudden changes in soil moisture may contribute to fruit cracking and blossom-end rot. Neither problem is solved by simply applying more fertilizer. Maintaining steady moisture and avoiding severe cycles of drought followed by heavy watering are more useful preventive measures.
Mulching Around Tomato Plants
Once the soil has warmed, apply a layer of clean organic mulch around the plants. Straw, shredded leaves, untreated grass clippings applied in thin layers, or other suitable garden mulch can help conserve moisture, suppress weeds, and reduce soil splashing.
Keep mulch slightly away from the main stem rather than piling it directly against the plant. Mulch placed against the stem can hold excessive moisture around the crown and create a sheltered area for pests.
A mulch layer approximately 2 to 3 inches deep is often sufficient. If the mulch settles or decomposes during the season, it can be refreshed as needed.
Fertilizing During the Growing Season
Tomatoes need adequate nutrition, but balance is essential. Follow soil-test recommendations whenever possible. If a soil test is unavailable, select a fertilizer labeled for vegetable gardens or tomatoes and apply it according to the package directions.
A transplant fertilizer may help young plants establish, depending on existing soil fertility. Additional fertilizer is sometimes applied after the first fruit begins developing, but the need varies with the soil, plant growth, and product being used.
Dark green plants with abundant foliage but few flowers may be receiving too much nitrogen. Pale leaves and weak growth can have several causes, including nutrient shortages, root stress, cold soil, excessive moisture, or disease. Diagnose the cause before repeatedly adding fertilizer.
Pruning Tomato Plants
Pruning needs depend on the growth habit and support method. Indeterminate tomatoes trained to stakes or trellises may benefit from selective removal of some suckers, which are shoots that develop where leaves meet the main stem. This can make the plant easier to support and improve air circulation.
Avoid removing excessive foliage. Leaves manufacture energy and shade developing fruit from intense sunlight. Heavy pruning can reduce production and increase the risk of sunscald.
Determinate tomatoes should generally receive little pruning because they produce much of their crop on a limited framework. Removing too many shoots can significantly reduce the harvest.
Leaves touching the soil or showing clear signs of disease can be removed with clean pruners. Disinfect tools as appropriate when working around diseased plants, and avoid handling wet foliage because moisture can make it easier to spread some plant pathogens.
Growing Tomatoes in Containers
Container-grown tomatoes need the same essentials as garden plants, but their roots depend entirely on the gardener for water and nutrients. Choose a compact or patio variety when space is limited, or use a generously sized container for a larger plant.
The container must have unobstructed drainage holes. Fill it with a high-quality potting mix rather than dense garden soil, which can compact and drain poorly in pots. Add support at planting time, since pushing a stake or cage into an established root system can cause damage.
Containers dry more quickly than garden beds and may need daily attention during hot or windy weather. Check the moisture regularly and water thoroughly when needed. Do not allow the pot to sit continuously in standing water.
Place the container where the plant will receive abundant sunlight. Remember that a mature tomato plant and wet potting mix can be heavy, so position large containers before the plant becomes difficult to move.
Encouraging Flowers and Fruit
Tomato flowers are self-pollinating, but movement from wind or visiting pollinators helps release pollen. Plants grown in sheltered spaces can be gently shaken when flowers are open to encourage pollination.
Temperature strongly affects fruit set. Very cool nights, extremely hot days, excessive humidity, and plant stress can cause flowers to drop without forming fruit. In many cases, production resumes when conditions improve.
Water stress and excessive nitrogen can also interfere with flowering and fruit development. Maintain steady care and avoid responding to temporary weather-related flower drop with unnecessary fertilizer.
Watching for Pests
Inspect tomato plants regularly, including the undersides of leaves. Aphids, whiteflies, spider mites, stink bugs, flea beetles, and tomato hornworms are among the pests that may appear, although the most common problems vary by region.
Minor insect damage does not always require treatment. Hand-picking larger pests, removing heavily damaged leaves, encouraging beneficial insects, and maintaining a clean garden may be sufficient. If additional control is necessary, identify the pest accurately and choose the least disruptive method appropriate for the situation.
Never apply a pesticide simply because a plant looks unhealthy. Nutrient disorders, water stress, herbicide injury, and disease can resemble insect damage. Follow all pesticide labels exactly, including application rates, protective precautions, and the required interval before harvesting.
Preventing Common Tomato Diseases
Good garden practices cannot prevent every disease, but they can reduce risk. Start with healthy plants, consider disease-resistant varieties, allow adequate spacing, support the vines, mulch the soil, and water at the base of each plant.
Remove dropped fruit and badly diseased plant material from the growing area. At the end of the season, clean up tomato debris rather than leaving it around the bed. Rotate nightshade-family crops when garden space permits.
Leaf spots often begin on lower foliage, where moisture and soil splash are most common. Remove affected leaves when the problem is limited, but do not strip the plant of healthy foliage. If symptoms spread quickly or the entire plant begins wilting, consult a local Cooperative Extension resource for identification because management varies by disease.
Understanding Blossom-End Rot
Blossom-end rot appears as a dark, sunken area on the bottom of developing fruit. It is associated with inadequate calcium reaching the fruit, frequently because fluctuating soil moisture interferes with calcium movement through the plant.
Consistent watering and mulch can help prevent the disorder. Excess nitrogen, root damage, and other sources of rapid or uneven growth can make the problem worse. Adding calcium is unlikely to help when the soil already contains adequate calcium.
Affected fruit will not repair itself, so it can be removed. Later fruit may develop normally once the plant receives steadier moisture and the root system becomes established.
Harvesting Ripe Tomatoes
Tomatoes are usually ready to harvest when they have developed the expected color for the variety and feel slightly soft when gently pressed. Some varieties remain green, striped, purple, or unusually pale when mature, so color should be evaluated according to the cultivar.
Pick fruit carefully to avoid tearing the vines. Harvesting regularly encourages the gardener to notice developing problems and prevents overripe fruit from splitting or falling.
Tomatoes that have begun changing from mature green to their ripe color can continue ripening after picking. Bringing partially colored fruit indoors can be useful before heavy rain, severe heat, or the first frost. Place them at room temperature and check them regularly.
Fresh tomatoes generally maintain their best flavor and texture when stored at room temperature. Refrigeration can be useful for fully ripe fruit that cannot be eaten promptly, but allow chilled tomatoes to return to room temperature before serving for better flavor.
Preparing for the End of the Season
As autumn approaches, remove new flower clusters that have little chance of producing mature fruit before frost. This allows the plant to direct more energy toward fruit already developing.
Before the first expected frost, harvest mature fruit that has started showing color. Mature green tomatoes can also be brought indoors, although not every immature fruit will ripen successfully.
After frost ends the season, remove tomato plants, fallen fruit, ties, and other plant debris. Clean reusable cages and stakes before storing them. Keeping simple notes about variety performance, disease problems, planting dates, and harvest quality can make next year’s tomato garden even more successful.
From Seedling to Garden Favorite
A productive tomato season is built through consistent care rather than a single gardening trick. Begin with a variety suited to the growing space, give each plant warm soil and abundant sunlight, and support it before the vines become difficult to manage. Deep watering, mulch, balanced nutrition, and regular observation will help the plant remain vigorous as it flowers and develops fruit.
Every garden season brings different weather, pests, and challenges, but tomato plants are remarkably rewarding. That first sun-warmed tomato, picked directly from a plant that began as a tiny seedling, makes the effort worthwhile.
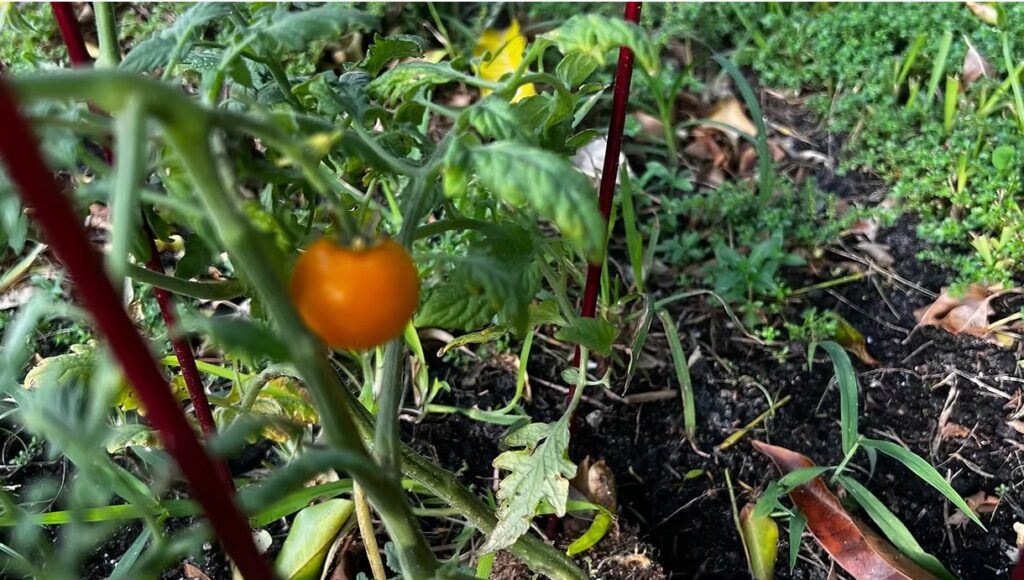
A golden orange cherry tomato ripens on the vine in the vegetable garden.
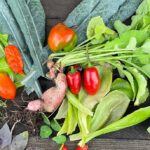
Discover the fresh flavors of a Heart Harvest Salad made with crisp radishes, juicy tomatoes, peppery arugula, tender kale, and fragrant tarragon. This colorful garden-to-table salad is healthy, naturally gluten-free, and perfect for any occasion. Heart Harvest Salad: Bringing the Garden to Your Table There is nothing quite like walking into the garden with a basket in hand and returning with the ingredients for a meal that is bursting with freshness. Every season offers its own treasures, and few dishes showcase them better than a simple garden salad. This Heart Harvest Salad is a celebration of colorful vegetables, leafy greens, and fragrant herbs that come together to create a meal that is both beautiful and nourishing. With every bite, you will enjoy the crisp crunch of freshly picked radishes, the juicy sweetness of ripe tomatoes, the peppery kick of arugula, the hearty texture of kale, and the delicate herbal notes of fresh tarragon. Each ingredient has its own personality, yet together they create a balanced salad that feels light, refreshing, and satisfying. Whether you grow your own vegetables, visit a local farmers market, or simply enjoy seasonal produce from the grocery store, this salad is an easy way to bring the flavors of the garden to your table. A Salad That Celebrates Fresh Ingredients One of the best things about this salad is that it allows every ingredient to shine. There is no need for heavy dressings or complicated techniques. Fresh, high-quality produce does all the work. The brilliant red radishes add a crisp texture and a gentle peppery bite that wakes up the palate. Sweet tomatoes provide bursts of juicy flavor that perfectly balance the greens. Arugula contributes its signature peppery taste, while kale adds heartiness and an abundance of nutrients. Finally, fresh tarragon introduces a subtle hint of anise that gives the salad an elegant finish without overwhelming the other ingredients. It is a combination that feels simple yet sophisticated, making it equally at home on a casual lunch table or served alongside an elegant dinner. Why You Will Love This Salad This Heart Harvest Salad is naturally gluten-free and filled with wholesome ingredients that are as nutritious as they are flavorful. It comes together in just a few minutes, making it perfect for busy weekdays, leisurely weekend lunches, or entertaining guests. Because it relies on fresh produce rather than processed ingredients, every serving is packed with vibrant colors, crisp textures, and naturally delicious flavors. It is also incredibly versatile, allowing you to customize it based on what is growing in your garden or what is in season. Best of all, it is a salad that never feels boring. Every bite offers something different, from crunchy radishes and juicy tomatoes to tender greens and fragrant herbs. The Stars of the Garden Radishes Fresh radishes are often one of the earliest vegetables to be harvested from the garden. Their crisp texture and mild peppery flavor add excitement to every bite while their bright color makes the salad visually appealing. Tomatoes Few ingredients capture the taste of summer quite like a perfectly ripe tomato. Whether you choose cherry tomatoes, heirloom varieties, grape tomatoes, or Roma tomatoes, their natural sweetness adds balance and freshness to the salad. Arugula Arugula brings a lively peppery flavor that complements both the tomatoes and radishes. Its tender leaves create a light texture while adding depth to the overall flavor profile. Kale Kale provides substance and nutrition, making the salad more filling without feeling heavy. Lightly massaging the leaves with a drizzle of olive oil softens their texture and makes them wonderfully tender. Tarragon Fresh tarragon is often overlooked, yet it is one of the herbs that can completely transform a simple salad. Its delicate herbal aroma and subtle notes of licorice create a unique flavor that pairs beautifully with leafy greens and ripe tomatoes. A Light Dressing That Lets the Produce Shine Instead of masking the fresh vegetables with a rich dressing, this salad benefits from a simple homemade lemon vinaigrette. A combination of extra-virgin olive oil, fresh lemon juice, Dijon mustard, honey, sea salt, and freshly ground black pepper creates a bright, tangy dressing that enhances every ingredient while allowing the garden-fresh flavors to remain the focus. Perfect for Every Season Although this salad shines during the height of summer, it can easily be adapted throughout the year. In spring, add edible flowers such as nasturtiums or calendula petals for extra color. During summer, include cucumbers, sweet peppers, or freshly picked strawberries. Autumn is the perfect time to add crisp apples, roasted squash, or toasted pecans. In winter, roasted beets, citrus segments, or pomegranate arils bring warmth and vibrant seasonal color. This flexibility makes the Heart Harvest Salad one you can enjoy nearly year-round. Serving Ideas This salad is wonderfully versatile and pairs beautifully with countless meals. Serve it alongside grilled chicken, roasted salmon, shrimp, or steak for a complete dinner. It also complements gluten-free pasta dishes, homemade soups, quiche, or roasted vegetables. For entertaining, it makes an elegant first course that is both colorful and refreshing. If you would like to make it even more filling, top it with avocado slices, toasted pumpkin seeds, sunflower seeds, shaved Parmesan, or crumbled gluten-free feta cheese. Garden Fresh Is Always Best Harvesting vegetables just before preparing a meal is one of the greatest rewards of gardening. Radishes are at their sweetest when picked young, tomatoes develop their richest flavor when allowed to ripen on the vine, and leafy greens stay crispest when harvested during the cool morning hours. Fresh tarragon should be snipped just before serving to preserve its delicate aroma, while kale benefits from a quick massage with olive oil to soften the leaves and enhance their flavor. These simple touches elevate the salad from ordinary to unforgettable. A Salad That Nourishes Body and Soul Beyond its beautiful appearance, the Heart Harvest Salad is packed with nutrients. Tomatoes provide lycopene and vitamin C, radishes offer antioxidants and fiber, kale supplies vitamins A, C, and
Learn how to grow healthy fig trees at home, including variety selection, planting, watering, pruning, winter protection, harvesting, and troubleshooting. Fig trees bring beauty, character, and remarkable flavor to a home garden. Their broad, deeply lobed leaves create a lush appearance, while their sweet fruit can be enjoyed fresh from the tree, dried, preserved, baked into desserts, or added to savory dishes. Once established in a suitable location, a fig tree can produce generously with relatively straightforward care. The common fig, botanically known as Ficus carica, is a deciduous shrub or small tree native to western Asia and the Mediterranean region. Although figs are associated with warm climates, gardeners in many cooler regions can grow them successfully by choosing a cold-tolerant variety, planting in a protected microclimate, or using a container that can be moved into shelter for winter. Successful fig growing begins with the right variety and location. Sunlight, drainage, seasonal warmth, winter temperatures, moisture, and pruning practices can all influence whether a tree develops healthy growth and fully ripened fruit. This complete fig tree growing guide explains how to select, plant, water, fertilize, prune, protect, harvest, and troubleshoot fig trees at home. Understanding How Fig Trees Grow A fig is not a conventional fruit with visible flowers. What appears to be the fruit is a hollow structure called a syconium. The tiny flowers develop inside this structure, which is why gardeners do not see blossoms covering a fig tree before fruit appears. There are several types of edible figs, but common figs are generally the most practical choice for home gardens. Most commonly sold home-garden varieties can develop fruit without cross-pollination, which means a single tree may produce a crop. Some specialized varieties require pollination by a particular fig wasp and may not produce properly in regions where that pollinator is absent. Buying a named common fig variety from a reliable regional nursery helps prevent this problem. Depending on the variety and climate, a fig tree may produce one or two crops. The early crop, known as the breba crop, forms on growth produced during the previous season. The main crop normally develops later on new growth. A cold winter or heavy pruning can eliminate the breba crop while still allowing the tree to produce a later crop on new branches. Choosing the Best Fig Variety for Your Climate Variety selection should be based on winter hardiness, summer heat, the length of the growing season, local humidity, and whether the tree will grow in the ground or a container. A variety that performs beautifully in a hot Southern garden may ripen too late in a cool Northern climate. Brown Turkey is a familiar and widely grown fig with brownish-purple skin and sweet flesh. It adapts to a range of conditions and can produce fruit on new growth after winter damage. Celeste produces small to medium fruit with light brown to violet skin and sweet flesh. Its relatively tight fruit opening can help limit problems caused by insects and excess moisture. It is especially popular in warm, humid regions. Chicago Hardy is frequently selected for colder climates because its roots can survive lower temperatures than those of many tender varieties when properly established and protected. Aboveground growth may still die back during severe winter weather, so the name should not be interpreted as a guarantee that every branch will survive extreme cold. Black Mission produces dark purple fruit with richly flavored pink or red flesh. It performs best where summers are warm and the growing season is sufficiently long. In colder areas, it may be better suited to container cultivation. Violette de Bordeaux produces smaller, dark-skinned figs with a rich flavor. Its naturally compact growth and suitability for pruning can make it an appealing option for containers and smaller gardens. Desert King is known for producing a dependable breba crop in climates with cooler summers. Because breba figs form on the previous year’s wood, winter protection and careful pruning are particularly important. Local performance is more valuable than a variety’s general description. A cooperative extension office, regional nursery, or experienced grower can help identify cultivars that reliably ripen before the first fall frost in your area. Selecting the Right Planting Location Fig trees produce their best growth and fruit in full sun. Choose a location that receives at least six to eight hours of direct sunlight, with more sun being beneficial in cool or short-season regions. A south-facing wall can create a warmer microclimate, protect the tree from cold winds, and help the fruit ripen. Good drainage is essential. Fig trees adapt to several soil types, but they should not remain in saturated ground. Standing water and prolonged soil saturation can contribute to root and crown problems. If the garden has heavy clay or a consistently high water table, consider planting on a raised mound or growing the tree in a large container. Allow enough room for the mature canopy and roots. The final size depends on variety, climate, pruning, and winter dieback, but an unrestrained fig can become a broad shrub or small tree. Avoid planting directly beside foundations, septic systems, drains, or paved areas where vigorous roots and spreading growth may become difficult to manage. In colder climates, select a sheltered area away from low spots where cold air collects. A position beside a south-facing masonry wall may provide additional warmth, although the tree still needs adequate airflow and space. When to Plant a Fig Tree In climates with mild winters, figs may be planted while dormant in fall or early winter. In colder regions, spring planting is generally safer. Wait until the danger of a hard freeze has passed so the young tree has an entire growing season to establish roots before winter. Container-grown trees offer more flexibility than bare-root plants, but they still require protection from extreme heat, drought, and sudden cold during establishment. Avoid planting during periods of frozen soil, waterlogged conditions, or intense summer heat. How to Plant a Fig Tree Before
Here, you will learn all about chive blossoms and parsley, including how companion planting helps both herbs thrive, the many benefits they bring to your garden, and the delicious ways to use them in everyday cooking. Whether you are creating a thriving kitchen garden or looking for fresh inspiration in the kitchen, chive blossoms and parsley are a versatile pairing that offers beauty, flavor, and abundant harvests throughout the growing season. There is something incredibly satisfying about walking into your garden, brushing your hand across a patch of fragrant herbs, and gathering a handful of fresh parsley alongside a few vibrant purple chive blossoms. Moments like these remind us that a garden is more than a place to grow food. It is a space where beauty, nature, and fresh ingredients come together to inspire every meal. Among the many herbs you can grow, chives and parsley are one of the easiest and most rewarding companion planting combinations. They thrive under similar growing conditions, complement one another beautifully, and provide fresh harvests from spring through fall. Their partnership benefits not only your kitchen but your entire garden by attracting pollinators, supporting beneficial insects, and helping create a healthier growing environment. Whether you are planting a large kitchen garden, filling raised beds, or growing herbs in containers on your patio, chive blossoms and parsley are a pairing that delivers season after season. Their fresh flavors elevate everyday meals, while their graceful appearance adds charm and color to any outdoor space. A Perfect Partnership in the Herb Garden Companion planting is the practice of growing plants together that naturally benefit one another. Some companion plants improve soil conditions, others attract pollinators, while some help reduce pest problems or make better use of available growing space. Chives and parsley check nearly every one of those boxes. Parsley grows in lush, leafy mounds that remain attractive throughout much of the growing season. Chives produce slender green leaves that eventually give way to beautiful globe-shaped blossoms in shades of lavender and purple. Together they create layers of texture and color that look just as lovely in ornamental gardens as they do in vegetable beds. Their similar care requirements also make them easy companions. Both appreciate fertile soil, regular watering, and plenty of sunshine, allowing gardeners to care for both herbs using the same routine. For anyone just beginning an herb garden, this combination is an excellent place to start. Why Companion Planting Matters Healthy gardens are built on diversity. Instead of growing a single crop in isolation, companion planting encourages a balanced ecosystem where plants, pollinators, and beneficial insects work together. Every herb contributes something unique to the garden. Parsley provides dense foliage that helps shade the soil and reduce moisture loss. Chives contribute their distinctive onion aroma while producing nectar-rich flowers that become gathering places for pollinating insects. Together they create an environment where plants thrive naturally. Rather than viewing herbs simply as ingredients for cooking, companion planting reminds us that every plant plays an important role in supporting the health of the entire garden. Chives Help Naturally Discourage Garden Pests One reason gardeners have planted chives throughout vegetable gardens for generations is their reputation for helping reduce certain insect problems. As members of the onion family, chives contain sulfur compounds responsible for their mild onion fragrance. While people enjoy this familiar aroma, many insects do not. Growing chives near parsley may help discourage aphids, Japanese beetles, spider mites, and several other common garden pests. Although companion planting is not a replacement for good garden management, it can become an important part of an organic gardening strategy by encouraging healthier plants and reducing stress caused by insect activity. Many gardeners also plant chives near tomatoes, carrots, strawberries, roses, peppers, and apple trees for the very same reason. Chive Blossoms Bring Your Garden to Life If there is one reason never to cut every chive flower before it opens, it is the incredible number of beneficial insects they attract. As spring transitions into early summer, chives produce clusters of soft purple blossoms that quickly become one of the busiest places in the garden. Honeybees eagerly gather nectar from the flowers while native bees move from bloom to bloom collecting pollen. Butterflies drift through the blossoms, adding movement and beauty to the landscape, while hoverflies quietly perform double duty by feeding on nectar as adults and helping control aphids during their larval stage. Watching these visitors move through your herb garden is one of the simple pleasures of gardening. Their presence also benefits nearby vegetables, fruit trees, berry bushes, and flowering plants that depend on pollination for healthy harvests. Growing Chives and Parsley Together One of the reasons these herbs are so popular is because they are wonderfully uncomplicated. Choose a location that receives at least six hours of sunlight each day. While chives love full sun, parsley appreciates a little afternoon shade during periods of intense summer heat, especially in warmer climates. Plant both herbs in fertile, well-drained soil enriched with compost. Rich organic matter encourages vigorous growth while helping retain moisture between waterings. Water regularly, keeping the soil evenly moist without allowing it to become soggy. Applying a layer of mulch around the plants helps regulate soil temperature, conserve moisture, and reduce weed growth. With only a little routine care, both herbs will reward you with months of fresh harvests. Beautiful in Every Garden Style One of the joys of growing herbs is their versatility. Chives and parsley look equally at home in formal herb gardens, rustic cottage gardens, raised beds, decorative borders, and patio containers. The upright foliage and cheerful blossoms of chives create natural height, while parsley fills the surrounding space with rich green leaves. The contrast between soft purple flowers and vibrant green foliage creates a timeless combination that looks attractive from spring until frost. Many gardeners intentionally plant these herbs near walkways or seating areas where their fragrance and colorful blooms can be enjoyed every day. Other Plants That Thrive
Originally published
March 2026
Updated
August 2026
Reviewed by
Culibloom