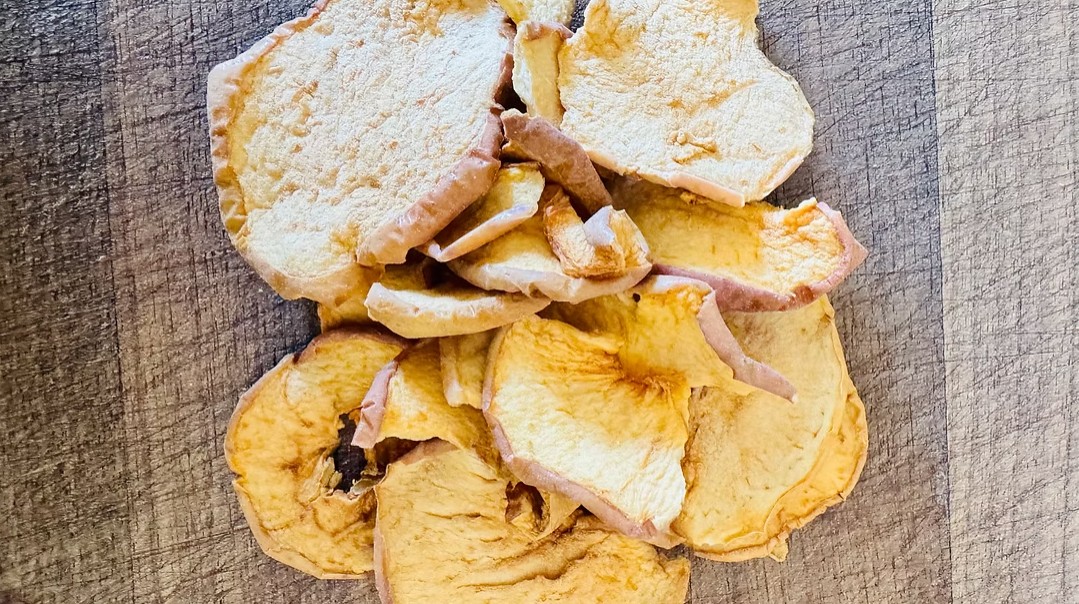
Make crispy homemade oven-dried cinnamon apple chips with fresh apples and simple ingredients for an easy, naturally sweet snack.
Warm, naturally sweet, and perfectly crisp, this Crispy Homemade Oven-Dried Cinnamon Apple Chips Recipe transforms fresh apples into a wholesome snack with the comforting flavors of cinnamon and optional maple sugar. Slow drying in the oven concentrates the apples’ natural sweetness while creating a satisfyingly crisp or pleasantly chewy texture.
These easy apple chips are delicious on their own and make a versatile addition to lunchboxes, trail mix, oatmeal, yogurt, salads, and desserts. With only a few simple ingredients and no special dehydrator required, they are a flavorful snack you can prepare throughout the year.
Prep Time: 15 minutes
Cook Time: 2 to 3 hours
Total Time: 2 hours 15 minutes to 3 hours 15 minutes
Yield: 4 servings
Ingredients
3 to 4 apples, such as Honeycrisp, Fuji, Gala, Pink Lady, or Granny Smith
1 to 2 teaspoons ground cinnamon
1 to 2 teaspoons granulated sugar or maple sugar, optional
1 tablespoon lemon juice, optional
Directions
Step 1: Prepare the Oven
Preheat the oven to 225°F. Line one or two baking sheets with parchment paper to prevent sticking and promote even drying.
Step 2: Slice the Apples
Wash and dry the apples thoroughly. Remove the cores, then cut the apples into thin, even rounds approximately 1/8-inch thick.
For the most consistent results, use a mandoline slicer to create slices of equal thickness. Always use the mandoline’s hand guard and follow the manufacturer’s safety instructions.
Step 3: Prevent Browning
If desired, place the apple slices in a large bowl and gently toss them with the lemon juice. The lemon juice helps preserve the color of the apples as they dry.
Step 4: Season the Apples
Sprinkle the cinnamon over the apple slices and gently toss until they are evenly coated. For sweeter apple chips, add the optional granulated sugar or maple sugar and toss again.
Step 5: Arrange the Apple Slices
Place the seasoned apple slices in a single layer on the prepared baking sheets. Leave a small amount of space between the slices and make sure they do not overlap. Proper spacing allows air to circulate around the apples and helps them dry evenly.
Step 6: Dry the Apples
Place the baking sheets in the oven and bake for 2 to 3 hours. Flip the apple slices halfway through the drying time to encourage even dehydration.
The exact baking time will depend on the thickness and moisture content of the apples. For chewier apple chips, remove them when the edges are dry but the centers remain slightly flexible. For crisp apple chips, continue drying until the slices are fully dehydrated.
Step 7: Cool Completely
Remove the baking sheets from the oven and allow the apple chips to cool completely. The chips will continue to firm and become crisper as they cool.
Step 8: Serve
Enjoy the cinnamon apple chips on their own or add them to oatmeal, yogurt, smoothie bowls, breakfast parfaits, salads, or homemade trail mix. They can also be used as an edible garnish for cakes, pies, and holiday snack boards.
Notes
Choose firm, crisp apple varieties such as Honeycrisp, Fuji, Gala, Pink Lady, or Granny Smith for the best texture.
Sweet apples create naturally sweeter chips, while tart apples provide a brighter flavor.
Thin, evenly cut slices produce crisper apple chips. Slightly thicker slices generally remain chewier and may require additional drying time.
A mandoline slicer helps create uniformly thin slices that dry at approximately the same rate.
For additional flavor, add a small pinch of nutmeg, pumpkin pie spice, or apple pie spice with the cinnamon.
Watch the apples closely near the end of the baking time. Thin slices can change from properly dried to overly browned quickly.
Allow the apple chips to cool completely before storing them. Packing warm chips may trap moisture and cause them to soften.
Store the cooled apple chips in an airtight container at room temperature for up to 1 week or refrigerate them for up to 2 weeks.
If the chips soften during storage, arrange them on a parchment-lined baking sheet and return them to a 225°F oven for 10 to 15 minutes. Let them cool completely before returning them to the container.