Make crispy homemade oven-dried apple chips with fresh apples and optional cinnamon or spice for an easy, naturally sweet gluten-free snack.
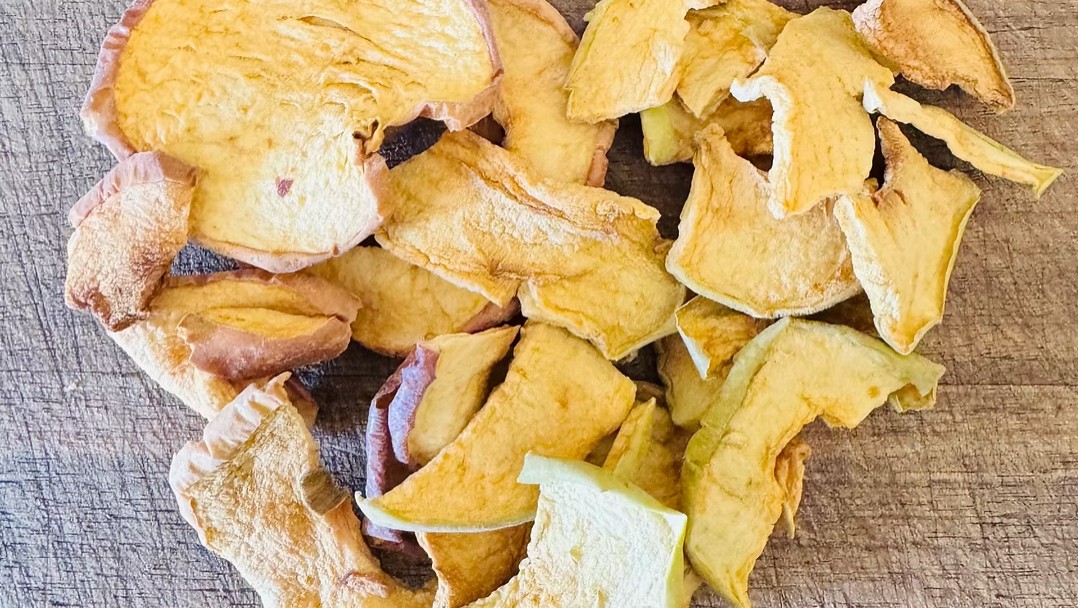
Light, crunchy, and naturally sweet, this Crispy Homemade Oven-Dried Apple Chips Recipe transforms fresh apples into an irresistible snack using a low-temperature oven. With only apples and your choice of optional seasonings, these fruit chips are perfect for lunchboxes, afternoon snacks, and satisfying crunchy cravings.
Slowly drying thin apple slices intensifies their natural sweetness while creating a crisp texture. Enjoy them plain or add a light sprinkle of cinnamon, apple pie spice, sugar, or a combination of seasonings. These easy apple chips are naturally gluten-free, simple to customize, and a delicious way to use an abundance of fresh apples.
Prep Time: 15 minutes
Cook Time: 2 to 3 hours
Total Time: 2 hours 15 minutes to 3 hours 15 minutes
Yield: 4 servings
Ingredients
4 medium apples
1 to 2 teaspoons sugar, optional
1 teaspoon ground cinnamon, optional
1/2 teaspoon apple pie spice, optional
Directions
Step 1: Prepare the Oven
Preheat the oven to 200°F. Line two large baking sheets with parchment paper.
Step 2: Slice the Apples
Wash and thoroughly dry the apples. Using a mandoline slicer or a very sharp knife, cut the apples into slices approximately 1/8 inch thick.
For decorative apple chips with star-shaped centers, leave the cores intact. If preferred, remove the cores before slicing.
Step 3: Arrange the Apple Slices
Arrange the apple slices in a single layer on the prepared baking sheets.
Do not overlap the slices because they need space for moisture to escape as they dry.
Step 4: Season the Apples
Leave the apple slices plain or lightly sprinkle them with sugar, cinnamon, apple pie spice, or a combination of seasonings. Keep the coating light so the natural apple flavor remains prominent.
Step 5: Slowly Dry the Apples
Place the baking sheets in the preheated oven. Bake for 2 to 3 hours, flipping the apple slices halfway through the drying time so they dry evenly.
The exact cooking time will depend on the apple variety, moisture content, and thickness of the slices. The apple chips are ready when they look dry and their edges are slightly curled.
Step 6: Cool the Apple Chips
Remove the baking sheets from the oven and allow the apple chips to cool completely. The slices will continue to crisp as they cool.
Step 7: Create an Extra-Crispy Texture
For crunchier apple chips, turn off the oven and leave the chips inside for an additional hour with the oven door slightly open. This allows any remaining moisture to escape.
Step 8: Serve or Store
Enjoy the oven-dried apple chips after they have cooled completely, or transfer them to an airtight container for storage.
Notes
Firm apple varieties such as Honeycrisp, Fuji, Gala, Pink Lady, and Granny Smith work especially well for homemade apple chips.
A mandoline slicer produces evenly sized slices, helping the apples dry at approximately the same rate. Always use the hand guard and follow the manufacturer’s safety instructions.
Drying time may vary depending on the apple variety, slice thickness, natural moisture content, and individual oven.
Let the apple chips cool completely before deciding whether they need additional drying. Warm chips may feel slightly soft but become crisp as they cool.
For the best texture, store completely cooled apple chips in an airtight container at room temperature for up to one week.
If the chips soften during storage, arrange them on a parchment-lined baking sheet and warm them in a 200°F oven for 10 to 15 minutes. Let them cool completely before returning them to the container.
Serve these crispy apple chips as a snack or use them as a crunchy topping for oatmeal, yogurt, smoothie bowls, and salads.
This recipe is naturally gluten-free. When preparing it for someone with celiac disease or gluten sensitivity, check packaged sugar and seasonings for appropriate gluten-free labeling and prevent cross-contact during preparation.