
Discover how chocolate curls can transform cakes, cupcakes, cheesecakes, and desserts into elegant bakery-style creations. Learn the best chocolate to use, decorating ideas, and expert tips for perfect chocolate curls every time.
There is something undeniably magical about a dessert finished with chocolate curls. They instantly transform an ordinary cake into a stunning centerpiece, add elegance to a simple cheesecake, and give cupcakes, brownies, and even hot chocolate a polished, professional finish. Whether they are delicate spirals resting on a silky buttercream cake or dramatic ribbons cascading over a rich chocolate ganache, chocolate curls bring both beauty and indulgence to every bite.
The best part is that creating chocolate curls is much easier than many home bakers realize. You do not need expensive pastry tools or years of decorating experience to achieve impressive results. With quality chocolate, the right technique, and a little patience, you can create beautiful chocolate decorations that look as though they came straight from a professional bakery.
If you enjoy baking for birthdays, holidays, family gatherings, or simply because you love spending time in the kitchen, learning how to make chocolate curls is a decorating skill that you will use again and again.
What Are Chocolate Curls?
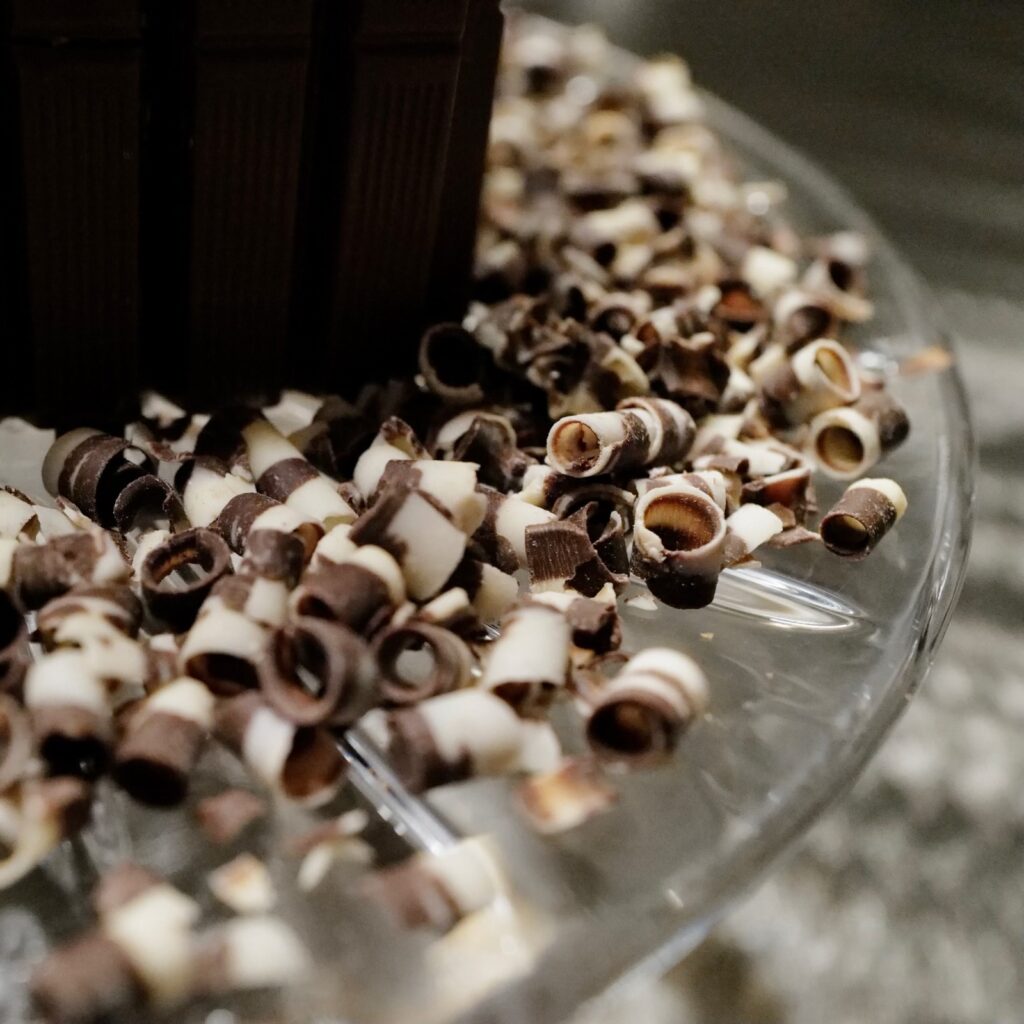
Chocolate curls are thin ribbons of chocolate that naturally curl as they are shaved from a block or sheet of chocolate. Depending on the technique and the tool you use, they can range from tiny, delicate spirals to large, dramatic curls that add height and movement to cakes.
Unlike chocolate shavings, which tend to be small and irregular, chocolate curls have a graceful shape that creates dimension and visual interest. They add texture, elegance, and rich chocolate flavor all at once, making them one of the most versatile dessert decorations available.
Professional pastry chefs have relied on chocolate curls for decades because they are timeless, sophisticated, and suitable for nearly every style of dessert.
Why Chocolate Curls Are So Popular
One of the reasons chocolate curls have remained a favorite among bakers is their incredible versatility. They complement almost every dessert and every celebration.
They instantly make homemade desserts look professionally decorated without requiring complicated decorating techniques. They also add another layer of rich chocolate flavor while creating beautiful contrast against smooth buttercream, silky whipped cream, glossy ganache, or creamy frosting.
Chocolate curls are also wonderfully forgiving. No two curls are exactly alike, and that natural variation is part of their charm. Even imperfect curls create a beautiful, handcrafted appearance that makes desserts feel warm, inviting, and made with care.
Choosing the Best Chocolate
Not all chocolate performs the same when making curls. The quality of the chocolate plays a significant role in both appearance and ease of preparation.
Dark chocolate is often the easiest choice because it creates sturdy curls with bold flavor and beautiful definition.
Milk chocolate produces softer curls with a sweeter taste and a warm caramel color that pairs beautifully with vanilla and caramel desserts.
White chocolate creates elegant ivory curls that look stunning on wedding cakes, spring desserts, and holiday treats.
Ruby chocolate offers naturally pink curls that add a unique touch without the need for food coloring.
Whenever possible, choose high-quality baking chocolate or couverture chocolate with a higher cocoa butter content. Better chocolate produces smoother curls, cleaner edges, and fewer broken pieces.
Simple Tools You Probably Already Own
One of the best things about making chocolate curls is that you likely already have everything you need in your kitchen.
A vegetable peeler is perfect for creating long, elegant curls.
A bench scraper works well for larger, dramatic ribbons.
A chef’s knife creates rustic curls and decorative shavings.
An offset spatula or palette knife can also produce unique decorative shapes.
There is no need for specialized equipment to create beautiful results.
The Secret Is Temperature
If there is one secret to making perfect chocolate curls, it is understanding temperature.
Chocolate that is too cold becomes brittle and breaks into small pieces.
Chocolate that is too warm becomes soft and smears instead of curling.
The ideal chocolate is cool, firm, and slightly flexible. Many bakers simply allow refrigerated chocolate to sit at room temperature for several minutes before shaving it.
Once you find that perfect temperature, creating beautiful curls becomes surprisingly easy.
Decorating with Chocolate Curls
Chocolate curls are incredibly versatile and can be used to decorate almost any dessert.
Pile generous curls in the center of a layer cake for an elegant bakery-style finish.
Scatter smaller curls across cupcakes for a simple but sophisticated decoration.
Top cheesecakes with curls for added texture and visual appeal.
Finish chocolate mousse with delicate spirals for an elegant restaurant-quality presentation.
Add curls to brownies, trifles, ice cream sundaes, pudding, or even homemade hot chocolate for an extra touch of indulgence.
They also pair beautifully with fresh berries, edible flowers, chocolate roses, crushed nuts, gold leaf, whipped cream, and chocolate ganache.
Whether your decorating style is rustic or refined, chocolate curls adapt beautifully to almost any dessert.
Mixing Different Chocolates
One of the easiest ways to create an eye-catching dessert is by combining several types of chocolate curls.
Dark chocolate adds rich contrast.
Milk chocolate brings warmth and sweetness.
White chocolate brightens the overall presentation.
When all three are layered together, they create depth, color, and texture that instantly elevate any cake.
This combination is especially beautiful for birthdays, weddings, anniversaries, and holiday desserts.
Storing Chocolate Curls
Chocolate curls can easily be prepared in advance, making them a wonderful decorating option for busy bakers.
Place the curls in an airtight container with sheets of parchment paper between the layers to prevent sticking.
Store them in a cool, dry place away from direct sunlight. If your kitchen is especially warm, refrigerate the container until you are ready to decorate.
Preparing the curls ahead of time allows you to focus on assembling your dessert without rushing at the last minute.
Common Mistakes to Avoid
Every baker experiences a few broken curls while learning, and that is perfectly normal.
If your chocolate snaps into pieces, allow it to warm slightly before trying again.
If it smears, let it cool for a few minutes.
Use steady, even pressure rather than forcing the tool through the chocolate.
Handle finished curls gently to prevent fingerprints or melting from the warmth of your hands.
Most importantly, remember that chocolate curls are meant to look natural. Their slight variations are what make them so beautiful.
A Timeless Finishing Touch
While decorating trends continue to evolve, chocolate curls have never gone out of style. Their classic beauty, rich flavor, and effortless elegance make them one of the most beloved cake decorations in both home kitchens and professional bakeries.
Whether you are decorating a simple weeknight dessert or creating a showstopping celebration cake, chocolate curls have a way of making every dessert feel a little more special. They add texture, movement, and sophistication while celebrating the simple joy of chocolate itself.
With just a little practice, you will discover that these elegant curls are one of the easiest ways to give your homemade desserts a beautiful bakery-quality finish that family and friends will admire before they even take the first bite.