How to Grow Mint: The Complete Guide to Growing Healthy, Flavorful Mint at Home
How to grow mint successfully starts with choosing one of the easiest and most rewarding herbs you can grow. There is something truly satisfying about stepping outside, harvesting a handful of fresh mint leaves, and enjoying their cool, refreshing aroma. Whether you are making a soothing cup of herbal tea, adding a burst of flavor to homemade lemonade, or garnishing your favorite desserts, fresh mint brings a taste of the garden to every meal. Best of all, it is an herb that grows quickly, asks for very little care, and rewards you with an abundant harvest throughout the growing season.
Mint has earned its place as one of the most popular herbs in home gardens around the world. Its vibrant green foliage, refreshing fragrance, and endless culinary uses make it a favorite for gardeners of every skill level. If you are planting your very first herb garden or looking to expand an established one, mint is an excellent choice because it is forgiving, productive, and incredibly versatile.
One of the first things experienced gardeners will tell you about mint is that it loves to grow. In fact, it grows so enthusiastically that many people recommend planting it in a container rather than directly in the garden. While its underground runners allow it to spread quickly, keeping mint in a pot makes it easy to manage while still providing a steady supply of fresh leaves all season long.
Beyond the kitchen, mint is a wonderful addition to the garden itself. Its fragrant leaves release a refreshing scent whenever you brush past them, and its delicate flowers attract bees, butterflies, and other important pollinators. From classic spearmint and peppermint to unique varieties like chocolate mint and pineapple mint, there is a type of mint to suit every taste and every garden style.
Whether your goal is to grow fresh herbs for cooking, create a beautiful container garden, or simply enjoy the satisfaction of harvesting your own ingredients, learning how to grow mint is a skill that will reward you for years to come. This complete guide will show you everything you need to know, from selecting the best variety and planting it correctly to caring for your plants and enjoying a plentiful harvest season after season.
Why Grow Mint?
It is easy to see why mint has remained one of the world’s favorite herbs for centuries. Not only is it incredibly easy to grow, but it is also one of the most useful plants you can have in your garden. From refreshing summer drinks to flavorful dinners and homemade desserts, fresh mint has a way of elevating everyday recipes with its bright, cooling flavor.
One of the greatest advantages of growing your own mint is convenience. Instead of purchasing packaged herbs that lose their freshness after a few days, you can simply step outside and harvest exactly what you need. Freshly picked mint has a stronger aroma and richer flavor than store-bought leaves, making every recipe taste even better.
Mint is also an excellent herb for gardeners who are just getting started. Unlike some plants that require constant attention, mint is remarkably forgiving. Give it sunlight, consistently moist soil, and occasional pruning, and it will reward you with lush growth throughout the growing season.
Beyond its culinary value, mint brings life to your garden. During the summer months, its delicate flowers attract bees, butterflies, and other beneficial pollinators that help support nearby vegetables, fruits, and flowering plants. Its dense green foliage also adds beautiful texture to herb gardens, patios, and decorative containers.
Perhaps the best part of all is its generous nature. A single healthy mint plant often produces far more leaves than one household can use fresh, giving you plenty to dry, freeze, or share with friends and family.
Benefits of Growing Mint
Once you begin growing mint, it quickly becomes one of those herbs you wonder how you ever lived without.
Some of the many benefits include:
Fresh herbs available whenever you need them.
Easy to grow for gardeners of all experience levels.
Perfect for containers, raised beds, and indoor gardens.
Fast-growing and highly productive.
Beautiful fragrant foliage that smells wonderful throughout the garden.
Flowers that attract bees, butterflies, and other beneficial insects.
Excellent for teas, desserts, beverages, salads, sauces, marinades, and savory recipes.
Simple to propagate from cuttings or divisions.
Returns year after year in many climates.
Adds beauty and fragrance to patios, balconies, and outdoor living spaces.
Popular Types of Mint
Many people are surprised to discover that there are hundreds of varieties of mint, each with its own unique flavor and personality. Exploring different types of mint is part of the fun, and you may find yourself growing several varieties once you experience how different each one tastes.
Spearmint
Spearmint is the classic variety most gardeners grow. With its sweet, refreshing flavor and bright green leaves, it is perfect for teas, mojitos, mint jelly, fruit salads, yogurt sauces, and countless everyday recipes. If you are wondering which variety to plant first, spearmint is always an excellent choice.
Peppermint
Peppermint contains more menthol than spearmint, giving it a stronger cooling flavor that instantly refreshes the palate. It is commonly used in herbal teas, candies, chocolates, desserts, and holiday treats. Many gardeners also enjoy growing peppermint for its invigorating fragrance.
Chocolate Mint
Chocolate mint offers one of the most unique flavor profiles in the mint family. Alongside its refreshing mint taste is a subtle hint of chocolate that makes it perfect for brownies, cakes, cookies, hot chocolate, coffee drinks, and homemade ice cream. Its darker stems and attractive foliage also make it an eye-catching addition to herb gardens.
Apple Mint
Apple mint features soft, fuzzy leaves and a delicate fruity flavor that is milder than many other mint varieties. It is wonderful for fresh herbal teas, fruit salads, infused water, and decorative herb gardens.
Pineapple Mint
Pineapple mint is loved as much for its appearance as its flavor. Its beautiful cream-edged variegated leaves brighten containers and herb beds while offering a light tropical taste that complements fruit dishes and refreshing beverages.
Orange Mint
Orange mint combines cool mint with bright citrus notes, making it an excellent choice for lemonade, cocktails, infused water, desserts, and summer recipes.
Mojito Mint
As its name suggests, mojito mint is widely considered one of the best varieties for making the classic Cuban cocktail. Its crisp, clean flavor also works beautifully in sparkling water, iced tea, and fruit drinks.
Choosing the Best Place to Grow Mint
One of the reasons mint is such a popular herb is its ability to adapt to a variety of growing conditions. However, giving it the right environment will encourage faster growth, healthier plants, and more flavorful leaves.
Before planting, spend a little time choosing the best location. Your mint will reward you with months of lush growth if its basic needs are met.
Sunlight Requirements
Mint thrives with about four to six hours of sunlight each day.
If you live in a cooler climate, full sun helps produce vigorous growth and richly colored foliage. In warmer regions, however, providing some afternoon shade protects the leaves from scorching during periods of intense summer heat.
One of the wonderful things about mint is its flexibility. Even if your garden does not receive full sun all day, mint usually performs well in partial shade, making it an excellent herb for a variety of landscapes.
If you are growing mint indoors, place the container near a bright window that receives several hours of indirect sunlight. South-facing or east-facing windows often provide the ideal amount of light. If natural light is limited, a quality grow light can easily keep your mint healthy throughout the year.
Temperature Requirements
Mint prefers temperatures between 55°F and 75°F, which makes it well suited to spring, summer, and early fall gardens.
Most varieties are hardy perennials in USDA Hardiness Zones 3 through 9, returning each spring with fresh new growth after winter dormancy.
While mint tolerates cool weather surprisingly well, prolonged periods of extreme heat can slow its growth. During especially hot weather, consistent watering and a little afternoon shade help keep the foliage lush and productive.
Soil Requirements
Healthy soil is one of the secrets to growing beautiful mint.
Mint grows best in rich, fertile, well-draining soil that retains moisture without becoming soggy. Before planting, work several inches of compost into the soil to improve its structure and provide a steady supply of nutrients.
A soil pH between 6.0 and 7.0 is ideal, although mint is forgiving and adapts well to slightly different conditions.
If you are planting in containers, choose a high-quality potting mix rather than garden soil. Potting mixes provide better drainage while allowing roots to develop freely, resulting in healthier, more productive plants.
With the right location, healthy soil, and plenty of sunlight, your mint will quickly become one of the easiest and most productive herbs in your garden.
Now that you have chosen the perfect location for your mint, it is time for the exciting part, getting it planted and watching it grow. One of the reasons gardeners love mint is because it establishes quickly and requires very little effort to become a lush, productive plant. With just a few simple care techniques, your mint can provide fresh leaves for months while filling your garden with its refreshing fragrance.
Whether you are growing mint in a container on your patio, in a raised garden bed, or indoors near a sunny window, following these care tips will help your plants stay healthy, vigorous, and productive throughout the growing season.
How to Plant Mint
If you have never grown herbs before, mint is one of the best plants to begin with. It is forgiving, grows quickly, and adapts well to different growing environments.
The easiest way to get started is by purchasing a healthy nursery plant. Look for one with vibrant green leaves, sturdy stems, and no signs of yellowing or insect damage. Healthy plants establish more quickly and begin producing new growth almost immediately.
When planting outdoors, dig a hole slightly wider than the root ball. Place the plant into the hole so it sits at the same depth it was growing in its nursery pot. Fill in the soil around the roots, gently firm it into place, and water thoroughly to help eliminate air pockets.
If you are planting several mint plants, allow about 18 to 24 inches of space between them. Even though mint grows best in containers, proper spacing improves air circulation and helps reduce the chance of fungal diseases.
Why Growing Mint in Containers Is the Best Choice
Ask experienced gardeners for advice about mint, and you will almost always hear the same recommendation.
Grow it in a container.
Mint spreads through underground stems called rhizomes, which allow it to travel beneath the soil and produce new shoots several inches away from the original plant. While this vigorous growth makes mint wonderfully productive, it can quickly overwhelm nearby flowers, herbs, and vegetables if planted directly into open garden beds.
Fortunately, the solution is simple.
Growing mint in a container gives you complete control over its growth while still allowing the plant to flourish. It also makes harvesting easier and allows you to move the plant if weather conditions change.
Choose a container that is at least 12 inches wide and equally deep. Make sure it has drainage holes to prevent excess moisture from collecting around the roots.
Terracotta pots provide excellent airflow, while glazed ceramic containers retain moisture slightly longer during hot summer weather. Both make excellent choices depending on your climate.
If you prefer growing mint in the ground, consider burying a large container with the bottom removed to help contain the roots while still creating a natural garden appearance.
Growing Mint Indoors
One of the wonderful things about mint is that it grows just as happily indoors as it does outside.
If you enjoy cooking year-round, growing mint on a sunny kitchen windowsill means fresh herbs are always within reach.
Choose a bright location that receives several hours of indirect sunlight each day. South-facing and east-facing windows usually provide ideal lighting conditions.
Indoor air tends to be drier than outdoor conditions, especially during winter when heating systems are running. Check the soil regularly and water whenever the top inch begins to feel dry.
Rotating the pot every week or two encourages balanced growth and prevents the plant from leaning toward the light.
With regular harvesting, your indoor mint will stay compact, attractive, and productive throughout the year.
Watering Mint
If there is one thing mint appreciates most, it is consistent moisture.
Unlike herbs that prefer dry conditions, mint grows best when the soil remains evenly moist but never soggy.
Rather than watering on a strict schedule, check the soil every few days. Insert your finger about an inch into the soil. If it feels dry at that depth, it is time to water.
Container-grown mint usually requires more frequent watering than plants growing in the ground because pots dry out faster, especially during warm summer weather.
The best time to water is early in the morning. This gives the plant plenty of moisture before the heat of the day while allowing excess moisture on the leaves to dry quickly.
Adding a layer of organic mulch around outdoor plants helps conserve soil moisture, regulate temperature, and reduce weed growth.
Fertilizing Mint
Mint is not a heavy feeder, which is one more reason it is so easy to grow.
Before planting, mix compost into the soil to provide slow-release nutrients throughout the season.
For established plants, another light application of compost each spring is often all that is needed.
If your mint begins growing more slowly or the leaves lose some of their vibrant color, one application of a balanced organic fertilizer can encourage healthy new growth.
Avoid overfertilizing.
Too much nitrogen encourages rapid leafy growth but may reduce the concentration of the essential oils that give mint its wonderful fragrance and flavor.
Sometimes less truly is more.
Pruning and Regular Maintenance
One of the most enjoyable aspects of growing mint is that harvesting naturally keeps the plant healthy.
Each time you trim a stem, the plant responds by producing new branches. Over time, this creates a fuller, bushier plant with even more leaves to harvest.
Once your mint reaches about six to eight inches tall, begin pinching back the growing tips regularly.
Using clean scissors or garden snips, cut just above a pair of healthy leaves. New shoots will soon emerge from that point.
If flower buds begin to appear and your primary goal is harvesting leaves, remove the buds before they bloom. This allows the plant to direct more energy toward producing flavorful foliage.
Of course, if you enjoy watching bees and butterflies visit your garden, allowing a few flowers to bloom can be a wonderful choice.
How to Propagate Mint
One of the best things about mint is how incredibly easy it is to propagate.
Instead of purchasing new plants every year, you can create additional plants from the one you already have.
Growing Mint from Stem Cuttings
Take a healthy stem about four to six inches long.
Remove the lower leaves.
Place the stem in a glass of clean water.
Within one to two weeks, tiny white roots usually begin to appear.
Once the roots are about one inch long, transplant the cutting into moist potting soil.
It really is that simple.
Dividing Mature Plants
Every two to three years, mature mint plants benefit from division.
Carefully dig up the root ball.
Separate it into several healthy sections using a clean garden knife or spade.
Replant each division immediately and water well.
Division not only gives you additional plants but also keeps older plants vigorous and productive.
Companion Planting with Mint
Mint can be a valuable companion plant when used thoughtfully.
Its fragrant foliage may help discourage certain insects, while its flowers attract pollinators that benefit nearby vegetables and flowers.
Many gardeners place containers of mint near tomatoes, peppers, broccoli, cabbage, kale, cauliflower, and carrots.
Keeping mint in containers nearby allows you to enjoy its companion planting benefits without worrying about it spreading into vegetable beds.
Common Pests
Mint is generally resistant to serious pest problems, but an occasional visitor may appear.
Aphids
These tiny insects feed on tender new growth.
A strong spray of water often removes them, and beneficial insects like ladybugs usually help keep populations under control.
Spider Mites
Spider mites become more common during hot, dry weather.
If you notice fine webbing or tiny yellow spots on the leaves, increase humidity around the plant and rinse the foliage regularly.
Whiteflies
Whiteflies sometimes gather beneath leaves.
Yellow sticky traps and insecticidal soap usually provide effective control when necessary.
Common Diseases
Fortunately, mint rarely experiences major disease problems when grown under proper conditions.
Powdery Mildew
Powdery mildew appears as a white coating on the leaves during humid weather.
Good air circulation, proper spacing, and watering at the base of the plant usually prevent this fungal disease.
Rust
Rust causes orange or brown spots on the undersides of leaves.
Remove infected stems promptly and avoid composting diseased foliage.
Root Rot
Root rot is usually caused by poorly draining soil or overwatering.
Healthy drainage and containers with drainage holes are the best prevention.
Common Mistakes to Avoid
Even though mint is considered one of the easiest herbs to grow, a few common mistakes can affect its health.
Planting mint directly into an open garden bed without containment often results in unwanted spreading.
Allowing the soil to dry completely slows growth and causes leaves to wilt.
Overwatering plants growing in poorly drained soil can lead to root rot.
Applying too much fertilizer may produce large leaves with less concentrated flavor.
Skipping regular harvesting allows plants to become tall and leggy instead of full and bushy.
Fortunately, these mistakes are easy to avoid, and even if they happen, mint usually recovers quickly with a little care.
How to Grow Mint: The Complete Guide to Growing Healthy, Fragrant Mint at Home
Part 3: Harvesting, Preserving, and Enjoying Fresh Mint
One of the greatest rewards of growing mint is harvest day. After weeks of watching your plant fill out with vibrant green leaves, you finally get to enjoy the fresh flavor and incredible fragrance that only homegrown herbs can provide. Unlike many garden crops that produce just once each season, mint continues to reward you with fresh growth every time you harvest it. In fact, regular harvesting is one of the best ways to keep your plant healthy, full, and productive.
Whether you are clipping a few sprigs for a refreshing glass of iced tea or gathering a larger harvest to dry for the winter months, knowing the best time and technique to harvest mint helps you enjoy the freshest flavor while encouraging even more growth.
When to Harvest Mint
One of the wonderful things about mint is that you do not have to wait long before enjoying your first harvest.
Most plants are ready once the stems reach about 6 to 8 inches tall and have developed several sets of healthy leaves. At this stage, the plant has enough growth to recover quickly after harvesting.
Although you can harvest mint throughout the growing season, many gardeners agree that the flavor is at its peak just before the plant begins flowering. During this stage, the leaves contain the highest concentration of essential oils, giving them their signature refreshing taste and aroma.
The best time of day to harvest is in the morning after the dew has dried but before the afternoon sun becomes too warm. This is when the leaves are at their freshest and their natural oils are most concentrated.
How to Harvest Mint Without Damaging the Plant
Harvesting mint is simple, but using the proper technique encourages healthier, bushier plants.
Rather than picking individual leaves, use clean scissors or garden snips to cut entire stems just above a pair of healthy leaves. New branches will quickly grow from that point, producing even more stems to harvest later.
Try not to remove more than one-third of the plant during a single harvest. Leaving plenty of healthy foliage allows the plant to recover quickly and continue producing fresh growth.
One of the best things about mint is that the more you harvest it, the fuller it becomes. Frequent trimming naturally encourages branching, creating a dense, lush plant instead of one with long, leggy stems.
How to Store Fresh Mint
Sometimes you only need a few sprigs for dinner, while other times your garden produces far more mint than you can use immediately.
Fortunately, mint stores beautifully using several different methods.
Refrigerating Fresh Mint
If you plan to use your mint within a few days, wrap the stems in a slightly damp paper towel and place them inside a reusable storage bag or airtight container in the refrigerator.
Another popular method is to place the stems upright in a glass containing an inch or two of water and loosely cover them with a plastic bag before refrigerating.
Fresh mint usually stays vibrant for about one week using either method.
How to Dry Mint
Drying mint is one of the easiest ways to preserve your harvest for year-round use.
Gather several stems into a small bundle and secure them with kitchen twine or a rubber band.
Hang the bundle upside down in a cool, dry location with good air circulation and away from direct sunlight.
After one to two weeks, the leaves should crumble easily between your fingers.
Remove the dried leaves from the stems and store them in airtight glass jars away from heat and light.
Properly stored dried mint maintains good flavor for up to one year.
How to Freeze Mint
Freezing preserves much of mint’s fresh flavor and vibrant color.
There are several simple ways to freeze mint.
Place whole leaves on a baking sheet until frozen, then transfer them to freezer-safe bags.
You can also chop fresh mint and place it into ice cube trays with water. Once frozen, the cubes are perfect for smoothies, soups, sauces, lemonade, and iced tea.
Many gardeners like freezing mint with olive oil for easy use in savory recipes.
Delicious Ways to Use Fresh Mint
One of the greatest joys of learning how to grow mint is discovering just how many ways it can be used in the kitchen.
Fresh mint pairs beautifully with both sweet and savory dishes and instantly adds brightness to recipes.
Some favorite uses include:
Fresh herbal tea
Homemade lemonade
Iced tea
Fruit salads
Garden salads
Smoothies
Sparkling water
Infused water
Homemade pesto
Yogurt sauces
Tzatziki
Roasted vegetables
Grilled lamb
Chicken dishes
Spring rolls
Chocolate desserts
Brownies
Cookies
Ice cream
Fresh fruit
Cocktails
Mocktails
Simple syrup
Homemade jellies
Once you begin harvesting fresh mint from your own garden, you may be surprised how often you reach for it while cooking.
Health Benefits of Mint
While mint is best known for its refreshing flavor, it has also been appreciated for centuries for its natural wellness benefits.
Mint contains antioxidants that help protect plant cells and contribute to overall wellness as part of a balanced diet.
Many people enjoy peppermint tea after meals because it is traditionally associated with supporting comfortable digestion.
Its refreshing aroma can also make gardens and outdoor spaces feel especially inviting during the warmer months.
Although mint has long been used in traditional herbal practices, it should not be considered a substitute for professional medical advice or treatment.
Common Questions About Growing Mint
Does mint come back every year?
Yes. Most varieties are perennial in USDA Hardiness Zones 3 through 9. Once established, they return each spring with fresh new growth.
How often should I water mint?
Mint prefers consistently moist soil. Water whenever the top inch of soil begins to feel dry, especially during warm weather.
Can mint grow indoors?
Absolutely. Mint is one of the easiest herbs to grow indoors. Place it near a bright window, keep the soil evenly moist, and harvest regularly to encourage compact growth.
Can mint grow in full sun?
Yes. In cooler climates, mint performs beautifully in full sun. In hotter regions, providing afternoon shade helps prevent leaf scorch and keeps plants looking their best.
Why is my mint becoming woody?
Older stems naturally become woody over time. Regular harvesting, pruning, and dividing mature plants every few years encourage fresh, tender growth.
Is mint invasive?
Yes. Mint spreads rapidly through underground rhizomes. Growing it in containers is the easiest way to enjoy abundant harvests without allowing it to overtake your garden.
How long does mint live?
With proper care, mint can live for many years. Dividing mature plants every two to three years helps maintain their vigor and encourages healthy new growth.
Which variety is best for cooking?
Spearmint is the most versatile variety for everyday cooking, while peppermint is often preferred for desserts, candies, and herbal teas. Chocolate mint, pineapple mint, and orange mint each offer unique flavors that are fun to experiment with in the kitchen.
Final Tips for Growing Healthy Mint
Growing mint is wonderfully simple, but a few small habits can make an even bigger difference.
Harvest often to encourage bushier plants.
Keep the soil consistently moist but never waterlogged.
Choose containers with good drainage.
Add compost each spring to maintain healthy growth.
Remove older woody stems to encourage fresh foliage.
Divide mature plants every few years.
Do not be afraid to trim your plant regularly. Mint responds to harvesting by producing even more fresh growth.
Bring Fresh Flavor to Your Garden All Season Long
Learning how to grow mint is one of the easiest ways to enjoy fresh herbs straight from your garden. From its refreshing fragrance and beautiful green foliage to its endless culinary possibilities, mint offers something for every gardener. It thrives in containers, raised beds, and indoor gardens, making it an excellent choice no matter how much space you have available.
Whether you are harvesting leaves for homemade herbal tea, creating refreshing summer drinks, adding fresh herbs to family meals, or simply enjoying the relaxing scent as you walk through your garden, mint quickly becomes one of those plants you cannot imagine gardening without.
With just a little sunshine, consistently moist soil, and regular harvesting, your mint will continue producing flavorful leaves throughout the growing season. Once you experience the simple pleasure of stepping outside to gather fresh mint whenever you need it, you will understand why this timeless herb has remained a favorite in gardens around the world for generations.
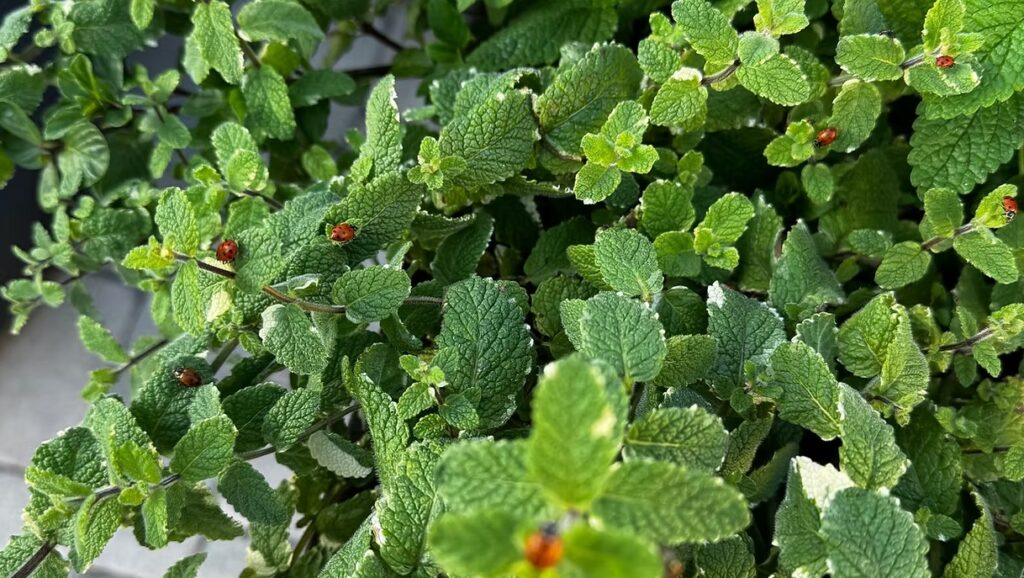
Ladybugs explore the fragrant leaves of a thriving mint plant.
There is something refreshing about brushing past a patch of pineapple mint and catching its sweet, fruity aroma drifting through the garden. This beautiful variegated herb combines the familiar cooling scent of traditional mint with delicate tropical notes that resemble fresh pineapple, creating a plant that is as ornamental as it is useful. A Pineapple Mint Growing Guide is the perfect place to begin if you are looking for an herb that adds beauty to your landscape while providing endless culinary and decorative possibilities. Pineapple mint is one of those herbs that quickly earns a permanent place in the garden. Its soft green leaves edged in creamy white brighten flower beds, containers, and herb gardens throughout the growing season. During summer, it produces delicate spikes of pale pink to lavender flowers that attract bees, butterflies, and other beneficial pollinators, making it both productive and environmentally friendly. Why Gardeners Love Pineapple Mint Unlike many ornamental plants that simply provide visual appeal, pineapple mint offers something for every gardener. It is easy to grow, highly fragrant, edible, and surprisingly versatile. Whether you enjoy creating refreshing beverages, homemade desserts, herbal teas, fruit salads, or floral arrangements, this herb brings fresh flavor and beauty to every season. One of the reasons gardeners love pineapple mint is its forgiving nature. Even beginners can grow it successfully with very little experience. Once established, the plant grows vigorously and rewards minimal care with lush foliage that can be harvested repeatedly throughout the growing season. Its resilience makes it an excellent choice for busy gardeners who still want a productive herb garden. The striking variegated foliage also makes pineapple mint stand out among other herbs. The creamy white leaf margins create a bright, almost glowing appearance that contrasts beautifully with darker green herbs such as rosemary, oregano, thyme, and sage. It pairs especially well with colorful flowers, creating attractive combinations in cottage gardens, pollinator gardens, and decorative containers. Growing Pineapple Mint in the Garden Because pineapple mint spreads through underground runners, many gardeners prefer growing it in containers or raised beds where its growth can be managed more easily. This habit allows the plant to develop into a full, healthy mound without overtaking neighboring herbs or vegetables. Container growing also makes harvesting convenient since fresh sprigs remain within easy reach near patios, porches, or outdoor kitchens. Like most members of the mint family, pineapple mint thrives when given plenty of sunshine, consistently moist soil, and good air circulation. While it tolerates partial shade, the brightest variegation typically develops in locations receiving several hours of sunlight each day. Healthy growing conditions encourage fuller growth, stronger fragrance, and abundant harvests. Gardeners in many climates appreciate pineapple mint because of its adaptability. It grows well in traditional garden beds, raised beds, decorative containers, window boxes, and even indoor pots placed near sunny windows. This flexibility allows nearly anyone to enjoy fresh herbs regardless of available gardening space. Culinary Uses for Pineapple Mint Beyond its beauty, pineapple mint has become increasingly popular among home cooks. Fresh leaves can be infused into water, iced tea, lemonade, fruit punches, cocktails, mocktails, syrups, jellies, fruit salads, and desserts. The subtle pineapple aroma complements tropical fruits while adding a refreshing finish to both sweet and savory dishes. Its fragrant foliage can also be used to garnish cakes, decorate charcuterie boards, flavor homemade vinegars, or create refreshing herbal ice cubes for summer beverages. Keeping a healthy plant close to the kitchen makes it easy to harvest fresh sprigs whenever inspiration strikes. A Favorite for Pollinator Gardens Pineapple mint is equally valuable outside the kitchen. Freshly cut stems can be added to bouquets, dried for potpourri, or used to make homemade sachets that naturally scent drawers and closets. Even a gentle breeze passing through the leaves releases its pleasant fragrance, making it a delightful addition near walkways, patios, and outdoor seating areas. During its blooming period, the tiny flowers attract honeybees, native bees, butterflies, and other beneficial insects that help support a healthy garden ecosystem. Growing flowering herbs alongside vegetables and fruit trees encourages pollination while increasing biodiversity throughout the garden. Start Your Pineapple Mint Growing Journey Whether you dream of harvesting fragrant herbs for afternoon tea, creating beautiful edible landscapes, attracting butterflies, or simply enjoying the delightful scent while walking through your garden, pineapple mint offers exceptional rewards with surprisingly little effort. Its attractive foliage, refreshing fragrance, culinary versatility, and easy-care nature have made it one of the most beloved herbs for gardeners of every skill level. Choosing the Best Location for Pineapple Mint Selecting the right location is one of the most important steps in growing healthy pineapple mint. This fragrant herb thrives in areas that receive at least 4 to 6 hours of sunlight each day. Morning sun with light afternoon shade is ideal, especially in regions with hot summers, as it helps protect the beautiful variegated leaves from scorching. Pineapple mint also grows well in partial shade, although the foliage may become slightly less vibrant if it receives too little light. Whether planted in the ground, a raised bed, or a decorative container, choosing a location with good air circulation helps reduce the risk of fungal diseases while encouraging vigorous growth. The Best Soil for Pineapple Mint Pineapple mint prefers fertile, well-drained soil rich in organic matter. Amending garden soil with compost before planting improves both drainage and moisture retention while supplying valuable nutrients. A slightly acidic to neutral soil pH between 6.0 and 7.0 provides ideal growing conditions. Heavy clay soils can retain excessive moisture, which may lead to root problems, while sandy soils benefit from added compost to improve water retention. For container gardening, use a high-quality potting mix rather than garden soil. Containers should always have drainage holes to prevent standing water around the roots. Planting Pineapple Mint Plant pineapple mint outdoors after the danger of frost has passed in spring. Dig a hole slightly larger than the root ball and position the plant so that the crown sits level
Learn how to grow lemon balm and mint together with this complete gardening guide. Discover planting tips, care, harvesting, companion planting, culinary uses, health benefits, and expert advice for enjoying these fragrant herbs all season long. If you are looking for two herbs that are easy to grow, wonderfully fragrant, and incredibly versatile, lemon balm and mint are an unbeatable combination. These hardy perennial herbs thrive in a variety of garden settings and reward gardeners with lush green foliage that can be harvested again and again throughout the growing season. Whether you have a backyard garden, raised beds, or a few containers on a sunny patio, lemon balm and mint add beauty, fresh aromas, and endless culinary possibilities. Their refreshing flavors brighten beverages, desserts, salads, and savory dishes, while their delicate flowers attract bees, butterflies, and other beneficial pollinators that help create a healthier garden ecosystem. From beginner gardeners to experienced growers, these two herbs remain favorites because they are productive, low maintenance, and useful in countless ways. Why Grow Lemon Balm and Mint Together? Lemon balm and mint belong to the mint family (Lamiaceae), which means they share many of the same growing preferences. They enjoy similar soil conditions, moisture levels, and sunlight, making them natural companions in the herb garden. Growing them together offers many advantages. Both plants grow quickly, produce abundant harvests, and release delightful fragrances whenever their leaves are touched. Their flowers attract beneficial insects that help pollinate vegetables, flowers, and fruit trees, making them valuable additions to any edible landscape. Gardeners also appreciate that these herbs continue producing fresh growth throughout much of the growing season. With regular harvesting, one small planting can provide months of fresh herbs for the kitchen. Getting to Know Lemon Balm Lemon balm (Melissa officinalis) is a perennial herb native to southern Europe and the Mediterranean region. It has been cultivated for centuries for its pleasant lemon fragrance and its many culinary and traditional herbal uses. The bright green, slightly crinkled leaves release a fresh citrus aroma when gently rubbed between your fingers. During summer, clusters of tiny white flowers appear, providing an excellent nectar source for honeybees and native pollinators. Depending on growing conditions, lemon balm typically reaches 18 to 36 inches tall and gradually spreads into attractive clumps. It is winter hardy in many climates and returns year after year with minimal care. Getting to Know Mint Mint (Mentha species) is one of the world’s most recognizable culinary herbs. There are dozens of varieties available, each offering its own unique flavor and fragrance. Popular varieties include peppermint, spearmint, chocolate mint, pineapple mint, apple mint, orange mint, and mojito mint. Mint grows vigorously through underground stems called rhizomes, allowing it to spread rapidly. While this makes it an excellent producer, it can quickly overtake nearby plants if left unchecked. Many gardeners choose to grow mint in containers to keep it under control. Most mint varieties grow between 12 and 24 inches tall and produce attractive spikes of white, pink, or lavender flowers during the summer months. The Best Growing Conditions Both lemon balm and mint thrive when provided with the right growing environment. Sunlight These herbs perform best in full sun to partial shade. In cooler climates, six to eight hours of sunlight each day encourages vigorous growth and flavorful leaves. In warmer regions, afternoon shade helps prevent leaf scorch during periods of intense summer heat. Soil Healthy herbs begin with healthy soil. Lemon balm and mint prefer rich, fertile soil that drains well while retaining consistent moisture. Mixing compost into the planting area before planting improves soil texture, increases fertility, and helps retain moisture during dry periods. A soil pH between 6.0 and 7.5 provides ideal growing conditions. Watering Consistent watering produces lush, healthy foliage. Water deeply whenever the top inch of soil begins to dry. Rather than watering lightly every day, deep watering encourages stronger root systems. Avoid waterlogged soil, which may lead to root rot. Container-grown herbs generally require more frequent watering than plants growing directly in the garden. Fertilizing Neither herb requires heavy feeding. A generous layer of compost each spring is often all they need to remain productive. If desired, apply a balanced organic fertilizer once or twice during the growing season. Avoid excessive fertilizer applications, as rapid growth may reduce the concentration of essential oils responsible for their rich flavors and aromas. Growing Lemon Balm and Mint in Containers Containers are an excellent choice for growing these herbs, especially mint. A container at least 12 inches wide with drainage holes provides plenty of room for healthy root development. Use a high-quality potting mix, water consistently, and harvest regularly to encourage compact, bushy growth. Growing mint in containers prevents it from spreading aggressively throughout the garden while making harvesting more convenient. Companion Planting Benefits Lemon balm and mint make excellent companion plants for many vegetables, herbs, and flowering plants. They pair particularly well with tomatoes, peppers, cabbage, broccoli, kale, rosemary, thyme, parsley, marigolds, nasturtiums, and many flowering annuals. Their fragrant foliage may help confuse certain insect pests while attracting bees, butterflies, hoverflies, and other beneficial insects that improve pollination and support a balanced garden ecosystem. Harvesting for Maximum Flavor One of the greatest advantages of growing these herbs is their ability to produce repeated harvests. Begin harvesting after the plants become well established. Using clean garden scissors, cut stems just above a healthy pair of leaves. This encourages branching and produces fuller, bushier plants. Morning is the ideal time to harvest because the leaves contain the highest concentration of aromatic oils after the morning dew has evaporated. Never remove more than one-third of the plant at a time, allowing it to recover quickly and continue producing fresh growth. Easy Ways to Preserve Your Harvest A productive herb garden often provides more herbs than can be used immediately. Fortunately, both lemon balm and mint preserve beautifully. Fresh leaves can be air dried, dehydrated, frozen whole, chopped and frozen in ice cube trays with water,
Celebrate a tulips, mint, and cosmos harvest with practical gathering tips, seasonal garden inspiration, and ideas for colorful floral arrangements. A garden harvest is not limited to fruits, vegetables, and culinary herbs. Flowers and fragrant foliage can be gathered throughout the growing season to create colorful bouquets, fresh arrangements, and meaningful moments that reflect the beauty of the garden. Tulips, mint, and cosmos each contribute something special, from the sculptural elegance of spring tulips to the refreshing fragrance of mint and the airy charm of summer cosmos. Although these plants usually reach their peak at different times, together they tell the story of a garden moving through the seasons. Tulips announce the arrival of spring, mint fills the warmer months with vigorous green growth, and cosmos carries the cutting garden into summer and fall. Photographing, arranging, or preserving each harvest creates a lovely seasonal record. The Tulips, Mint, and Cosmos Harvest celebrates more than beautiful plants. It represents the simple pleasure of stepping outdoors, choosing a few carefully grown stems, and bringing the colors and fragrances of the garden inside. The Elegant Beauty of Fresh Tulips Tulips are among the most anticipated flowers of spring. Their smooth petals, graceful stems, and remarkable range of colors make them natural focal points in seasonal bouquets. Depending on the variety, tulips may bloom in soft pastels, bright jewel tones, warm sunset shades, or dramatic near-black hues. For indoor arrangements, tulips are generally best harvested when the buds have developed their full color but remain mostly closed. Flowers gathered at this stage can continue opening in the vase, allowing their beauty to unfold over several days. Use clean, sharp garden snips or a floral knife to cut the stems. When tulips are grown as returning garden bulbs, avoid removing too much foliage with the flower. The remaining leaves need time to gather energy for the bulb. Allow the foliage to stay in the garden until it naturally yellows and declines. Place harvested tulips in clean, cool water as soon as possible. Tulip stems may continue to grow and curve after cutting, giving arrangements a relaxed, changing appearance. Refreshing the water and trimming the stem ends can help keep the flowers looking their best. Fragrant Mint From the Herb Garden Mint brings an entirely different sensory quality to a garden harvest. Its vibrant green leaves and refreshing fragrance make it valuable in the kitchen, in homemade beverages, and as greenery in informal floral arrangements. Harvest mint after the morning dew has dried but before the strongest heat of the day. Use clean snips to cut several inches down the stem, making the cut just above a healthy set of leaves. This encourages branching and can help the plant develop fuller growth. Regular harvesting also keeps mint from becoming overly tall and unruly. Because mint spreads aggressively in many gardens, it is often grown in a large container or another contained area. Even in a pot, it can provide an abundant supply of fragrant stems throughout the growing season. Fresh mint may be added to water, lemonade, iced tea, fruit salads, sauces, and many other dishes. It can also be dried or frozen for later use. When placing mint in a bouquet, keep in mind that its stems may wilt more quickly than some flowers. Condition freshly cut stems in cool water before arranging them. Only use mint in food or drinks when the plant has been positively identified and grown without products that are unsuitable for edible crops. Mint from florist arrangements should be treated as decorative unless its source and growing practices are known. The Airy Charm of Cosmos Cosmos brings movement, softness, and an unmistakable cottage-garden character to summer arrangements. The slender stems and delicate flowers appear to float above their fine, feathery foliage. Common colors include white, pink, rose, burgundy, orange, and yellow, depending on the species and variety. For the longest possible vase life, harvest cosmos when the flower is beginning to open but has not fully expanded. Choose healthy stems with fresh petals and no signs of damage. Cut deeply into the plant when possible, selecting long stems while leaving enough healthy growth to support continued flowering. Cosmos is a productive cut flower because regular harvesting and deadheading can encourage the plant to keep producing blooms. Flowers that are allowed to remain on the plant will eventually form seeds, which may reduce new flower production as the season progresses. Place the stems in clean water immediately after cutting. Remove any foliage that would sit below the waterline, since submerged leaves can deteriorate and reduce water quality. Cosmos looks beautiful on its own, but it also combines naturally with herbs, grasses, zinnias, dahlias, and other garden flowers. Bringing Different Garden Seasons Together In many climates, tulips and cosmos will not bloom at the same time. Tulips are cool-season spring flowers, while cosmos usually begins blooming during the warmer months. Mint may be available between these periods and continue producing until cold weather arrives. Rather than viewing this seasonal difference as a limitation, consider it part of the garden’s story. A collection of photographs, pressed flowers, dried petals, or individual seasonal arrangements can connect the three harvests. Spring tulips may be photographed beside the first emerging mint, while summer cosmos can be arranged with mature mint foliage later in the year. Garden journals are another beautiful way to preserve the experience. Record bloom dates, colors, fragrance, weather conditions, and the performance of different varieties. These observations can help with future planting decisions while creating a personal record of the season. Creating a Garden Fresh Arrangement Tulips create a bold foundation for spring arrangements, while mint adds texture and a clean herbal fragrance. During summer, cosmos can replace tulips as the primary flower, with mint continuing to provide greenery and contrast. Begin with a clean vase filled with fresh water. Remove leaves that would fall below the waterline, trim the stems with clean tools, and arrange the flowers loosely so their natural
Originally published
March 2026
Updated
August 2026
Reviewed by
Culibloom