Lavender: The Complete Guide to Growing, Caring for, Harvesting, and Using Lavender
Learn how to grow lavender with this complete guide to planting, watering, pruning, harvesting, drying, and using lavender at home.
Lavender brings beauty, fragrance, and versatility to the garden. Its silvery foliage, colorful flower spikes, and unmistakable herbal scent make it a favorite for borders, containers, pollinator gardens, and edible landscapes. Once established in the right conditions, lavender can also be surprisingly low-maintenance.
Successful lavender growing begins with understanding what the plant needs most: abundant sunlight, excellent drainage, and room for air to circulate. Lavender generally tolerates dry conditions better than wet soil, and many common problems develop when its roots remain damp for too long.
Whether you want to grow lavender for its ornamental value, harvest the flowers for crafts, or use culinary varieties in the kitchen, proper plant selection and seasonal care will help you enjoy healthier plants and more abundant blooms.
Understanding Lavender
Lavender belongs to the genus Lavandula, a group of aromatic perennial plants native to regions surrounding the Mediterranean, the Middle East, and parts of Asia. Its natural habitat helps explain why lavender prefers sunny, relatively dry conditions and soil that drains quickly.
Depending on the variety and climate, lavender may grow as an evergreen or semi-evergreen perennial. In colder regions, some foliage may die back during winter. Plant size, flower color, fragrance, and cold tolerance vary considerably among species and cultivars.
Lavender flowers are commonly purple or violet, but some varieties produce pink, white, or pale blue blooms. The narrow foliage may be green, silver-green, or gray, creating year-round texture in climates where the plants remain evergreen.
Popular Types of Lavender
Choosing a lavender suited to your climate is one of the most important steps in growing it successfully.
English lavender, or Lavandula angustifolia, is known for its sweet fragrance, compact growth, and relatively good cold tolerance. It is a popular choice for culinary use, dried flowers, and traditional lavender products. Common cultivars include ‘Hidcote’ and ‘Munstead.’
Lavandin, or Lavandula x intermedia, is a hybrid between English lavender and spike lavender. These vigorous plants are usually larger and produce long stems with abundant, strongly fragrant flowers. Popular cultivars include ‘Grosso’ and ‘Provence.’ Lavandin is often grown for crafts, sachets, and essential oil production.
Spanish lavender, or Lavandula stoechas, has distinctive flower heads topped with petal-like bracts. It performs well in warm, dry climates but is generally less tolerant of severe winter cold than English lavender.
French lavender is a name that can refer to different species depending on the region. It is often used for Lavandula dentata, which has softly toothed leaves and a long flowering period in warm climates. Always check the botanical name and growing requirements before purchasing a plant labeled French lavender.
Choosing the Best Location
Lavender grows and flowers best in full sun. Select a location that receives at least six hours of direct sunlight each day. Eight or more hours may produce stronger growth and more abundant flowering, particularly in humid climates where sunlight helps foliage and soil dry more quickly.
Good air circulation is also important. Avoid crowding lavender against dense shrubs or placing it where surrounding plants will trap moisture around its foliage. Proper spacing varies by cultivar, so check the expected mature width before planting.
A warm location near a stone path, gravel garden, raised bed, or south-facing wall can provide the bright, dry environment lavender prefers. In very hot climates, some varieties may benefit from protection during the most intense part of the afternoon, but heavy shade usually results in weak growth and fewer flowers.
The Best Soil for Lavender
Lavender requires well-draining soil. It often struggles in heavy clay, compacted ground, or low areas where water collects after rain.
Sandy, gravelly, or loamy soil with good drainage is usually ideal. Lavender also tends to prefer neutral to slightly alkaline soil, although the best pH range can vary somewhat by species and local growing conditions. A soil test can help determine whether an amendment is actually needed.
Avoid enriching the planting area with large amounts of compost or fertilizer. Extremely fertile soil can encourage soft, leafy growth at the expense of flowers. Rich soil may also retain more moisture than lavender roots can tolerate.
If the garden contains heavy clay, consider planting lavender in a raised bed, on a slope, or in a berm where excess water can drain away. Adding a small amount of organic matter may improve soil structure, but digging a narrow hole filled with drastically different soil can create a pocket where water collects. Improving a wider planting area is generally more effective.
When to Plant Lavender
Spring is often the best time to plant lavender, especially in regions with cold winters. Plant after the danger of severe frost has passed and the soil has begun to warm. This gives the roots an entire growing season to become established before winter.
Lavender may also be planted in early fall in mild climates. Allow enough time for roots to establish before cold or persistently wet weather arrives.
Avoid planting during periods of extreme heat whenever possible. If summer planting is necessary, watch soil moisture carefully while the plant becomes established without keeping the ground constantly wet.
How to Plant Lavender
Dig a hole approximately as deep as the plant’s root ball and somewhat wider. Remove the lavender from its nursery container and gently loosen tightly circling roots.
Position the plant so the top of the root ball is level with or slightly above the surrounding soil. Planting too deeply can hold moisture against the crown, increasing the risk of rot.
Backfill with the surrounding soil, press it gently into place, and water thoroughly. Leave enough space between plants for each variety to reach its mature size without becoming crowded.
Avoid piling mulch directly around the crown. In damp climates, gravel or small stones may be more suitable than moisture-retaining organic mulch. Any mulch should be kept away from the base of the stems.
Watering Lavender Correctly
Newly planted lavender needs regular watering while its root system becomes established. Water deeply, then allow the upper portion of the soil to begin drying before watering again. The exact schedule will depend on temperature, rainfall, soil composition, and whether the plant is growing in the ground or a container.
Established lavender is drought-tolerant, but drought-tolerant does not mean it never needs water. Plants may need supplemental irrigation during extended hot, dry periods. Deep, occasional watering is generally better than frequent, shallow watering.
Overwatering is one of the most common causes of lavender decline. Yellowing foliage, limp growth, darkened stems, or sudden dieback can indicate root stress, although pests, disease, temperature extremes, and other environmental problems may produce similar symptoms.
Water at the base of the plant when possible. Wetting the foliage repeatedly, especially late in the day, can contribute to fungal problems in humid conditions.
Fertilizing Lavender
Lavender usually requires little fertilizer when grown in suitable soil. Too much nitrogen can produce lush foliage, weak stems, and fewer flowers.
If growth is poor, first evaluate sunlight, drainage, watering, soil pH, and winter damage before applying fertilizer. A soil test is the most reliable way to identify nutrient deficiencies.
Container-grown lavender may eventually need a small amount of balanced fertilizer because nutrients wash out of pots more quickly. Follow the product directions and avoid heavy feeding.
Pruning and Shaping Lavender
Regular pruning helps lavender remain compact and encourages fresh growth. Without pruning, plants may become woody, open in the center, or develop sprawling stems.
After the main flowering period, remove spent flower stalks and lightly shape the plant. Trim leafy growth while avoiding deep cuts into old, bare wood. Many lavender plants do not reliably produce new shoots from leafless woody stems.
The best pruning time depends on climate and lavender type. Gardeners in colder areas often perform the main shaping in spring after new growth appears and the extent of winter damage is visible. In mild climates, plants may be shaped after flowering. Avoid severe pruning shortly before winter in regions where cold weather could damage tender new growth.
Growing Lavender in Containers
Container growing is an excellent option when garden soil drains poorly or winter protection is needed. Choose a pot with generous drainage holes and enough space for the plant’s mature root system.
Use a fast-draining potting mix rather than dense garden soil. A container designed from breathable material may help excess moisture evaporate, although it may also require more frequent watering in hot weather.
Water until moisture drains from the bottom, then wait until the mix has partially dried before watering again. Never allow the pot to remain in a saucer filled with water.
Container-grown lavender is more exposed to temperature changes than lavender planted in the ground. In cold climates, move the pot to a sheltered, unheated location or provide protection appropriate for the variety and local winter conditions.
Caring for Lavender Through the Seasons
In spring, inspect plants for winter damage and wait for new growth before removing questionable stems. Prune lightly, clear away decaying material, and confirm that the surrounding soil still drains properly.
During summer, monitor newly planted and container-grown lavender for water stress. Harvest flowers as they open, remove faded blooms if desired, and maintain air circulation around the plant.
In fall, avoid late applications of high-nitrogen fertilizer. Gardeners in cold climates should allow the plant to prepare naturally for dormancy. Make certain fallen leaves and heavy mulch do not collect around the crown.
During winter, protection from excessive moisture can be just as important as protection from cold. Wet soil combined with freezing temperatures can be particularly damaging. Local climate, snow cover, plant variety, and site drainage all influence winter survival.
Common Lavender Problems
Poor drainage and excessive watering are among the most frequent causes of lavender failure. Root and crown rot can develop when soil remains saturated or moisture collects around the plant’s base.
Sparse flowering may result from inadequate sunlight, excessive fertilizer, improper pruning, or a variety that is not well suited to the climate.
Woody, leggy growth is common in older plants and plants that have not been pruned regularly. Consistent light pruning can slow this process, but lavender plants naturally become woodier with age.
Spittlebugs, aphids, whiteflies, and spider mites may occasionally appear. Lavender can also experience fungal diseases in crowded, humid, or poorly drained conditions. Examine affected plants carefully before choosing a treatment, since environmental stress can resemble pest damage.
Encouraging Pollinators
Lavender flowers attract bees, butterflies, and other beneficial insects. Planting several lavender plants together can create an easily visible source of nectar while adding color and movement to the garden.
For a longer season of pollinator activity, combine lavender with other sun-loving plants that bloom before and after it. Suitable companions may include thyme, oregano, salvia, yarrow, catmint, coneflower, and other plants adapted to similar growing conditions.
Avoid spraying open flowers with broad-spectrum insecticides. Even products marketed for garden use may affect visiting pollinators if applied incorrectly.
When and How to Harvest Lavender
The best harvest time depends on how the lavender will be used. For dried bundles and decorative arrangements, cut stems when the lower flowers have opened but many buds remain closed. This stage often helps the flowers retain their color and fragrance after drying.
For fresh display, stems may be harvested when more flowers are open. For culinary use, harvest clean, unsprayed flowers from a variety known to be suitable for food.
Cut lavender on a dry morning after dew has evaporated. Use clean, sharp pruners and leave plenty of green foliage on the plant. Avoid cutting deeply into old woody growth.
Frequent light harvesting can encourage some varieties to produce additional flowers, although the timing and intensity of reblooming vary by cultivar, climate, and growing conditions.
Drying and Storing Lavender
Gather small bundles of stems and secure them loosely. Hang the bundles upside down in a dark, dry, well-ventilated place. Smaller bundles improve airflow and reduce the chance of trapped moisture.
Protect drying lavender from strong sunlight, which can fade the flower color and weaken its fragrance. Drying time varies with humidity, airflow, and bundle size.
Once completely dry, store the bundles whole or gently remove the flower buds from the stems. Place dried lavender in a clean, airtight container away from heat, light, and moisture. Label culinary lavender separately from flowers intended for crafts or decoration.
Discard dried lavender if it develops mold, an unpleasant odor, or signs of moisture.
Culinary Uses for Lavender
Only use lavender that has been grown and handled for culinary purposes. Plants purchased for ornamental display may have been treated with products not intended for edible crops.
English lavender is often favored in the kitchen because of its sweet, floral character. Other types may taste sharper or contain stronger camphor-like notes. The flavor varies by species, cultivar, growing conditions, and harvest stage.
Lavender has a powerful flavor, so a small amount is usually sufficient. It pairs especially well with lemon, berries, peaches, honey, vanilla, chocolate, and herbs such as rosemary and thyme.
Culinary lavender can add floral character to baked goods, sugar, tea blends, syrups, lemonade, preserves, and savory herb mixtures. Use it carefully so its fragrance complements the food without overwhelming it.
Decorative and Household Uses
Dried lavender is traditionally used in sachets, wreaths, bouquets, potpourri, and other crafts. The flowers can also be added to decorative jars or tucked into linen storage areas for fragrance.
Fresh or dried bundles create a simple seasonal decoration. Keep dried plant material away from open flames, heat sources, pets that may chew it, and areas where moisture could cause mold.
Lavender may also be incorporated into homemade bath and body projects, but essential oils and concentrated preparations require additional safety considerations. Essential oils should not be treated as interchangeable with culinary flowers, and they should be diluted and used according to reliable safety guidance.
Propagating Lavender
Lavender can be grown from seed, but germination may be slow and plants may not grow true to the characteristics of a named cultivar.
Stem cuttings are commonly used to reproduce an established plant. Healthy, nonflowering shoots are generally the best candidates. Rooting success depends on the season, plant health, growing medium, humidity, and variety.
Layering is another option. A flexible lower branch can be gently bent to the ground, partially covered with soil, and allowed to form roots while it remains attached to the parent plant. Once a healthy root system develops, the new plant can be separated and transplanted.
Designing a Garden With Lavender
Lavender works beautifully along walkways, where brushing past the foliage can release its fragrance. It also adds structure to borders, cottage gardens, herb gardens, gravel gardens, and Mediterranean-inspired landscapes.
The silver foliage complements roses, ornamental grasses, coneflowers, salvia, and many other sun-loving plants. When selecting companions, prioritize plants with similar light, soil, and watering needs.
Repeated groupings of lavender can create a formal rhythm, while individual plants can soften the edge of a path or add fragrance near an outdoor seating area. Always account for the mature size of each variety so the plants have sufficient airflow.
Is Lavender Right for Your Garden?
Lavender is an excellent choice for a sunny garden with well-draining soil. It offers fragrant flowers, attractive foliage, pollinator value, and numerous options for harvesting and household use.
The greatest challenge is matching the variety to the local climate. Cold tolerance, humidity tolerance, mature size, and bloom time differ among lavender types. Checking the plant label and consulting a knowledgeable local nursery or extension service can help you select a cultivar suited to your region.
With careful placement, moderate watering, and regular light pruning, lavender can become one of the most distinctive and rewarding plants in the garden.
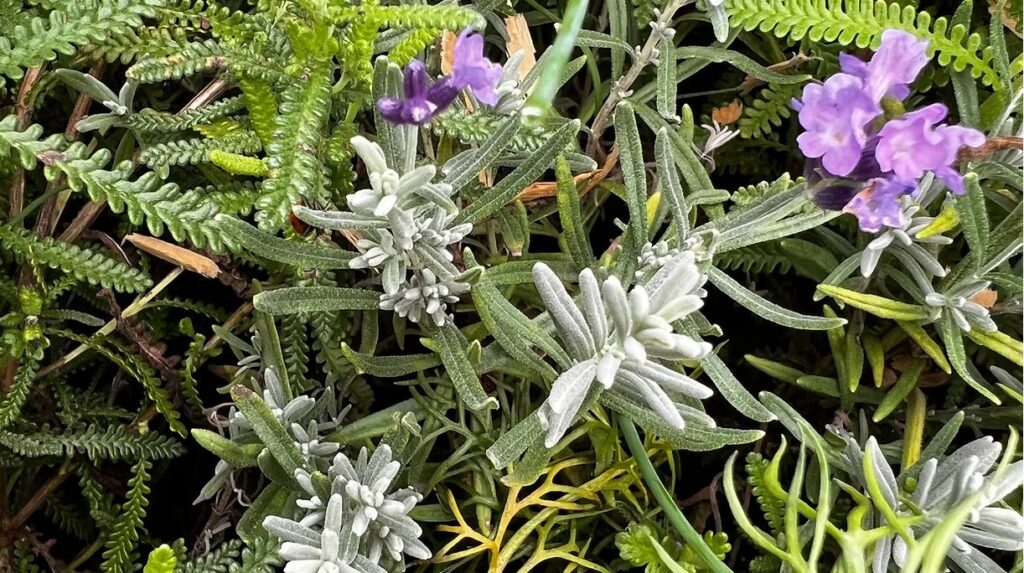
Purple lavender blossoms add soft color to a textured display of silvery leaves and green ferns.
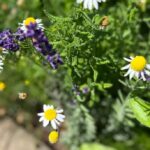
Lavender and chamomile companion planting is one of the easiest and most rewarding ways to create a beautiful, fragrant, and productive herb garden. These two beloved herbs have been cultivated for centuries for their ornamental beauty, calming aromas, culinary uses, and medicinal properties. Together, they form a stunning combination that not only enhances your landscape but also supports pollinators, attracts beneficial insects, and contributes to a healthier garden ecosystem. Whether you are planning a cottage garden, designing a pollinator-friendly landscape, or creating an edible herb garden, lavender and chamomile companion planting offers countless benefits. Their complementary growth habits, similar cultural requirements, and long-lasting blooms make them an ideal pairing for gardeners of all skill levels. What Is Lavender and Chamomile Companion Planting? Lavender and chamomile companion planting is the practice of growing these two herbs together because they thrive under similar growing conditions and provide mutual benefits within the garden. While companion planting cannot eliminate every gardening challenge, it encourages biodiversity, supports beneficial insects, and creates a balanced growing environment. Lavender adds striking vertical spikes of fragrant purple flowers, while chamomile produces delicate white blossoms with cheerful yellow centers. Together they create a classic cottage garden display that is both elegant and functional. Their flowers bloom over an extended period, providing a continuous source of nectar for pollinators while filling the garden with color and fragrance. Benefits of Lavender and Chamomile Companion Planting One of the greatest advantages of lavender and chamomile companion planting is the abundance of pollinators it attracts. Honeybees, native bees, butterflies, hoverflies, and other beneficial insects are drawn to their nectar-rich flowers throughout the growing season. As pollinators visit these herbs, they also improve the pollination of nearby vegetables, fruit trees, berry bushes, and flowering ornamentals. A garden filled with pollinators is often healthier, more productive, and more resilient. Lavender and chamomile also attract beneficial insects such as ladybugs, lacewings, parasitic wasps, and hoverflies. These natural predators help control aphids, whiteflies, spider mites, and other common garden pests, reducing the need for chemical pesticides. Lavender’s aromatic foliage contains naturally fragrant essential oils that may help discourage mosquitoes, moths, fleas, and certain flying insects. While no single plant completely prevents pests, incorporating aromatic herbs into your landscape contributes to a more balanced garden ecosystem. Another advantage of lavender and chamomile companion planting is its simplicity. Since both herbs enjoy similar growing conditions, caring for them together is easy and efficient. Growing Conditions for Lavender and Chamomile Successful lavender and chamomile companion planting begins with choosing the right location. Both herbs grow best in full sun and require at least six to eight hours of direct sunlight each day. Plenty of sunshine encourages compact growth, abundant blooms, and stronger fragrance. Well-drained soil is essential for healthy plants. Lavender thrives in sandy or gravelly soil that drains quickly, while chamomile prefers fertile, loose soil with good drainage. Incorporating compost before planting improves soil structure without sacrificing drainage. Lavender becomes highly drought tolerant once established and prefers the soil to dry slightly between waterings. Chamomile appreciates moderate moisture during dry periods but should never remain in waterlogged soil. Providing adequate spacing between plants encourages good airflow, reduces humidity around the foliage, and minimizes the risk of fungal diseases. The Best Companion Plants for Lavender and Chamomile Although lavender and chamomile thrive together, they also pair beautifully with many other herbs, vegetables, flowers, and fruit-producing plants. Excellent companion plants include rosemary, thyme, sage, oregano, basil, calendula, borage, yarrow, echinacea, roses, strawberries, blueberries, tomatoes, peppers, eggplant, broccoli, cabbage, cauliflower, and many drought-tolerant flowering perennials. These companions benefit from increased pollinator activity while creating a diverse and visually appealing garden. Plants to Avoid To ensure successful lavender and chamomile companion planting, avoid placing lavender near plants that require constantly moist soil. Mint, celery, hostas, watercress, and other moisture-loving plants have watering requirements that differ significantly from lavender. Excess moisture around lavender roots can lead to root rot and poor plant performance. Grouping plants with similar moisture needs simplifies watering and promotes healthier growth throughout the garden. Culinary Uses of Lavender and Chamomile Lavender and chamomile companion planting provides more than ornamental beauty. Both herbs are edible and offer a variety of culinary possibilities. Lavender flowers add delicate floral notes to teas, shortbread cookies, cakes, muffins, scones, ice cream, custards, infused honey, lemonade, simple syrups, sugar blends, and Herbes de Provence seasoning. Lavender also complements roasted vegetables, poultry, lamb, seafood, and grilled dishes. Chamomile flowers are widely enjoyed in herbal teas, infused honey, syrups, jellies, cakes, cookies, fruit salads, custards, smoothies, and homemade desserts. Their mild apple-like flavor makes them a versatile ingredient for both sweet and savory recipes. Growing both herbs together provides a convenient harvest of fresh flowers throughout the growing season. Harvesting Lavender and Chamomile Harvest lavender stems when approximately one-third to one-half of the flowers have opened. At this stage, the blossoms contain the highest concentration of aromatic oils and dry exceptionally well. Chamomile flowers should be harvested once they are fully open. Frequent harvesting encourages additional blooms, providing a continuous supply throughout the season. Dry the flowers in a cool, shaded location with good air circulation before storing them in airtight containers away from direct sunlight. Growing Lavender and Chamomile in Containers Lavender and chamomile companion planting is not limited to garden beds. These herbs also thrive in containers, making them excellent choices for patios, balconies, porches, and small-space gardens. Select containers with drainage holes and fill them with a high-quality, well-draining potting mix. Place containers where they receive plenty of sunlight, and water carefully, allowing the soil to dry slightly between waterings. Container-grown herbs bring fragrance, beauty, and fresh culinary ingredients within easy reach. Why Lavender and Chamomile Companion Planting Belongs in Every Garden Lavender and chamomile companion planting combines ornamental beauty with practical gardening benefits. Their shared growing requirements make them easy to cultivate together, while their abundant flowers support pollinators, attract beneficial insects, and enhance biodiversity throughout the landscape. Whether you are growing herbs for
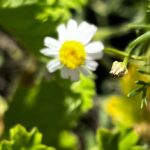
Chamomile is one of the most treasured herbs in gardens around the world, admired for its cheerful daisy-like flowers, sweet apple-like fragrance, and incredible versatility. Whether you grow it for calming herbal tea, beautiful pollinator-friendly blooms, or flavorful culinary creations, chamomile is a rewarding plant that offers beauty and usefulness throughout the growing season. For thousands of years, chamomile has been valued by cultures across Europe, Asia, and the Middle East. Today, it continues to be one of the most popular herbs for home gardeners because it is easy to grow, requires very little maintenance, and produces an abundance of fragrant blossoms. From cottage gardens and herb borders to raised beds and patio containers, chamomile adds charm while supporting a healthy garden ecosystem. If you are looking for a plant that is as practical as it is beautiful, chamomile deserves a place in your garden. What Is Chamomile? Chamomile is a flowering herb belonging to the Asteraceae family, which also includes daisies, sunflowers, asters, and chrysanthemums. Its delicate white petals surrounding bright golden centers make it instantly recognizable, while its feathery green foliage adds soft texture to the landscape. There are two primary types of chamomile grown by gardeners. German Chamomile (Matricaria chamomilla) is an annual that grows upright and produces hundreds of blossoms throughout the season. It is the most commonly cultivated variety for drying and making herbal tea because of its abundant flower production. Roman Chamomile (Chamaemelum nobile) is a perennial that grows lower to the ground and spreads gradually, creating a fragrant carpet of evergreen foliage in many climates. It is often used as an ornamental ground cover while still producing the familiar chamomile flowers. Although both varieties offer similar fragrance and flavor, each brings its own unique growing habit and ornamental appeal. Why Chamomile Is So Popular Few herbs are as versatile as chamomile. It is equally at home in ornamental flower beds, vegetable gardens, herb gardens, and containers. Gardeners appreciate chamomile because it attracts pollinators, improves biodiversity, and blooms for months with very little care. Home cooks love its delicate floral flavor, while herbal enthusiasts have treasured it for generations. Its ability to serve multiple purposes makes chamomile one of the hardest-working plants in any garden. Growing Chamomile Chamomile is an excellent choice for gardeners of every experience level. It germinates easily, grows quickly, and rewards even minimal care with an abundance of flowers. Choose a location that receives at least six to eight hours of sunlight each day. While chamomile appreciates full sun, it also tolerates light afternoon shade in regions with particularly hot summers. The plant grows best in loose, well-drained soil with moderate fertility. Rich soils tend to produce excessive leafy growth instead of flowers, so heavy fertilization is usually unnecessary. Chamomile seeds are extremely small and require light to germinate. Scatter them across the soil surface and gently press them into the soil without covering them deeply. Keep the soil lightly moist until seedlings emerge. Once established, chamomile develops into a resilient herb that tolerates short periods of drought and continues flowering for much of the growing season. Caring for Chamomile One of chamomile’s greatest advantages is how little maintenance it requires. Water deeply when the soil begins to dry, but avoid consistently wet conditions that can lead to root diseases. Mature plants become surprisingly drought tolerant and often require very little supplemental irrigation. Removing spent flowers encourages the plant to continue producing fresh blooms throughout the summer. Frequent harvesting also stimulates additional flowering, allowing gardeners to enjoy multiple harvests. Adding compost in early spring provides all the nutrients chamomile typically needs without encouraging excessive foliage growth. German chamomile often reseeds itself naturally, providing new plants the following year, while Roman chamomile slowly expands through creeping stems to form an attractive flowering ground cover. Harvesting Chamomile Flowers Harvesting chamomile is one of the most enjoyable parts of growing this herb. The blossoms should be collected once they are fully open but before the petals begin to droop. Morning is generally considered the ideal harvest time after the dew has evaporated but before the day’s heat becomes intense. Fresh flowers may be used immediately or dried for long-term storage. Spread the blossoms in a single layer on a screen or drying rack in a cool, dry location with good air circulation and away from direct sunlight. Once completely dry, store them in airtight glass jars in a cool pantry where they can retain much of their fragrance and flavor for up to one year. Culinary Uses of Chamomile Although chamomile is best known as a tea herb, its culinary possibilities extend far beyond the teacup. Its delicate floral flavor carries gentle notes of apple, honey, and wildflowers that complement a wide variety of recipes. Chamomile can be infused into honey to create a naturally floral sweetener for biscuits, yogurt, pancakes, and toast. The flowers make wonderful simple syrups that add elegance to lemonade, iced tea, sparkling water, cocktails, and mocktails. Home bakers frequently incorporate chamomile into cakes, cupcakes, cookies, muffins, scones, and shortbread, where its subtle floral aroma pairs beautifully with vanilla and citrus. The blossoms can also flavor custards, panna cotta, rice pudding, homemade ice cream, whipped cream, fruit compotes, jams, and jellies. Fresh flowers may be sprinkled over green salads, fruit salads, cheese boards, or used as edible garnishes for desserts. Chamomile pairs especially well with apples, pears, peaches, lemons, oranges, honey, vanilla, cinnamon, lavender, rosemary, mint, lemon balm, strawberries, blueberries, and blackberries. Herbal and Traditional Uses Chamomile has a long and fascinating history that spans thousands of years. Ancient civilizations valued the herb for its pleasant aroma and included it in everyday life for a variety of traditional purposes. Today, chamomile remains one of the most widely enjoyed herbal teas in the world. Beyond tea, the flowers are commonly used to prepare herbal infusions, facial steams, bath soaks, infused oils, soaps, lotions, and handcrafted skincare products. Chamomile naturally contains beneficial plant compounds, including antioxidants and flavonoids, that have
Here, you will learn all about chive blossoms and parsley, including how companion planting helps both herbs thrive, the many benefits they bring to your garden, and the delicious ways to use them in everyday cooking. Whether you are creating a thriving kitchen garden or looking for fresh inspiration in the kitchen, chive blossoms and parsley are a versatile pairing that offers beauty, flavor, and abundant harvests throughout the growing season. There is something incredibly satisfying about walking into your garden, brushing your hand across a patch of fragrant herbs, and gathering a handful of fresh parsley alongside a few vibrant purple chive blossoms. Moments like these remind us that a garden is more than a place to grow food. It is a space where beauty, nature, and fresh ingredients come together to inspire every meal. Among the many herbs you can grow, chives and parsley are one of the easiest and most rewarding companion planting combinations. They thrive under similar growing conditions, complement one another beautifully, and provide fresh harvests from spring through fall. Their partnership benefits not only your kitchen but your entire garden by attracting pollinators, supporting beneficial insects, and helping create a healthier growing environment. Whether you are planting a large kitchen garden, filling raised beds, or growing herbs in containers on your patio, chive blossoms and parsley are a pairing that delivers season after season. Their fresh flavors elevate everyday meals, while their graceful appearance adds charm and color to any outdoor space. A Perfect Partnership in the Herb Garden Companion planting is the practice of growing plants together that naturally benefit one another. Some companion plants improve soil conditions, others attract pollinators, while some help reduce pest problems or make better use of available growing space. Chives and parsley check nearly every one of those boxes. Parsley grows in lush, leafy mounds that remain attractive throughout much of the growing season. Chives produce slender green leaves that eventually give way to beautiful globe-shaped blossoms in shades of lavender and purple. Together they create layers of texture and color that look just as lovely in ornamental gardens as they do in vegetable beds. Their similar care requirements also make them easy companions. Both appreciate fertile soil, regular watering, and plenty of sunshine, allowing gardeners to care for both herbs using the same routine. For anyone just beginning an herb garden, this combination is an excellent place to start. Why Companion Planting Matters Healthy gardens are built on diversity. Instead of growing a single crop in isolation, companion planting encourages a balanced ecosystem where plants, pollinators, and beneficial insects work together. Every herb contributes something unique to the garden. Parsley provides dense foliage that helps shade the soil and reduce moisture loss. Chives contribute their distinctive onion aroma while producing nectar-rich flowers that become gathering places for pollinating insects. Together they create an environment where plants thrive naturally. Rather than viewing herbs simply as ingredients for cooking, companion planting reminds us that every plant plays an important role in supporting the health of the entire garden. Chives Help Naturally Discourage Garden Pests One reason gardeners have planted chives throughout vegetable gardens for generations is their reputation for helping reduce certain insect problems. As members of the onion family, chives contain sulfur compounds responsible for their mild onion fragrance. While people enjoy this familiar aroma, many insects do not. Growing chives near parsley may help discourage aphids, Japanese beetles, spider mites, and several other common garden pests. Although companion planting is not a replacement for good garden management, it can become an important part of an organic gardening strategy by encouraging healthier plants and reducing stress caused by insect activity. Many gardeners also plant chives near tomatoes, carrots, strawberries, roses, peppers, and apple trees for the very same reason. Chive Blossoms Bring Your Garden to Life If there is one reason never to cut every chive flower before it opens, it is the incredible number of beneficial insects they attract. As spring transitions into early summer, chives produce clusters of soft purple blossoms that quickly become one of the busiest places in the garden. Honeybees eagerly gather nectar from the flowers while native bees move from bloom to bloom collecting pollen. Butterflies drift through the blossoms, adding movement and beauty to the landscape, while hoverflies quietly perform double duty by feeding on nectar as adults and helping control aphids during their larval stage. Watching these visitors move through your herb garden is one of the simple pleasures of gardening. Their presence also benefits nearby vegetables, fruit trees, berry bushes, and flowering plants that depend on pollination for healthy harvests. Growing Chives and Parsley Together One of the reasons these herbs are so popular is because they are wonderfully uncomplicated. Choose a location that receives at least six hours of sunlight each day. While chives love full sun, parsley appreciates a little afternoon shade during periods of intense summer heat, especially in warmer climates. Plant both herbs in fertile, well-drained soil enriched with compost. Rich organic matter encourages vigorous growth while helping retain moisture between waterings. Water regularly, keeping the soil evenly moist without allowing it to become soggy. Applying a layer of mulch around the plants helps regulate soil temperature, conserve moisture, and reduce weed growth. With only a little routine care, both herbs will reward you with months of fresh harvests. Beautiful in Every Garden Style One of the joys of growing herbs is their versatility. Chives and parsley look equally at home in formal herb gardens, rustic cottage gardens, raised beds, decorative borders, and patio containers. The upright foliage and cheerful blossoms of chives create natural height, while parsley fills the surrounding space with rich green leaves. The contrast between soft purple flowers and vibrant green foliage creates a timeless combination that looks attractive from spring until frost. Many gardeners intentionally plant these herbs near walkways or seating areas where their fragrance and colorful blooms can be enjoyed every day. Other Plants That Thrive
Originally published
March 2026
Updated
August 2026
Reviewed by
Culibloom