Oregano Growing Guide: The Fragrant Herb Every Garden Should Grow
Use this oregano growing guide to learn how to plant, water, prune, harvest, dry, and grow flavorful oregano in gardens or containers.
Oregano is one of the most rewarding herbs to grow at home. Its fragrant foliage, delicate flowers, and bold culinary flavor make it a useful addition to vegetable gardens, raised beds, containers, and ornamental borders. Once established, this resilient herb generally needs little attention beyond occasional watering, harvesting, and pruning.
A member of the mint family, oregano is valued for both its flavor and its beauty. The small leaves release a warm, earthy fragrance when brushed, while clusters of tiny flowers attract bees, butterflies, and other visiting pollinators. Depending on the variety and local climate, oregano may return year after year as a perennial.
This oregano growing guide explains how to choose a variety, prepare the planting area, water and prune the plant, harvest flavorful leaves, and protect oregano during winter. Whether you have a large garden or a sunny windowsill, oregano can provide months of fresh herbs and lasting garden interest.
What Is Oregano?
Oregano belongs to the genus Origanum, which includes numerous culinary and ornamental plants. Common oregano, botanically known as Origanum vulgare, is a spreading perennial herb native to parts of Europe, western Asia, and the Mediterranean region.
Its flavor can vary considerably among varieties. Some plants have a mild, grassy taste, while others produce the peppery, pungent flavor commonly associated with Mediterranean cooking. The plant’s flavor and growth may also be influenced by sunlight, temperature, soil, water, and harvest timing.
Oregano typically develops low, branching stems covered with small green or gray-green leaves. Mature plants may form gently spreading clumps, making the herb useful as a fragrant edging plant or informal ground cover where its growth can be managed.
Choosing the Right Oregano Variety
Selecting a variety is an important part of growing flavorful oregano. Plants sold simply as oregano can differ in taste, appearance, growth habit, and cold tolerance, so checking the botanical name and plant label is helpful.
Greek oregano, often identified as Origanum vulgare subsp. hirtum, is a popular culinary choice with a robust, peppery flavor. Italian oregano generally offers a somewhat milder flavor that works well in tomato sauces, roasted vegetables, soups, and marinades.
Common oregano is adaptable and can be used in both culinary and ornamental gardens, although its flavor may be less intense than that of carefully selected culinary cultivars. Golden oregano has bright yellow-green foliage and a softer flavor, making it especially attractive along paths or near darker-leaved plants.
Ornamental oregano varieties are grown primarily for their colorful bracts, trailing stems, or decorative flowers. Some may be edible, but they are usually selected for appearance rather than strong culinary flavor.
Mexican oregano is not a true Origanum oregano. It comes from a different plant family and has a more citrusy, assertive flavor. It is popular in Mexican, Southwestern, and Latin American dishes, but its growing requirements and cold tolerance can differ from those of Mediterranean oregano.
The Best Place to Grow Oregano
Oregano generally grows best in full sun. A location receiving at least six hours of direct sunlight encourages compact growth, abundant foliage, and concentrated flavor. In very hot climates, light afternoon shade may help reduce heat stress, particularly for plants growing in containers.
Good drainage is essential. Oregano is adapted to relatively dry conditions and does not thrive when its roots remain in wet, heavy soil. A raised bed, sloped garden area, or well-draining container can provide a suitable growing environment when the native soil holds too much moisture.
Allow enough space around each plant for air to circulate. Exact spacing depends on the variety, since some plants remain compact while others spread outward as they mature. Check the plant label and consider the oregano’s eventual width before choosing its permanent location.
Preparing the Soil
Oregano does not need excessively rich soil. Moderately fertile, well-draining ground is usually preferable to heavily amended soil that encourages fast, soft growth with less concentrated flavor.
If the garden contains dense clay, improve drainage by planting oregano in a raised bed or container rather than adding a small amount of loose material to an otherwise poorly drained hole. Containers should have unobstructed drainage openings and a potting mix formulated for good aeration.
Avoid placing a thick layer of moisture-retaining mulch directly against the crown of the plant. Gravel, small stones, or a light layer of dry organic mulch may be useful in some gardens, but the plant’s base should remain open and well ventilated.
Planting Oregano
Oregano can be grown from seed, nursery transplants, stem cuttings, or divisions. Nursery plants offer the quickest start and make it easier to select a named variety with known culinary qualities.
Plant oregano after severe frost has passed and the soil has begun to warm. Position the plant at approximately the same depth at which it was growing in its nursery container. Planting too deeply may trap moisture around the crown and stems.
Water thoroughly after planting to settle the surrounding soil. Continue monitoring moisture while the roots become established, but allow the soil surface to begin drying between waterings.
Oregano seeds are small and need warmth and light to germinate successfully. Seed-grown plants can vary in flavor, particularly when the seed does not come from a carefully maintained culinary strain. Gardeners seeking a particular flavor may prefer a named transplant or a cutting from a known plant.
Watering Oregano Correctly
Newly planted oregano needs consistent moisture while it establishes roots. The soil should remain lightly moist but never saturated.
Established plants are generally more tolerant of short dry periods. Water deeply when the upper portion of the soil feels dry, then allow excess moisture to drain away. Constant shallow watering can encourage weak root development and persistently damp conditions.
Container-grown oregano usually needs more frequent attention because potting mix dries faster than garden soil. Small pots, unglazed containers, strong sunlight, heat, and wind can all increase water loss. Check the soil instead of following a rigid watering schedule.
Yellowing foliage, soft stems, and declining growth can indicate excessive moisture or poor drainage. Dry, brittle leaves and severely wilted stems may indicate that the plant has remained dry for too long. Because similar symptoms can have several causes, examine the soil and roots before changing your watering routine.
Feeding Oregano
Oregano usually requires little supplemental fertilizer when planted in ordinary garden soil. Excessive feeding can produce rapid leafy growth with a milder fragrance and flavor.
A modest application of compost in spring may be enough for established garden plants. Container-grown oregano may eventually need a diluted, balanced fertilizer because nutrients gradually wash out of the potting mix. Follow the product directions and avoid frequent heavy feeding.
Pruning for Healthy, Bushy Growth
Regular pruning encourages oregano to branch and develop a fuller shape. Once a young plant is established, pinch or trim the stem tips just above a set of leaves. New shoots will begin developing below the cut.
Harvesting provides much of the pruning a culinary oregano plant needs. Remove small portions frequently rather than allowing the stems to become long and sparse. Avoid removing most of the plant at one time, especially when it is young, stressed, or approaching cold weather.
Flowering stems can be removed to encourage continued leaf production. However, allowing some oregano to bloom provides nectar for bees, butterflies, and other beneficial visitors. A practical approach is to harvest and trim part of the plant while leaving several flowering stems for pollinators.
Older plants may develop woody centers or open areas. Light renovation pruning and division can refresh an established clump. The best timing depends on the local climate, but vigorous spring growth often provides a useful opportunity to reshape the plant.
Growing Oregano in Containers
Oregano adapts beautifully to container gardening. A pot makes it easier to control drainage, manage spreading growth, and move the plant to a protected location when temperatures become unfavorable.
Choose a container with drainage holes and enough room for the variety’s mature root system. Terracotta can be helpful in humid or rainy conditions because it allows potting mix to dry more readily, although it may require more frequent watering during hot weather.
Place the container in a sunny location and rotate it occasionally if one side receives significantly more light. Avoid leaving the pot in a saucer filled with water.
Oregano can share a large container with other Mediterranean herbs that prefer full sun and relatively dry soil. It may not be an ideal companion for herbs that require consistently moist conditions. Watch its spreading stems so they do not crowd smaller plants.
Growing Oregano Indoors
Oregano can grow indoors when it receives strong light and adequate air circulation. A bright, unobstructed south-facing window may be suitable, although a grow light can provide more consistent results during darker months.
Keep indoor oregano away from cold drafts, heating vents, and constantly wet soil. Water only after the surface begins to dry, and empty any water collected beneath the pot.
Indoor plants may become stretched when light is insufficient. Pale foliage, long spaces between leaves, and stems leaning sharply toward a window are common signs that the plant needs stronger or more evenly distributed light.
Harvesting Oregano for the Best Flavor
Begin harvesting once the plant is actively growing and has enough foliage to recover easily. Use clean scissors or garden snips to cut stems just above a leaf node. This encourages branching and helps maintain a compact plant.
For particularly aromatic leaves, harvest oregano after morning moisture has dried but before the strongest afternoon heat. Many gardeners prefer to gather a larger crop shortly before the plant flowers, when the leaves are often especially fragrant. Flavor can still be excellent at other stages, so regular tasting is the best guide.
Do not harvest from plants that have been treated with products not labeled for use on edible herbs. Rinse the leaves gently when needed and dry them thoroughly before cooking or preserving.
Drying and Storing Oregano
Oregano retains its flavor particularly well when dried. Gather healthy stems and remove any damaged or discolored foliage. Small bundles can be hung in a warm, dry, well-ventilated place away from direct sunlight.
A dehydrator set to an appropriate low temperature can provide more controlled drying. Whichever method is used, the leaves should be completely dry before storage. Remaining moisture can encourage spoilage.
Strip the dried leaves from the stems and place them in a clean, airtight container. Store the container in a cool, dark, dry cabinet. Crushing the leaves shortly before use helps preserve their fragrance longer than grinding the entire harvest in advance.
Fresh oregano can also be refrigerated for short-term use. Wrap the stems loosely in a slightly damp towel or place them in a suitable produce container, then monitor them for wilting or spoilage.
Propagating Oregano
Stem cuttings are an easy way to reproduce a favorite oregano plant. Cut a healthy, nonflowering stem and remove the lower leaves. The cutting can be rooted in a moist, well-draining medium until new growth and gentle resistance indicate root development.
Established oregano can also be divided. Carefully lift the clump and separate it into sections, making sure each division has healthy roots and shoots. Replant the sections promptly and keep the soil lightly moist while they recover.
Layering provides another simple option. Bend a flexible stem toward the soil, secure a portion of it against the surface, and allow it to develop roots before separating it from the parent plant.
Common Oregano Problems
Oregano is generally a resilient herb, but poor drainage can lead to root and crown problems. Good air movement, appropriate watering, and clean garden practices help reduce the risk of disease.
Aphids, spider mites, and other small pests may occasionally appear, especially on stressed or indoor plants. Inspect the undersides of leaves and the points where stems meet. A strong stream of water may dislodge minor infestations. If further treatment is necessary, select a product labeled for both the pest and edible herbs, then follow every direction carefully.
Spindly growth is frequently related to inadequate sunlight or insufficient pruning. Relocating a container, improving supplemental light, or trimming the stems can encourage a more compact shape.
Winter Care
Winter care depends on the oregano variety, local climate, drainage, and growing location. Many common oregano varieties are cold-hardy perennials in suitable regions, but prolonged wet soil can be as damaging as low temperatures.
In colder climates, allow garden plants to enter dormancy naturally and avoid heavy late-season fertilization. A light protective mulch applied after the ground cools may help moderate temperature changes, but keep wet material away from the crown.
Container-grown plants are more vulnerable because their roots have less insulation. Pots can be moved to a sheltered location, placed in an unheated protected space when appropriate for the variety, or insulated according to regional gardening practices.
Where oregano cannot survive outdoors, gardeners may grow it as an annual, take cuttings for indoor cultivation, or replace the plant the following spring.
Culinary Uses for Fresh Oregano
Fresh oregano adds herbal depth to tomato dishes, roasted vegetables, grilled meats, poultry, beans, soups, salad dressings, and marinades. Its flavor can be assertive, so begin with a small amount and adjust according to the variety and dish.
Add fresh oregano toward the end of cooking when you want to preserve its bright aroma. Dried oregano can be added earlier, giving the leaves time to soften and release their flavor.
Oregano pairs especially well with garlic, lemon, olive oil, tomatoes, basil, thyme, rosemary, parsley, feta, olives, and many Mediterranean-inspired ingredients. Its usefulness in the kitchen is one of the best reasons to keep a healthy plant within easy reach.
Why Every Herb Garden Needs Oregano
Oregano combines fragrance, flavor, ornamental value, and general resilience in one compact plant. It can fill gaps along sunny borders, spill gently over container edges, attract pollinators when allowed to bloom, and provide fresh leaves throughout the growing season.
With plenty of sunlight, excellent drainage, moderate watering, and regular harvesting, oregano can remain productive for years where the variety and climate are compatible. It is an approachable herb for new gardeners and a dependable favorite for experienced growers.
Fresh oregano sprigs gathered straight from a thriving home herb garden.
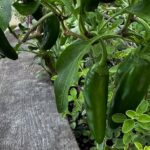
Discover how to grow jalapeño peppers and oregano together in your garden. Learn planting tips, care requirements, harvesting methods, culinary uses, and the benefits of this delicious herb and pepper combination. Jalapeño and Oregano: A Flavorful Garden Combination If you enjoy growing ingredients that go straight from the garden to the kitchen, few combinations are as rewarding as jalapeño peppers and oregano. These two plants complement each other beautifully in both the garden and countless recipes. The mild heat of fresh jalapeños pairs perfectly with the earthy, slightly peppery flavor of oregano, making them staples in Mexican, Tex-Mex, Mediterranean, and Southwestern cooking. Not only do they create bold flavors together, but they also have similar growing requirements, making them excellent companion plants for home gardeners. Whether you have a large backyard, raised beds, or a few containers on a sunny patio, jalapeños and oregano can thrive with proper care. Why Grow Jalapeños and Oregano Together? Jalapeños and oregano share many of the same growing preferences. Both enjoy warm temperatures, full sun, and well-drained soil. Planting them together creates an attractive and productive garden space while giving you fresh ingredients throughout the growing season. Oregano forms a low-growing mat that can help shade the soil around pepper plants, reducing moisture loss during hot weather. Meanwhile, the upright jalapeño plants provide visual interest and make harvesting simple. Growing these two together also means you can step into the garden and gather everything needed for homemade salsa, grilled vegetables, marinades, pizza toppings, soups, and countless other dishes. About Jalapeño Peppers Jalapeños are one of the world’s most popular chili peppers. They typically measure 2 to 4 inches long and mature from green to bright red if left on the plant. Green jalapeños offer a fresh, crisp flavor with moderate heat, while fully ripened red peppers become slightly sweeter with a deeper flavor. Most jalapeños measure between 2,500 and 8,000 Scoville Heat Units, making them flavorful without being overwhelmingly spicy for many people. Healthy jalapeño plants can produce dozens of peppers throughout the growing season when harvested regularly. About Oregano Oregano is a hardy perennial herb in many climates and is prized for its aromatic leaves. It produces small oval leaves packed with essential oils that become even more flavorful when dried. Its earthy, warm, and slightly peppery taste makes oregano an essential ingredient in Italian, Greek, Mediterranean, and Mexican cuisine. Once established, oregano requires very little maintenance and often returns year after year. Growing Requirements Both plants thrive in similar conditions, making them easy to grow together. Choose a location that receives at least 6 to 8 hours of direct sunlight every day. Plant them in loose, well-drained soil rich in organic matter. While oregano tolerates poorer soils better than peppers, both benefit from compost worked into the planting area before planting. Maintain consistent watering during the growing season, allowing the soil to dry slightly between waterings. Jalapeños require more moisture than oregano, so avoid overwatering the herb while ensuring the peppers receive enough water during flowering and fruit production. Companion Planting Benefits Growing oregano near jalapeños offers several advantages. The fragrant oils released by oregano may help confuse certain insect pests while attracting beneficial pollinators when allowed to flower. Both plants make excellent companions for tomatoes, basil, onions, garlic, carrots, and marigolds, creating a productive and diverse vegetable garden. Their compact growth habits also make them ideal choices for container gardening. Harvesting Jalapeños Harvest jalapeños once they reach full size and have a glossy appearance. Most gardeners pick them while green, but leaving them on the plant allows them to ripen to red for a sweeter flavor. Use clean pruning shears or scissors to remove peppers rather than pulling them from the plant, which can damage stems. Frequent harvesting encourages continued pepper production throughout the season. Harvesting Oregano Harvest oregano by snipping stems just above a pair of leaves. Regular harvesting encourages bushier growth and prevents the plant from becoming woody. For the strongest flavor, harvest oregano just before flowering when the essential oils are most concentrated. Fresh oregano can be used immediately or dried for long-term storage. Culinary Uses Fresh jalapeños and oregano create an incredible flavor combination in many recipes. They work beautifully in homemade salsa, tacos, burritos, enchiladas, fajitas, chili, soups, grilled chicken, roasted vegetables, pizza, pasta sauces, marinades, salad dressings, and stuffed peppers. Blend fresh oregano with jalapeños, garlic, olive oil, lime juice, and cilantro to create a vibrant herb sauce for grilled meats or vegetables. Both ingredients also enhance homemade tomato sauces and garden-fresh pasta dishes. Health Benefits Jalapeños contain vitamins A and C, antioxidants, and capsaicin, the natural compound responsible for their heat. Oregano is rich in antioxidants and contains beneficial plant compounds that have been valued for centuries in traditional herbal practices. Together, these fresh garden ingredients provide flavor without adding excess calories, making them excellent additions to healthy meals. Growing in Containers Jalapeños and oregano perform exceptionally well in containers. Choose pots with adequate drainage holes and use a high-quality potting mix designed for vegetables and herbs. Place containers where they receive full sunlight and water consistently during hot weather. Container-grown plants are perfect for patios, balconies, decks, and small-space gardens. Common Problems Jalapeños may occasionally encounter aphids, spider mites, blossom end rot, or fungal diseases if overwatered. Oregano is generally resistant to pests but can develop root rot in consistently wet soil. Proper spacing, good air circulation, and careful watering help prevent most problems before they begin. Storage Tips Fresh jalapeños can be refrigerated for one to two weeks. They can also be frozen, pickled, or dehydrated for long-term storage. Fresh oregano keeps well in the refrigerator for several days when wrapped in a slightly damp paper towel. It can also be air-dried or frozen to preserve its flavor for future recipes. Frequently Asked Questions Can jalapeños and oregano grow in the same container? Yes. Use a container that is at least 14 to 18 inches wide with excellent drainage so both
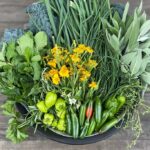
Learn how to enjoy your own colander harvest of fresh sage, chives, peppers, tarragon, and oregano. Discover harvesting tips, garden care, and delicious ways to use your homegrown herbs and vegetables. There is nothing quite like stepping into your garden with a pair of clean clippers and a sturdy colander, ready to gather a beautiful assortment of fresh herbs and peppers. A colander harvest is a simple yet practical way to collect your homegrown produce while keeping your harvest fresh and making cleanup easy. Whether you grow your plants in raised beds, containers, or a traditional garden, harvesting sage, chives, peppers, tarragon, and oregano together provides an abundance of fresh ingredients for countless homemade meals. Using a colander instead of a traditional basket offers several advantages. Its lightweight design makes it comfortable to carry through the garden, while the small openings allow loose soil, leaves, and insects to fall away as you harvest. Once you return indoors, you can rinse everything in the same colander, making the journey from garden to table both convenient and efficient. Why a Colander Harvest Is Perfect for Home Gardeners A colander harvest is more than a convenient way to collect vegetables and herbs. It encourages you to harvest regularly, which helps many garden plants remain healthy and productive throughout the growing season. Frequent harvesting stimulates new growth on many culinary herbs, keeping plants compact, lush, and full of tender leaves. Pepper plants also benefit from regular picking because removing mature peppers often encourages the plant to continue producing new fruit. The best time to harvest is during the morning after the dew has dried but before the afternoon heat arrives. At this time, herbs contain the highest concentration of essential oils, giving them exceptional flavor and fragrance. Always use clean, sharp garden clippers to make smooth cuts that minimize damage and promote healthy regrowth. How to Harvest Fresh Sage Sage is a beautiful perennial herb recognized by its soft gray-green leaves and rich earthy aroma. Harvest mature stems by cutting just above a pair of healthy leaves. This encourages branching and keeps the plant full and productive. Avoid removing more than one-third of the plant during a single harvest. Giving the plant time to recover ensures continuous growth throughout the season. Fresh sage is delicious in roasted poultry, pork dishes, stuffing, roasted vegetables, soups, brown butter sauces, herb butter, and homemade seasoning blends. It also dries exceptionally well for long-term storage. How to Harvest Chives Chives are one of the easiest herbs to grow and reward gardeners with continuous harvests. Instead of removing individual leaves, gather a small handful of stems and trim them approximately one to two inches above the soil. This simple harvesting method encourages rapid regrowth, allowing you to enjoy multiple harvests throughout the growing season. Fresh chives add a mild onion flavor to scrambled eggs, baked potatoes, salads, creamy dips, seafood, soups, compound butter, and homemade dressings. Harvesting Garden Peppers Whether you grow sweet bell peppers or spicy chili peppers, harvesting regularly encourages continued production. Rather than pulling peppers from the plant, use garden clippers to cut each pepper from its stem. This protects the branches from unnecessary stress and helps prevent accidental breakage. Many peppers can be harvested while green, while others develop sweeter flavors or increased heat as they mature into vibrant shades of red, orange, yellow, purple, chocolate, or nearly black. Fresh peppers are perfect for stir-fries, grilled vegetables, stuffed peppers, homemade salsa, pasta sauces, salads, soups, pizzas, casseroles, and homemade hot sauces. Harvesting Tarragon Tarragon is an elegant culinary herb known for its subtle anise flavor and delicate aroma. Harvest young stems throughout the growing season by cutting just above a leaf node. Frequent harvesting encourages fuller plants and provides a continuous supply of tender new leaves. Fresh tarragon complements roasted chicken, seafood, eggs, cream sauces, vinaigrettes, roasted vegetables, herb butter, and infused vinegars. It is especially popular in French-inspired cooking. Harvesting Oregano Oregano is one of the most productive herbs you can grow. Harvest stems several inches long by cutting just above a pair of leaves. This encourages branching and helps the plant produce even more flavorful foliage. For the strongest flavor, harvest oregano before it flowers, when its aromatic oils are most concentrated. Fresh oregano is a staple in Mediterranean cuisine and is commonly used in pizza, pasta sauces, roasted vegetables, grilled meats, soups, marinades, casseroles, and homemade herb blends. It also dries beautifully, making it an excellent herb for preserving. From Garden to Table A single colander harvest filled with sage, chives, peppers, tarragon, and oregano provides endless culinary inspiration. Blend chopped herbs into compound butter, season roasted vegetables, prepare homemade marinades, create fresh salad dressings, or roast peppers for flavorful sauces. Fresh herbs can also be preserved by drying, freezing in olive oil, or infusing them into vinegar. Peppers can be frozen, dehydrated, roasted, or fermented, allowing you to enjoy the flavors of your garden long after the growing season ends. Tips for a Successful Colander Harvest Harvest herbs during the cool morning hours for the best flavor and aroma. Use clean, sharp clippers for precise cuts that promote healthy regrowth. Avoid harvesting more than one-third of any herb plant at one time. Pick mature peppers regularly to encourage additional fruit production. Rinse herbs and peppers in your colander immediately after harvesting and dry them thoroughly before storing. Store fresh herbs in the refrigerator wrapped in a slightly damp paper towel inside an airtight container to help maintain freshness. Enjoy Your Own Colander Harvest Harvesting your own sage, chives, peppers, tarragon, and oregano is one of the most rewarding experiences for any gardener. A simple colander makes collecting, cleaning, and transporting your fresh harvest easy while keeping your herbs and vegetables in excellent condition. Every colander harvest represents the care you have given your garden and the fresh flavors that await in your kitchen. Whether you are preparing a family meal, preserving herbs for future recipes, or simply enjoying the beauty
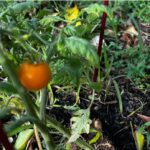
Follow this Tomato Plant Growing Guide to grow healthy plants from tiny seedlings, prevent common problems, and enjoy flavorful homegrown tomatoes. Few garden experiences are as satisfying as watching a tiny tomato seedling grow into a vigorous plant covered with ripe, flavorful fruit. Tomatoes are a favorite among home gardeners because they can flourish in traditional garden beds, raised beds, and containers. With sufficient sunlight, fertile soil, steady moisture, and dependable support, even a first-time gardener can enjoy a productive harvest. Tomato plants are tender, warm-season plants that thrive during the bright days of late spring and summer. They do require regular attention, but much of that care is straightforward. Choosing an appropriate variety, planting after the danger of frost has passed, watering consistently, and watching for early signs of trouble can make a remarkable difference. This Tomato Plant Growing Guide explains how to select, plant, support, maintain, and harvest tomatoes throughout the growing season. Whether you begin with seeds or purchase young plants from a nursery, a few thoughtful decisions will help transform those tiny seedlings into garden favorites. Understanding Tomato Plant Growth Tomatoes, botanically known as Solanum lycopersicum, are tender perennials in tropical climates but are usually grown as annuals in temperate gardens. Frost damages tomato foliage, and cool soil can slow root development, so these heat-loving plants should not be rushed outdoors in spring. Tomato varieties generally have determinate or indeterminate growth habits. Determinate tomatoes grow to a relatively compact size and produce much of their fruit within a concentrated period. Their manageable shape makes them useful for small gardens, containers, preserving, and gardeners who want a large harvest at one time. Indeterminate tomatoes continue producing new vines, flowers, and fruit until frost or disease ends the growing season. These plants can become tall and vigorous, so they need strong cages, stakes, or trellises. Their extended harvest makes them an appealing choice for gardeners who want fresh tomatoes throughout summer and early fall. Dwarf and patio varieties offer another solution for limited spaces. Although compact, they still need adequate sunlight, fertile potting mix, consistent moisture, and a container large enough to support healthy root growth. Choosing the Right Tomato Variety The best tomato variety depends on the garden, climate, available space, and intended use. Cherry and grape tomatoes are often prolific and convenient for snacking and salads. Slicing tomatoes provide substantial fruit for sandwiches and fresh meals, while paste tomatoes generally contain more flesh and less juice, making them well suited to sauces and preserving. Days to maturity are especially important in regions with short growing seasons. A variety that matures quickly may produce a more dependable harvest before cool autumn weather arrives. Gardeners in hot climates may prefer varieties known to set fruit more reliably during warm conditions. Disease resistance can also influence success. Seed packets and plant labels may include letters indicating resistance to particular diseases. Resistance does not guarantee that a plant will remain problem-free, but it can reduce the likelihood or severity of certain common infections. Heirloom tomatoes are treasured for their distinctive flavors, colors, and shapes. Hybrid varieties may offer improved uniformity, productivity, disease resistance, or tolerance to challenging conditions. A garden can include both, allowing the gardener to enjoy heirloom character alongside the dependability of carefully selected hybrids. Starting Tomato Plants From Seed Tomato seeds are commonly started indoors approximately five to eight weeks before the expected outdoor planting date. Starting too early can result in crowded, overgrown plants that become difficult to maintain before the weather is warm enough for transplanting. Sow the seeds about ¼ inch deep in a clean, sterile seed-starting mix. Warmth encourages germination, with temperatures around 75°F to 85°F generally supporting quick emergence. Once seedlings appear, place them beneath a bright overhead grow light. Insufficient light causes thin, stretched stems that lean toward the light source. Keep the growing medium evenly moist but not saturated. Constantly wet soil and poor air circulation can encourage seedling diseases. Once the seedlings develop true leaves, move them into individual containers if they were started together. As they grow, provide enough space for air circulation and turn or reposition the containers when necessary to encourage balanced growth. Healthy tomato seedlings should be compact and sturdy rather than tall and pale. A stocky plant with a strong stem and deep green leaves is usually better prepared for transplanting than an oversized plant that has already begun flowering indoors. Choosing Healthy Nursery Seedlings Gardeners who prefer to purchase plants should look for short, sturdy seedlings with healthy green foliage and well-developed stems. Avoid plants with yellowing leaves, extensive spotting, visible insects, or severely tangled roots. A smaller, healthy transplant frequently establishes more successfully than a large plant that has remained in its nursery container too long. Flowers and tiny tomatoes may look appealing at the garden center, but they do not necessarily indicate that the plant will establish quickly after transplanting. Read the plant label before buying. Confirm the mature size, growth habit, estimated days to maturity, and disease-resistance information. This helps prevent placing a vigorous indeterminate tomato in a container or garden space designed for a compact variety. Hardening Off Tomato Seedlings Seedlings grown indoors are not immediately prepared for direct sunlight, wind, and changing outdoor temperatures. Hardening off gradually introduces them to outdoor conditions and reduces transplant stress. Begin about one to two weeks before planting. Place the seedlings in a protected, shaded location for a short period, then gradually increase their exposure to sunlight and outdoor air. Bring them inside when frost or unusually cold temperatures threaten. Watch the leaves carefully during this transition. Bleached, pale, or papery areas can indicate sunscald caused by too much direct sunlight too quickly. Gradual exposure allows the leaves and stems to adjust without severe damage. When to Plant Tomatoes Outdoors Plant tomatoes after the danger of frost has passed, the soil has warmed, and nighttime temperatures are consistently suitable for tender plants. Local frost dates are useful planning tools, but actual
Originally published
March 2026
Updated
August 2026
Reviewed by
Culibloom