Make crispy garden kale chips with fresh kale, olive oil, and seasoned salt. This easy, healthy baked snack is ready in just 25 minutes.
Crunchy, savory, and incredibly easy to prepare, this Crispy Garden Kale Chips Recipe transforms fresh kale into a light and satisfying homemade snack. Each delicate leaf develops an irresistible crisp texture in the oven, while olive oil and seasoned salt add simple, balanced flavor.
The secret to crispy kale chips is removing all moisture from the leaves before adding the oil. A light coating of olive oil helps the kale brown and crisp without becoming heavy or greasy. Spreading the leaves in a single layer also allows hot air to circulate around every piece.
Ready in just 25 minutes, these baked kale chips are perfect for afternoon snacking, lunchboxes, party platters, or serving alongside sandwiches. They can also add a crunchy finishing touch to soups, salads, grain bowls, and roasted vegetables.
These homemade kale chips are naturally gluten-free, vegetarian, and easy to customize with different seasonings. They taste best shortly after baking, but properly stored leftovers can be refreshed in the oven if they begin to soften.
Prep Time: 10 minutes
Cook Time: 15 minutes
Total Time: 25 minutes
Yield: 4 servings
Ingredients
1 bunch fresh kale
1 tablespoon olive oil
1 teaspoon seasoned salt
Directions
Step 1: Prepare the Oven
Preheat the oven to 350°F. Line a large baking sheet with parchment paper.
Step 2: Prepare the Kale
Use a sharp knife or kitchen shears to remove the kale leaves from the thick center stems.
Discard the tough stems or reserve them for another use. Tear the leaves into evenly sized, bite-sized pieces.
Step 3: Wash and Dry the Kale
Rinse the kale thoroughly under cool water, making sure to remove any dirt trapped within the leaves. Dry the kale completely using a salad spinner, clean kitchen towels, or paper towels.
Removing all excess moisture is essential because wet kale will steam in the oven instead of becoming crisp.
Step 4: Season the Kale
Place the dry kale leaves in a large mixing bowl. Drizzle them with the olive oil and gently massage the leaves with clean hands until every piece is lightly coated.
Sprinkle the seasoned salt over the kale and toss until it is evenly distributed.
Step 5: Arrange the Kale
Spread the seasoned kale in a single layer on the prepared baking sheet. Avoid overlapping or overcrowding the leaves because they need room for air to circulate.
Use a second baking sheet or bake the kale in batches if necessary.
Step 6: Bake Until Crisp
Bake for 10 to 15 minutes, checking the kale after 10 minutes. The chips are ready when the leaves are crisp and delicate and the edges are lightly browned.
Watch the kale closely during the final few minutes because it can quickly change from perfectly crisp to overcooked.
Step 7: Cool and Serve
Remove the baking sheet from the oven and let the kale chips cool for several minutes. They will become slightly crisper as they cool.
Serve immediately for the best flavor and texture.
Notes
Drying the kale completely is the most important step for making crispy kale chips. Excess moisture will cause the leaves to steam.
Use only enough olive oil to coat the kale lightly. Too much oil can make the finished chips heavy or greasy.
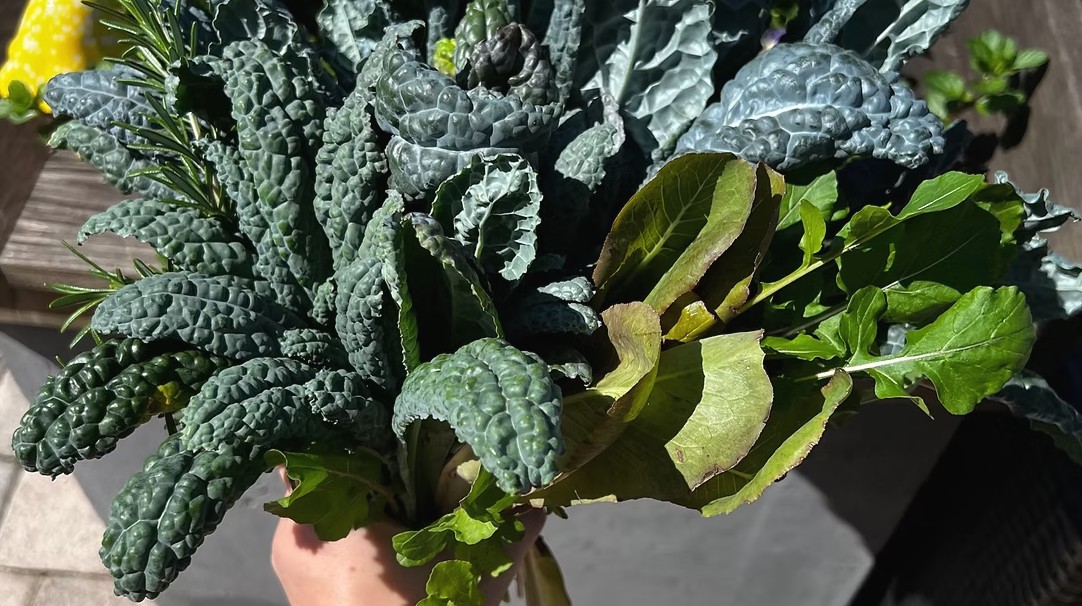
Curly kale works especially well because its ruffled leaves develop a light, crispy texture in the oven.
Rotate the baking sheet halfway through the cooking time if your oven has hot spots.
For cheesy flavor, sprinkle the kale with nutritional yeast before baking.
For spicy kale chips, add a small amount of cayenne pepper or crushed red pepper flakes.
For smoky flavor, season the kale with smoked paprika and garlic powder.
For a ranch-inspired variation, replace the seasoned salt with your favorite ranch seasoning blend.
For an herb variation, add dried rosemary, thyme, or Italian seasoning.
For extra savory flavor, sprinkle the chips lightly with freshly grated Parmesan cheese immediately after baking.
Serve crispy kale chips as a snack or use them as a crunchy topping for soups, salads, grain bowls, and roasted vegetables.
Kale chips are best enjoyed on the day they are made. Store leftovers in an airtight container at room temperature for up to 2 days. If they soften, place them in a 300°F oven for 3 to 5 minutes to help restore their crisp texture.
This recipe is naturally gluten-free. When preparing it for someone with celiac disease or gluten sensitivity, check the seasoned salt for appropriate gluten-free labeling and prevent cross-contact during preparation.