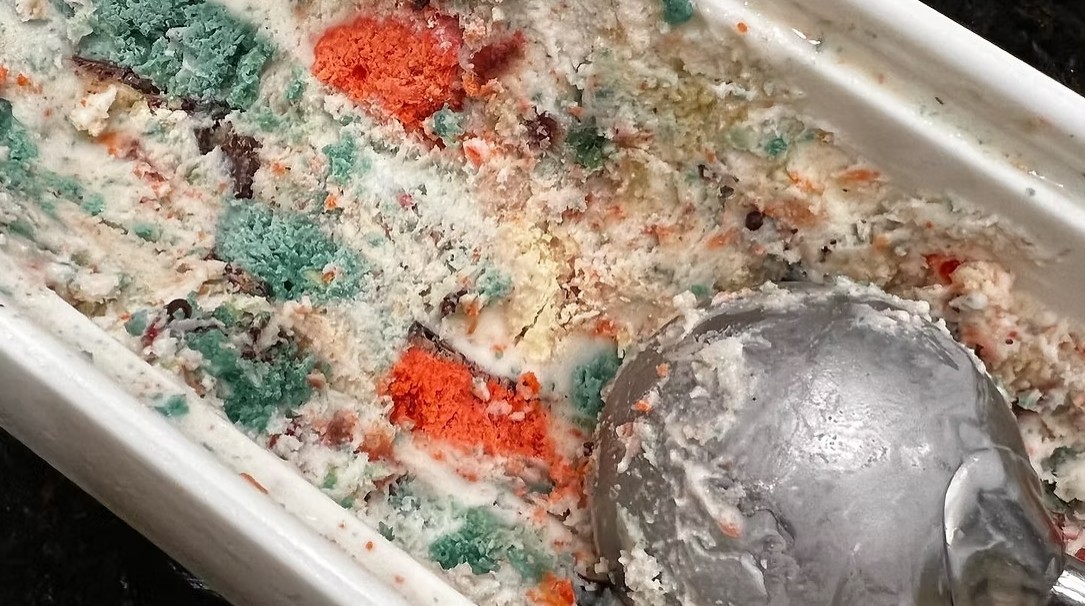
Make easy no-churn gluten-free rainbow cookie ice cream with four simple ingredients, colorful cookie pieces, and no ice cream maker.
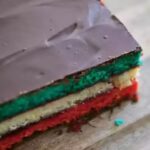
Turn a favorite Italian bakery treat into a cool and creamy dessert with this Easy No-Churn Gluten-Free Rainbow Cookie Ice Cream Recipe. Each scoop is filled with colorful cookie pieces and the familiar combination of almond, chocolate, fruit, and vanilla flavors.
One of the best things about this homemade ice cream is that you do not need an ice cream maker. Whipped cream creates a light texture, while sweetened condensed milk provides sweetness and helps produce a rich, creamy base. The crumbled rainbow cookies add flavor, color, and a soft, cake-like texture to every serving.
This no-churn ice cream is also wonderfully easy to prepare. The base requires only four ingredients and about 15 minutes of hands-on preparation. Once everything is combined, the freezer does the rest of the work.
Serve this colorful gluten-free rainbow cookie ice cream at summer cookouts, birthday parties, family gatherings, or holiday celebrations. It is also an easy make-ahead dessert for anyone who loves the nostalgic flavors of traditional Italian rainbow cookies.
Directions
Step 1: Prepare the Ingredients
Place the heavy whipping cream in the refrigerator until you are ready to use it. Cold cream whips more successfully and holds its shape better than cream that has been allowed to become warm.
Crumble the gluten-free rainbow cookies into a mixture of small pieces and larger chunks. The smaller crumbs will distribute their flavor throughout the ice cream, while the larger pieces will add texture to each scoop.
Step 2: Whip the Cream
Pour the cold heavy whipping cream into the bowl of a stand mixer fitted with the whisk attachment. You can also use a large mixing bowl and an electric hand mixer.
Beat the cream on medium-high speed until stiff peaks form. To check the consistency, lift the whisk or beaters out of the bowl. The peaks should stand upright without collapsing.
Watch the cream carefully as it thickens. Overwhipping can make it grainy and may eventually turn it into butter.
Step 3: Prepare the Sweetened Condensed Milk Base
Pour the sweetened condensed milk into a separate large mixing bowl. Add the vanilla extract and whisk until the mixture is smooth and evenly combined.
Sweetened condensed milk serves as the rich and sweet foundation for this no-churn ice cream. Because it is already thick and concentrated, no cooking is required.
Step 4: Lighten the Ice Cream Base
Add a generous spoonful of the whipped cream to the sweetened condensed milk mixture. Fold it in gently with a rubber spatula to begin lightening the base.
Add the remaining whipped cream in several additions. Use slow, sweeping motions to lift the mixture from the bottom of the bowl and fold it over the top.
Continue folding just until no large streaks remain. Do not stir vigorously because preserving the air in the whipped cream helps create a lighter finished texture.
Step 5: Add the Rainbow Cookies
Add the crumbled gluten-free rainbow cookies to the ice cream mixture. Fold them in gently until the colorful pieces are distributed throughout the base.
Avoid mixing more than necessary. Leaving a few visible swirls and larger cookie pieces will give the finished ice cream a more interesting appearance and texture.
If you would like to garnish the servings with additional cookies, crumble those separately and reserve them until serving.
Step 6: Transfer the Mixture to a Container
Spoon the ice cream mixture into a freezer-safe insulated container, loaf pan, or paper ice cream container. Spread it into an even layer and smooth the top with a spatula.
Press a piece of plastic wrap directly against the surface of the ice cream. Cover the container tightly with a lid or another layer of plastic wrap. Keeping the surface covered can help limit the formation of ice crystals.
Step 7: Freeze the Ice Cream
Place the covered container on a level surface in the freezer. Freeze the ice cream for 4 to 6 hours, or until it is firm enough to scoop.
The exact freezing time may vary depending on the depth of the container and the temperature of the freezer. A shallow container may allow the mixture to freeze more quickly than a deep container.
Step 8: Soften and Serve
Remove the ice cream from the freezer and let it stand at room temperature for about 5 minutes. This brief softening time will make it easier to scoop.
Serve the ice cream in bowls or gluten-free cones. Garnish it with additional crumbled gluten-free rainbow cookies, if desired.
Notes
Keep the heavy whipping cream refrigerated until you are ready to whip it.
A chilled mixing bowl and whisk attachment may also help the cream whip efficiently.
Stiff peaks are important because the whipped cream supplies the air needed to create the no-churn ice cream’s lighter texture. Stop whipping as soon as the peaks hold their shape.
Fold the whipped cream into the condensed milk gently. Stirring or beating the mixture can deflate the cream and produce a denser dessert.
Use high-quality gluten-free rainbow cookies for the best flavor and texture. Check the package carefully to confirm that the cookies are labeled gluten-free.
For additional almond flavor, add a few drops of almond extract along with the vanilla. Almond extract is powerful, so begin with a small amount.
For a chocolate variation, drizzle slightly cooled melted chocolate over the completed ice cream mixture. Fold it once or twice to create thin chocolate ribbons, then transfer the mixture to the freezer container.
For more cookie texture, reserve some of the crumbled rainbow cookies and sprinkle them over the top of the ice cream before freezing.
Let the frozen ice cream stand at room temperature for about 5 minutes before scooping. Avoid leaving it out for an extended period, especially in a warm kitchen.
Store the ice cream in a tightly covered, freezer-safe container for up to 2 weeks. Pressing plastic wrap directly against the surface can help protect its texture during storage.
This recipe is gluten-free when it is prepared with certified gluten-free rainbow cookies and appropriately labeled ingredients. When serving someone with celiac disease or gluten sensitivity, check every ingredient and prevent cross-contact with gluten-containing foods, utensils, and preparation surfaces.
Traditional rainbow cookies often contain almonds. Carefully review the cookie label and other ingredient packaging when serving anyone with a nut allergy.