Step 1: Choose a Cake Option
Prepare either the chocolate cake or the vanilla cake. Do not combine the two cake formulas. Both options use the same buttercream binder, microphone handles, chocolate coating, and decorations.
Step 2: Prepare the Pans for the Chocolate Cake
If making the chocolate cake, preheat the oven to 350°F. Lightly grease the cake pans or cake-pop pans you plan to use.
Step 3: Combine the Chocolate Cake Dry Ingredients
In a medium bowl, whisk together the oat flour, cornstarch, rice flour, glutinous rice flour, tapioca flour, baking powder, baking soda, xanthan gum, kosher salt, and Dutch-process cocoa powder. Whisk thoroughly so the flours, cocoa powder, and leavening ingredients are evenly distributed.
Step 4: Mix the Chocolate Cake Batter
In a large mixing bowl, beat the softened butter and granulated sugar until light and fluffy. Add the vanilla extract and continue mixing until incorporated.
Add the eggs one at a time, beating well after each addition. Scrape down the sides and bottom of the bowl as necessary. Mix in the oil and sour cream until smooth.
Gradually add the dry ingredients and milk, alternating between them and beginning and ending with the dry mixture. Mix just until combined. Fold in the instant chocolate pudding mix and mini chocolate chips.
Step 5: Bake the Chocolate Cake
Pour the chocolate batter into the prepared pans. Bake for approximately 20 minutes, or until a toothpick inserted into the center comes out clean.
Let the cake cool in the pans for 5 to 10 minutes. Transfer it to a wire rack and allow it to cool completely before making the cake-pop mixture.
Step 6: Prepare the Pans for the Vanilla Cake
If making the vanilla cake option, preheat the oven to 350°F. Grease two 9-inch round cake pans.
In a medium bowl, whisk together the gluten-free all-purpose flour and xanthan gum until evenly combined.
Step 7: Mix the Vanilla Cake Batter
In a large mixing bowl, beat the granulated sugar, softened butter, salt, baking powder, and vanilla extract until smooth and creamy.
Add the eggs one at a time, beating thoroughly after each addition. Alternate adding the milk and dry mixture while mixing on low speed. Continue mixing just until a smooth batter forms.
Step 8: Bake the Vanilla Cake
Divide the vanilla batter evenly between the prepared pans. Bake for 25 to 30 minutes, or until a toothpick inserted into the center comes out clean.
Let the cakes cool completely before proceeding. Warm cake can melt the buttercream and produce a sticky cake-pop mixture.
Step 9: Make the Cake-Pop Mixture
Crumble the completely cooled cake into fine crumbs in a large mixing bowl. Break apart any large pieces so the finished mixture has an even texture.
Add 2 tablespoons of vanilla buttercream frosting. Mix until the crumbs hold together when gently squeezed. The mixture should be moist enough to shape without feeling excessively sticky.
Step 10: Shape the Cake Balls
Divide the cake mixture into 24 portions. Roll each portion into a ball approximately 1 1/2 inches in diameter.
Place the cake balls on a parchment-lined baking sheet. Try to make them as uniform as possible so the finished microphones have a consistent appearance.
Step 11: Chill the Cake Balls
Refrigerate the shaped cake balls for 30 minutes, or until they are firm enough to dip and assemble without losing their shape.
Step 12: Prepare the Microphone Handles
Dip the open end of each gluten-free ice cream cone into the melted dark chocolate. Place the dipped cones on a parchment-lined tray and refrigerate them until the chocolate hardens.
The chocolate coating helps reinforce the cones and gives the microphone handles a finished appearance.
Step 13: Insert the Sticks
Dip one end of each lollipop stick or paper straw into melted chocolate. Insert the coated end halfway into a chilled cake ball.
Let the chocolate set for several minutes before dipping the cake balls. The chocolate helps secure each cake ball to its stick or straw.
Step 14: Coat the Microphone Tops
Dip each chilled cake ball completely into the additional melted chocolate. Lift it from the chocolate and gently tap off the excess coating.
Work carefully so the cake ball remains attached to the stick or straw. Avoid tapping too firmly because this may loosen the cake ball.
Step 15: Assemble the Microphones
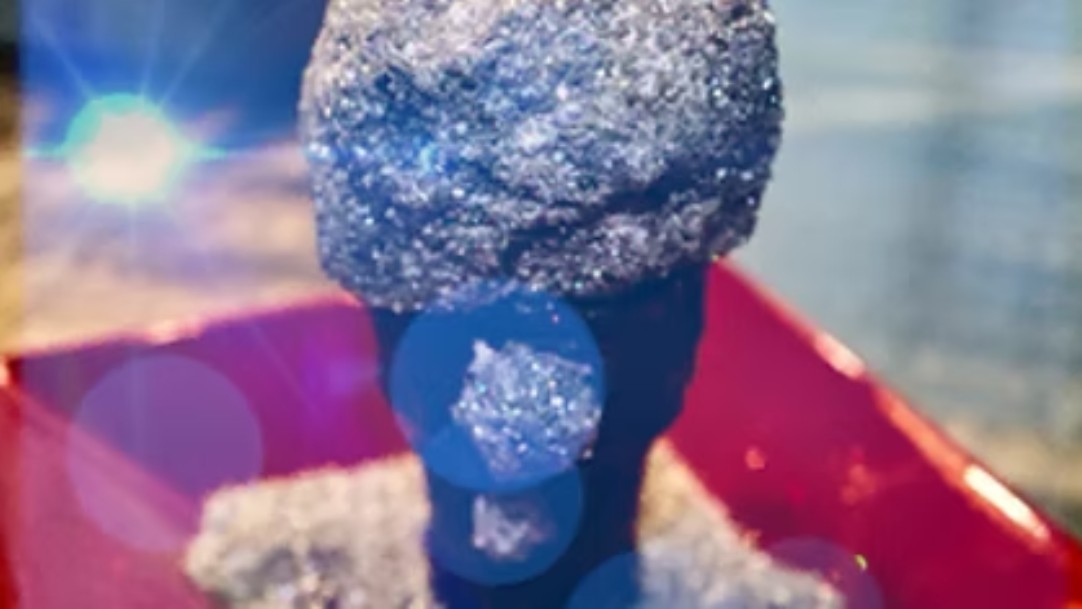
Before the chocolate coating sets, attach each covered cake ball to the prepared open end of a gluten-free ice cream cone. Use a small amount of melted chocolate to secure the pieces.
Hold the cake ball and cone together briefly, or until the chocolate begins to set and the microphone top feels secure.
Step 16: Decorate the Microphone Cake Pops
While the chocolate coating is still wet, cover each rounded microphone top with silver sprinkles, sanding sugar, or edible glitter. Decorate all sides to create the textured, sparkling appearance of a microphone head.
Place the finished microphone cake pops on a parchment-lined tray and allow the chocolate to set completely. If necessary, refrigerate them for 15 to 20 minutes to help the coating firm up.
Step 17: Serve
Arrange the finished cake pops in a decorative stand or display them carefully on a serving platter. Serve them at karaoke nights, music-themed birthdays, concerts, talent shows, or other festive occasions.