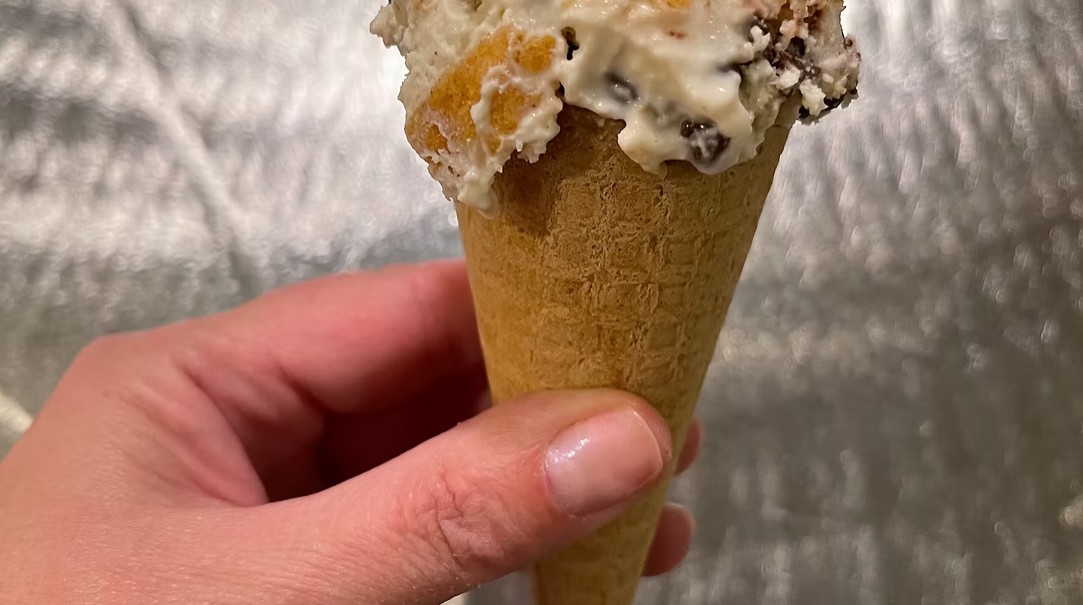
Creamy, rich, and packed with classic Italian dessert flavor, this Gluten-Free Easy No-Churn Cannoli Ice Cream transforms everything you love about a traditional cannoli into a refreshing frozen treat. Made with smooth ricotta cheese, luxurious mascarpone, sweet vanilla, and miniature chocolate chips, this simple homemade ice cream delivers the signature taste of a bakery-style cannoli without the need for an ice cream machine.
Traditional cannoli are beloved for their crisp pastry shells filled with a sweet, creamy ricotta filling studded with chocolate chips. This easy no-churn version captures those same irresistible flavors in a frozen dessert that is perfect for summer gatherings, holiday celebrations, family dinners, or anytime you are craving a cool and creamy indulgence.
One of the best things about this gluten-free cannoli ice cream recipe is its simplicity. With only a handful of ingredients and minimal preparation, you can create a gourmet-quality dessert that tastes like it took hours to prepare. The combination of ricotta and mascarpone creates an exceptionally smooth texture while adding richness and depth that make this ice cream stand out from ordinary frozen desserts.
Whether served in bowls, cones, or alongside your favorite gluten-free cookies, this cannoli-inspired ice cream is sure to become a favorite addition to your dessert collection.
Directions
Prepare the Ricotta Mixture
Place the ricotta cheese into a large mixing bowl. If your ricotta contains excess moisture, allow it to drain in a fine mesh strainer for about 30 minutes before using. This step helps create a thicker, creamier ice cream texture.
Add the mascarpone cheese, granulated sugar, vanilla extract, kosher salt, and heavy whipping cream to the bowl.
Using a hand mixer, beat the ingredients on medium speed until completely smooth and creamy. Continue mixing for approximately 2 to 3 minutes. The sugar should be well incorporated and the mixture should appear silky and slightly fluffy.
Be sure to scrape down the sides of the bowl several times during mixing to ensure all ingredients are evenly blended.
Fold in the Chocolate Chips
Once the mixture is smooth, gently fold in the miniature chocolate chips using a rubber spatula.
Stir carefully to distribute the chocolate chips evenly throughout the ice cream base. The miniature chips work especially well because they provide small bursts of chocolate in every bite without becoming overly hard when frozen.
Transfer to a Freezer Container
Pour the prepared mixture into a freezer-safe container. A loaf pan, freezer-safe glass dish, or airtight plastic container works well.
Spread the mixture evenly with a spatula and smooth the surface.
For extra flavor and visual appeal, sprinkle a small handful of additional miniature chocolate chips over the top before freezing.
Cover tightly with a lid or plastic wrap pressed directly onto the surface of the ice cream to help prevent ice crystals from forming.
Freeze Until Firm
Transfer the container to the freezer and freeze for at least 8 hours or overnight.
As the mixture freezes, the mascarpone and ricotta create a creamy consistency that closely resembles traditional churned ice cream.
For the best texture and flavor, allow the ice cream to freeze completely before serving.
Serve and Enjoy
Remove the ice cream from the freezer approximately 5 to 10 minutes before serving.
Allowing the ice cream to soften slightly will make scooping easier and enhance its creamy texture.
Serve in chilled dessert bowls, gluten-free sugar cones, or waffle cones.
For an authentic cannoli-inspired presentation, garnish with additional miniature chocolate chips, crushed gluten-free cannoli shells, shaved dark chocolate, or a light dusting of powdered sugar.
Delicious Topping Ideas
Transform this simple ice cream into an elegant dessert with a variety of toppings.
Try a drizzle of chocolate sauce for added richness.
Sprinkle chopped pistachios over each serving for a traditional cannoli-inspired touch.
Add finely grated orange zest to brighten the flavors and provide a subtle citrus note.
Serve alongside gluten-free biscotti or almond cookies for a delightful contrast in textures.
A spoonful of whipped cream adds even more indulgence and creates a beautiful presentation.
Storage Tips
Store the ice cream in an airtight container in the freezer for up to 2 weeks.
To maintain the creamiest texture, place a piece of plastic wrap directly on the surface before covering the container.
Because homemade ice cream does not contain commercial stabilizers, it may become firmer after extended storage. Simply allow it to sit at room temperature for several minutes before scooping.
Recipe Variations
For a classic Sicilian-inspired flavor, add ½ teaspoon ground cinnamon to the mixture.
Mix in finely chopped gluten-free cannoli shell pieces before freezing for extra texture.
Fold in mini white chocolate chips or dark chocolate chips for a different flavor profile.
Add 1 teaspoon of fresh orange zest to recreate the bright citrus notes often found in traditional cannoli fillings.
For a chocolate lover’s version, swirl chocolate ganache throughout the mixture before freezing.
Notes
Using whole milk ricotta cheese will provide the richest flavor and smoothest texture.
High-quality mascarpone cheese is recommended for the best results.
Be sure to check that all ingredients are certified gluten-free if preparing for someone with celiac disease or gluten sensitivity.
Miniature chocolate chips distribute more evenly than regular-sized chips and create the signature texture associated with traditional cannoli filling.
Allowing the ice cream to soften slightly before serving dramatically improves its scoopability and mouthfeel.
This recipe is an excellent make-ahead dessert for holidays, dinner parties, birthdays, and summer entertaining.
The flavor actually improves after resting in the freezer overnight, making it an ideal dessert to prepare ahead of time.
This no-churn cannoli ice cream is incredibly easy to make and requires no special equipment.
The recipe is naturally gluten-free when prepared with certified gluten-free ingredients.
It combines the authentic flavors of traditional Italian cannoli filling with the creamy texture of homemade ice cream.
The rich mascarpone and ricotta create a luxurious dessert that feels elegant enough for special occasions while remaining simple enough for everyday enjoyment.
The recipe can easily be customized with your favorite cannoli-inspired mix-ins and toppings.