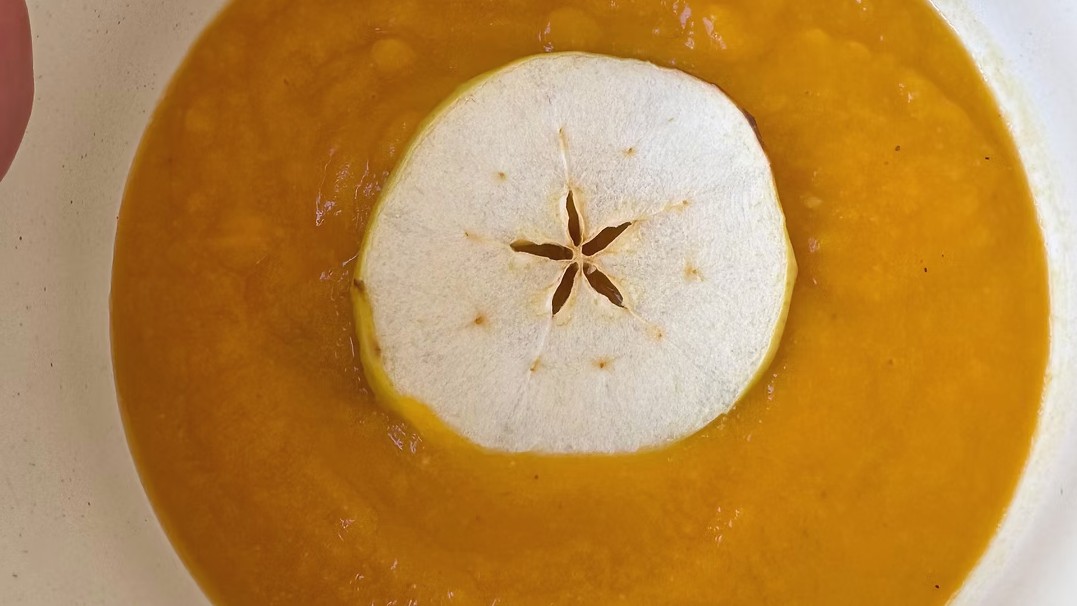
Make velvety roasted butternut squash and apple soup with tart Granny Smith apples, ginger, thyme, and maple syrup for a cozy gluten-free meal.
This Velvety Roasted Butternut Squash and Apple Soup Recipe is a comforting gluten-free fall favorite filled with naturally sweet squash, tart Granny Smith apples, fragrant thyme, and warming ginger. Roasting the butternut squash first caramelizes its edges and concentrates its flavor, creating a rich foundation for a smooth homemade soup that feels both cozy and elegant.
Maple syrup gently enhances the sweetness of the squash and apples without overwhelming their fresh flavor. A small pinch of crushed red pepper flakes adds subtle warmth, while vegetable stock keeps the soup savory and satisfying. Once blended, the ingredients become silky and creamy even before any optional cream is added, making this an easy choice for weeknight dinners, autumn lunches, meal prep, and holiday gatherings.
Finish each bowl with cool sour cream, fresh thyme, and crisp fresh or dried apple slices for a beautiful contrast of flavor and texture. Serve the soup with gluten-free crusty bread, a fresh green salad, or a grilled gluten-free sandwich for a complete meal. It can also be made ahead and reheated, allowing the seasonal flavors to meld while simplifying entertaining or busy-day cooking.
Prep Time: 20 minutes
Cook Time: 45 minutes
Total Time: 1 hour 5 minutes
Yield: 6 to 8 servings
Ingredients
8 cups peeled and cubed butternut squash, about 1 large squash
4 tablespoons olive oil, divided
1 1/2 teaspoons kosher salt, divided
1/2 teaspoon black pepper
1 tablespoon butter
1 medium onion, chopped
4 Granny Smith apples, peeled, cored, and chopped
2 cloves garlic, minced
1 1/2 teaspoons freshly grated ginger
2 tablespoons fresh thyme leaves, plus additional thyme for garnish
1 tablespoon pure maple syrup
1 pinch crushed red pepper flakes
1 32-ounce carton vegetable stock
1 cup water
Sour cream, for serving
Fresh or dried apple slices, for garnish
Directions
Step 1: Prepare the Oven
Preheat the oven to 425°F. Line a large rimmed baking sheet with parchment paper or lightly grease it for easier cleanup. Make sure the baking sheet is large enough to hold the squash in a single layer so the cubes roast instead of steaming.
Step 2: Roast the Butternut Squash
Place the cubed butternut squash on the prepared baking sheet. Drizzle it with 2 tablespoons of olive oil, then season with 1/2 teaspoon kosher salt and the black pepper. Toss well until the pieces are evenly coated.
Spread the squash into a single layer. Roast for 30 to 35 minutes, turning the cubes halfway through the cooking time, until the squash is tender and lightly caramelized around the edges. The squash should pierce easily with a fork when it is ready.
Step 3: Cook the Aromatics
While the squash is roasting, heat the remaining 2 tablespoons of olive oil and the butter in a large Dutch oven or heavy-bottomed soup pot over medium heat.
Add the chopped onion and cook for about 4 minutes, stirring occasionally, until it has softened. Avoid browning the onion heavily because its mild sweetness should complement the squash and apples.
Step 4: Add the Apples and Seasonings
Stir the chopped apples into the softened onion. Continue cooking for about 5 minutes, stirring occasionally, until the apple pieces begin to soften.
Add the minced garlic, grated ginger, fresh thyme, maple syrup, remaining 1 teaspoon kosher salt, and crushed red pepper flakes. Cook for 1 minute, stirring constantly, until the garlic, ginger, and thyme are fragrant. Keeping the mixture moving helps prevent the garlic from scorching.
Step 5: Simmer the Soup
Add the roasted butternut squash to the pot along with the vegetable stock. Stir gently to combine the roasted squash with the apples and aromatics.
Bring the soup to a gentle boil, then reduce the heat to maintain a simmer. Cook uncovered for about 5 minutes, allowing all the flavors to blend. Remove the soup from the heat and let it cool slightly before blending.
Step 6: Blend Until Smooth
Using an immersion blender, carefully puree the soup directly in the pot until it is completely smooth and creamy. Move the blender around the pot as needed so no pieces of squash or apple remain.
Alternatively, blend the soup in batches in a countertop blender. Do not overfill the blender with hot soup, and allow steam to escape according to the manufacturer’s instructions. Return each blended batch to the pot.
Stir in the water and heat the soup gently over medium-low heat until warmed through. For a thinner consistency, add a little more vegetable stock or water until the soup reaches your preferred texture. Taste before serving and adjust the seasoning only if needed.
Step 7: Garnish and Serve
Ladle the hot soup into serving bowls. Top each portion with a dollop of sour cream, a sprinkle of fresh thyme leaves, and fresh or dried apple slices. Serve immediately with gluten-free crusty bread, a fresh green salad, or a grilled gluten-free sandwich for a satisfying meal.
Notes
This soup is naturally gluten-free when prepared with vegetable stock that is labeled or certified gluten-free. Check all packaged ingredients and prevent cross-contact when serving anyone with celiac disease or gluten sensitivity.
For a dairy-free version, replace the butter with an equal amount of additional olive oil. Use a dairy-free sour cream alternative for serving, or omit the creamy garnish.
Honey may be substituted for the maple syrup if preferred, although maple syrup keeps the recipe vegan when the butter and sour cream are also replaced with plant-based options.
Roasting the squash develops a deeper caramelized flavor and gives the finished soup a richer, sweeter profile. Keep the cubes in one layer and turn them halfway through roasting for more even browning.
For extra richness, stir in 1/2 cup of heavy cream or full-fat coconut milk after blending. Warm the soup gently after adding it, but do not let it boil vigorously.
The amount of additional liquid can be adjusted to suit your preferred consistency. Begin with the specified 1 cup of water, then add more stock or water in small increments if you would like a thinner soup.
Store cooled leftovers in an airtight container in the refrigerator for up to 4 days. Reheat the soup gently on the stovetop or in the microwave, stirring occasionally until it is hot throughout.
This soup freezes well for up to 3 months. Freeze it without the sour cream and apple garnishes, thaw it overnight in the refrigerator, and reheat gently before adding fresh toppings and serving.