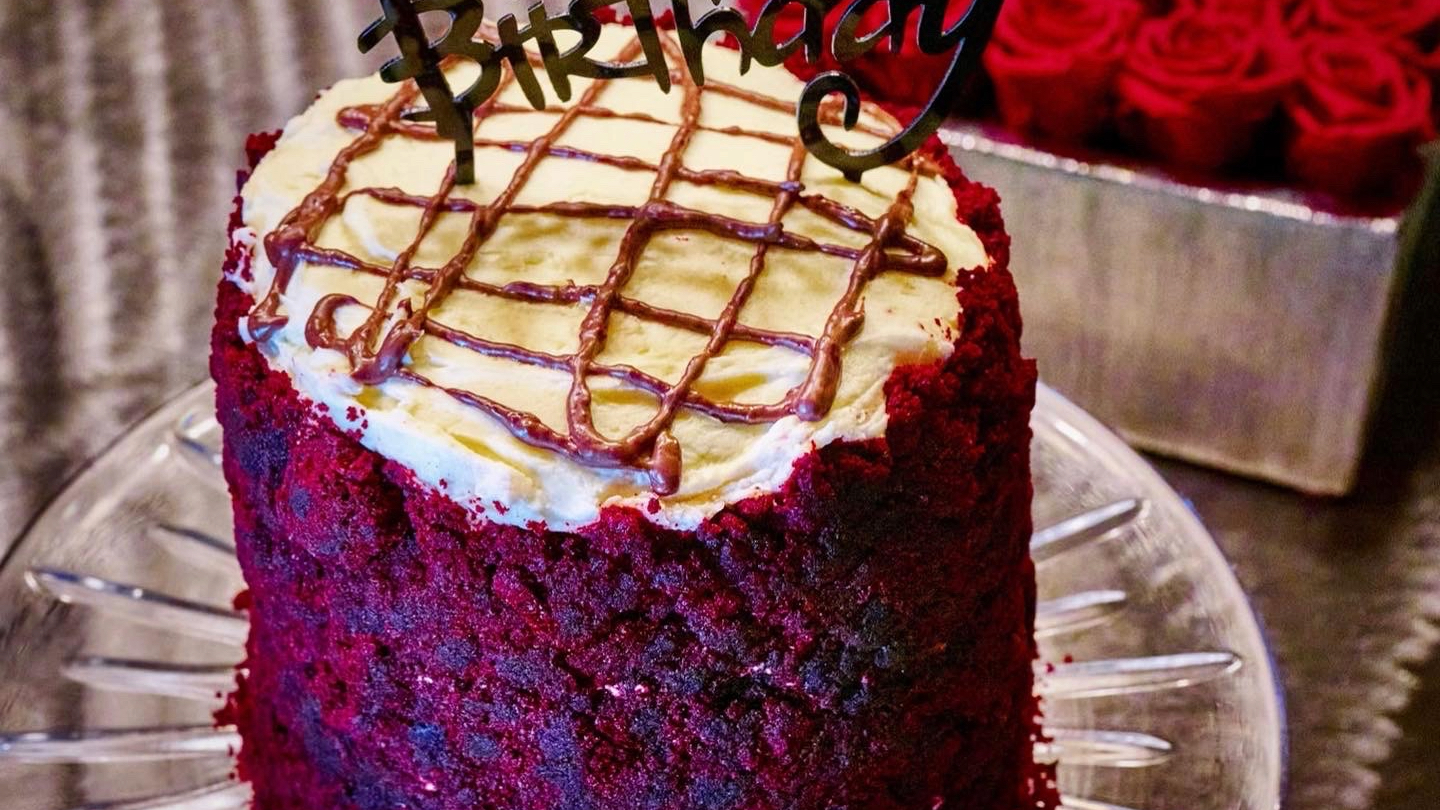
Make velvety gluten-free red velvet cake with cream cheese frosting, tender cocoa layers, and cake crumbles. Includes two complete flour options.
This Velvety Gluten-Free Red Velvet Cake with Cream Cheese Frosting Recipe combines tender cocoa-flavored layers, smooth cream cheese frosting, and a decorative coating of red velvet cake crumbles. The contrast of crimson cake and creamy white frosting makes it a beautiful dessert for birthdays, holidays, anniversaries, and other special occasions.
Red velvet cake brings together cocoa, vanilla, and the gentle tang of buttermilk. Cream cheese frosting complements those flavors with a rich, slightly tangy finish, while crumbs made from the trimmed cake tops add texture and color to the finished cake.
Choose between two complete cake options: a homemade gluten-free flour blend with sour cream or a separate formula using measure-for-measure gluten-free flour. Each has its own ingredient quantities and mixing instructions. Prepare only one cake option, then finish it with the frosting and decorations below.
Directions
Step 1: Prepare the Oven and Cake Pans
Preheat the oven to 350°F. Grease three 6-inch round cake pans or two 8-inch round cake pans. Line the bottoms with parchment paper and lightly grease the parchment.
The two cake formulas make different amounts of batter. As an optional precaution against overflow, fill the pans no more than two-thirds full and bake any remaining batter separately as cupcakes or an additional thin layer. Smaller portions will need a shorter baking time.
Step 2: Prepare the Dry Ingredients for Your Chosen Cake
For Option 1, whisk together the sweet rice flour, white rice flour, tapioca flour, brown rice flour, xanthan gum, baking powder, baking soda, kosher salt, and cocoa powder until evenly combined.
For Option 2, whisk together the measure-for-measure gluten-free flour, cocoa powder, and salt. Keep the baking soda and vinegar separate for the final mixing step.
Choose one option and follow its corresponding mixing instructions below. Do not combine the two formulas.
Step 3: Mix the Homemade Flour Blend Batter
Follow this step only if making Option 1.
In a stand mixer fitted with the paddle attachment, beat the softened butter and granulated sugar on medium speed for 3 to 4 minutes, until light and fluffy. If using the oil alternative, whisk the oil and sugar until thoroughly combined.
Add the eggs one at a time, beating well after each addition. Mix in the vanilla extract, sour cream, red coloring, and apple cider vinegar until smooth.
With the mixer on low speed, add the dry ingredients in three portions, alternating with the buttermilk in two portions. Begin and end with the dry ingredients. Mix just until combined, scraping the bowl as needed.
Fold in the mini chocolate chips, if using.
Step 4: Mix the Measure-for-Measure Flour Batter
Follow this step only if making Option 2.
Whisk the neutral oil and granulated sugar together in a large mixing bowl. Add the eggs one at a time, mixing well after each addition. Stir in the vanilla extract and red coloring.
Add the dry ingredients in three portions, alternating with the buttermilk in two portions. Begin and end with the dry ingredients, mixing until the batter is evenly combined.
In a small bowl, stir together the baking soda and vinegar. Immediately fold the bubbling mixture into the batter until incorporated, then promptly divide the batter among the prepared pans.
Step 5: Bake the Cake Layers
Divide your chosen batter evenly among the prepared pans, keeping the batter depth consistent.
Bake for 30 to 35 minutes, or until a toothpick inserted into the center comes out clean or with a few moist crumbs. Use the doneness test as your guide because baking time can vary with the formula, pan size, and batter depth.
Let the cakes cool in their pans for 10 minutes. Carefully turn them out onto wire racks, remove the parchment, and let them cool completely before trimming or frosting.
Step 6: Prepare the Cream Cheese Frosting
Beat the softened cream cheese and butter in a large mixing bowl until smooth and creamy.
Add the sifted powdered sugar gradually, approximately 1 cup at a time, mixing on low speed after each addition. Scrape down the bowl as needed.
Add the vanilla extract and fine salt. Beat on medium-high speed for 2 to 3 minutes, until smooth and fluffy.
If the frosting needs thinning, add the heavy cream 1 tablespoon at a time, using only enough to reach a spreadable consistency.
Step 7: Make the Red Velvet Cake Crumbles
Once the cake layers are completely cool, use a serrated knife to level any rounded tops. Reserve the trimmed pieces.
Let the scraps sit uncovered for approximately 30 minutes to dry slightly. Crumble them finely with your fingers or pulse briefly in a food processor. Stop before the crumbs become compressed or pasty.
If using an extra thin baked layer, cool it completely before crumbling.
Step 8: Fill and Stack the Cake
Place the first cake layer on a cake stand or serving plate. Spread approximately 3/4 cup of cream cheese frosting evenly over the top.
For a two-layer cake, add the second layer. For a three-layer cake, add the second layer, spread it with another approximately 3/4 cup of frosting, and place the final layer on top.
Spread a thin crumb coat over the top and sides. Refrigerate for 20 to 30 minutes, until the frosting firms.
Apply a generous final layer of frosting, smoothing the top and sides with an offset spatula.
Step 9: Decorate the Cake
Gently press the red velvet cake crumbles onto the sides of the freshly frosted cake. Work around the cake in small sections until the sides are coated.
Smooth the frosting on top. If desired, drizzle with melted chocolate and finish with chocolate curls, fresh berries, or a birthday cake topper.
Step 10: Chill and Serve
Refrigerate the decorated cake for approximately 30 minutes to help the frosting set.
Remove it from the refrigerator 20 to 30 minutes before serving to allow the frosting to soften slightly. Slice and serve.
Notes
The two cake options are separate recipes with different proportions. The measure-for-measure flour is not a direct substitution for the combined flours in Option 1. Use all the ingredients and quantities listed for your chosen option.
The supplied recipe gives the same pan choices and a yield of 10 to 12 servings for both formulas, although their batter volumes differ. Any separately baked excess batter will provide additional cake or decorating crumbs.
Use room-temperature ingredients where specified to help the batter mix evenly. The cream cheese and butter should be softened enough to beat smoothly for the frosting.
Red coloring varies in strength and formulation. The listed 6 tablespoons refers to the supplied recipe’s coloring quantity; concentrated gels and powders may require different amounts. Follow the product’s directions rather than substituting the same volume of a concentrated coloring. Natural red coloring may produce a softer or less vivid result after baking.
Mix only until the ingredients are incorporated after adding the flour. Scrape the bottom and sides of the bowl so no pockets of dry ingredients remain.
Let the cake layers cool completely before frosting. Warm cake can soften the frosting and make the layers slide during assembly.
For optional extra decorating crumbs, bake a small portion of the batter separately in a cupcake pan. Check it earlier than the full cake layers and let it cool completely before crumbling.
Keep the frosted cake covered in the refrigerator. For longer advance preparation, the unfrosted layers can be wrapped tightly in plastic wrap and then aluminum foil and frozen for up to 3 months.
Cooling and decorating time is approximate. Allow additional time if the layers are still warm or if you are adding detailed decorations.
For gluten-free preparation, check the labels on the flour blend, cocoa powder, coloring, powdered sugar, chocolate, and other packaged ingredients. Use clean equipment and preparation surfaces to help prevent cross-contact.