Make an easy gluten-free classic pumpkin pie with a silky, warmly spiced filling and your choice of three delicious gluten-free crusts.
Rich, creamy, and warmly spiced, this Easy Gluten-Free Classic Pumpkin Pie Recipe brings timeless autumn flavor to Thanksgiving, Christmas, Friendsgiving, and fall celebrations. The silky pumpkin custard combines pure pumpkin puree, heavy cream, cinnamon, ginger, and freshly grated nutmeg for a beautifully balanced dessert that is sweet without being overwhelming.
Choose from an extra-flaky homemade pastry crust, a simple homemade pie crust, or a convenient ready-made gluten-free crust. Each option provides a delicious foundation for the smooth pumpkin filling. Serve the finished pie chilled or at room temperature with freshly whipped cream, vanilla ice cream, or a light sprinkle of cinnamon.
The pie can be baked one day ahead, making it especially convenient for holiday entertaining. Allowing it to cool completely is essential because the filling continues to set as it rests, creating clean slices and a luxuriously creamy texture.
Ingredients
For the Pumpkin Pie Filling
1 (15-ounce) can pure pumpkin puree
1 1/4 cups heavy cream
3/4 cup granulated sugar
2 large eggs
1 teaspoon ground cinnamon
1/2 teaspoon ground ginger
1/4 teaspoon freshly grated nutmeg
1/2 teaspoon pure vanilla extract
1/4 teaspoon kosher salt
Crust Option 1: Extra-Flaky Gluten-Free Pastry Crust
3/4 cup plus 2 tablespoons tapioca starch, plus additional for dusting
3/4 cup cornstarch
1/4 cup plus 2 tablespoons brown rice flour
1/4 cup oat flour
2 teaspoons granulated sugar
1/4 teaspoon sea salt
1 1/2 teaspoons xanthan gum
2 sticks salted butter, diced and thoroughly chilled
3 large eggs
Egg Wash for Crust Option 1
1 large egg
1 tablespoon water
Crust Option 2: Simple Gluten-Free Pie Crust
1 1/4 cups gluten-free all-purpose flour
1 tablespoon granulated sugar
1/2 teaspoon xanthan gum
1/2 teaspoon salt
6 tablespoons cold butter, cut into small cubes
1 large egg
2 teaspoons lemon juice or vinegar
2 teaspoons cornstarch, optional
Egg Wash for Crust Option 2
1 large egg
1 tablespoon water
Crust Option 3: Ready-Made Gluten-Free Pie Crust
1 (9-inch) unbaked gluten-free pie crust
Directions
Step 1: Choose the Crust
Select one of the three gluten-free crust options. Prepare your chosen homemade crust as directed below, or arrange the ready-made crust in a 9-inch pie plate according to the package instructions.
Step 2: Prepare Crust Option 1
Whisk together the tapioca starch, cornstarch, brown rice flour, oat flour, granulated sugar, sea salt, and xanthan gum in a large mixing bowl.
Add the thoroughly chilled diced butter. Cut it into the dry ingredients with a pastry cutter or two forks until the mixture resembles coarse crumbs with visible pea-sized pieces of butter.
Lightly beat the three eggs. Add them to the flour mixture and stir gently until the dough begins to come together. If the dough feels sticky, dust it lightly with additional tapioca starch.
Shape the dough into a disk, wrap it tightly, and refrigerate it for at least 30 minutes.
Roll the chilled dough between two sheets of parchment paper until it is large enough to fit a 9-inch pie plate. Transfer the dough carefully to the plate and gently press it into the bottom and sides.
Trim and crimp the edges, reserving any scraps for decorative pastry cutouts.
Refrigerate the prepared crust while making the filling.
Step 3: Prepare Crust Option 2
Whisk together the gluten-free all-purpose flour, granulated sugar, xanthan gum, salt, and optional cornstarch in a large bowl.
Cut the cold butter into the flour mixture until coarse crumbs form.
Whisk the egg with the lemon juice or vinegar in a small bowl. Add the egg mixture to the dry ingredients and stir until the dough comes together.
Shape the dough into a disk, wrap it tightly, and refrigerate it for 30 minutes.
Roll the chilled dough between two sheets of parchment paper. Transfer it to a 9-inch pie plate and gently press it into the bottom and sides. Trim and crimp the edges, reserving scraps for decorative cutouts if desired.
Refrigerate the prepared crust while making the filling.
Step 4: Prepare Crust Option 3
Place the unbaked ready-made gluten-free pie crust in a 9-inch pie plate according to the package instructions. Keep the crust refrigerated until the filling is ready.
Step 5: Preheat the Oven
Preheat the oven to 425°F. Position a rack in the center of the oven.
Step 6: Make the Pumpkin Filling
Whisk the two eggs in a large mixing bowl until smooth.
Add the pumpkin puree, granulated sugar, cinnamon, ginger, nutmeg, vanilla extract, and kosher salt. Whisk until the spices are evenly distributed and the mixture is completely combined.
Gradually pour in the heavy cream while continuing to whisk. Mix until the filling is smooth and silky with no visible streaks.
Step 7: Fill the Pie Crust
Pour the pumpkin filling into the chilled pie crust.
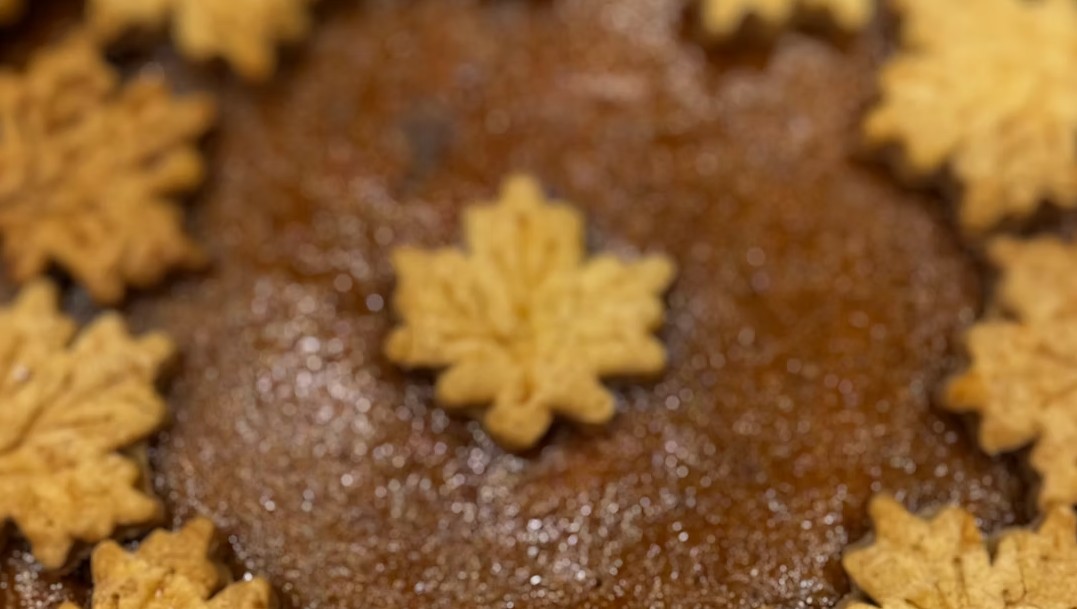
If you prepared a homemade crust, roll out the reserved scraps and cut them into leaves, pumpkins, or acorns. Arrange the decorations around the edge of the pie.
Whisk together the egg and water for the appropriate egg wash. Lightly brush the decorative pastry and exposed crust edge with the egg wash.
Step 8: Begin Baking the Pie
Place the pie on the center oven rack. Bake at 425°F for 15 minutes.
Step 9: Reduce the Temperature
Without removing the pie from the oven, reduce the temperature to 350°F. Continue baking for 40 to 45 minutes.
The pumpkin pie is ready when the edges of the filling are set and the center has only a slight wobble when the pie is gently moved. A knife inserted near the center should come out mostly clean.
If the crust begins to brown too quickly, loosely cover the edges with aluminum foil or a pie shield.
Step 10: Cool the Pumpkin Pie
Transfer the baked pie to a wire cooling rack. Let it cool completely for at least 2 hours. The filling will continue to set and develop its creamy texture during this time.
Avoid slicing the pie while it is warm because the filling may not hold its shape. For especially clean slices, refrigerate the cooled pie for an additional hour before serving.
Step 11: Serve
Serve the gluten-free pumpkin pie chilled or at room temperature. Top each slice with freshly whipped cream, vanilla ice cream, or a light sprinkle of cinnamon, if desired.
For a festive presentation, garnish the pie with sugared cranberries, candied pecans, or separately baked pastry leaves.
Notes
Choose only one crust option when preparing the recipe.
Always use pure pumpkin puree rather than pumpkin pie filling. Pumpkin pie filling already contains sweeteners and spices that would alter the recipe.
Room-temperature eggs and cream blend more easily into the filling and help create a smoother custard.
Freshly grated nutmeg provides a more vibrant flavor than pre-ground nutmeg.
Do not overbake the pie. The center should still move slightly when the pie comes out of the oven because it will continue to set as it cools.
Small cracks may indicate that the filling was baked slightly too long, but the pie will still taste delicious.
Decorative pastry cutouts may be baked separately until golden and added to the finished pie before serving.
The pie can be baked one day ahead. Cool it completely, cover it, and refrigerate it until serving.
Store leftover pumpkin pie tightly covered in the refrigerator for up to four days.
When baking for someone with celiac disease or gluten sensitivity, check the labels on the gluten-free flour, oat flour, cornstarch, spices, vanilla extract, and ready-made pie crust. Choose appropriately labeled products and prevent cross-contact during preparation.