Make a flaky gluten-free shortcrust pie crust with two buttery dough options for fruit pies, custard pies, quiche, pot pies, and tarts.
Buttery, tender, and easy to shape, this Flaky Gluten-Free Shortcrust Pie Crust Recipe offers two dough options for sweet and savory baking. Use the traditional individual-flour crust for a rich, exceptionally flaky pastry, or choose the convenient gluten-free all-purpose flour crust for a smaller, simple batch.
The first option combines tapioca starch, cornstarch, brown rice flour, and gluten-free oat flour. Cold butter and eggs bring the dough together while creating a delicate texture. The second option uses gluten-free all-purpose flour with butter, egg, and a small amount of lemon juice or vinegar.
Either dough can be rolled between sheets of parchment paper to make handling and transferring easier. Use the finished crust for fruit pies, custard pies, quiche, pot pies, or tarts.
Prepare either Option 1 or Option 2. These are separate crust formulas and should not be combined.
Directions
Option 1: Traditional Gluten-Free Shortcrust Pie Crust
Step 1: Prepare the Pie Pan
Lightly grease a 9-inch pie pan and set it aside.
Step 2: Combine the Dry Ingredients
Place the tapioca starch, cornstarch, brown rice flour, gluten-free oat flour, granulated sugar, sea salt, and xanthan gum in a food processor or stand mixer fitted with the blade attachment. Pulse until evenly combined.
Step 3: Cut in the Butter
Add the cold diced butter. Pulse until the mixture resembles coarse crumbs with small, pea-sized pieces of butter distributed throughout.
Step 4: Add the Eggs
Add the three eggs and pulse just until the dough begins to come together. Avoid overmixing, which can affect the crust’s tender texture.
Step 5: Form the Dough
Transfer the mixture to a surface lightly dusted with tapioca starch. Knead it gently just until a cohesive dough forms.
Divide the dough into two equal portions. Shape each portion into a flat disk and wrap it tightly.
Step 6: Chill the Dough
Refrigerate the dough for at least 1 hour or up to overnight.
Step 7: Roll Out the Bottom Crust
Let one disk rest at room temperature for 10 to 15 minutes. Place it between two sheets of parchment paper and roll it into a circle approximately 14 inches in diameter.
Step 8: Transfer the Crust
Remove the top sheet of parchment paper. Carefully transfer the dough to the prepared pie pan.
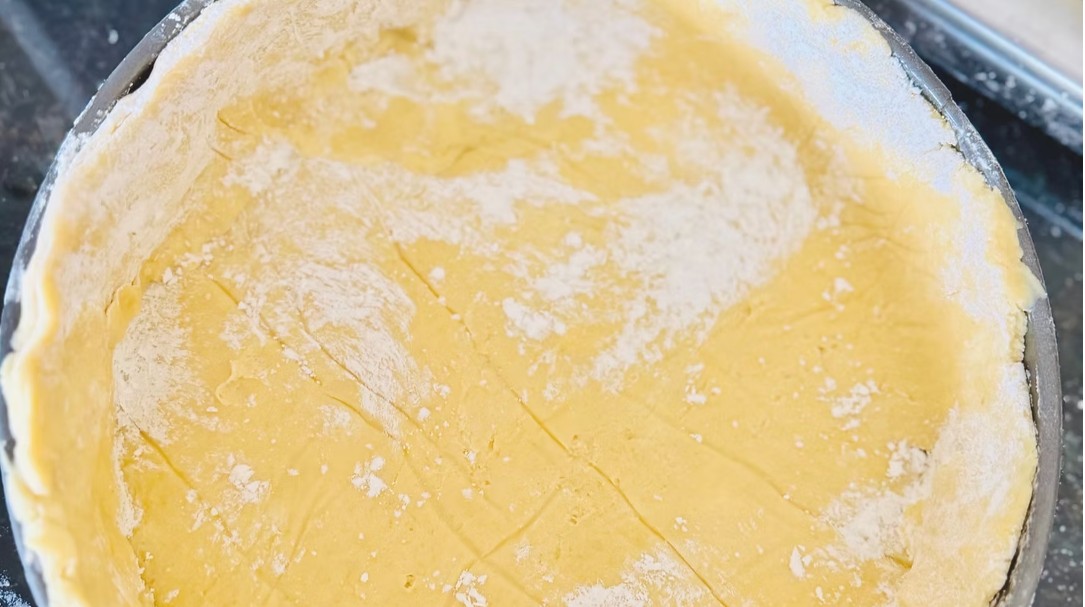
Lift the edges slightly and allow the dough to settle naturally into the bottom and sides of the pan. Do not stretch it.
Step 9: Trim and Crimp the Edges
Trim the dough, leaving approximately a 1-inch overhang. Fold the excess underneath itself and crimp the edges as desired.
For a single-crust pie, fill and bake the crust according to the selected pie recipe.
Step 10: Assemble a Double-Crust Pie
For a double-crust pie, roll out the second disk between sheets of parchment paper. Add the desired filling to the bottom crust, then arrange the second crust over the filling.
Trim and seal the edges. Cut vents in the top crust as required by the filling recipe.
Step 11: Prepare the Egg Wash
Whisk the remaining egg with 1 tablespoon of water until smooth. Lightly brush the egg wash over the top crust to encourage a golden, glossy finish.
Bake the assembled pie according to the filling recipe’s temperature and timing instructions.
Option 2: Easy Gluten-Free All-Purpose Pie Crust
Step 1: Prepare the Pie Pan
Lightly grease a 9-inch pie pan and set it aside.
Step 2: Mix the Dry Ingredients
In a large bowl, whisk together the gluten-free all-purpose flour, granulated sugar, xanthan gum, salt, and cornstarch.
Step 3: Cut in the Butter
Add the cold butter. Work it into the dry ingredients with a pastry cutter, fork, or clean fingertips until the mixture is crumbly and small, pea-sized pieces of butter remain.
Step 4: Combine the Wet Ingredients
In a small bowl, whisk together the egg and lemon juice or vinegar until frothy.
For the egg-free alternative, omit both the egg and lemon juice or vinegar. Begin with the specified 4 tablespoons of cold water instead.
Step 5: Form the Dough
Add the wet ingredients to the flour mixture and stir until a dough forms. If the standard dough remains dry or crumbly, add 1 to 3 tablespoons of cold water, one tablespoon at a time, until it holds together.
When making the egg-free crust, add more cold water only if necessary to form a cohesive dough.
Step 6: Chill the Dough
Shape the dough into a disk and wrap it tightly. Refrigerate for at least 1 hour or up to overnight.
Step 7: Roll Out the Dough
Allow the chilled dough to rest at room temperature for 10 to 15 minutes.
Place it between two sheets of parchment paper and roll it into a circle large enough to fit the prepared pie pan.
Step 8: Transfer the Crust
Remove the top sheet of parchment paper. Invert the dough into the prepared pan and carefully remove the remaining parchment paper.
Gently press the crust into the bottom and sides without stretching it.
Step 9: Finish and Fill the Crust
Trim away the excess dough and crimp the edges as desired. Add the selected filling and bake according to the filling recipe’s temperature and timing instructions.
Notes
Keep the butter and other ingredients cold throughout preparation. Pieces of cold butter release steam during baking, helping create flaky layers.
Roll the dough between sheets of parchment paper to reduce sticking and make the delicate gluten-free crust easier to transfer.
If the dough cracks during rolling or transferring, gently press the cracked area back together with your fingertips.
Option 1 makes enough dough for one double-crust 9-inch pie or two single-crust pies. Option 2 is a smaller formula intended for one single-crust 9-inch pie. Prepare a second batch of Option 2 if you need a full double crust.
Use the crust for apple pie, pumpkin pie, pecan pie, berry pie, quiche, pot pie, or a tart. Follow the selected filling recipe for baking temperatures and times.
The traditional shortcrust option produces a rich, buttery pastry using individual gluten-free flours and starches. The all-purpose flour option offers a convenient alternative for a single-crust pie.
Check the ingredient label on the gluten-free all-purpose flour before adding xanthan gum. If the blend already contains xanthan gum, follow the flour manufacturer’s recommendations for pie crust.
When preparing the recipe for someone with celiac disease or gluten sensitivity, use appropriately labeled gluten-free flour, oat flour, starches, and other packaged ingredients. Prevent cross-contact by using clean equipment, surfaces, and utensils.
The wrapped dough can be refrigerated for up to 2 days or frozen for up to 3 months. Thaw frozen dough in the refrigerator before bringing it to a workable temperature.