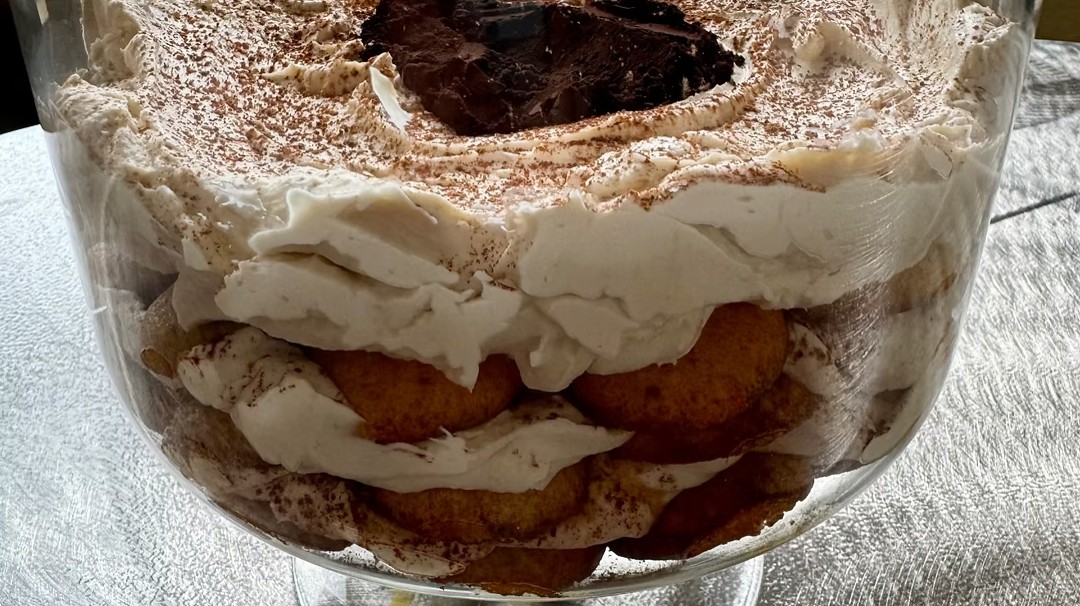
Make a decadent gluten-free tiramisu with espresso-soaked cookies, fluffy mascarpone cream, and rich cocoa in this easy no-bake dessert.
Creamy, elegant, and deeply flavorful, this Decadent Gluten-Free Tiramisu Recipe transforms the classic Italian dessert into an impressive gluten-free treat. Espresso-soaked gluten-free ladyfingers or vanilla wafers are layered with fluffy mascarpone cream and delicate dustings of unsweetened cocoa powder.
Tiramisu means “pick me up” in Italian, an appropriate name for a dessert filled with bold coffee, rich cocoa, and silky mascarpone. The slight bitterness of the espresso and cocoa balances the sweet filling, creating a sophisticated dessert that tastes indulgent without feeling overly heavy.
This gluten-free tiramisu is also a convenient no-bake dessert. Once the layers are assembled, the refrigerator does the remaining work. Chilling softens the cookies, sets the mascarpone filling, and allows the coffee, vanilla, and cocoa flavors to blend beautifully.
Prepare this decadent make-ahead dessert for holidays, birthdays, dinner parties, bridal showers, or family gatherings. The optional coffee liqueur, Marsala wine, or rum adds another layer of flavor for an adults-only variation, but the alcohol-free version is equally delicious.
Directions
Step 1: Whip the Heavy Cream
Pour the heavy cream into a large, chilled mixing bowl. Using an electric mixer, beat the cream on medium speed until it becomes frothy and begins to thicken.
Increase the mixer speed to high and continue beating until stiff peaks form. The whipped cream should hold its shape when the beaters are lifted.
Place the whipped cream in the refrigerator while preparing the remaining ingredients. Keeping it cold helps preserve its light, airy texture.
Step 2: Prepare the Espresso Mixture
Combine the cooled coffee and instant espresso powder in a wide, shallow bowl, pie plate, or baking dish. Whisk until the espresso powder has dissolved completely and no granules remain.
For the optional alcohol version, stir in the gluten-free coffee liqueur, Marsala wine, or rum. Choose only one type of alcohol.
Set the espresso mixture aside while preparing the mascarpone filling.
Step 3: Make the Mascarpone Filling
Place the mascarpone cheese in a large mixing bowl. Beat it on medium speed for 1 to 2 minutes, or until completely smooth and creamy.
Reduce the mixer speed to low. Gradually add the powdered sugar and vanilla extract.
Once the sugar and vanilla are incorporated, increase the mixer speed to medium. Continue mixing until the mascarpone filling is silky, smooth, and free of lumps.
Step 4: Fold in the Whipped Cream
Remove the whipped cream from the refrigerator. Using a rubber spatula, gently fold one-third of the whipped cream into the mascarpone mixture. This lightens the mascarpone and makes it easier to incorporate the remaining cream.
Gently fold in the rest of the whipped cream using slow motions. Continue folding just until the mixture is evenly combined and no white streaks remain. The finished filling should be light, fluffy, and creamy.
Step 5: Assemble the First Layer
Working with one gluten-free ladyfinger or vanilla wafer at a time, quickly dip each cookie into the espresso mixture. Do not soak the cookies. A quick dip provides enough coffee flavor while helping the cookies retain their structure.
Arrange the dipped cookies in a single layer in the bottom of a trifle dish, large glass bowl, or 9-inch square serving dish. Break additional cookies into smaller pieces as needed to fill any gaps.
Spread one-third of the mascarpone filling evenly over the cookies. Smooth the surface with an offset spatula or the back of a spoon.
Place the cocoa powder in a fine-mesh sieve and lightly dust some of it over the mascarpone filling.
Step 6: Add the Second Layer
Quickly dip another third of the cookies into the espresso mixture. Arrange them evenly over the first layer of mascarpone filling.
Spread another third of the mascarpone filling over the cookies. Smooth the top and dust it lightly with cocoa powder.
Step 7: Finish the Final Layer
Dip the remaining cookies in the espresso mixture and arrange them over the second mascarpone layer.
Top the cookies with the remaining mascarpone filling. Spread it evenly to create a smooth finish, then dust the top generously with the remaining cocoa powder.
Step 8: Chill the Tiramisù
Cover the dish tightly with plastic wrap. Refrigerate the tiramisù for at least 6 hours.
For the best flavor, texture, and cleanest portions, refrigerate the dessert overnight. The extended chilling time allows the cookies to soften and helps the layers hold together when served.
Step 9: Serve
Keep the tiramisù refrigerated until serving. Scoop portions into dessert bowls or cut the dessert into squares if it was assembled in a baking dish. Serve chilled.
Notes
Mascarpone cheese should be cold but not frozen. Mascarpone that becomes too warm may produce a filling that is softer and more difficult to layer.
Strong brewed coffee or espresso delivers the boldest flavor. Regular brewed coffee may be used for a milder coffee taste.
Gluten-free vanilla wafers create a slightly sweeter dessert. Gluten-free ladyfingers provide a texture closer to traditional tiramisù.
Quickly dip each cookie into the espresso mixture. Soaking the cookies for too long can make the finished dessert soggy or difficult to serve.
Fold the whipped cream into the mascarpone gently. Vigorous stirring or overmixing can deflate the cream and make the filling less airy.
For the cleanest portions, assemble the tiramisù in a square serving dish and refrigerate it overnight before slicing.
Store leftover tiramisù tightly covered in the refrigerator for up to 3 days.
Do not freeze the tiramisù because freezing may alter the smooth texture of the mascarpone filling.
Check the labels on the ladyfingers or vanilla wafers, instant espresso powder, cocoa powder, vanilla extract, and optional coffee liqueur to confirm that they meet your gluten-free needs. Prevent cross-contact by using clean bowls, utensils, preparation surfaces, and serving dishes.
Must be 21 years of age or older to purchase or consume alcoholic beverages. Please drink responsibly.