Black Sweet Bell Pepper Plant: A Stunning and Productive Addition to Your Garden
The Black Sweet Bell Pepper Plant is an eye-catching variety that combines ornamental beauty with excellent culinary value. Known for its deep purple to nearly black foliage and glossy dark fruits, this unique pepper plant stands out in vegetable gardens, raised beds, and decorative containers. As the peppers mature, they gradually change color from black or dark purple to a rich, vibrant red, signaling their peak sweetness and full flavor.
Unlike hot peppers, Black Sweet Bell Peppers are completely sweet and contain no heat, making them an excellent choice for gardeners who enjoy colorful vegetables with a mild, crisp taste. Their thick walls and juicy texture make them incredibly versatile in the kitchen, while the plant itself adds dramatic contrast among green vegetables and flowering plants.
Black Sweet Bell Pepper Plants thrive in warm weather and require plenty of sunlight to produce abundant fruit. Plant them after the danger of frost has passed when soil temperatures have warmed. They perform best in fertile, well-drained soil enriched with compost or organic matter.
Consistent watering is essential throughout the growing season, especially during flowering and fruit development. Applying mulch around the base of the plant helps retain moisture, regulate soil temperature, and reduce weed growth. Regular feeding with a balanced vegetable fertilizer encourages healthy foliage, strong stems, and plentiful peppers.
These compact plants typically reach 18 to 30 inches tall, making them suitable for traditional gardens, raised beds, and large patio containers.
What Makes Black Sweet Bell Peppers Unique?
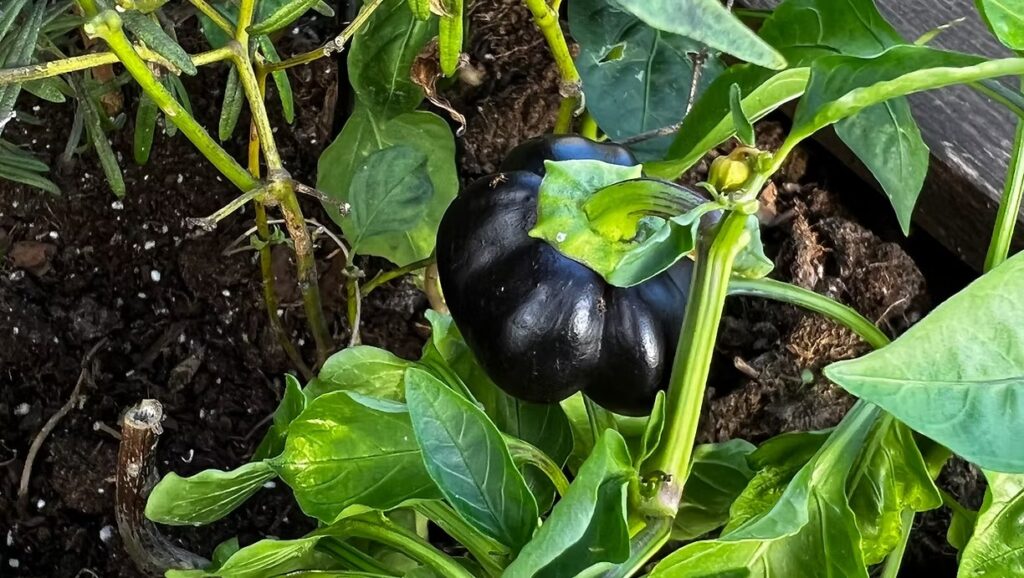
One of the most remarkable features of this variety is its striking appearance. The nearly black peppers create a dramatic contrast against the plant’s dark green to purple foliage before gradually ripening to brilliant red. This color transformation makes the plant highly ornamental while also providing a visual cue for harvest timing.
The peppers are blocky, thick-walled, and crunchy with a sweet flavor that becomes even richer as they mature. Harvesting at either the dark purple stage or the fully red stage allows gardeners to enjoy slightly different flavor profiles.
Culinary Uses
Black Sweet Bell Peppers are as versatile in the kitchen as they are beautiful in the garden. Their sweet, mild flavor pairs well with countless dishes and cooking methods.
Fresh peppers add vibrant color and crisp texture to salads, vegetable trays, wraps, sandwiches, and fresh salsas. Their sturdy walls make them ideal for stuffing with rice, quinoa, vegetables, meats, or gluten-free grains before baking.
They are also excellent for roasting, grilling, sautéing, stir-frying, and adding to soups, casseroles, pasta dishes, omelets, pizzas, and fajitas. Roasting enhances their natural sweetness while softening their texture, making them perfect for sauces, dips, and roasted vegetable medleys.
For gardeners with abundant harvests, Black Sweet Bell Peppers can be frozen, pickled, or dehydrated for long-term storage without sacrificing much of their delicious flavor.
Harvesting Tips
Harvest Black Sweet Bell Peppers when they reach full size and display their characteristic glossy black or deep purple color if you prefer a slightly milder flavor. Allowing the peppers to remain on the plant until they ripen to bright red increases their sweetness and vitamin content.
Using clean pruning shears or scissors to harvest peppers helps prevent damage to the plant and encourages continued production throughout the growing season.
Nutritional Benefits
Black Sweet Bell Peppers are rich in essential vitamins and antioxidants that support overall health. They are an excellent source of vitamin C, vitamin A, vitamin B6, potassium, and dietary fiber. Their colorful pigments contain beneficial antioxidants that help protect cells from oxidative stress while supporting immune function and healthy skin.
Because they are naturally low in calories and high in nutrients, these peppers make a flavorful addition to balanced meals and healthy snacks.
Why Grow Black Sweet Bell Pepper Plants?
Black Sweet Bell Pepper Plants offer an exceptional combination of beauty, productivity, and flavor. Their unusual dark fruits and ornamental foliage make them a conversation piece in any garden, while their sweet, crisp peppers provide endless culinary possibilities. Whether grown in a backyard vegetable garden, raised bed, or decorative container, this unique variety delivers both visual appeal and delicious harvests throughout the growing season.
A striking black pepper grows among vibrant green leaves in the vegetable garden.
Use this red bell pepper growing guide to learn about planting, sunlight, soil, watering, container care, common problems, and harvesting sweet peppers. Red bell peppers bring brilliant color, satisfying crunch, and naturally sweet flavor to the home garden. Their glossy fruit looks beautiful among deep green leaves, and each pepper becomes even more striking as it ripens from green to vibrant red. Whether you grow them in a traditional vegetable garden, raised bed, greenhouse, or sunny container, red bell peppers can be a rewarding warm-season crop. Although they are commonly treated as separate vegetables at the grocery store, many red bell peppers begin as green peppers. The fruit changes color when it remains on the plant long enough to reach full maturity. During this ripening period, its flavor becomes sweeter and fruitier. Growing fully ripened red peppers requires patience because they need more time on the plant than peppers harvested while green. Warm weather, consistent moisture, healthy soil, and the right variety can help gardeners enjoy a colorful harvest filled with fresh flavor. Understanding Red Bell Pepper Plants Red bell peppers are sweet pepper varieties of Capsicum annuum. Unlike hot peppers, bell peppers do not produce meaningful levels of capsaicin, the compound responsible for spicy heat. Their mild flavor makes them versatile for fresh eating, roasting, grilling, stuffing, sautéing, and preserving. Bell pepper plants have a bushy growth habit and produce small white flowers followed by green fruit. Depending on the variety, the mature peppers may become red, orange, yellow, purple, brown, or another color. Select a variety specifically described as ripening red if bright red peppers are your goal. Days to maturity vary considerably. The number printed on a seed packet or plant label may refer to the approximate period after transplanting rather than the time from sowing. Cool temperatures, extreme heat, inconsistent watering, and limited sunlight can also slow fruit development. Choosing the Best Red Bell Pepper Variety Look for a red bell pepper variety suited to your climate and growing season. Gardeners in regions with short summers may have better results with an early-maturing or cold-tolerant selection. In hot climates, widely adapted or heat-tolerant varieties may continue setting fruit more reliably as temperatures rise. Disease-resistant varieties can be especially valuable in areas where bacterial leaf spot, viruses, or soilborne diseases have caused previous problems. Compact varieties are convenient for patios and containers, while larger plants may benefit from staking or support once they become heavy with fruit. Healthy transplants should be sturdy, compact, and free from spots, insects, yellowing leaves, or damaged stems. Avoid severely root-bound plants and tall, weak seedlings that have stretched toward inadequate light. Starting Red Bell Peppers From Seed Red bell peppers grow slowly during their earliest stages, so gardeners commonly start seeds indoors approximately eight to ten weeks before the expected outdoor planting date. Sow the seeds about ¼ inch deep in a clean, sterile seed-starting mix. Warmth is important for germination. A seedling heat mat can help maintain consistently warm conditions, but the growing medium should be monitored because heated trays can dry more quickly. Once the seedlings emerge, place them beneath bright overhead grow lights so they develop strong, compact stems. When the seedlings produce true leaves, move them into individual containers if necessary. Keep the potting mix lightly moist without allowing it to remain waterlogged. Before planting outdoors, harden the seedlings gradually for one to two weeks. Begin with a short period in a sheltered outdoor location, then slowly increase their exposure to sunlight and wind. Bring them inside if conditions become too cold. When to Plant Red Bell Peppers Outdoors Peppers are frost-sensitive plants that prefer genuinely warm weather. Wait until the danger of frost has passed, the soil has warmed, and nighttime temperatures are consistently above approximately 50°F before transplanting. Planting in cold soil can stall growth, stress the roots, and delay the eventual harvest. If spring conditions remain cool, black plastic mulch can help warm the soil before planting. Gardeners may also use protective covers temporarily, but covers should not press against the foliage during cold nights. Transplant on a cloudy, calm day or during the late afternoon when possible. Water the seedlings before planting and handle the root balls gently. Unlike tomatoes, pepper transplants should generally be placed at approximately the same soil depth at which they were growing in their containers. Sunlight and Location Choose a location that receives at least six to eight hours of direct sunlight each day. Abundant sunlight supports sturdy growth, flowering, fruit development, and the ripening process that turns mature peppers red. A site with good air movement can help foliage dry after rain and may reduce conditions that encourage certain diseases. However, extremely exposed locations may subject plants to strong winds that damage stems or increase water loss. Avoid planting peppers in the same location where peppers, tomatoes, potatoes, eggplants, or tomatillos have recently grown when space allows. Rotating these related crops can help interrupt the buildup of certain pests and diseases. Soil Preparation and Fertility Red bell peppers grow best in fertile, well-drained soil rich in organic matter. Before planting, incorporate finished compost when needed and use a soil test to determine the appropriate pH and nutrient levels for your garden. A soil pH near neutral, generally around 6.0 to 7.0, suits bell peppers in many gardens. Local soil conditions vary, so recommendations from a regional soil test should take priority over a universal fertilizer schedule. Avoid excessive nitrogen. Too much nitrogen may create large, leafy plants that produce fewer peppers or take longer to set fruit. Do not use lawn fertilizers or products containing weed killers around vegetable plants. Spacing and Support Space red bell pepper plants approximately 18 inches apart, allowing about 30 to 36 inches between traditional rows. Follow the seed packet or plant label when a specific variety requires different spacing. Proper spacing allows sunlight to reach the plants while supporting air circulation. However, some leaf cover is valuable because it shades
Follow this Tomato Plant Growing Guide to grow healthy plants from tiny seedlings, prevent common problems, and enjoy flavorful homegrown tomatoes. Few garden experiences are as satisfying as watching a tiny tomato seedling grow into a vigorous plant covered with ripe, flavorful fruit. Tomatoes are a favorite among home gardeners because they can flourish in traditional garden beds, raised beds, and containers. With sufficient sunlight, fertile soil, steady moisture, and dependable support, even a first-time gardener can enjoy a productive harvest. Tomato plants are tender, warm-season plants that thrive during the bright days of late spring and summer. They do require regular attention, but much of that care is straightforward. Choosing an appropriate variety, planting after the danger of frost has passed, watering consistently, and watching for early signs of trouble can make a remarkable difference. This Tomato Plant Growing Guide explains how to select, plant, support, maintain, and harvest tomatoes throughout the growing season. Whether you begin with seeds or purchase young plants from a nursery, a few thoughtful decisions will help transform those tiny seedlings into garden favorites. Understanding Tomato Plant Growth Tomatoes, botanically known as Solanum lycopersicum, are tender perennials in tropical climates but are usually grown as annuals in temperate gardens. Frost damages tomato foliage, and cool soil can slow root development, so these heat-loving plants should not be rushed outdoors in spring. Tomato varieties generally have determinate or indeterminate growth habits. Determinate tomatoes grow to a relatively compact size and produce much of their fruit within a concentrated period. Their manageable shape makes them useful for small gardens, containers, preserving, and gardeners who want a large harvest at one time. Indeterminate tomatoes continue producing new vines, flowers, and fruit until frost or disease ends the growing season. These plants can become tall and vigorous, so they need strong cages, stakes, or trellises. Their extended harvest makes them an appealing choice for gardeners who want fresh tomatoes throughout summer and early fall. Dwarf and patio varieties offer another solution for limited spaces. Although compact, they still need adequate sunlight, fertile potting mix, consistent moisture, and a container large enough to support healthy root growth. Choosing the Right Tomato Variety The best tomato variety depends on the garden, climate, available space, and intended use. Cherry and grape tomatoes are often prolific and convenient for snacking and salads. Slicing tomatoes provide substantial fruit for sandwiches and fresh meals, while paste tomatoes generally contain more flesh and less juice, making them well suited to sauces and preserving. Days to maturity are especially important in regions with short growing seasons. A variety that matures quickly may produce a more dependable harvest before cool autumn weather arrives. Gardeners in hot climates may prefer varieties known to set fruit more reliably during warm conditions. Disease resistance can also influence success. Seed packets and plant labels may include letters indicating resistance to particular diseases. Resistance does not guarantee that a plant will remain problem-free, but it can reduce the likelihood or severity of certain common infections. Heirloom tomatoes are treasured for their distinctive flavors, colors, and shapes. Hybrid varieties may offer improved uniformity, productivity, disease resistance, or tolerance to challenging conditions. A garden can include both, allowing the gardener to enjoy heirloom character alongside the dependability of carefully selected hybrids. Starting Tomato Plants From Seed Tomato seeds are commonly started indoors approximately five to eight weeks before the expected outdoor planting date. Starting too early can result in crowded, overgrown plants that become difficult to maintain before the weather is warm enough for transplanting. Sow the seeds about ¼ inch deep in a clean, sterile seed-starting mix. Warmth encourages germination, with temperatures around 75°F to 85°F generally supporting quick emergence. Once seedlings appear, place them beneath a bright overhead grow light. Insufficient light causes thin, stretched stems that lean toward the light source. Keep the growing medium evenly moist but not saturated. Constantly wet soil and poor air circulation can encourage seedling diseases. Once the seedlings develop true leaves, move them into individual containers if they were started together. As they grow, provide enough space for air circulation and turn or reposition the containers when necessary to encourage balanced growth. Healthy tomato seedlings should be compact and sturdy rather than tall and pale. A stocky plant with a strong stem and deep green leaves is usually better prepared for transplanting than an oversized plant that has already begun flowering indoors. Choosing Healthy Nursery Seedlings Gardeners who prefer to purchase plants should look for short, sturdy seedlings with healthy green foliage and well-developed stems. Avoid plants with yellowing leaves, extensive spotting, visible insects, or severely tangled roots. A smaller, healthy transplant frequently establishes more successfully than a large plant that has remained in its nursery container too long. Flowers and tiny tomatoes may look appealing at the garden center, but they do not necessarily indicate that the plant will establish quickly after transplanting. Read the plant label before buying. Confirm the mature size, growth habit, estimated days to maturity, and disease-resistance information. This helps prevent placing a vigorous indeterminate tomato in a container or garden space designed for a compact variety. Hardening Off Tomato Seedlings Seedlings grown indoors are not immediately prepared for direct sunlight, wind, and changing outdoor temperatures. Hardening off gradually introduces them to outdoor conditions and reduces transplant stress. Begin about one to two weeks before planting. Place the seedlings in a protected, shaded location for a short period, then gradually increase their exposure to sunlight and outdoor air. Bring them inside when frost or unusually cold temperatures threaten. Watch the leaves carefully during this transition. Bleached, pale, or papery areas can indicate sunscald caused by too much direct sunlight too quickly. Gradual exposure allows the leaves and stems to adjust without severe damage. When to Plant Tomatoes Outdoors Plant tomatoes after the danger of frost has passed, the soil has warmed, and nighttime temperatures are consistently suitable for tender plants. Local frost dates are useful planning tools, but actual
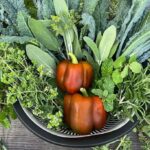
Learn how to harvest kale, peppers, and fresh herbs using garden clippers and a simple colander. Discover easy garden harvest tips to keep plants healthy, boost production, and enjoy fresh garden-to-table ingredients all season long. Harvesting fresh vegetables and herbs is one of the most rewarding parts of maintaining a home garden. Whether you are growing curly kale, sweet bell peppers, hot peppers, basil, parsley, rosemary, or thyme, knowing how to harvest them properly helps keep your plants healthy and productive throughout the growing season. One of the easiest and most practical ways to gather your harvest is with a pair of sharp garden clippers and a simple kitchen colander. While many gardeners use traditional harvest baskets, a colander offers several unique advantages. It is lightweight, easy to carry, allows loose soil to fall away naturally, and can go directly from the garden to the sink for washing fresh produce. If you are looking for an easy garden harvest method that saves time while protecting your plants, harvesting kale, peppers, and herbs with garden clippers and a colander is a simple solution that every gardener can appreciate. Why Proper Harvesting Matters Learning how to harvest vegetables correctly is just as important as learning how to grow them. Proper harvesting encourages plants to continue producing, reduces stress on stems and branches, and helps prevent unnecessary damage that can slow future growth. Garden clippers create clean, precise cuts that heal quickly, unlike twisting or pulling vegetables by hand. Clean cuts also reduce the risk of introducing diseases into your vegetable garden, especially when clippers are sanitized between plants. Regular harvesting keeps many vegetables and herbs actively producing, allowing you to enjoy fresh ingredients from your garden for weeks or even months. How to Harvest Kale Kale is one of the easiest leafy greens to grow because it produces continuously when harvested correctly. Rather than removing the entire plant, harvest the large outer leaves first while leaving the smaller center leaves untouched. This allows the growing crown to continue producing new foliage. Choose leaves that are dark green, crisp, and fully developed. Avoid removing more than one-third of the plant at one time, giving it plenty of energy to produce another flush of healthy leaves. Fresh garden kale is incredibly versatile and can be used in smoothies, salads, soups, casseroles, pasta dishes, stir-fries, and homemade kale chips. Harvesting kale regularly not only provides a steady supply of nutritious greens but also encourages stronger, healthier plants throughout the season. How to Harvest Garden Peppers Whether you grow sweet bell peppers, jalapeños, banana peppers, cayenne peppers, or colorful heirloom varieties, harvesting peppers correctly helps maximize production. Never pull peppers from the plant. Instead, use garden clippers to cut the stem about one inch above the pepper. Pulling can snap branches or damage developing fruit. Green peppers can be harvested early for a crisp texture, while allowing peppers to mature produces sweeter flavors and brilliant shades of red, orange, yellow, purple, or chocolate, depending on the variety. Frequent harvesting encourages pepper plants to continue flowering and producing new fruit well into the growing season. Fresh peppers are perfect for grilling, roasting, stuffing, freezing, dehydrating, making homemade salsa, adding to salads, or preserving through pickling. How to Harvest Fresh Herbs Fresh culinary herbs are among the easiest and most rewarding plants to harvest. Regular trimming actually improves growth by encouraging plants to become fuller and bushier. For the best flavor, harvest herbs during the morning after the dew has dried but before the afternoon heat begins. At this time, the essential oils responsible for flavor and aroma are often at their highest concentration. Popular herbs to harvest include basil, parsley, oregano, thyme, rosemary, sage, mint, cilantro, dill, and chives. Always trim stems just above a set of leaves rather than cutting randomly. This encourages branching and continuous production throughout the season. Fresh herbs can be enjoyed immediately or preserved by drying, freezing, or infusing them into oils, vinegars, and compound butters. Why a Colander Is the Perfect Harvest Basket Many gardeners already have the perfect harvest basket sitting in their kitchen. A colander offers excellent airflow that helps keep leafy greens cool while you continue harvesting throughout the garden. Its drainage holes allow loose soil and garden debris to fall away naturally, making cleanup much easier. Unlike solid buckets, a colander also prevents moisture from collecting around freshly picked vegetables and herbs, helping maintain their freshness until they are washed. Once harvesting is complete, simply rinse your produce directly in the same colander before bringing it into the kitchen. It is an inexpensive, practical tool that works beautifully for everyday harvesting. Garden Harvest Tips for Healthier Plants Harvest during the cooler morning hours whenever possible. Use clean, sharp garden clippers for every harvest. Harvest kale from the outer leaves inward. Cut peppers from the stem instead of pulling them. Never remove more than one-third of an herb plant during a single harvest. Inspect plants regularly for insects, diseases, or damaged foliage. Harvest often to encourage continuous vegetable production. Wash produce shortly after harvesting and store it properly for maximum freshness. Enjoy the Freshest Garden-to-Table Harvest There is something incredibly satisfying about walking into your garden with nothing more than a pair of garden clippers and a colander, then returning to your kitchen with a colorful collection of fresh kale, ripe peppers, and fragrant herbs. Homegrown produce offers exceptional flavor, beautiful color, and peak freshness that simply cannot be matched by store-bought vegetables. Every harvest represents weeks of care and attention, making each meal even more rewarding. Whether you are preparing a crisp salad, homemade soup, roasted vegetables, herb butter, fresh salsa, pasta dishes, or your favorite family recipe, harvesting directly from your garden allows you to enjoy ingredients at their absolute best. By harvesting regularly and using proper techniques, your kale, peppers, and herbs will continue producing throughout the growing season, providing a steady supply of delicious garden-fresh ingredients from your backyard to your table. Frequently
Originally published
March 2026
Updated
August 2026
Reviewed by
Culibloom