Orange Nasturtium Growing Guide: Plant, Grow, and Care for Vibrant Edible Flowers
Learn how to plant, grow, and care for orange nasturtiums, including sunlight, soil, watering, container care, harvesting, and edible uses.
Orange nasturtiums bring glowing color, rounded green leaves, and a relaxed cottage-garden appearance to beds, borders, containers, and edible landscapes. These cheerful flowers are especially attractive spilling over the side of a window box, filling an open space in a vegetable garden, or weaving through a sunny flower bed.
Common garden nasturtiums belong to the genus Tropaeolum. The two types most often grown are trailing nasturtium, Tropaeolum majus, and compact bush nasturtium, Tropaeolum minus. Depending on the variety, the flowers may be soft apricot, golden orange, tangerine, salmon, or deep red-orange.
Nasturtiums are valued for more than their beauty. Their flowers and leaves are edible and have a fresh, peppery flavor similar to watercress or arugula. The blossoms can add vivid color to salads, appetizers, pasta, and serving platters. Their easygoing nature also makes them an inviting choice for beginning gardeners.
Are Orange Nasturtiums Annuals or Perennials?
Nasturtiums are tender perennials in warm climates, but gardeners in colder regions usually grow them as annuals. They are sensitive to frost and generally continue growing and blooming until cold weather ends the season.
In frost-free or very mild areas, nasturtiums may live longer and reseed readily. Gardeners in warm regions should monitor spreading plants and unwanted seedlings because nasturtiums can become vigorous under favorable conditions.
Choosing the Right Orange Nasturtium
Before purchasing seeds, decide whether a compact or trailing growth habit will work best in your garden.
Compact varieties form tidy mounds that are well suited to garden borders, raised beds, small spaces, and patio containers. Many remain approximately 6 to 18 inches tall, although the final size depends on the cultivar and growing conditions.
Trailing varieties produce longer stems that can spread across the ground or cascade from containers, window boxes, and retaining walls. They can also be guided onto a low support, but they do not have tendrils and may need help staying attached.
For an especially colorful planting, look for named varieties with orange, apricot, peach, tangerine, or salmon-colored flowers. Check the seed packet for the plant’s mature size and habit rather than choosing by flower color alone.
When to Plant Nasturtium Seeds
Plant nasturtium seeds outdoors after the danger of frost has passed and the soil has begun to warm. In many regions, this means sowing them in late spring. Local frost dates and soil conditions are more useful than a fixed calendar date.
Seeds can also be started indoors approximately four to six weeks before the expected final spring frost. Nasturtiums can be sensitive to root disturbance, so plantable paper or fiber pots may make it easier to move seedlings into the garden without disrupting their roots.
Direct sowing is often the simplest option. The large seeds are easy to handle, and seedlings may emerge in approximately 7 to 10 days when temperature and moisture conditions are favorable. The University of Wisconsin recommends sowing seeds about ½ inch deep and placing plants approximately 10 to 12 inches apart, although spacing should also be adjusted for the selected variety. University of Wisconsin Horticulture
Selecting the Best Location
Nasturtiums generally flower best in full sun. A location receiving at least six hours of direct sunlight is a helpful starting point, but climate matters. Plants growing in regions with intense summer heat may benefit from protection during the hottest part of the afternoon.
Partial shade can help reduce heat stress, but excessive shade may produce long, leafy plants with fewer blossoms. Watch how the plants respond and adjust container placement if flowering slows during extremely hot weather.
Good air circulation is also beneficial. Avoid crowding plants tightly against one another, particularly in humid conditions.
Soil and Fertilizer Requirements
Nasturtiums prefer well-drained soil and often perform beautifully without rich amendments or frequent feeding. Highly fertile soil, especially soil containing abundant nitrogen, can encourage lush leaf production at the expense of flowers.
Before planting, loosen compacted soil and correct serious drainage problems. Gardeners working with heavy clay or waterlogged ground may have better results growing nasturtiums in raised beds or containers.
Routine fertilization is usually unnecessary unless the soil is extremely poor or a plant shows a confirmed nutrient deficiency. If a nasturtium produces many healthy leaves but very few flowers, excessive fertilizer may be part of the problem.
Growing Orange Nasturtiums in Containers
Orange nasturtiums make excellent container plants. Compact varieties create full mounds of foliage and flowers, while trailing varieties soften the edges of hanging baskets, window boxes, and tall planters.
Choose a container with unobstructed drainage holes and fill it with a well-draining potting mix. Avoid using dense garden soil in containers because it may compact and hold too much water.
Container-grown nasturtiums can dry more quickly than plants growing in the ground. Check the soil regularly, especially during hot or windy weather. Water when the upper portion of the potting mix begins to feel dry, then allow excess water to drain completely.
Watering Nasturtiums
Established nasturtiums tolerate some dryness, but regular watering supports stronger flowering. Water deeply enough to moisten the root zone, then allow the soil surface to begin drying before watering again.
The goal is consistent but not saturated soil. Prolonged waterlogging can contribute to weak growth and root problems, while repeated severe wilting may reduce flowering.
Direct water toward the soil instead of routinely soaking the foliage. Watering early in the day gives splashed leaves time to dry and may help limit disease problems in humid gardens.
Encouraging More Orange Flowers
Adequate sunlight, restrained fertilizer use, and regular moisture are the foundations of abundant nasturtium flowers. Harvesting blossoms or removing faded flowers can encourage the plant to continue producing buds rather than directing all its energy toward seed development.
If a healthy plant has abundant foliage but few flowers, check its light and fertilizer conditions. Moving a container to a sunnier position or stopping unnecessary feeding may improve flower production.
Very hot summer weather can temporarily slow growth or flowering. Plants may recover and begin blooming more vigorously when temperatures moderate.
Common Nasturtium Problems
Nasturtiums are generally easy to maintain, but aphids, imported cabbageworm caterpillars, and leafminers may occasionally appear. Leafminers create pale, winding trails inside the leaves. These marks can be unattractive, although minor damage may not seriously affect the plant.
Inspect leaves regularly, including their undersides. Small pest populations may be removed by hand or dislodged with water. Before using any treatment, confirm the pest’s identity and choose a product labeled for the plant and intended use.
This distinction is particularly important when the flowers or leaves will be eaten. Follow every label instruction, observe the required interval between application and harvest, and never assume that a product is safe for edible plants simply because it is described as natural.
Harvesting Edible Nasturtium Flowers and Leaves
Correct identification is essential before eating any garden flower. Purchase seeds or plants labeled with the proper botanical name, such as Tropaeolum majus, and avoid confusing garden nasturtiums with unrelated plants.
Harvest young, healthy flowers and leaves from plants that have not been treated with products unsuitable for edible crops. The leaves have a peppery flavor, while the flowers are usually somewhat milder. Plants growing in sunnier, hotter conditions may develop a stronger taste.
Pick blossoms on the day they will be served when possible. Gently rinse them with clean water, inspect them for insects, and allow them to dry. Introduce edible flowers gradually and in small amounts, especially when serving them for the first time. The University of Minnesota also recommends using only correctly identified flowers that have not been exposed to harmful chemicals. University of Minnesota Extension
Ways to Use Orange Nasturtium Flowers
Fresh orange nasturtium blossoms make a striking garnish for green salads, grain bowls, pasta, vegetable platters, soups, and savory appetizers. Their peppery character pairs particularly well with cucumbers, tomatoes, tender greens, fresh herbs, soft cheeses, citrus, and vinaigrettes.
Whole blossoms provide the strongest visual impact, while separated petals can scatter color more delicately across a dish. Add the flowers shortly before serving so they retain their fresh texture and vibrant appearance.
Young leaves can also be added sparingly to salads or used as a colorful alternative to other peppery greens. Taste a leaf before using a larger amount because flavor intensity can vary with plant age and growing conditions.
Collecting Nasturtium Seeds
Allow a few flowers to remain on the plant if you want to collect seeds. After flowering, nasturtiums develop distinctive segmented seed structures. Wait until mature seeds begin to dry, then collect them before they fall or are damaged by wet weather.
Allow saved seeds to dry thoroughly in a protected, well-ventilated location. Store them in a labeled paper envelope in a cool, dry place. Seeds collected from hybrids may produce plants that differ from the parent, so saved seed does not always preserve the exact flower color or growth habit.
Designing a Garden With Orange Nasturtiums
Orange nasturtiums create a warm, energetic accent among blue, purple, white, and soft yellow flowers. Their rounded foliage contrasts beautifully with fine-textured herbs, upright ornamental grasses, and plants with narrow leaves.
Compact plants can edge a kitchen garden or soften the corners of a raised bed. Trailing varieties are effective in hanging baskets, window boxes, and containers where their stems can spill naturally over the sides.
In an edible landscape, place nasturtiums where flowers can be harvested easily and where the plants will not be exposed to unsuitable lawn or ornamental-garden treatments. Their combination of color, texture, and culinary potential makes them one of the most versatile flowers for a sunny home garden.
A Bright and Flavorful Garden Favorite
Orange nasturtiums reward gardeners with brilliant flowers, attractive foliage, and an unexpectedly peppery flavor. They grow readily from seed, require little fertilizer, and adapt well to beds, borders, raised gardens, and containers.
Choose the right variety for the available space, provide well-drained soil and sufficient sunlight, water consistently without saturating the roots, and harvest faded or fresh blossoms regularly. With these simple practices, orange nasturtiums can fill the garden with vivid color from late spring until frost.
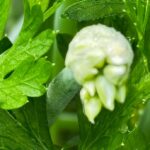
A vivid orange nasturtium flower glows among lush green foliage in the sunny garden.
Learn how to grow, harvest, clean, store, and enjoy nasturtium leaves, a colorful edible garden green with a fresh, peppery flavor. Nasturtium leaves bring beauty, flavor, and versatility to an edible garden. Their rounded shape, radiating veins, and fresh green color make them as ornamental as they are useful. Once harvested, the leaves offer a distinctive peppery flavor that can enliven salads, sandwiches, sauces, soups, and savory dishes. Common garden nasturtiums, usually identified botanically as Tropaeolum majus, are warm-season plants available in compact, trailing, and climbing forms. Although they are frequently grown for their jewel-toned flowers, the leaves deserve just as much attention. Both young and mature leaves are edible, although their flavor and texture become stronger as they grow. Nasturtiums are relatively easy to grow in garden beds, raised beds, containers, window boxes, and hanging baskets. With proper identification and food-safe growing practices, they can provide an abundant supply of flavorful leaves from late spring until cold weather arrives. What Are Nasturtium Leaves? Nasturtium leaves grow on plants belonging to the Tropaeolum genus. Common garden nasturtiums are unrelated to watercress, even though the word nasturtium is sometimes associated with both plants. The leaves are generally round or slightly shield-shaped, with slender stems that attach near the center of the underside. Their pale veins spread outward in a pattern that resembles the spokes of an umbrella. Some gardeners compare the leaves to tiny lily pads. Depending on the variety, nasturtium foliage may be solid green, blue-green, or variegated with cream-colored markings. The leaves range from small and delicate to broad and substantial, giving gardeners several culinary possibilities. Garden nasturtiums are usually treated as annuals in climates with freezing winters. In warm, frost-free regions, some plants may survive longer. The variety, climate, and individual growing environment will influence the plant’s life cycle and overall performance. Are Nasturtium Leaves Edible? The leaves of correctly identified common garden nasturtiums are edible. Their flowers, flower buds, and immature seed pods are also commonly used for culinary purposes. Always confirm a plant’s identity before eating any part of it. Common names can cause confusion, and not every unfamiliar plant with round leaves is safe to consume. The most dependable approach is to grow nasturtiums from clearly labeled seeds or transplants and retain the plant label for reference. Do not eat nasturtiums purchased as ornamental plants unless you know they were grown without pesticides or other products that are not approved for edible crops. Avoid harvesting plants growing along roadsides, in public landscapes, near treated lawns, or in gardens where chemical use is unknown. When trying nasturtium leaves for the first time, begin with a small quantity. Individual sensitivities and allergies are possible with almost any food. What Do Nasturtium Leaves Taste Like? Nasturtium leaves have a fresh, peppery flavor that is often compared to watercress, arugula, mustard greens, or radishes. Their intensity varies according to the age of the leaf, the cultivar, the weather, and the plant’s growing conditions. Young leaves tend to be more tender and moderately peppery. Larger, older leaves can have a stronger flavor, a firmer texture, and occasional bitterness. Hot weather and environmental stress may intensify their pungency. The flavor makes nasturtium leaves useful in dishes that need a bright, savory contrast. Mild and creamy ingredients such as potatoes, eggs, beans, cucumbers, avocado, yogurt, and soft cheeses help balance their peppery character. Choosing Nasturtiums for Edible Leaves Both compact and trailing nasturtiums produce edible foliage. The best choice depends on the available growing space and the way you want the plants to look in the garden. Compact varieties are well suited to raised beds, small gardens, window boxes, and patio containers. Trailing varieties can spill over hanging baskets, window boxes, retaining walls, and the edges of raised beds. Climbing varieties can be trained along fences or trellises, although they may require occasional guidance and support. Variegated nasturtiums provide especially decorative foliage. Their patterned leaves add visual interest to the garden and create attractive edible garnishes. Choose seeds or transplants from a dependable supplier. Look for plants labeled with the botanical name Tropaeolum majus or another clearly identified edible Tropaeolum species. How to Grow Nasturtiums From Seed Nasturtiums grow readily from seed and generally prefer minimal root disturbance. Seeds can be sown directly in the garden around the local last frost date once conditions are suitable. In climates with short growing seasons, seeds may be started indoors several weeks before the anticipated final frost. Plantable paper or fiber pots can help reduce root disturbance when the seedlings are transferred outdoors. Follow the planting-depth and spacing recommendations on the seed packet because individual cultivars can have very different growth habits. Keep the soil evenly moist during germination, but do not saturate it. If seedlings were started indoors, gradually introduce them to outdoor conditions before planting them in the garden. This adjustment period helps reduce stress from sunlight, wind, and temperature changes. Sunlight and Soil Requirements Nasturtiums generally grow best in full sun and well-drained soil. In regions with extremely hot summers, some afternoon shade can help protect the plants from prolonged heat stress. The plants perform well in poor to average soil. Rich soil and excessive nitrogen can encourage abundant foliage while reducing flower production. This may not be a disadvantage if leaves are the primary harvest, but excessive fertilizer can create crowded, soft growth. Good drainage is essential. Waterlogged soil can contribute to weak growth, yellow foliage, and root problems. If garden soil drains poorly, consider growing nasturtiums in raised beds or containers filled with a well-draining potting mix. Watering Nasturtium Plants Keep the soil consistently moist while seeds are germinating and seedlings are becoming established. Mature nasturtiums can tolerate short dry periods, but regular watering supports tender new growth. Water when the upper layer of soil begins to feel dry. Apply water near the base of the plant instead of repeatedly wetting the foliage. Watering at soil level and allowing adequate airflow around the plants can help reduce persistent moisture
Here, you will learn all about chive blossoms and parsley, including how companion planting helps both herbs thrive, the many benefits they bring to your garden, and the delicious ways to use them in everyday cooking. Whether you are creating a thriving kitchen garden or looking for fresh inspiration in the kitchen, chive blossoms and parsley are a versatile pairing that offers beauty, flavor, and abundant harvests throughout the growing season. There is something incredibly satisfying about walking into your garden, brushing your hand across a patch of fragrant herbs, and gathering a handful of fresh parsley alongside a few vibrant purple chive blossoms. Moments like these remind us that a garden is more than a place to grow food. It is a space where beauty, nature, and fresh ingredients come together to inspire every meal. Among the many herbs you can grow, chives and parsley are one of the easiest and most rewarding companion planting combinations. They thrive under similar growing conditions, complement one another beautifully, and provide fresh harvests from spring through fall. Their partnership benefits not only your kitchen but your entire garden by attracting pollinators, supporting beneficial insects, and helping create a healthier growing environment. Whether you are planting a large kitchen garden, filling raised beds, or growing herbs in containers on your patio, chive blossoms and parsley are a pairing that delivers season after season. Their fresh flavors elevate everyday meals, while their graceful appearance adds charm and color to any outdoor space. A Perfect Partnership in the Herb Garden Companion planting is the practice of growing plants together that naturally benefit one another. Some companion plants improve soil conditions, others attract pollinators, while some help reduce pest problems or make better use of available growing space. Chives and parsley check nearly every one of those boxes. Parsley grows in lush, leafy mounds that remain attractive throughout much of the growing season. Chives produce slender green leaves that eventually give way to beautiful globe-shaped blossoms in shades of lavender and purple. Together they create layers of texture and color that look just as lovely in ornamental gardens as they do in vegetable beds. Their similar care requirements also make them easy companions. Both appreciate fertile soil, regular watering, and plenty of sunshine, allowing gardeners to care for both herbs using the same routine. For anyone just beginning an herb garden, this combination is an excellent place to start. Why Companion Planting Matters Healthy gardens are built on diversity. Instead of growing a single crop in isolation, companion planting encourages a balanced ecosystem where plants, pollinators, and beneficial insects work together. Every herb contributes something unique to the garden. Parsley provides dense foliage that helps shade the soil and reduce moisture loss. Chives contribute their distinctive onion aroma while producing nectar-rich flowers that become gathering places for pollinating insects. Together they create an environment where plants thrive naturally. Rather than viewing herbs simply as ingredients for cooking, companion planting reminds us that every plant plays an important role in supporting the health of the entire garden. Chives Help Naturally Discourage Garden Pests One reason gardeners have planted chives throughout vegetable gardens for generations is their reputation for helping reduce certain insect problems. As members of the onion family, chives contain sulfur compounds responsible for their mild onion fragrance. While people enjoy this familiar aroma, many insects do not. Growing chives near parsley may help discourage aphids, Japanese beetles, spider mites, and several other common garden pests. Although companion planting is not a replacement for good garden management, it can become an important part of an organic gardening strategy by encouraging healthier plants and reducing stress caused by insect activity. Many gardeners also plant chives near tomatoes, carrots, strawberries, roses, peppers, and apple trees for the very same reason. Chive Blossoms Bring Your Garden to Life If there is one reason never to cut every chive flower before it opens, it is the incredible number of beneficial insects they attract. As spring transitions into early summer, chives produce clusters of soft purple blossoms that quickly become one of the busiest places in the garden. Honeybees eagerly gather nectar from the flowers while native bees move from bloom to bloom collecting pollen. Butterflies drift through the blossoms, adding movement and beauty to the landscape, while hoverflies quietly perform double duty by feeding on nectar as adults and helping control aphids during their larval stage. Watching these visitors move through your herb garden is one of the simple pleasures of gardening. Their presence also benefits nearby vegetables, fruit trees, berry bushes, and flowering plants that depend on pollination for healthy harvests. Growing Chives and Parsley Together One of the reasons these herbs are so popular is because they are wonderfully uncomplicated. Choose a location that receives at least six hours of sunlight each day. While chives love full sun, parsley appreciates a little afternoon shade during periods of intense summer heat, especially in warmer climates. Plant both herbs in fertile, well-drained soil enriched with compost. Rich organic matter encourages vigorous growth while helping retain moisture between waterings. Water regularly, keeping the soil evenly moist without allowing it to become soggy. Applying a layer of mulch around the plants helps regulate soil temperature, conserve moisture, and reduce weed growth. With only a little routine care, both herbs will reward you with months of fresh harvests. Beautiful in Every Garden Style One of the joys of growing herbs is their versatility. Chives and parsley look equally at home in formal herb gardens, rustic cottage gardens, raised beds, decorative borders, and patio containers. The upright foliage and cheerful blossoms of chives create natural height, while parsley fills the surrounding space with rich green leaves. The contrast between soft purple flowers and vibrant green foliage creates a timeless combination that looks attractive from spring until frost. Many gardeners intentionally plant these herbs near walkways or seating areas where their fragrance and colorful blooms can be enjoyed every day. Other Plants That Thrive
Learn how to grow orange cosmos with guidance on planting, sunlight, soil, watering, deadheading, containers, pests, seed saving, and companion plants. Orange cosmos bring brilliant color, delicate texture, and lively movement to sunny gardens. Their golden-orange flowers rise above airy green foliage, creating a cheerful display that feels equally at home in cottage gardens, pollinator beds, cutting gardens, and informal borders. Once established, these warm-season annuals provide months of flowers with relatively little maintenance. Often identified botanically as Cosmos sulphureus, orange cosmos are related to the familiar pink, white, and burgundy garden cosmos known as Cosmos bipinnatus. Orange cosmos generally have broader, more deeply divided foliage and produce flowers in vivid shades of yellow, gold, orange, and scarlet. Depending on the cultivar and growing conditions, plants may remain compact or reach several feet tall. One of the greatest advantages of growing orange cosmos is their adaptability. They tolerate heat, lean soil, and occasional dry conditions after their roots are established. They also attract butterflies and other visiting pollinators while producing flowers that can be enjoyed in both the garden and fresh arrangements. Why Grow Orange Cosmos? Orange cosmos offer impressive color without requiring rich soil or an elaborate care routine. Their daisy-like blooms complement many garden styles, from relaxed wildflower plantings to carefully planned color-themed borders. The fiery flowers are especially effective when planted in groups. A mass planting produces a glowing ribbon of color, while individual plants can be scattered among ornamental grasses and other annual flowers for a more natural appearance. Their open growth habit allows neighboring plants to remain visible, making orange cosmos useful for filling gaps without creating a heavy or crowded look. These flowers are also valuable for extending seasonal interest. In many climates, they begin blooming during summer and continue until cold weather or the first hard frost ends the display. Choosing the Right Orange Cosmos Orange cosmos cultivars vary considerably in height, flower form, and color. Some produce simple single flowers with open centers, while others have semi-double or double blooms. Colors may range from soft golden yellow to tangerine, deep orange, and reddish scarlet. Compact cultivars are well suited to containers, pathways, and the front of a flower bed. Taller varieties create an attractive backdrop and provide longer stems for cutting. Always check the seed packet or plant label for the expected mature height because some varieties stay under 2 feet while others can grow much taller. When planning a mixed planting, consider both the mature height and the intensity of the flower color. Bright orange cultivars create a dramatic focal point, while yellow-orange selections blend more gently with surrounding plants. The Best Location for Orange Cosmos Orange cosmos grow and flower best in full sun. Choose a location that receives at least six hours of direct sunlight each day. Plants may tolerate some light shade, but insufficient sunlight can result in fewer flowers and weaker, more elongated stems. Good air circulation is also helpful. Avoid crowding plants against dense shrubs or placing them where wet foliage remains enclosed for long periods. Taller varieties benefit from a location protected from strong wind, particularly in regions that experience frequent summer storms. Orange cosmos perform beautifully in flower beds, sunny borders, raised beds, cottage gardens, pollinator gardens, and dedicated cutting gardens. They can also be planted along fences or near vegetable gardens to add color and attract beneficial visitors. Soil Requirements Well-drained soil is more important than highly fertile soil when growing orange cosmos. These adaptable annuals can tolerate sandy, loamy, and moderately poor garden soils as long as water does not remain around their roots. Rich soil and excessive fertilizer can encourage abundant foliage at the expense of flowers. Overfed plants may also grow unusually tall and become more likely to lean or flop. In average garden soil, additional fertilizer is often unnecessary. If the planting area has heavy clay or drains slowly, improve the location before sowing by addressing compaction and drainage. Compost can help support soil structure, but it should be incorporated moderately rather than used to create an excessively rich planting bed. How to Grow Orange Cosmos From Seed Orange cosmos are easy to grow directly from seed. Wait until the danger of frost has passed and the soil has begun to warm. Cold, wet soil may delay germination and increase the chance of seeds deteriorating before they sprout. Prepare the site by loosening the surface and removing weeds, stones, and large clumps of soil. Scatter or space the seeds according to the information on the seed packet, then cover them lightly. Cosmos seeds should not be buried deeply because excessive planting depth may interfere with germination. Water the area gently so the seeds remain in place. Keep the upper layer of soil consistently moist while germination occurs, but do not leave it saturated. Seedlings commonly emerge within one to three weeks, depending on soil temperature, moisture, and the cultivar. Once the seedlings are large enough to handle, thin crowded plants to provide adequate space. Good spacing encourages stronger stems, better airflow, and a fuller display of flowers. Starting Seeds Indoors Gardeners with short growing seasons can start orange cosmos indoors several weeks before the expected final spring frost. Use a well-draining seed-starting mixture and provide strong, consistent light after the seedlings emerge. Insufficient light can cause young cosmos plants to become thin and stretched. If growing them beneath plant lights, position the lights according to the manufacturer’s recommendations and adjust them as the seedlings grow. Before moving indoor-grown seedlings into the garden, introduce them gradually to outdoor sunlight, wind, and temperature changes. This hardening process reduces transplant stress. Plant them outside only after frost danger has passed and conditions have warmed. Watering Orange Cosmos Newly planted seeds and young seedlings need consistent moisture while their root systems develop. Water carefully enough to moisten the soil without washing seeds away or flattening tender plants. Established orange cosmos tolerate occasional dry conditions, but they still benefit from water during extended
Originally published
March 2026
Updated
August 2026
Reviewed by
Culibloom