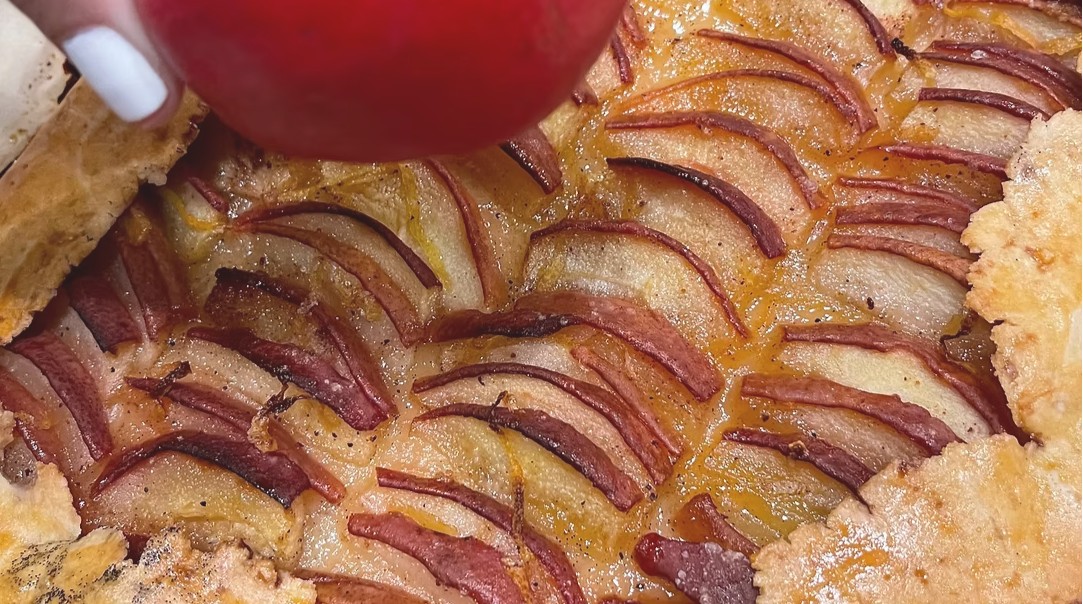
Make a rustic gluten-free pear galette with flaky homemade pastry, tender pears, lemon zest, and warm cinnamon-spiced filling.
Rustic, elegant, and filled with warm seasonal flavor, this Rustic Gluten-Free Pear Galette with Spiced Pear Filling Recipe wraps tender cinnamon-coated pears in a flaky homemade gluten-free pie crust. The free-form shape gives the dessert a relaxed appearance while still making it beautiful enough for a holiday table.
The crust combines tapioca flour, cornstarch, superfine brown rice flour, and oat flour to create a light, buttery pastry with a delicate texture. Cold butter produces flaky layers, while xanthan gum and eggs give the gluten-free dough enough flexibility to roll, fold, and hold the juicy pear filling.
Fresh lemon juice and zest brighten the natural sweetness of the pears, while cinnamon adds warmth without overpowering the fruit. As the galette bakes, the pears soften and release their juices, creating a glossy filling surrounded by a crisp, golden crust.
Serve this gluten-free pear galette slightly warm with vanilla ice cream, softly whipped cream, or caramel sauce. It is a lovely dessert for fall gatherings, Thanksgiving, Christmas, brunch, or any occasion when fresh pears are in season.
Prep Time: 30 minutes
Chilling Time: 30 minutes
Bake Time: 40 minutes
Cooling Time: 15 minutes
Total Time: 1 hour 55 minutes
Yield: 8 servings
Ingredients
Gluten-Free Pie Crust
3/4 cup plus 2 tablespoons tapioca flour, plus additional for dusting
3/4 cup cornstarch
1/4 cup plus 2 tablespoons superfine brown rice flour
1/4 cup oat flour
2 teaspoons granulated sugar
1/4 teaspoon sea salt
1 1/2 teaspoons xanthan gum
1 cup cold salted butter, diced
3 large eggs
Spiced Pear Filling
4 cups thinly sliced pears
2 teaspoons fresh lemon juice
1/3 cup granulated sugar
Zest of 1 lemon
1/4 teaspoon salt
3/4 teaspoon ground cinnamon
Pinch of ground nutmeg or cardamom, optional
Egg Wash
1 large egg
1 tablespoon water
Directions
Step 1: Combine the Dry Ingredients
In a large mixing bowl, whisk together the tapioca flour, cornstarch, superfine brown rice flour, oat flour, granulated sugar, sea salt, and xanthan gum until evenly combined.
Step 2: Cut in the Butter
Add the cold diced butter to the flour mixture. Use a pastry cutter or your fingertips to work the butter into the dry ingredients until the mixture resembles coarse crumbs with small pieces of butter remaining.
Step 3: Finish the Dough
Add the eggs and mix until the dough begins to come together. Gently knead it a few times in the bowl until it forms a smooth, cohesive ball. Avoid overworking the dough.
Step 4: Chill the Dough
Shape the dough into a thick disk and wrap it tightly. Refrigerate for at least 30 minutes to firm the butter and make the dough easier to roll.
Step 5: Prepare the Pear Filling
Place the sliced pears in a medium bowl. Add the lemon juice, granulated sugar, lemon zest, salt, cinnamon, and optional nutmeg or cardamom.
Toss gently until the pears are evenly coated. Set the filling aside while preparing the chilled dough.
Step 6: Prepare the Oven
Preheat the oven to 375°F. Have a large baking sheet ready for the assembled galette.
Step 7: Roll the Dough
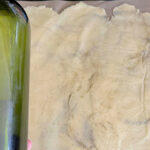
Place the chilled dough on a large sheet of parchment paper lightly dusted with tapioca flour. Dust the surface of the dough with additional tapioca flour and cover it with a second sheet of parchment paper.
Roll the dough into a circle approximately 12 to 14 inches in diameter and ¼ inch thick. Remove the top sheet of parchment paper.
Step 8: Add the Pear Filling
Arrange the spiced pears in the center of the dough, leaving a 4- to 5-inch border around the edges. Spread the pears evenly, creating a slightly mounded center.
Leave excess liquid behind in the mixing bowl to help prevent the bottom crust from becoming overly wet.
Step 9: Shape the Galette
Carefully lift and fold the edges of the dough over the outer portion of the pear filling. Overlap the sections of dough as needed to create a rustic border while leaving the center exposed.
If the dough cracks, gently press the cracked edges together. If it becomes too soft, refrigerate the assembled galette for 10 to 15 minutes before continuing.
Step 10: Apply the Egg Wash
Whisk the egg and water together in a small bowl. Lightly brush the exposed pastry with the egg wash to encourage a glossy, golden finish.
Step 11: Bake the Galette
Transfer the parchment paper and assembled galette to the baking sheet. Bake for approximately 40 minutes, or until the crust is golden brown and the pear filling is tender and bubbling.
Begin checking the galette after 35 minutes because oven temperatures can vary.
Step 12: Cool and Serve
Allow the galette to cool on the baking sheet for at least 15 minutes. Slice it into 8 servings and enjoy it warm or at room temperature.
Notes
Firm-ripe pears hold their shape better during baking. Bosc, Anjou, and Bartlett pears are suitable choices.
Slice the pears evenly so they soften at approximately the same rate. Very ripe pears may release more liquid and create a softer filling.
Keep the butter cold while preparing the pastry. Visible pieces of cold butter help create a flakier crust as they melt in the oven.
The dough may be made in advance and refrigerated until needed. Allow very firm dough to stand at room temperature briefly if it is difficult to roll.
Rolling the dough between parchment paper reduces sticking and makes the delicate gluten-free pastry easier to transfer.
If the dough becomes soft or sticky during assembly, refrigerate it for 10 to 15 minutes before baking.
For additional warmth, add a small pinch of ground nutmeg or cardamom to the pear filling.
Serve the galette warm with vanilla ice cream, whipped cream, or caramel sauce.
Store leftover galette covered in the refrigerator for up to 3 days.
Use certified gluten-free oat flour and verify that all other packaged ingredients are appropriately labeled gluten-free when serving someone with celiac disease or gluten sensitivity. Prepare the galette with clean equipment and surfaces to prevent cross-contact.